Подробнее про настройки полатформы можно узнать из видео:
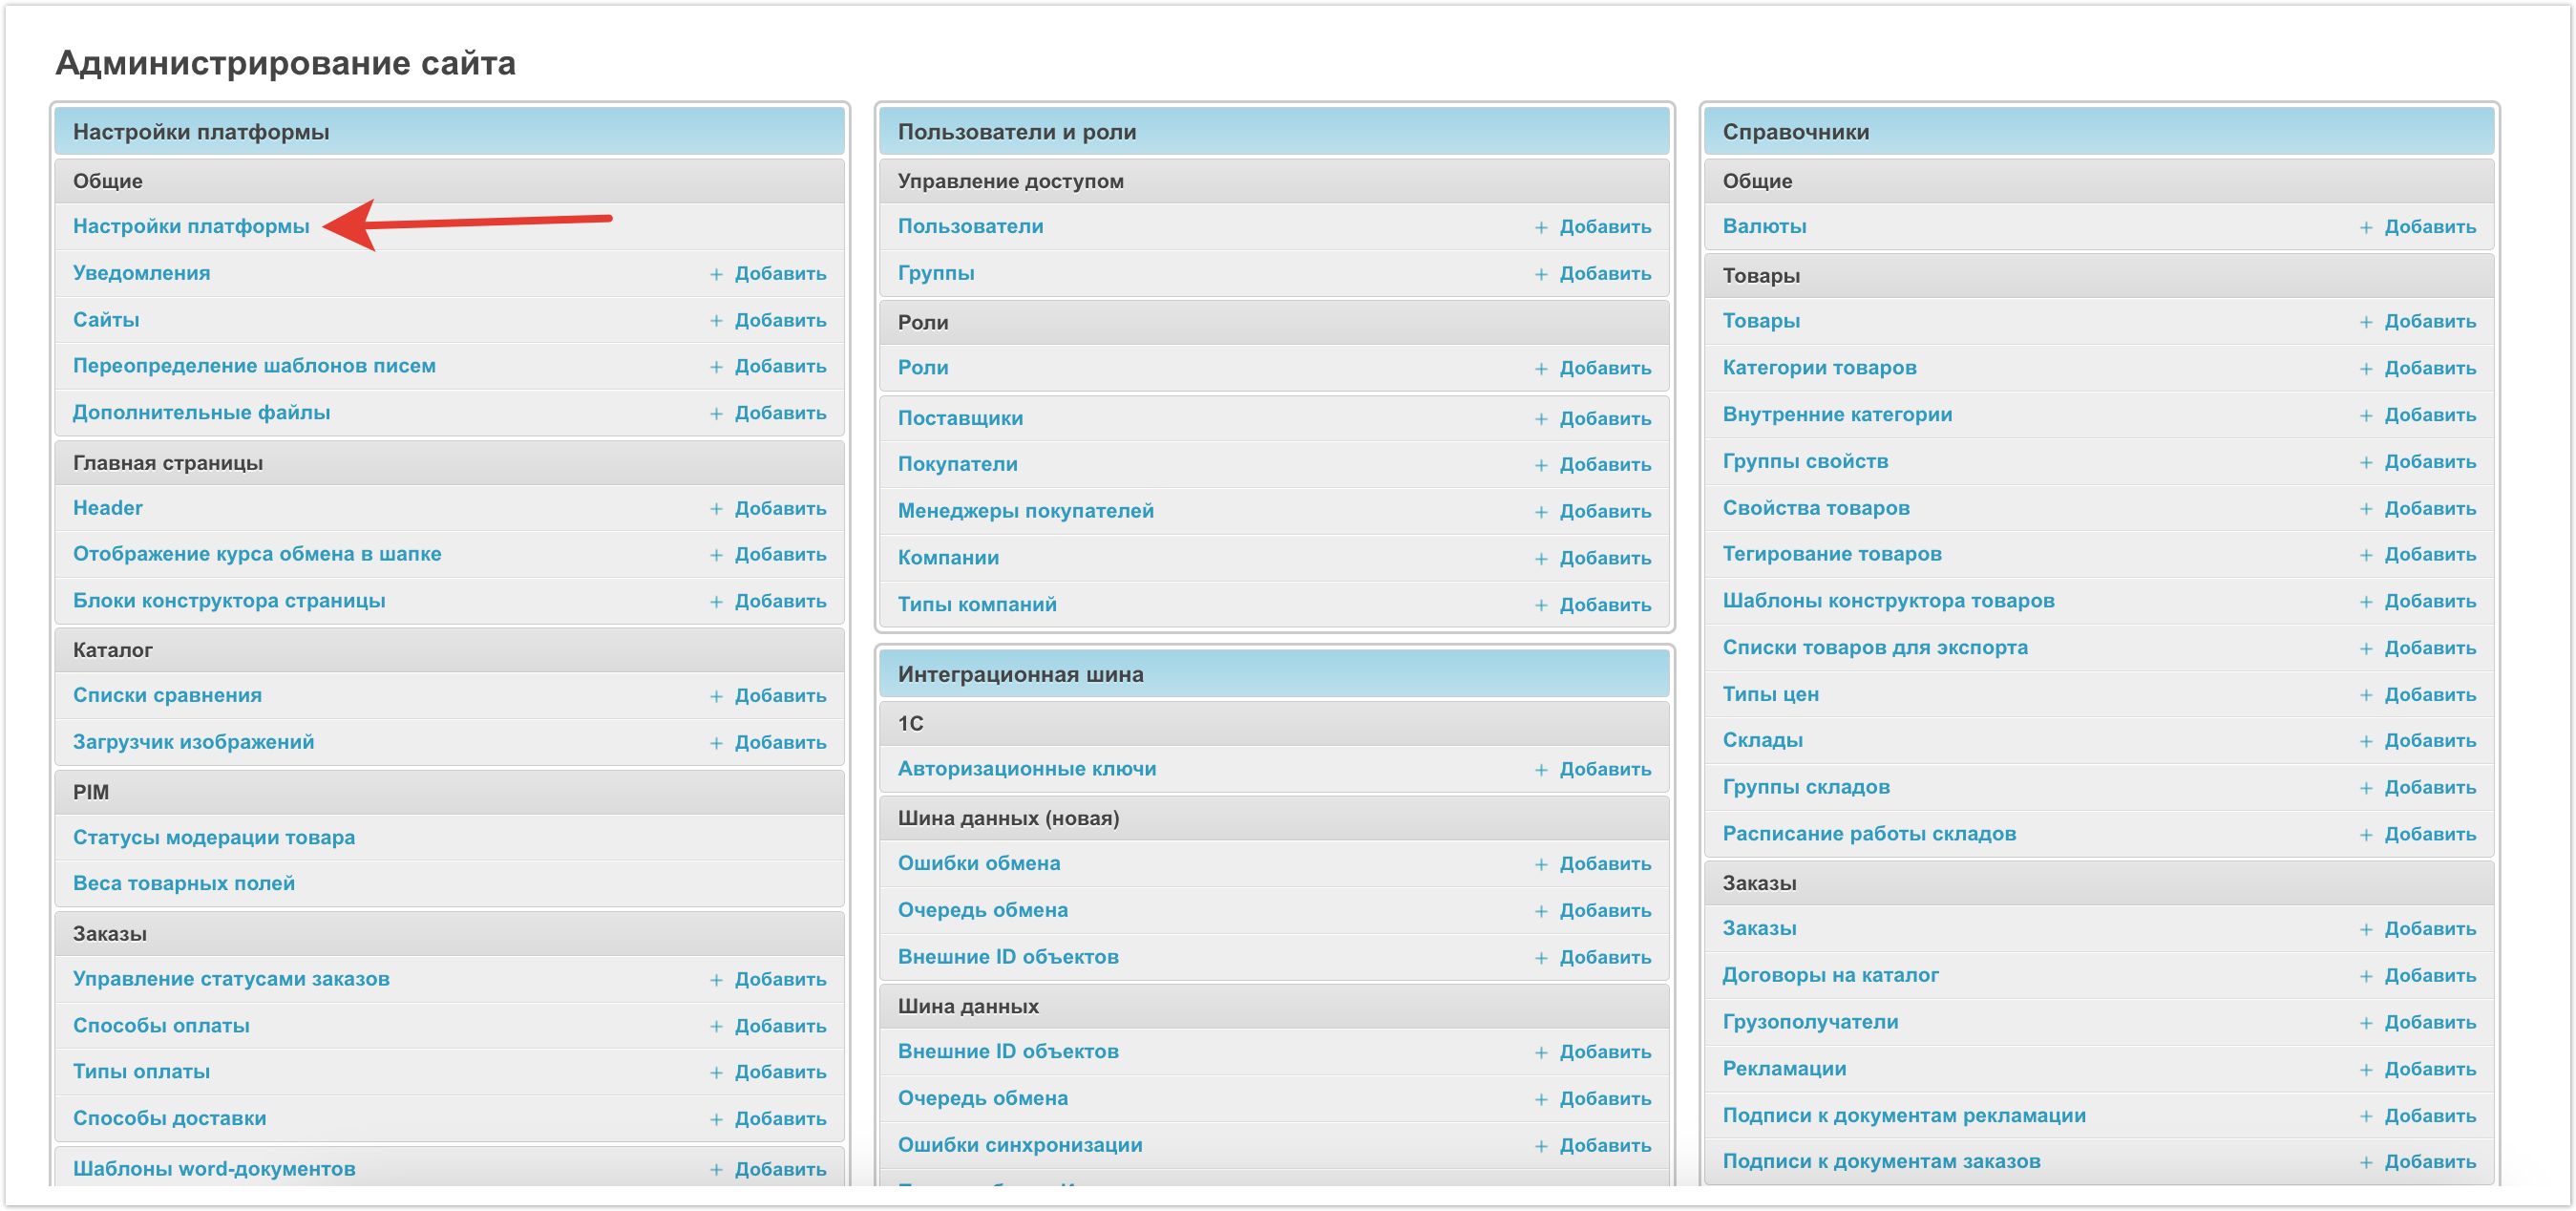
Для того, чтобы выполнить необходимые настройки платформы нужно перейти в раздел Настройки платформы в панели администратора.
Настройки разделены на несколько разделов или блоков:
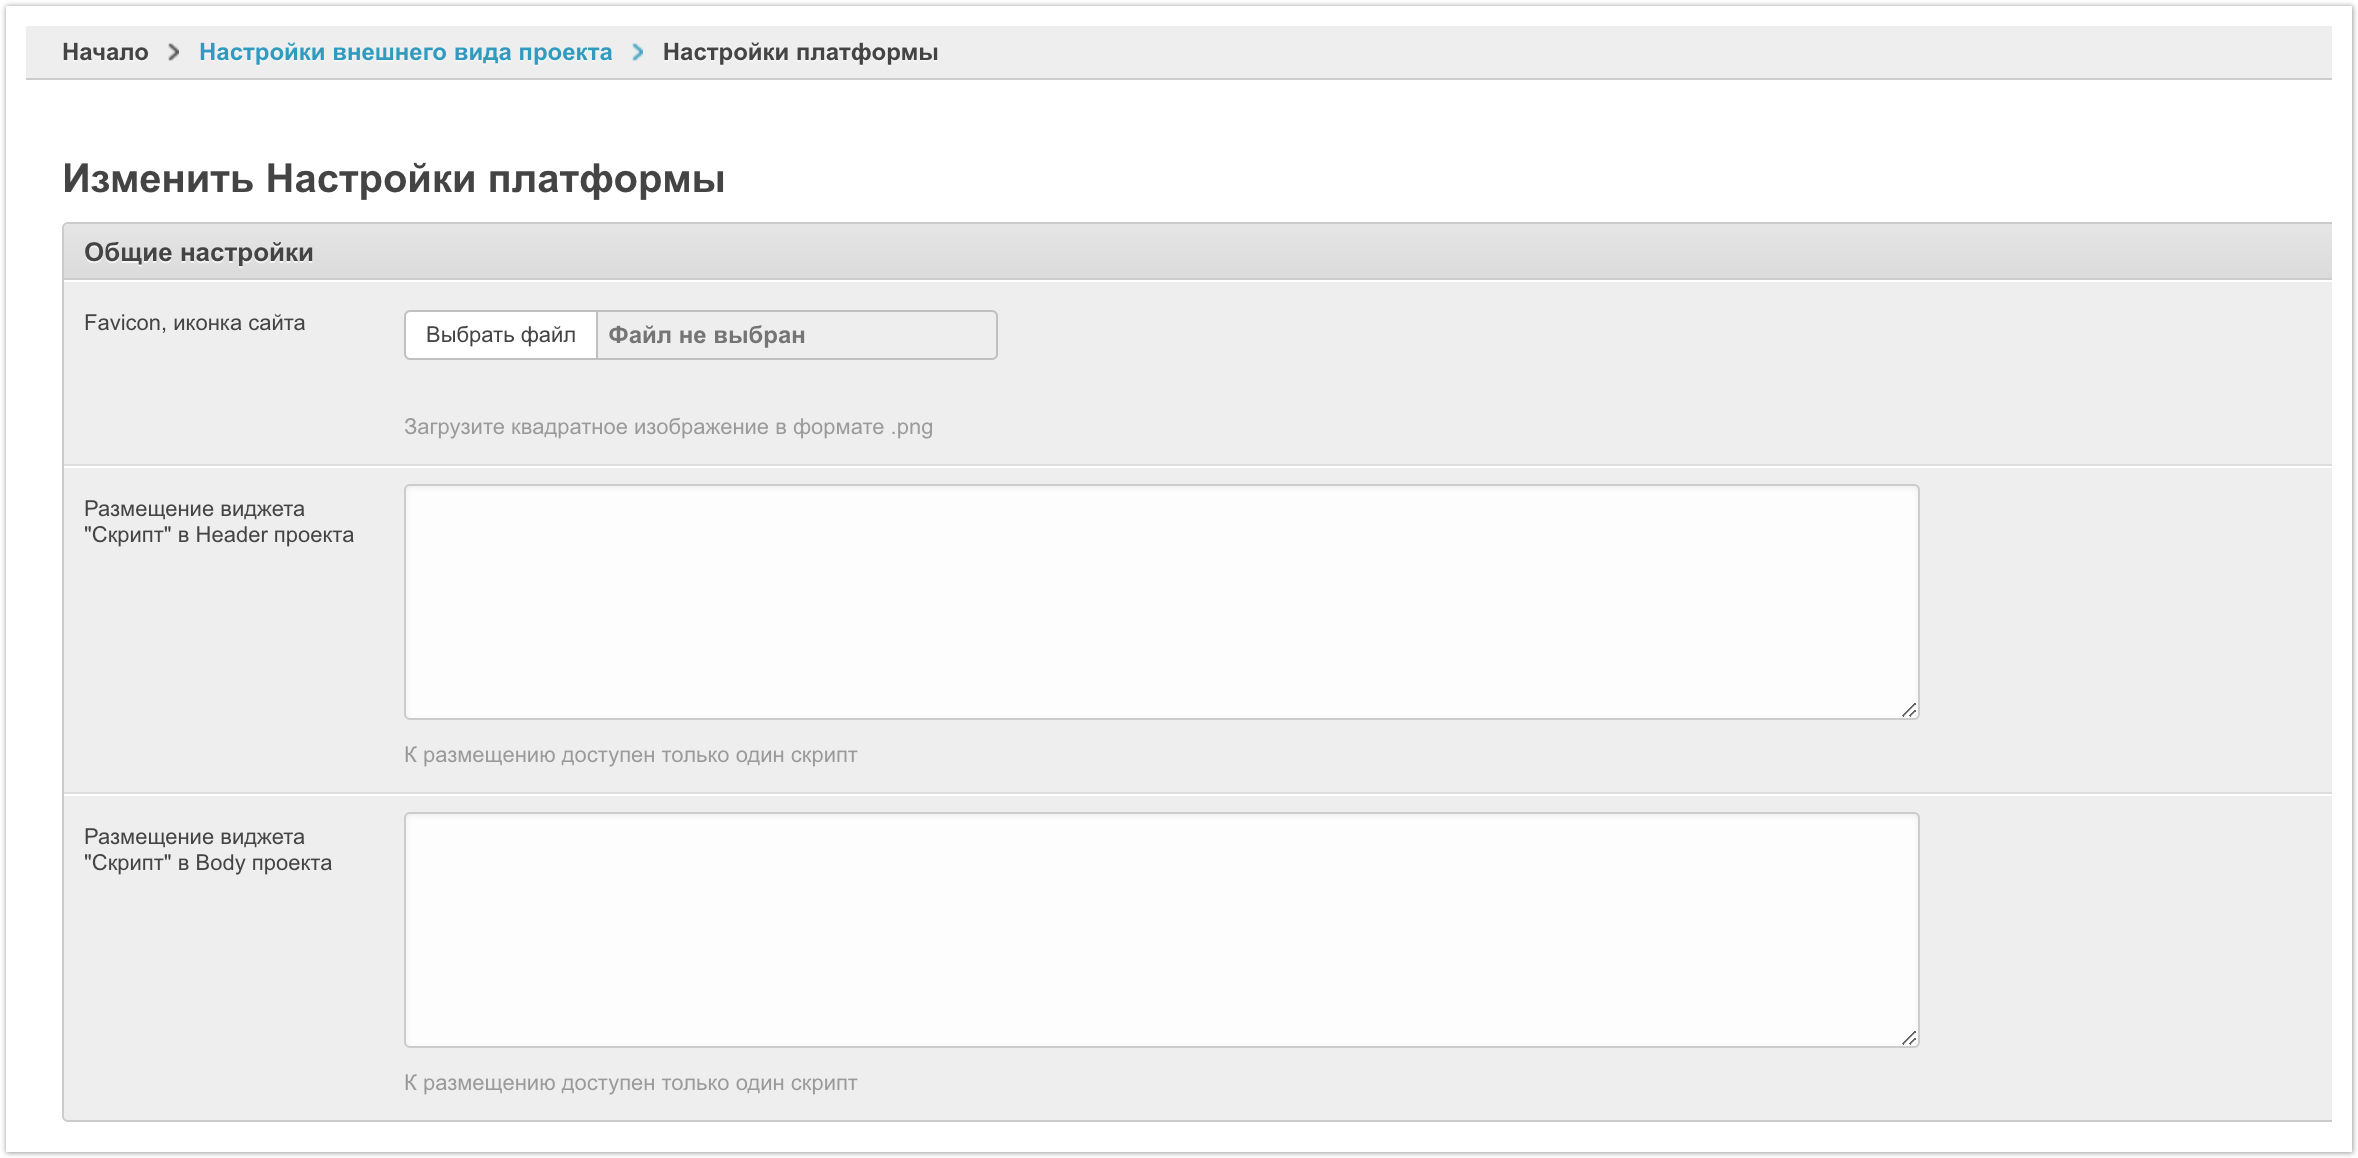
Общие настройки
Favicon, иконка сайта - это иконка, которая отображается у сайта в браузере в строке с вкладками. В этом поле можно загрузить изображение для фавикона. Рекомендуем использовать квадратное изображение в формате png размером 16х16px или 32х32px.
Размещение виджета "Скрипт" в Header проекта и Размещение виджета "Скрипт" в Body проекта - в этих полях можно прописать текст скрипта в header или в body, если это требуется для сторонних виджетов и приложений. Скрипт размещается на всех страницах платформы AGORA. Возможно размещение только по одному скрипту в каждое поле. Установленные скрипты запускаются в следующей последовательности: сначала header, потом body.
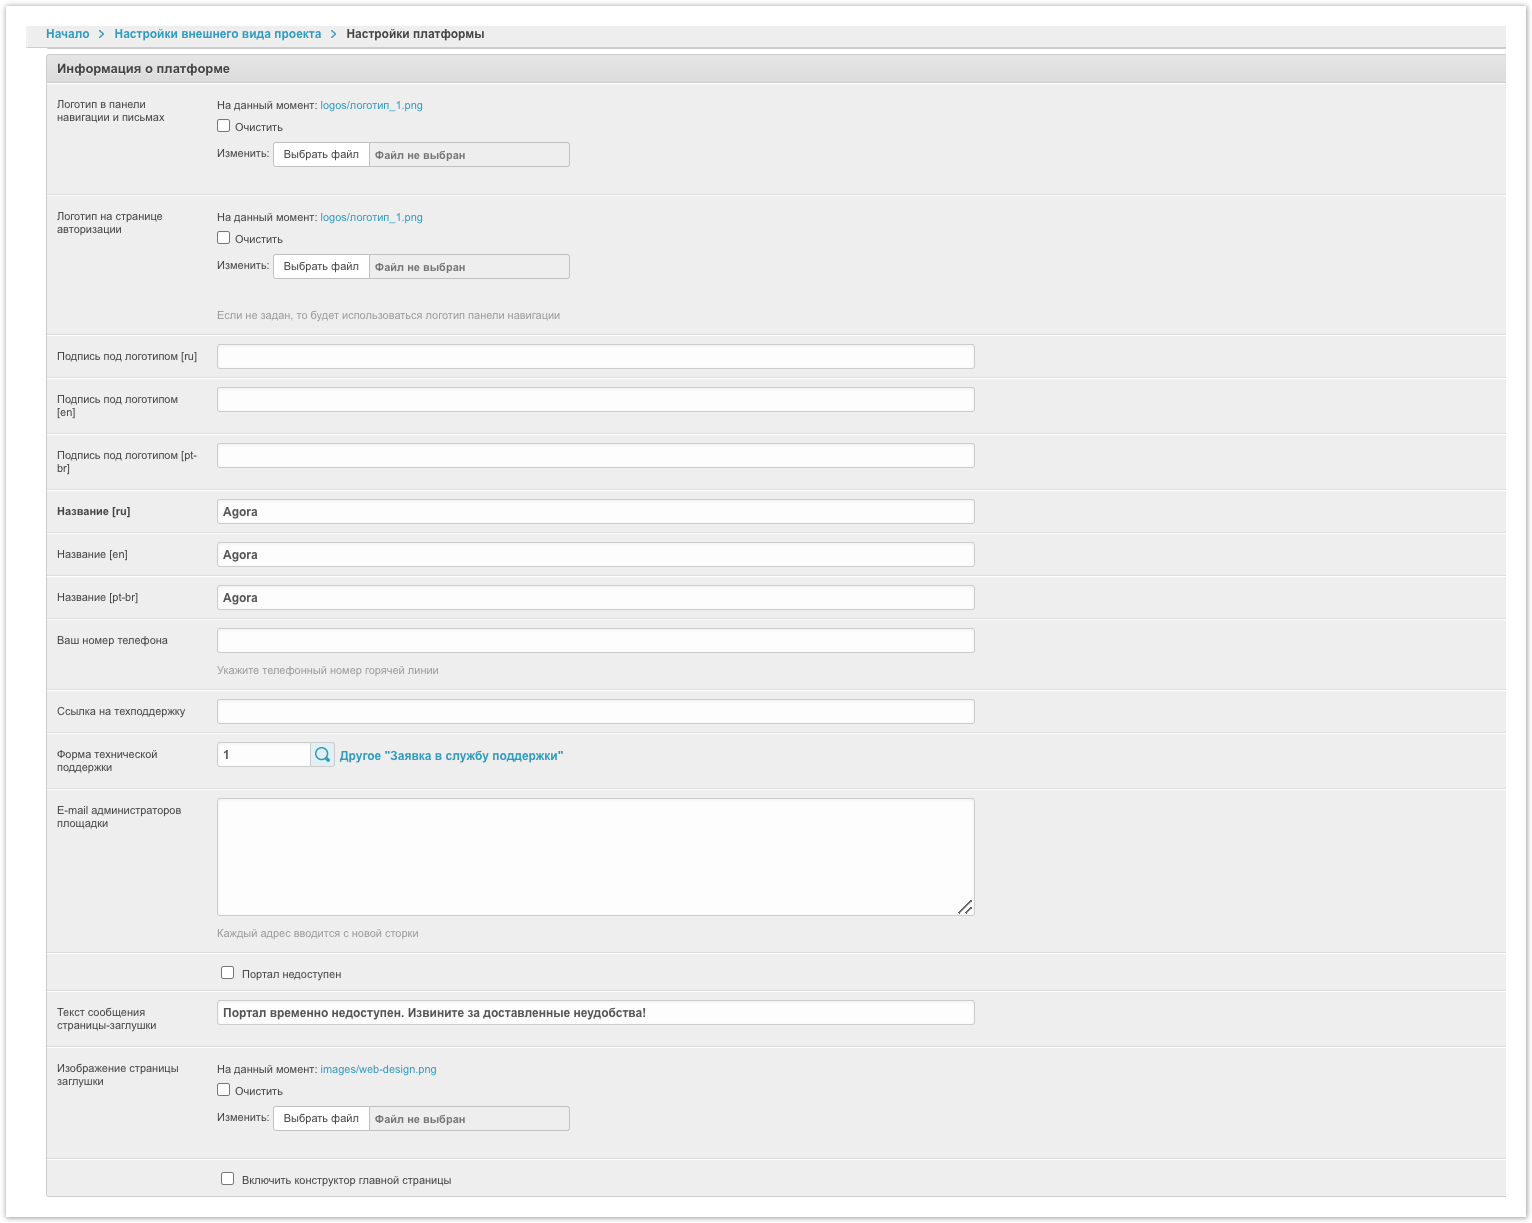
Информация о платформе
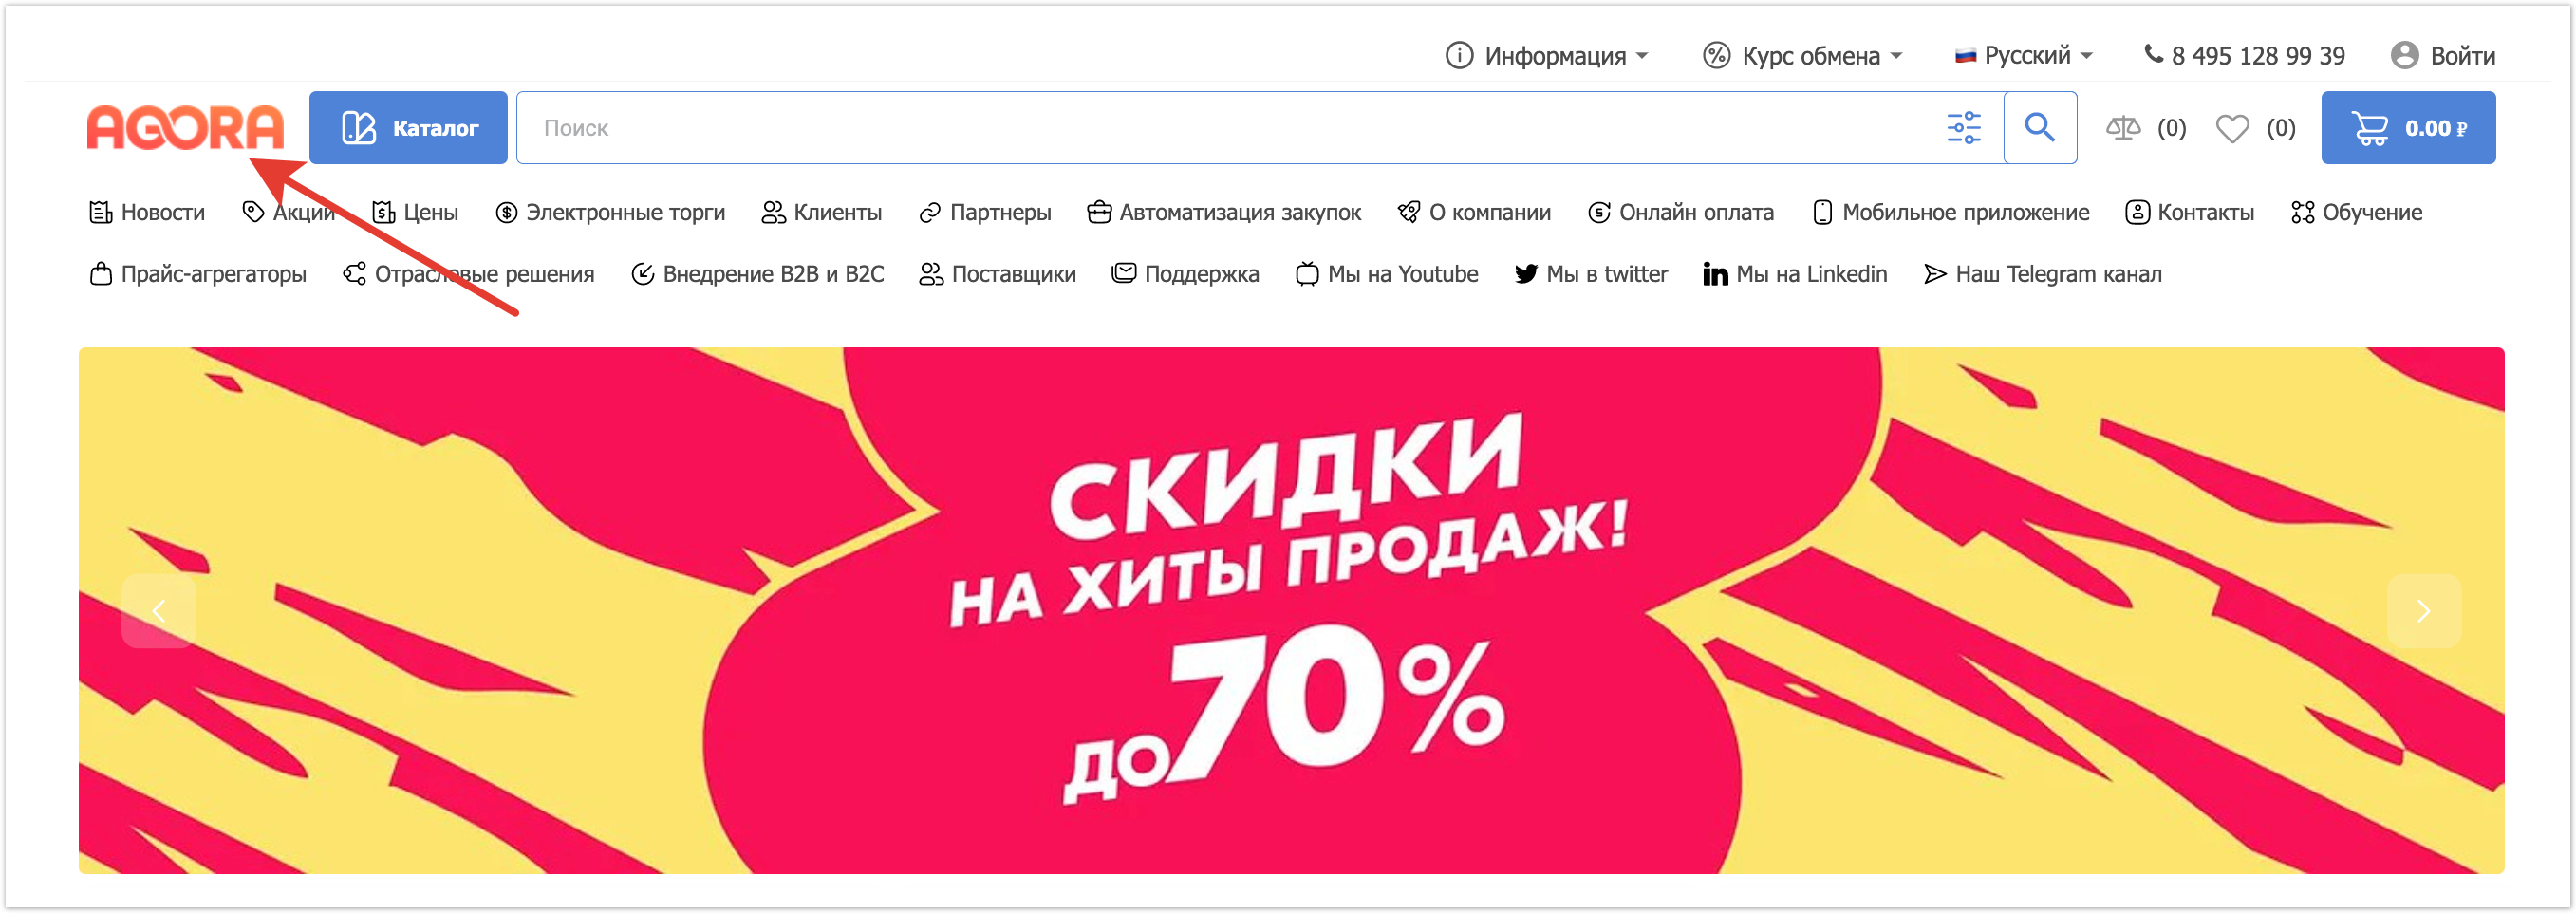
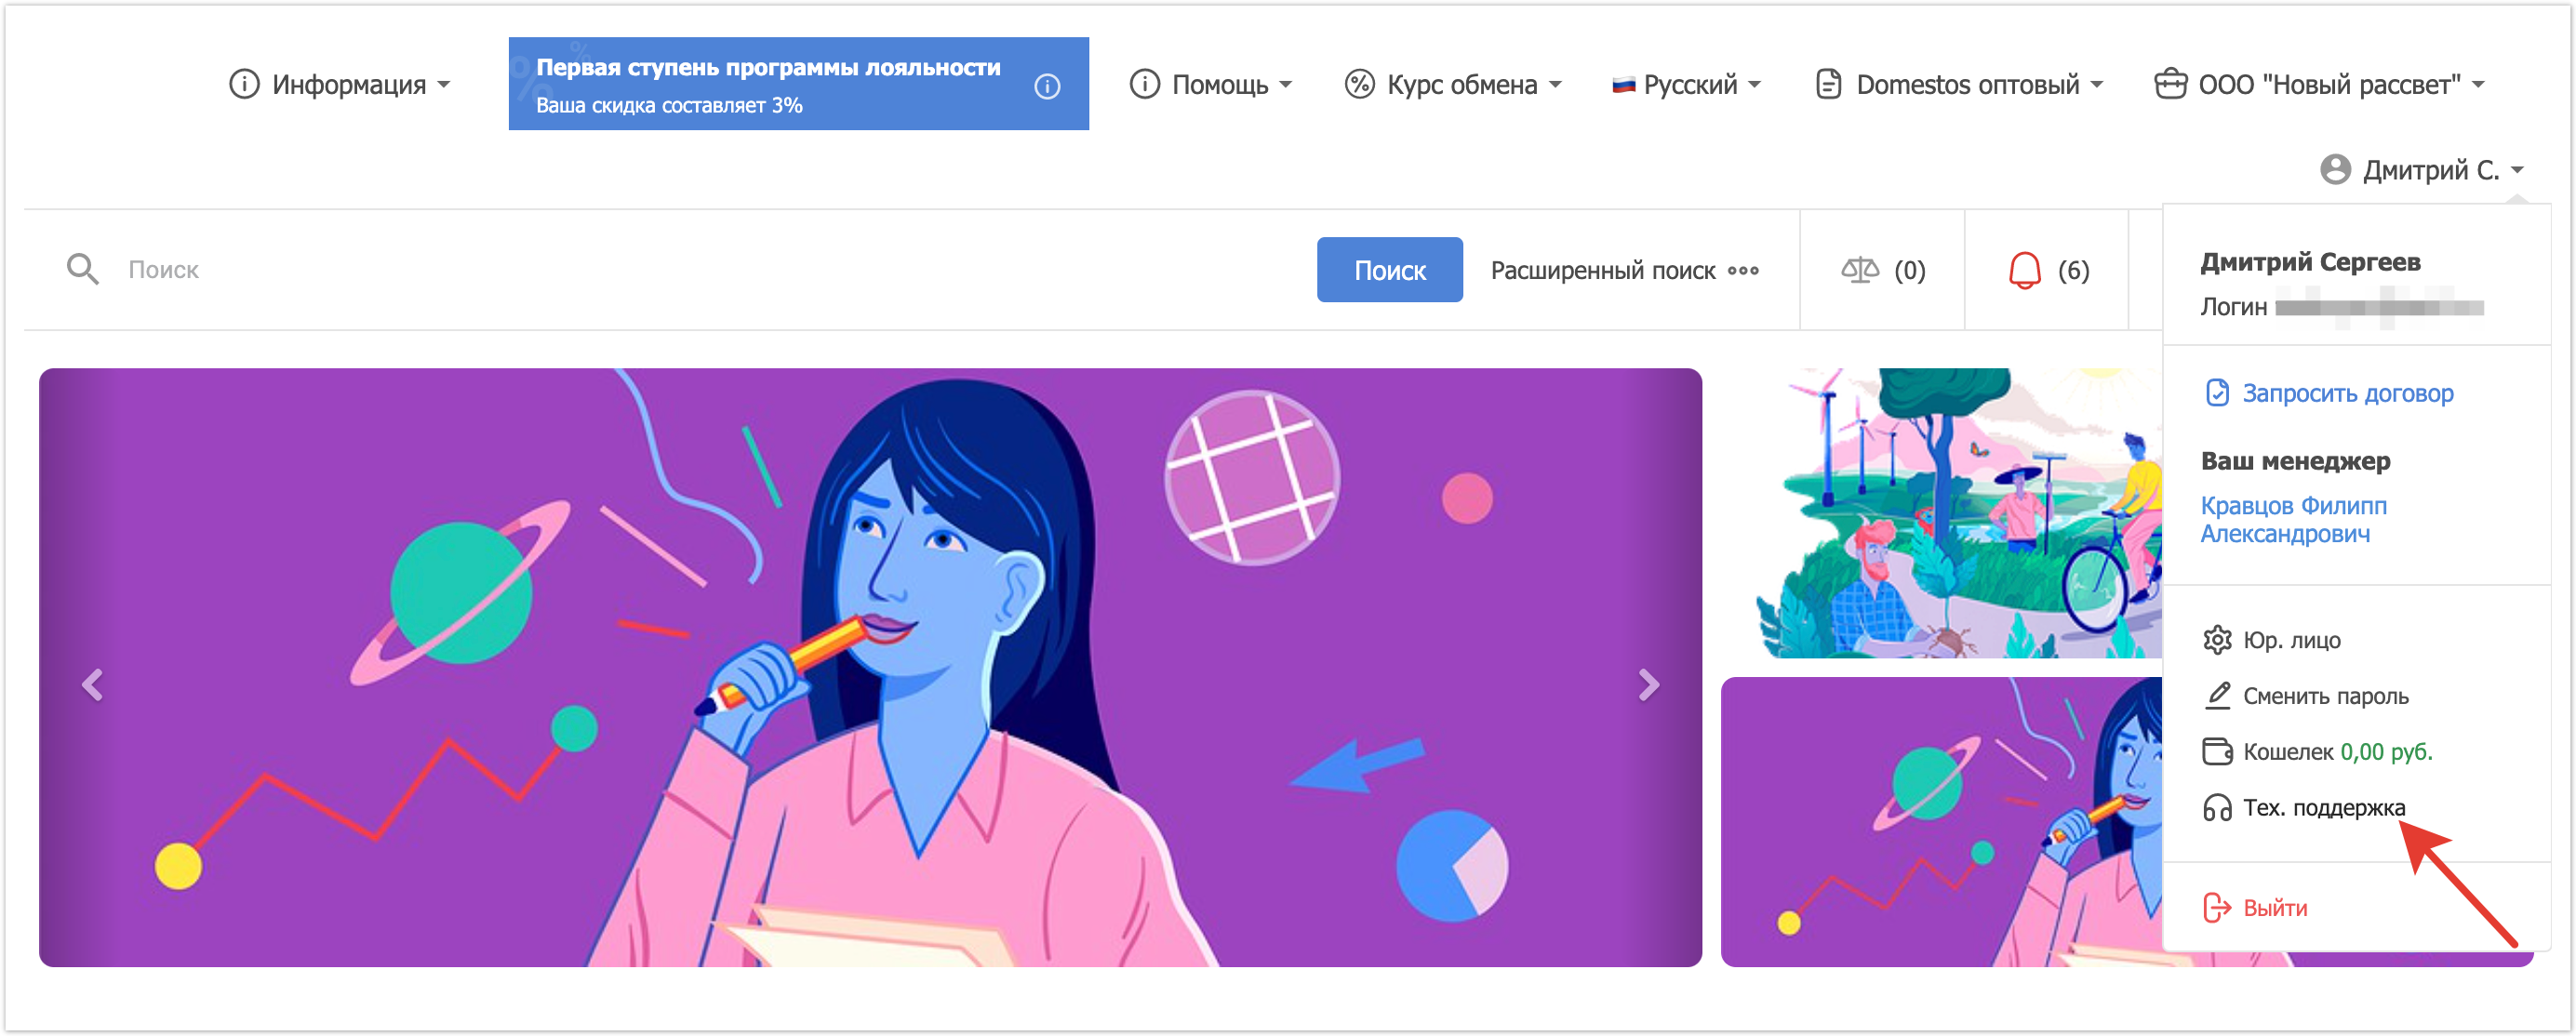
Логотип в панели навигации и письмах - в этом поле загружается логотип, который будет отображен в личных кабинетах пользователей, а также в e-mail уведомлениях. Рекомендованное разрешение для логотипа 136х30.
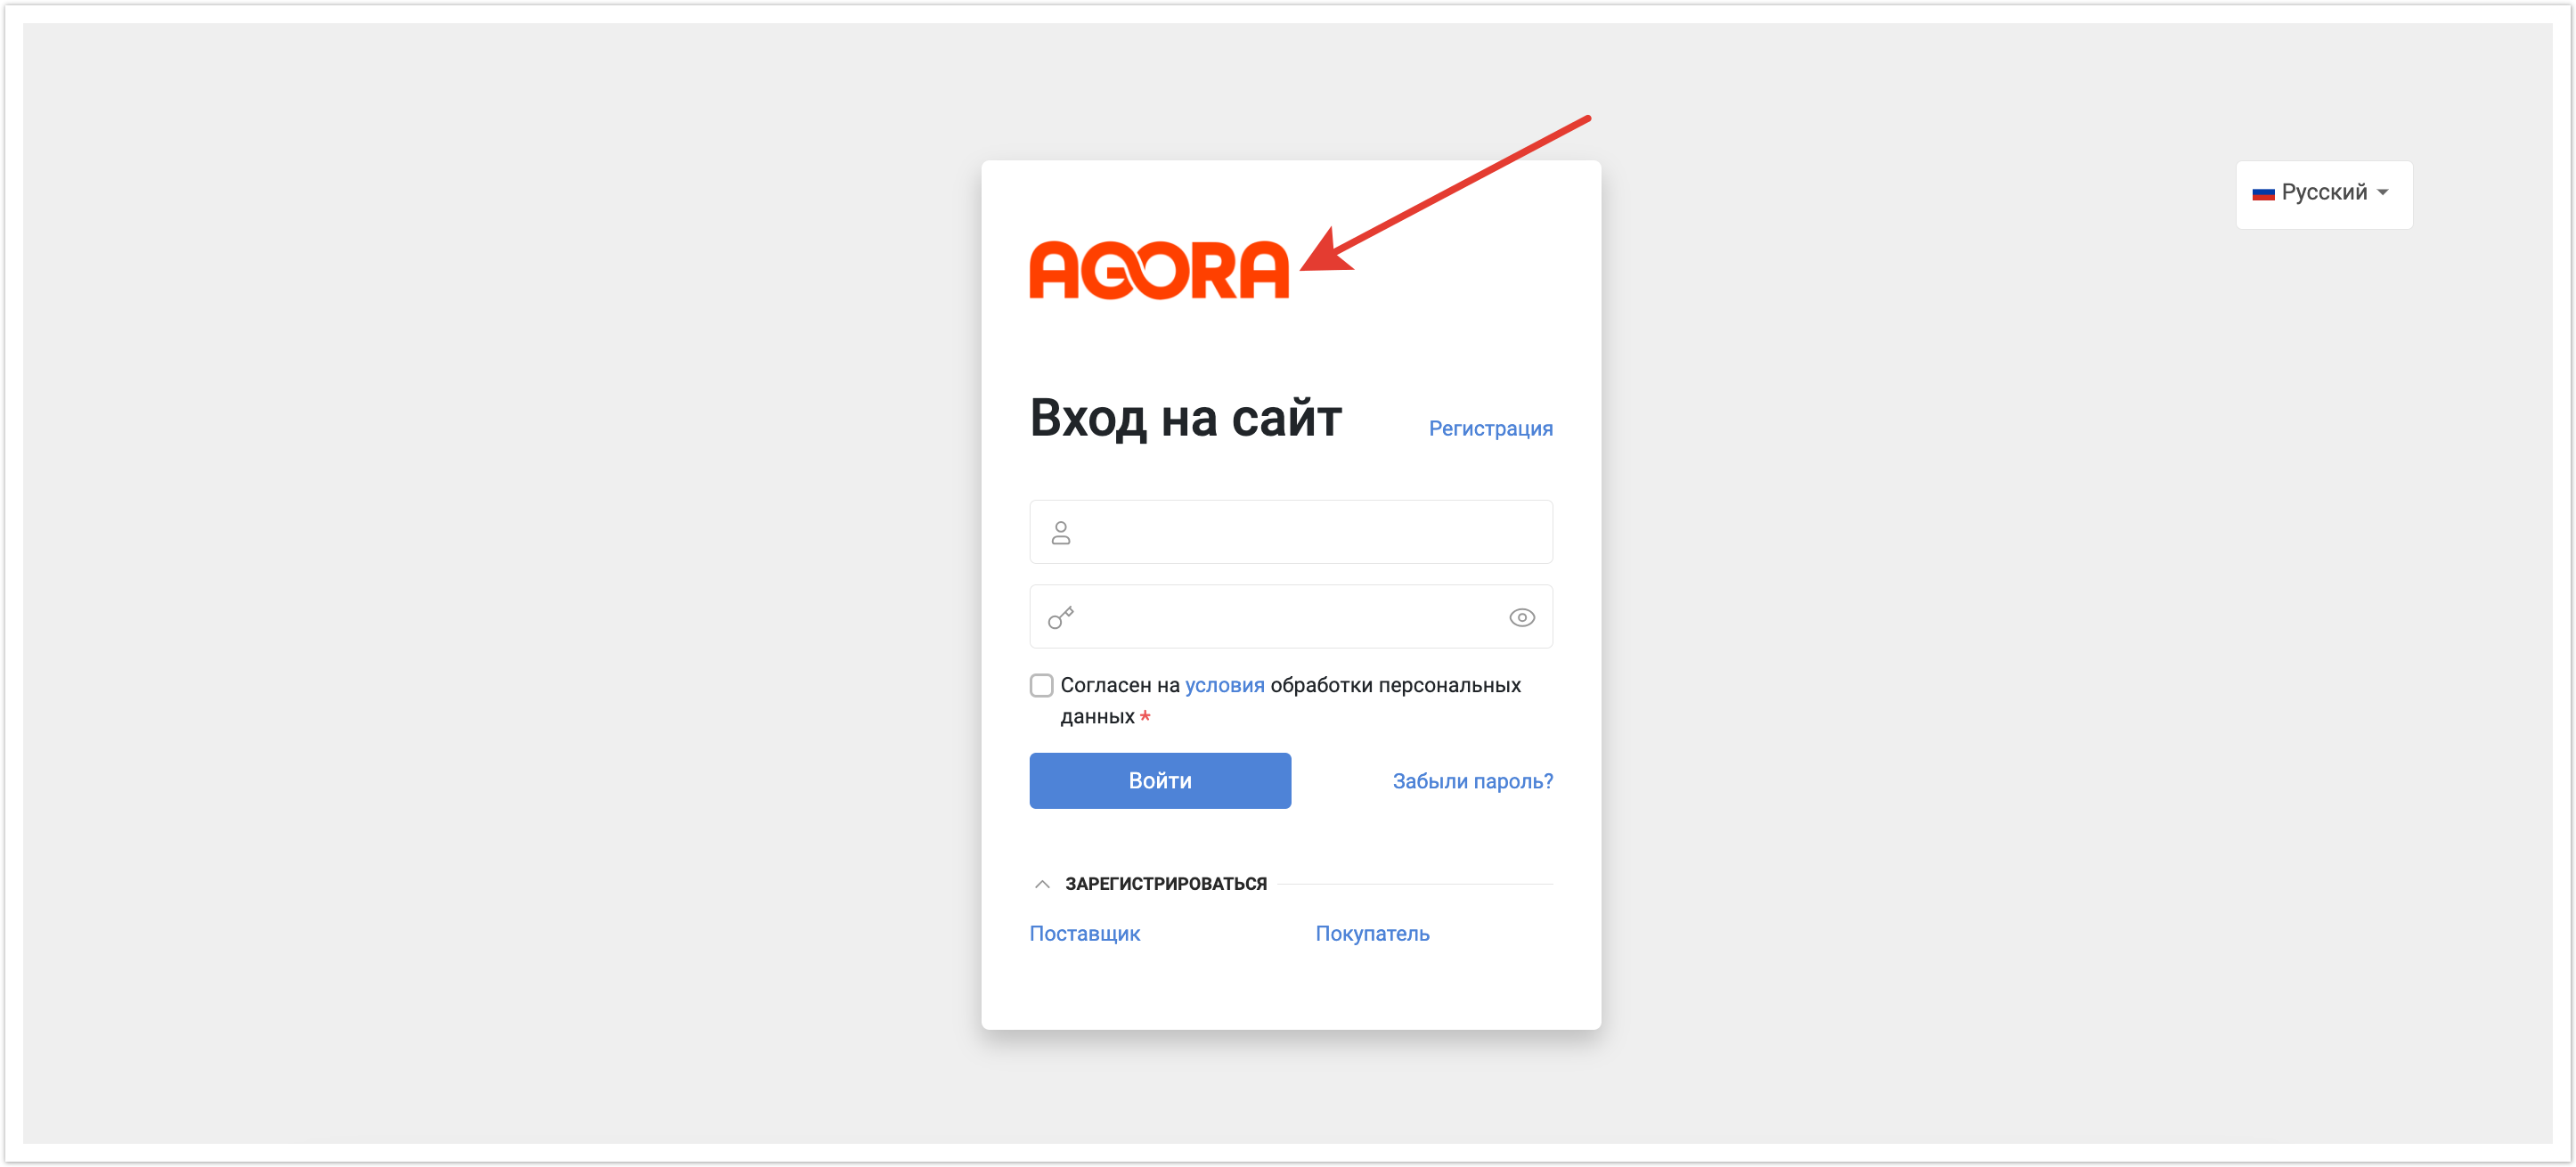
Логотип на странице авторизации - в этом поле загружается логотип, который будет выводится на странице авторизации. Если изображение не было загружено то на странице авторизации отобразится тот логотип, который был загружен в предыдущем поле Логотип в панели навигации и письмах. Рекомендованное разрешение для логотипа 136х30 px.
Подпись под логотипом - в этом поле можно указать подпись, которая будет дополнительно выводится под логотипом.
Название - в этом поле указывается название проекта, которое будет выводится в панели администратора проекта и в строке браузера.
Ваш номер телефона - в этом поле можно указать номер телефона, по которому можно связаться. Например, можно указать номер технической поддержки. Этот номер отобразится для не авторизованных пользователей на главной странице.
Ссылка на техническую поддержку - в этом поле можно указать ссылку, по которой можно напрямую обратиться в техническую поддержку. Эта ссылка будет выводиться в личном кабинете пользователей.
Форма технической поддержки - в этом поле можно выбрать форму обращения в техническую поддержку. Предварительно ее необходимо создать через раздел Формы обратной связи в панели администратора.
E-mail администраторов площадки - здесь можно указать адреса электронной почты, на которые будут отправляться уведомления с платформы.
Дальше идут три настройки, которые позволяют ограничить доступ к платформе на время. Например, недоступность платформы актуально включать на время, когда проводится инвентаризация или иные внутренние процессы, которым может помешать оформление новых заказов пользователями.
Портал недоступен - эта настройка делает платформу недоступной для всех пользователей. То есть ни один пользователь не сможет авторизоваться на платформе, просматривать каталог или оформить заказ. Для применения этой настройки потребуется перезапустить платформу по кнопке Перезапуск портала в панели администратора.
Текст сообщения страницы заглушки - в этом поле можно указать текст, который будет отображаться пользователям в момент недоступности платформы.
Изображение страницы заглушки - здесь можно загрузить изображение, которое будет отображаться пользователям в момент недоступности платформы. Изображение может сопровождать текст, указанный в предыдущем поле или оно может использоваться без текста.
После завершения инвентаризации достаточно выключить настройку Портал недоступен и повторно перезапустить портал.
Включить конструктор главной страницы - эта настройка отвечает за подключение конструктора главной страницы проекта. Для гибкой настройки внешнего вида главной страницы есть отдельный блок настроек в панели администратора - Настройки главной страницы проекта.
СМС-рассылка
Текст сообщения смс для подтверждения номера телефона - в этом поле можно указать текст, который будет отправляться в сообщениях смс рассылки. Это поле будет актуально в случае, если на проекте подключено дополнительное подтверждение аккаунта по номеру телефона. Отправка сообщений происходит по умолчанию с помощью сервиса Smstraffic.
Панель поиска
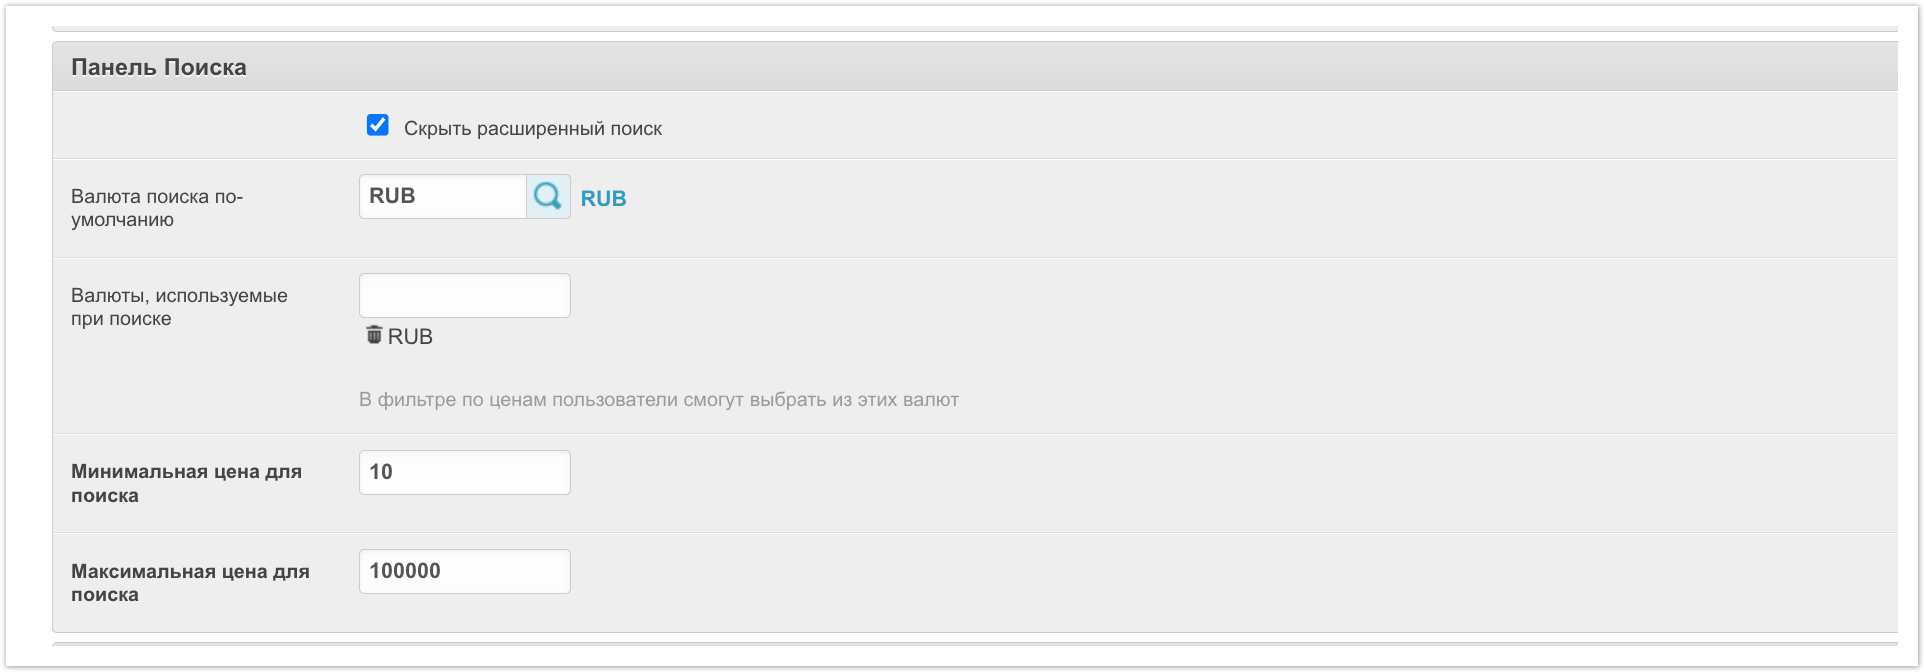
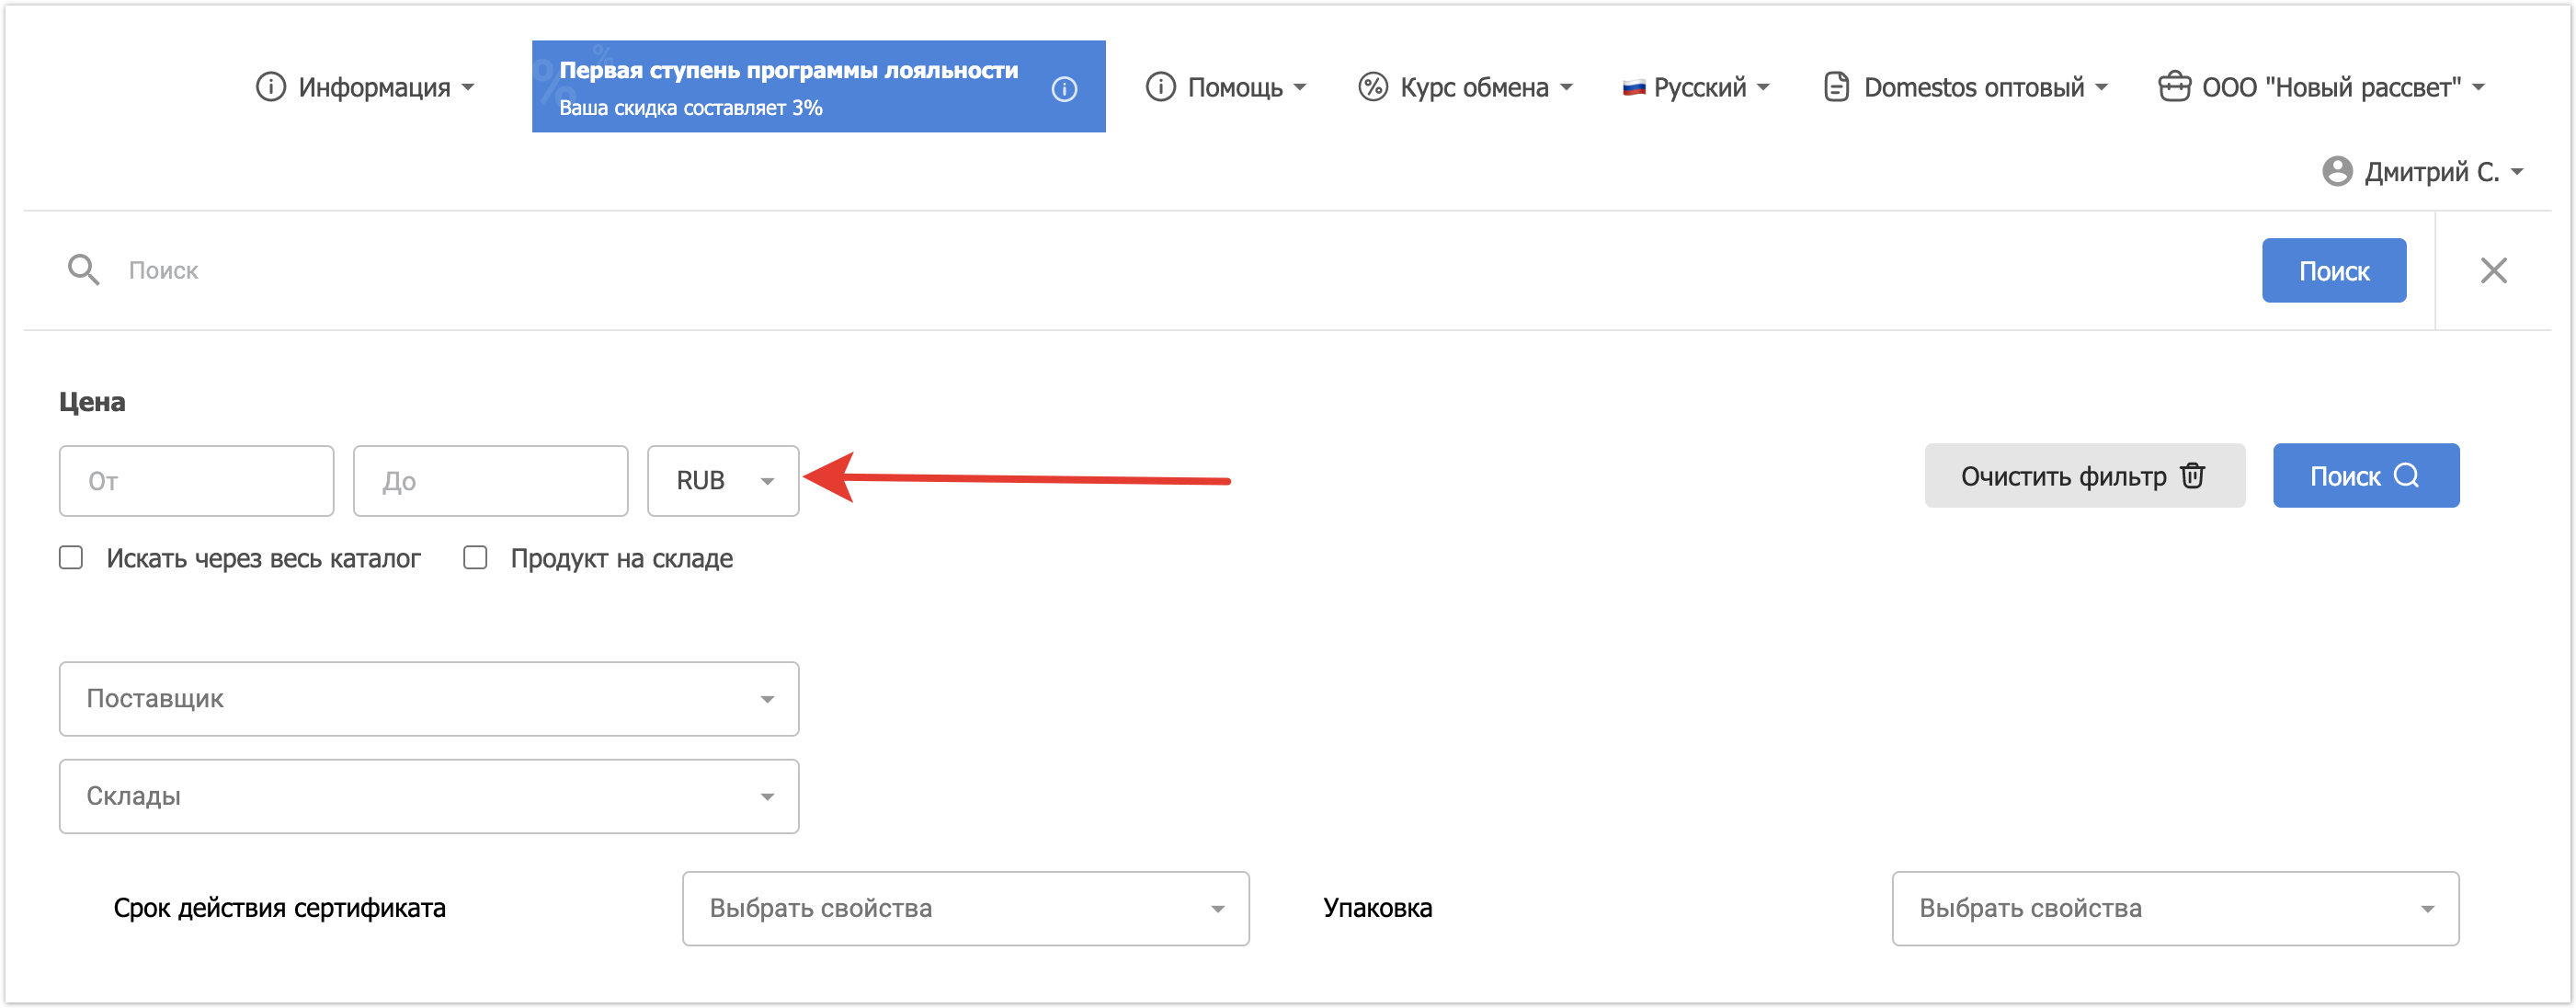
Скрыть расширенный поиск - чек-бокс позволяет отрегулировать отображение панели для расширенного поиска в каталоге. Через эту панель можно осуществлять поиск товаров в каталоге по свойствам.
Валюта поиска по-умолчанию - в этом поле заполняется валюта, которая будет использоваться по-умолчанию при поиске по каталогу.
Валюты, используемые при поиске - в этом поле можно указать дополнительные валюты, по которым будет доступен поиск товаров.
Минимальная цена для поиска и Максимальная цена для поиска - в этих полях заполняется ценовой диапазон для поиска товаров.
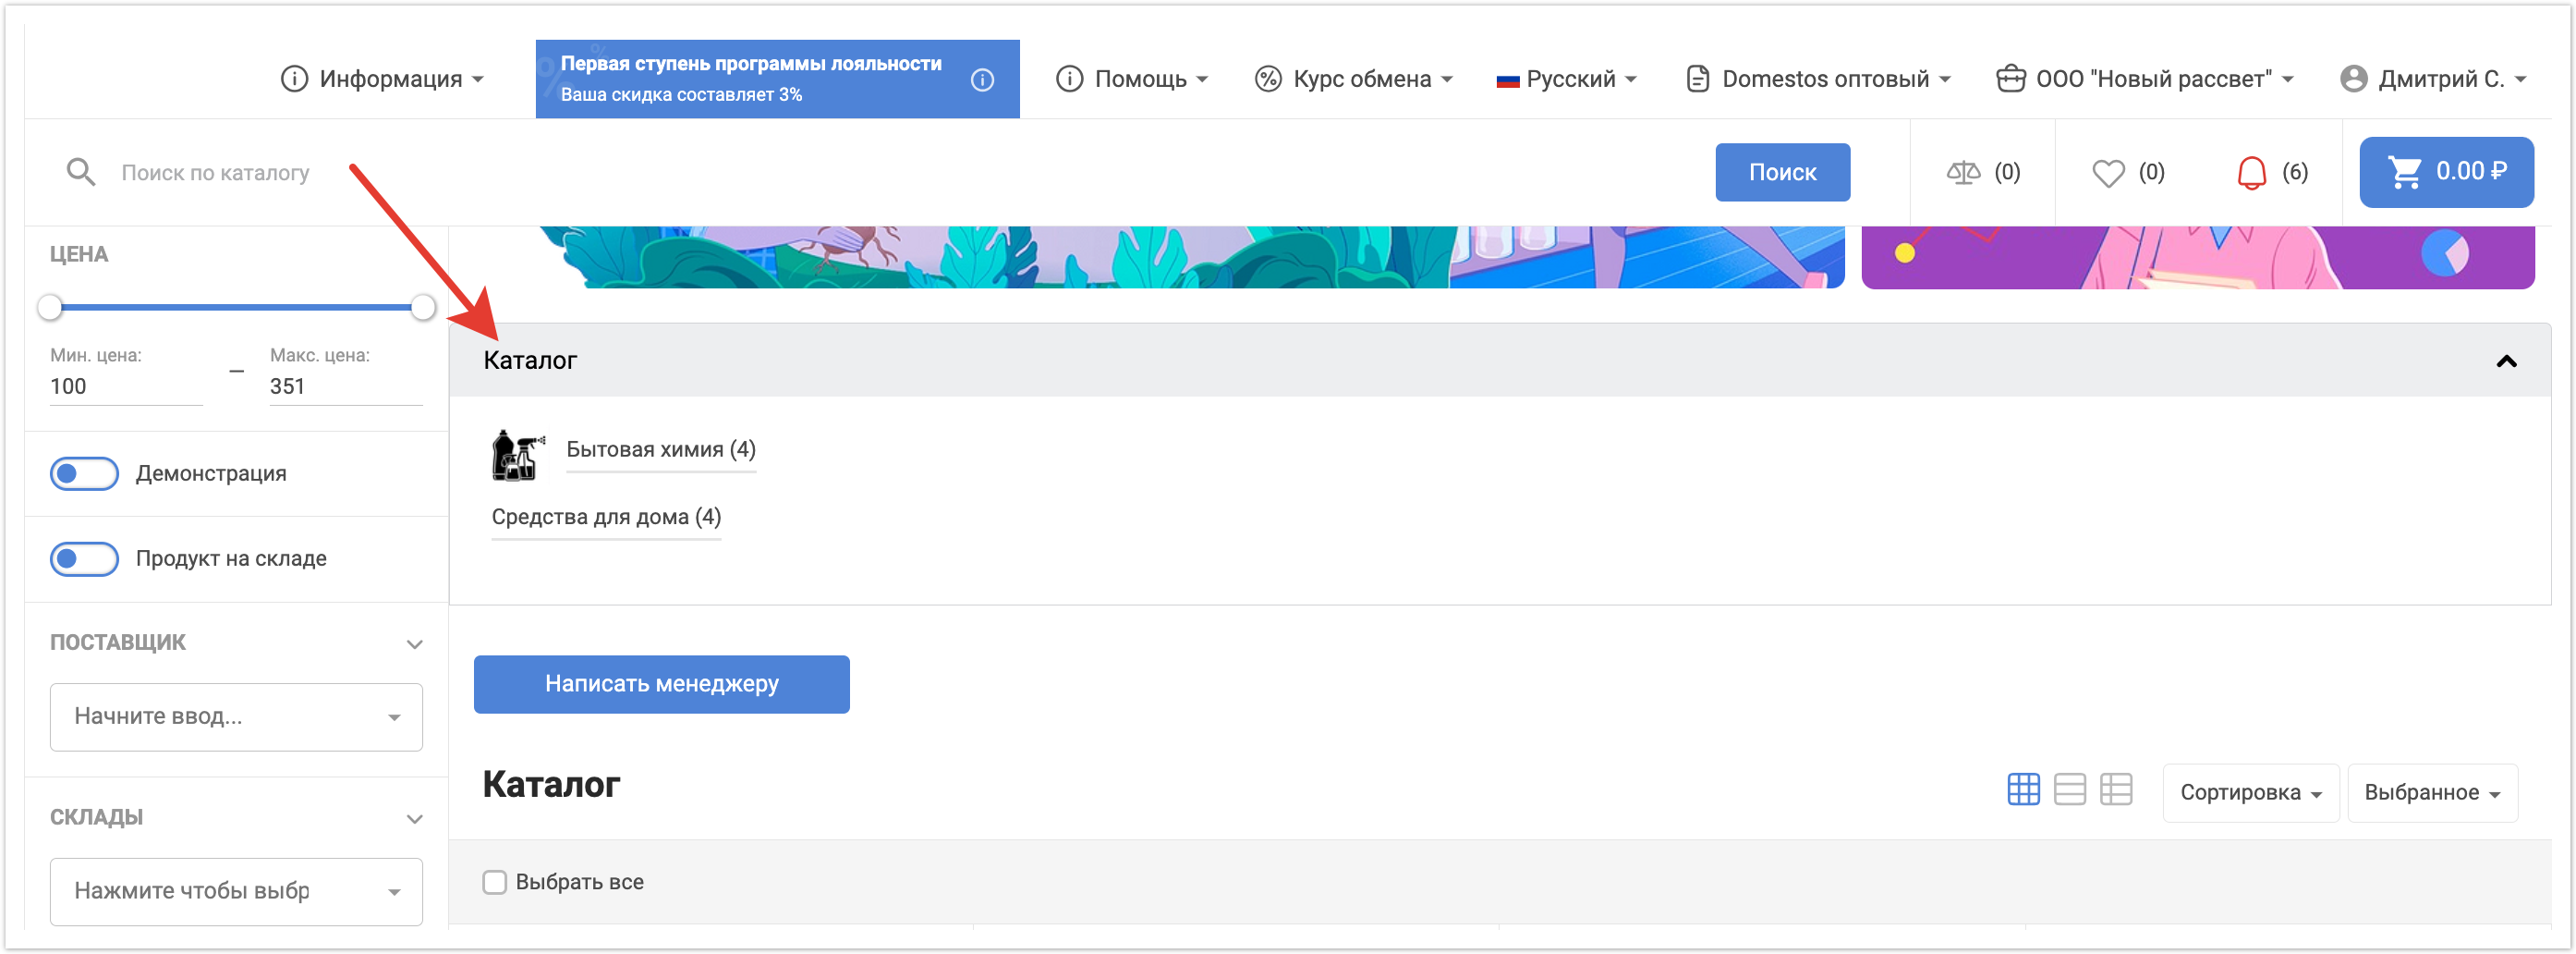
Панель Категорий
Панель Категорий в Каталоге - в выпадающем списке также три значения: Полностью отключена, Включена и скрыта по-умолчанию, Включена и показывается по-умолчанию. В зависимости от выбранного значения панель категорий в каталоге товаров будет скрыта или отображена.
Сайдбар
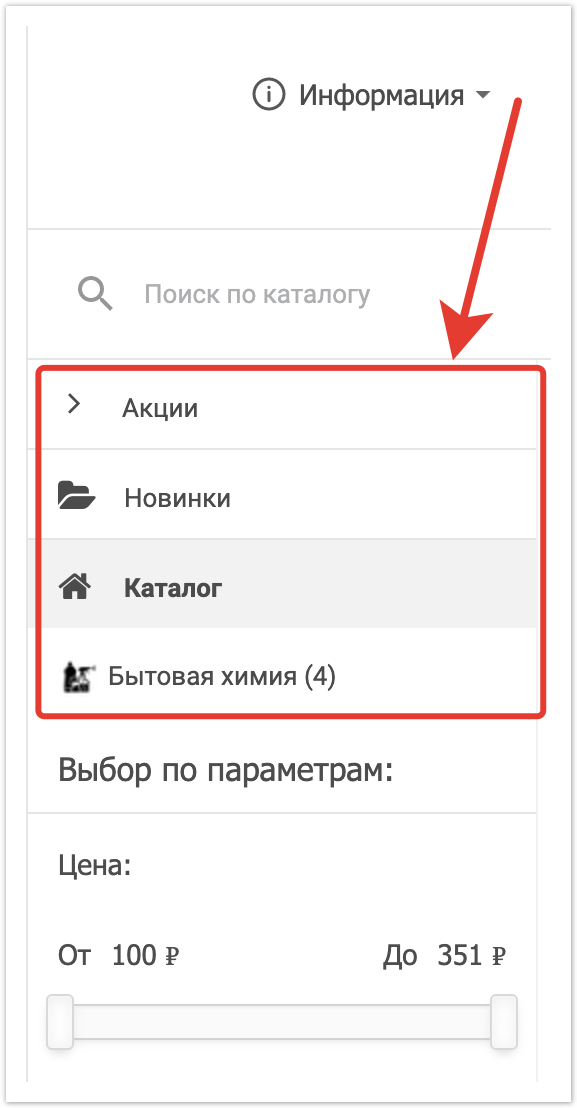
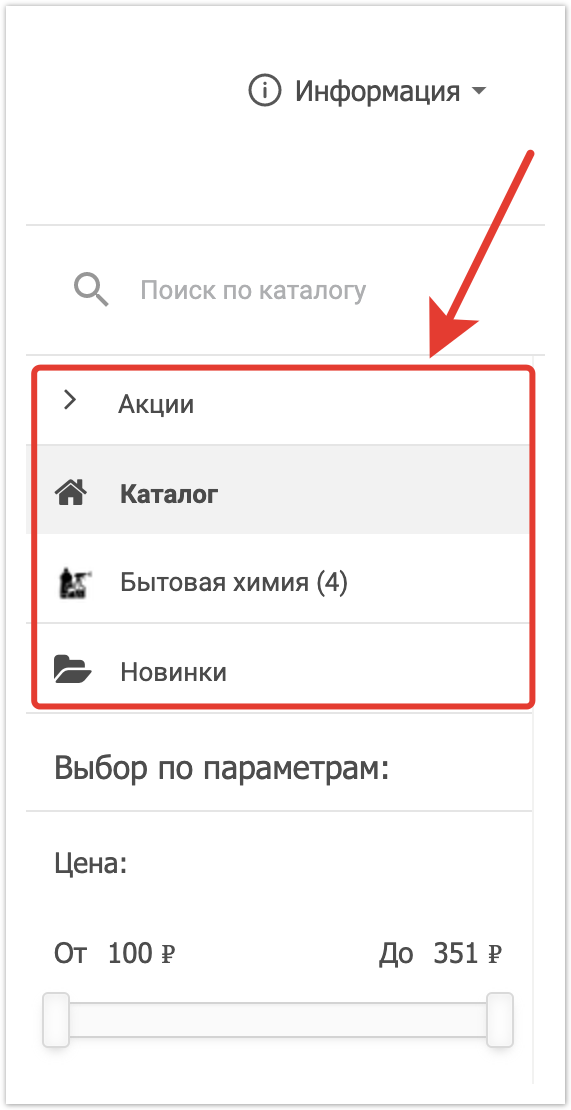
Тип сайдбара - в выпадающем списке можно выбрать из двух значений: Простой сайдбар или Расширенный сайдбар. Визуальное отображение незначительно отличается для этих вариантов.
Простой сайдбар:
Расширенный сайдбар:
Показывать количество товара в категории - эта настройка регулирует будет ли указано количество товара в каждой категории или нет.
Показывать количество товара в фильтрах свойства товара - эта настройка регулирует будет ли отображаться количество товара в фильтрах свойств или не будет.
Дополнительная Панель
Дополнительная Панель с вашим Контентом - в выпадающем списке есть три значения: Полностью отключена, Включена и скрыта по-умолчанию, Включена и показывается по-умолчанию. В зависимости от выбранного значения в личном кабинете пользователя может выводится или скрываться панель с дополнительным контентом. Она выводится над панелью категорий.
Название Дополнительной Панели - в этом поле указывается название панели с дополнительным контентом, которое будет выводится в личных кабинетах пользователей. Если подключено несколько языков, то название можно указать на каждом языке.
Товары
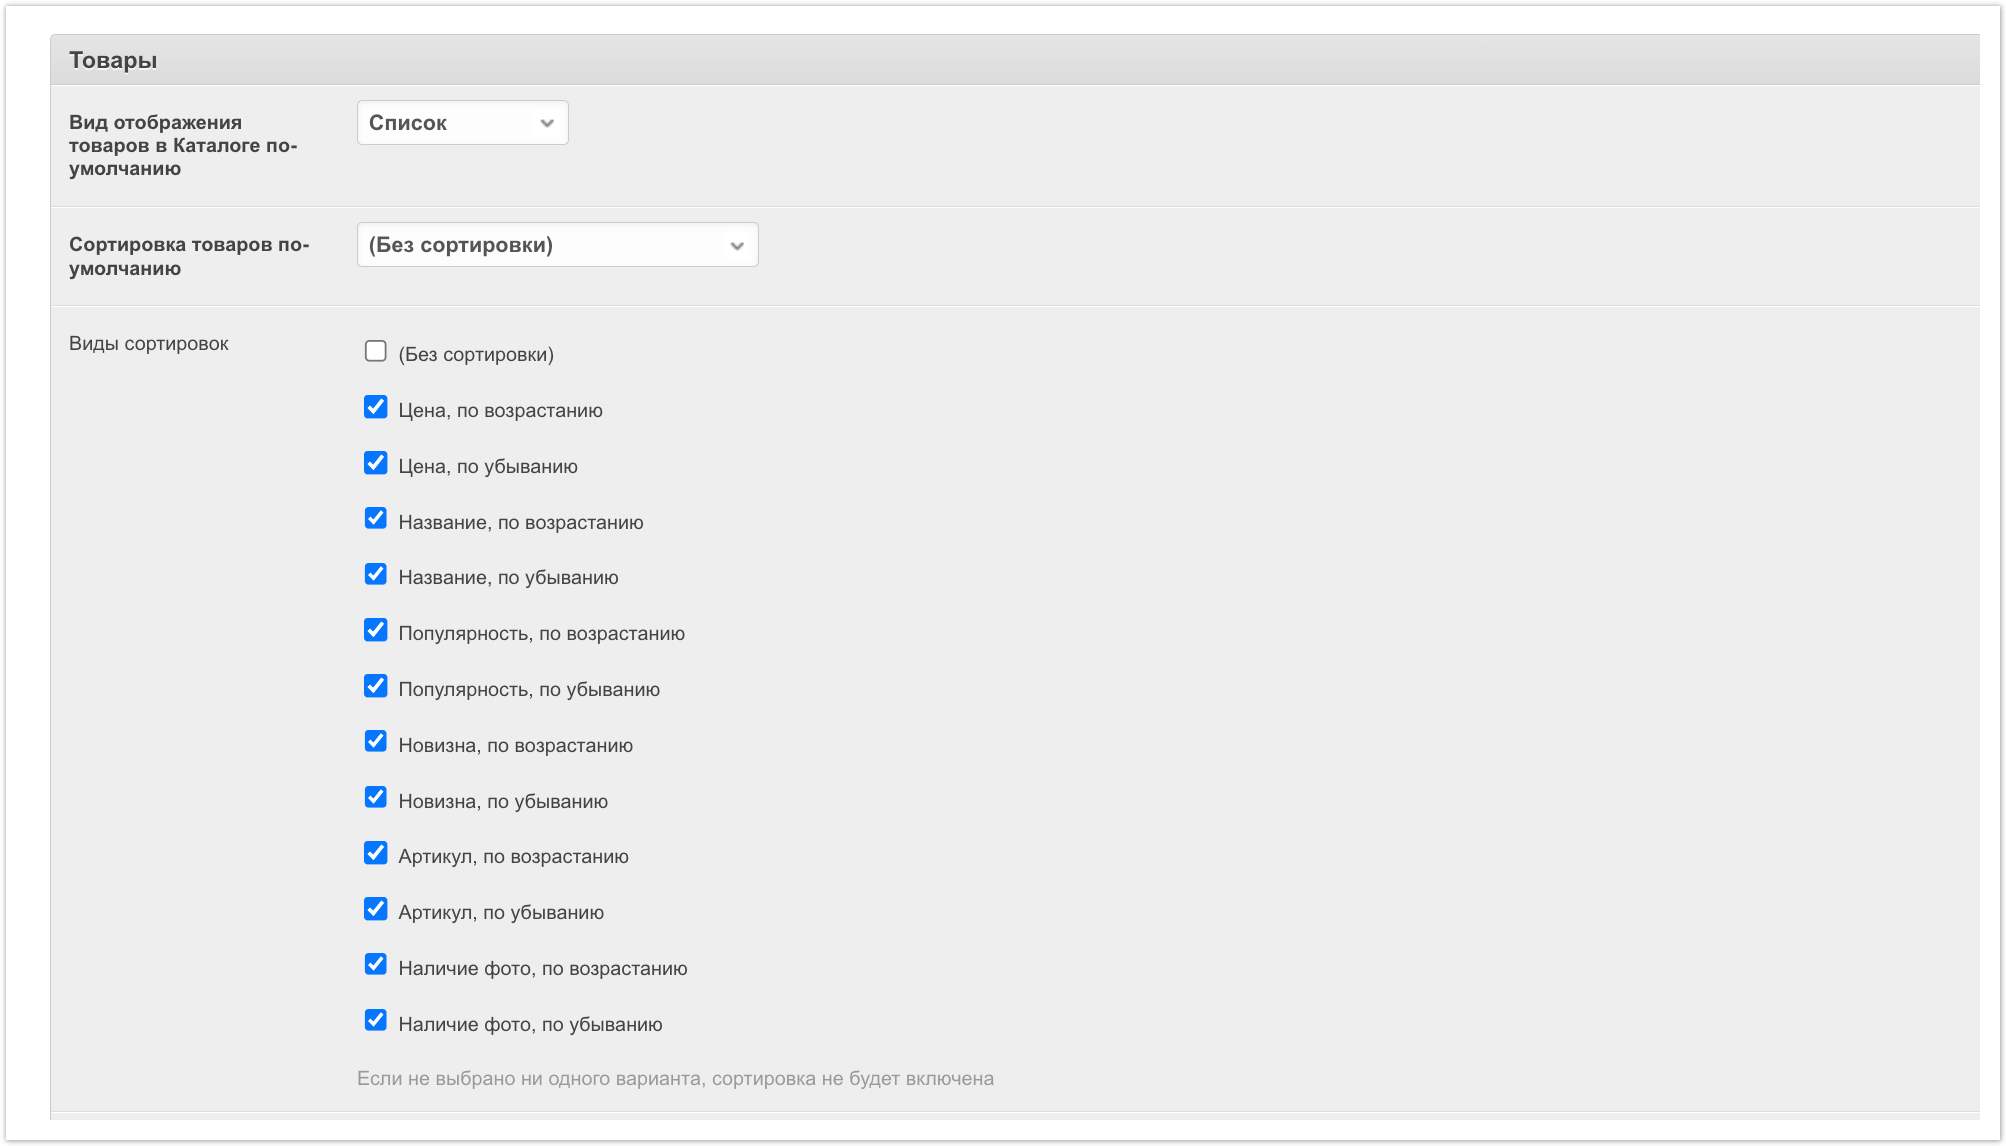
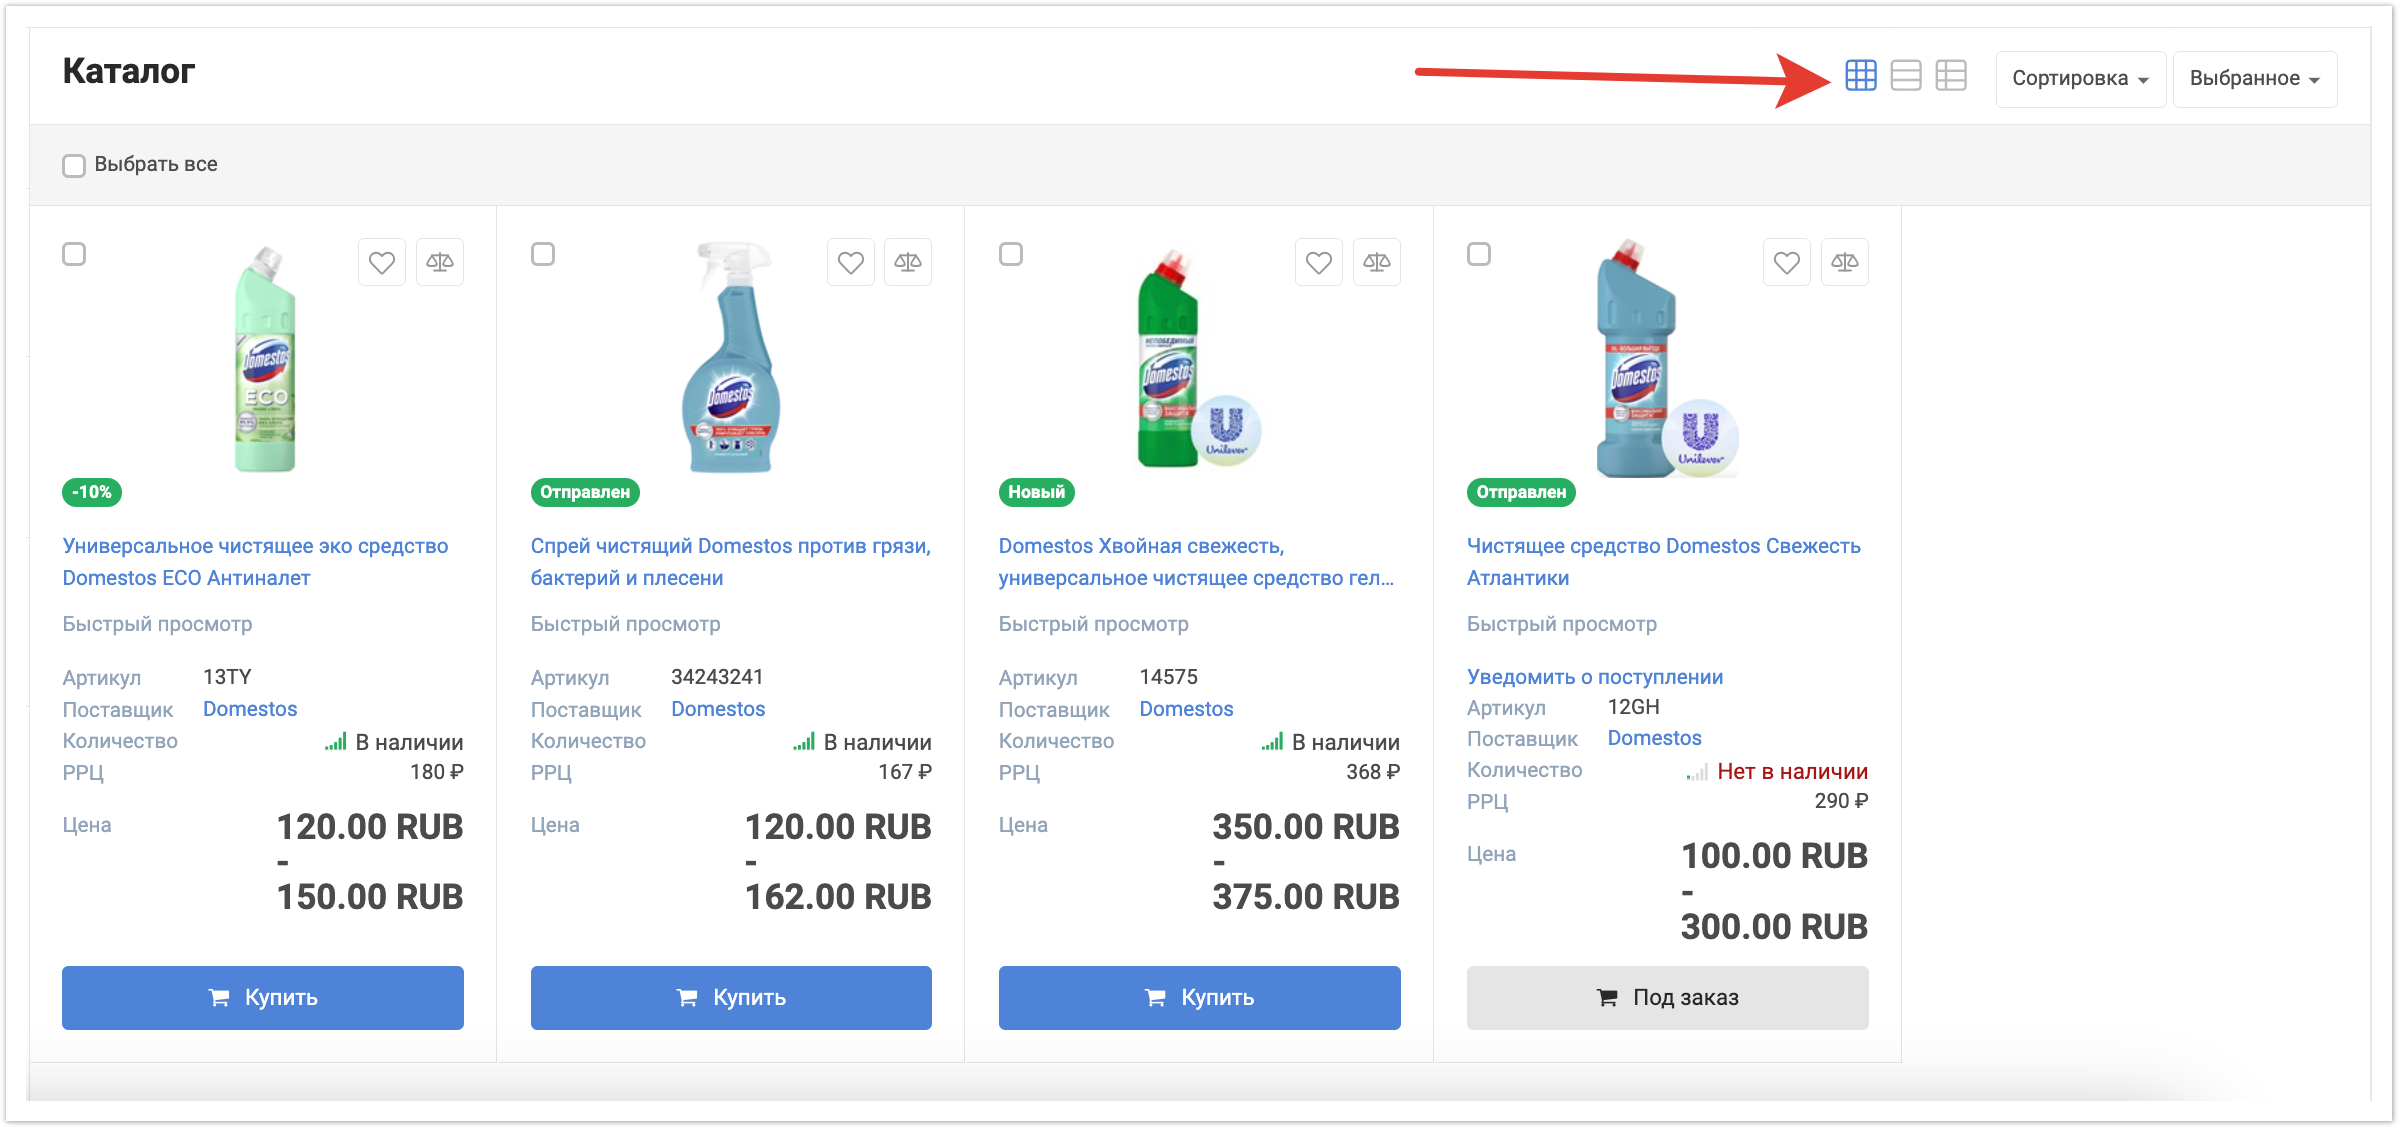
Вид отображения товаров в каталоге по-умолчанию - в выпадающем списке есть 3 значения: Таблица, Список, Сетка. В зависимости от выбранного значения товары в каталоге в личных кабинетах пользователей будут принимать заданный вид отображения. При необходимости пользователь может изменить вид отображения каталога в своем личном кабинете вручную.
Сортировка товаров по-умолчанию - в этом поле задается сортировка, которая будет автоматически применяться в каталоге для всех пользователей. Можно сортировать по возрастанию или убыванию следующих данных: Цене, Названию, Популярности, Новизне, Артикулу, Наличию фото. При необходимости пользователь может задать нужную ему сортировку товаров вручную.
Виды сортировок - доступные виды сортировок. В каталоге пользователей будут отображаться только те виды, которые отмечены чек-боксами.
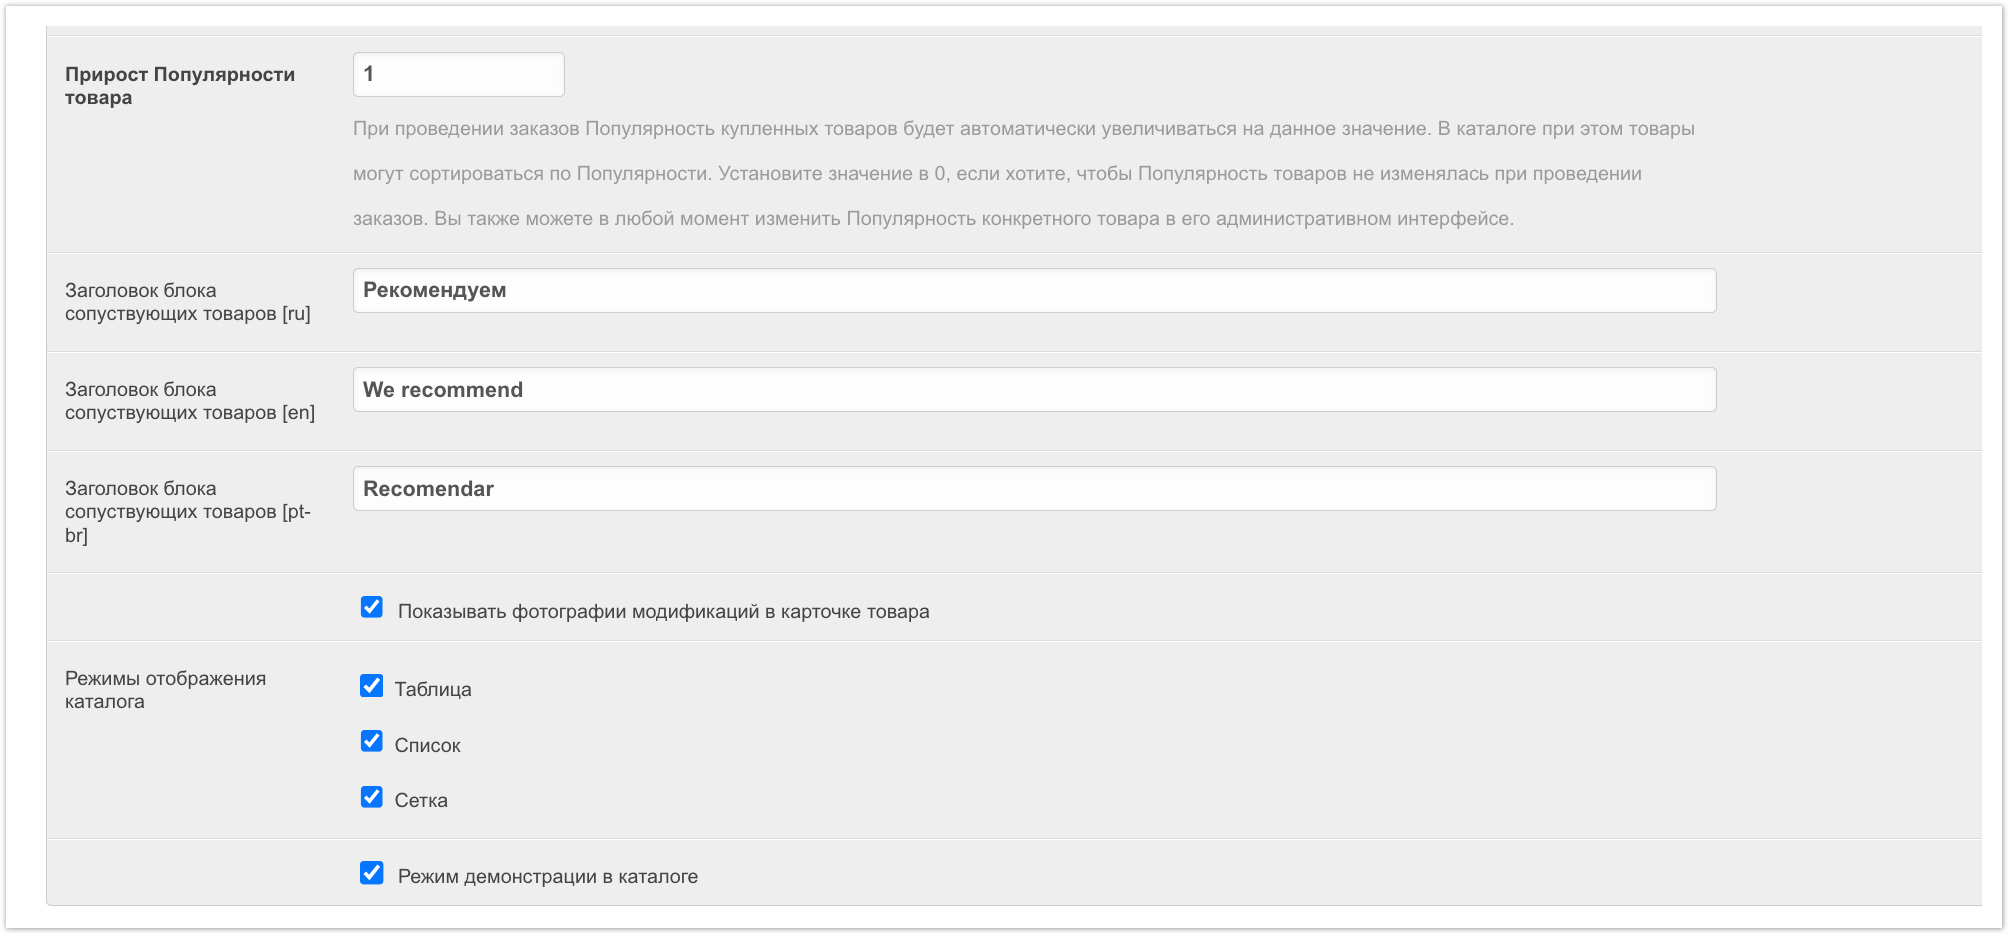
Прирост Популярности товара - в этом поле указывается значение для автоматического прироста популярности, и далее при совершении заказа на товар его популярность будет автоматически увеличиваться на значение прироста. Параметр популярности актуален при сортировке товара по популярности. С помощью автоматического прироста популярности можно выводить покупателям наиболее популярные товары вверху списка. Если необходимо, чтобы популярность товаров не изменялась при проведении заказов, то нужно установите значение прироста равным "0".
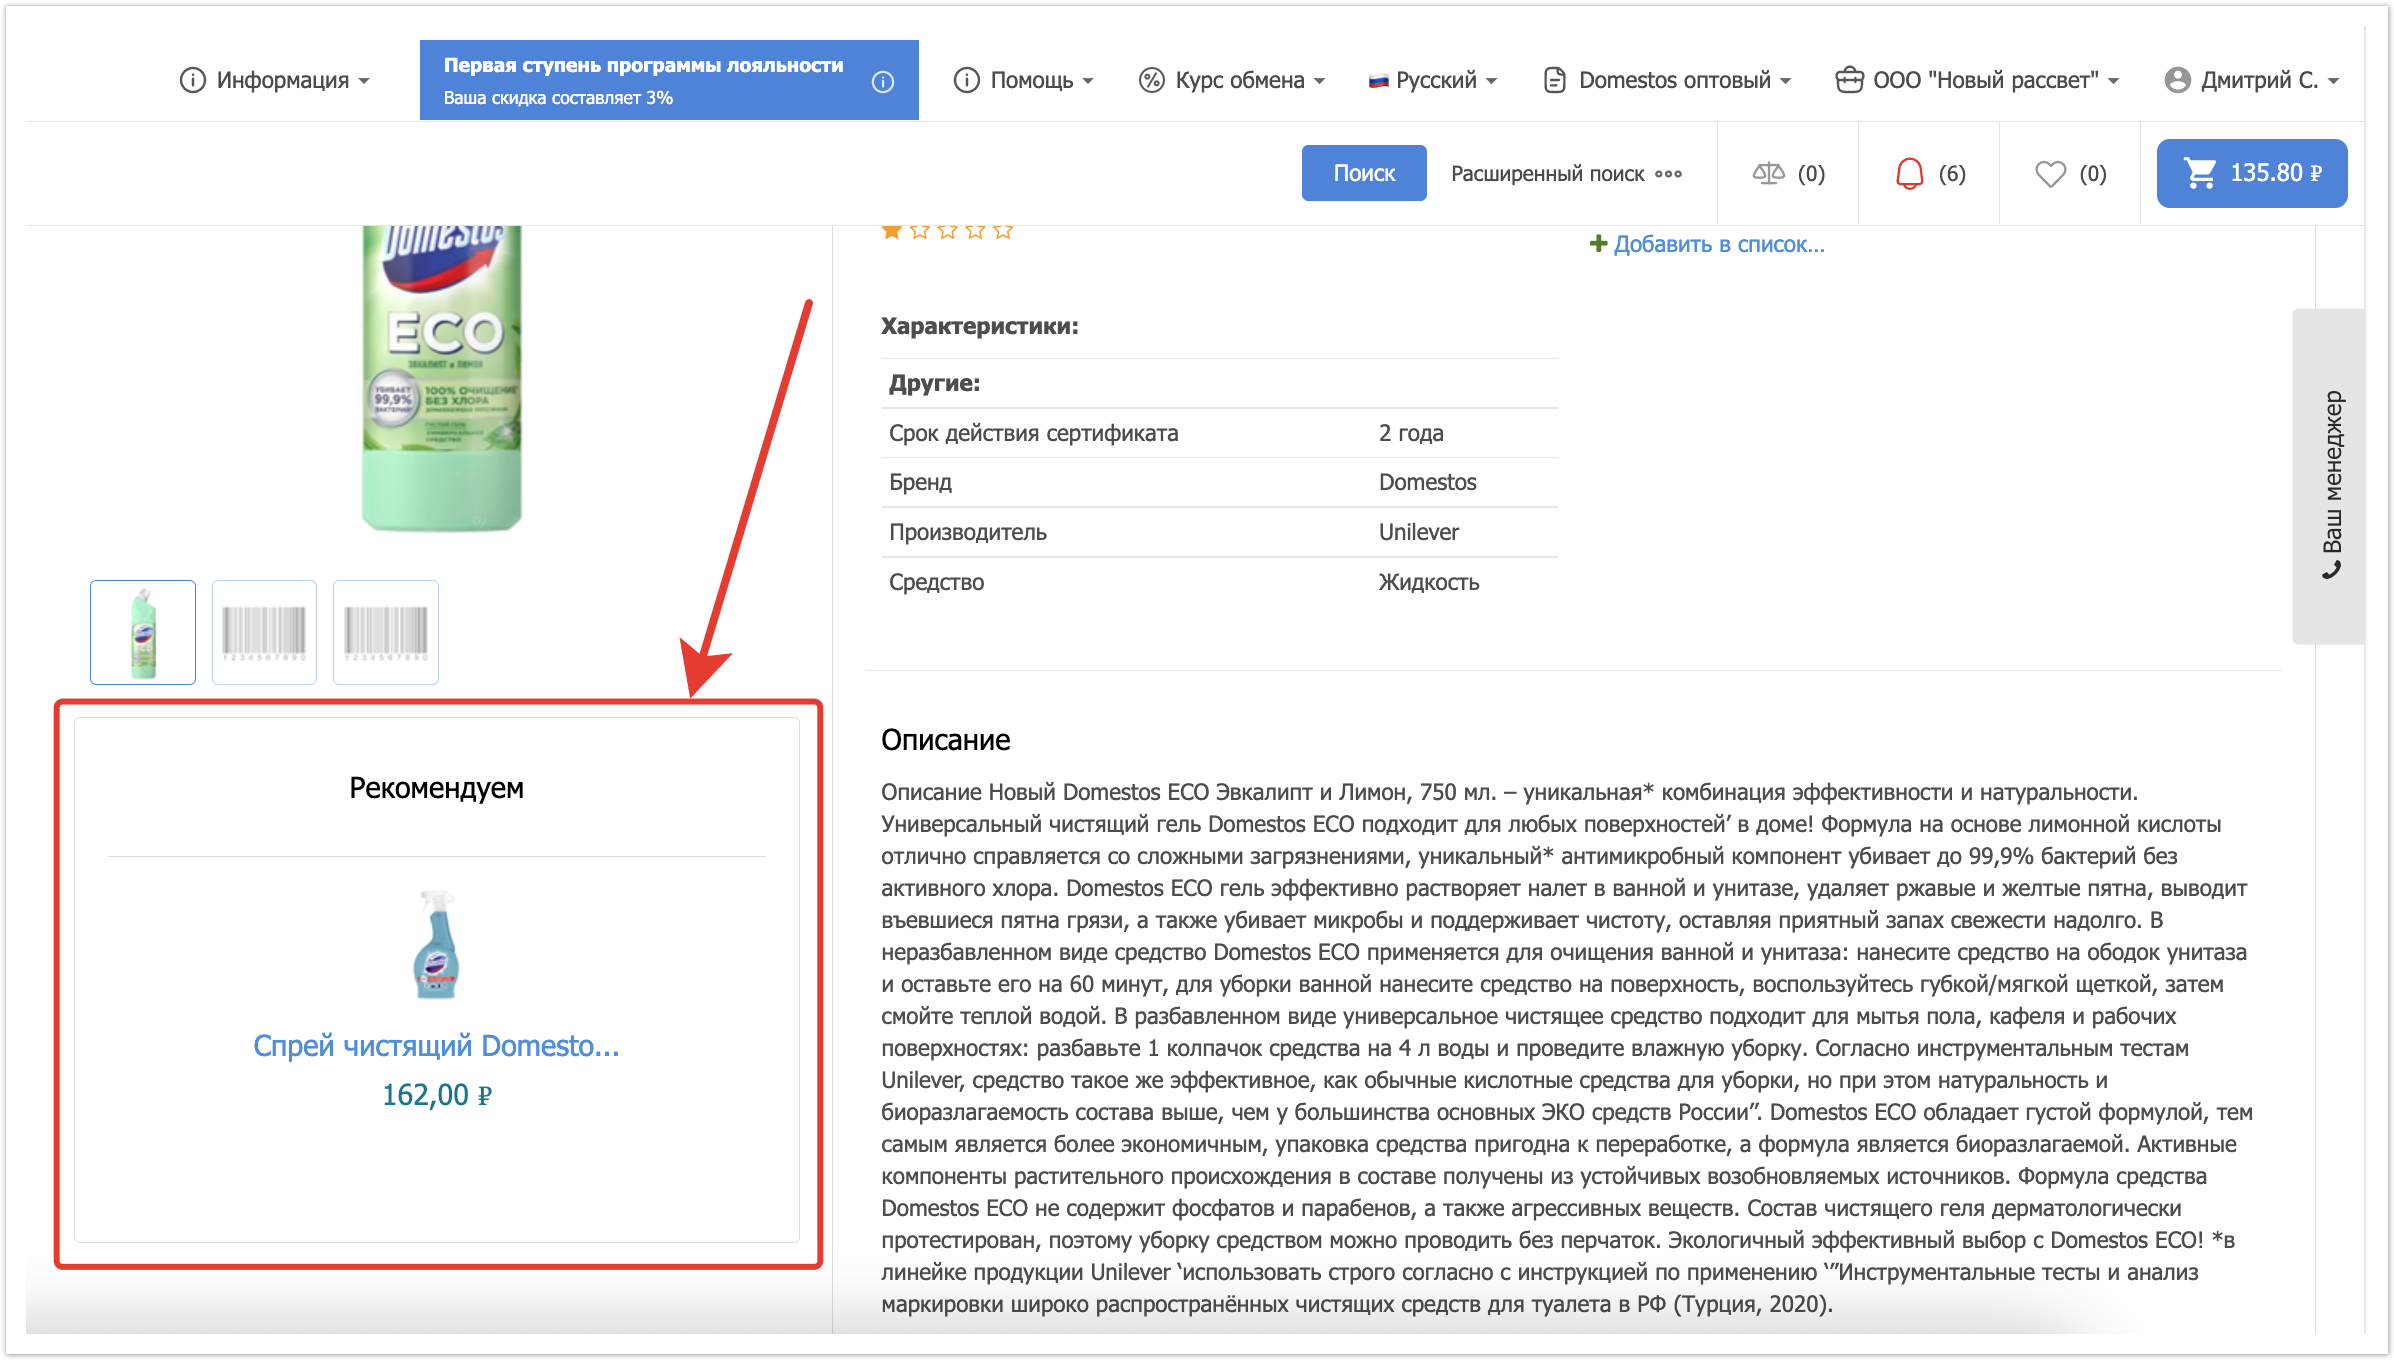
Заголовок блока сопутствующих товаров - этот заголовок будет выводится в карточке товара для блока с рекомендованными товарами. Если подключено несколько языков, то его можно указать на каждом языке.
Показывать фотографии модификаций в карточке товара - эта настройка регулирует будут ли отображаться изображения, загруженные для модификаций, в карточке основного товара.
Режимы отображения каталога - эта настройка также имеет три варианта отображения: Таблица, Список, Сетка. Настройка регулирует какие режимы отображения будут доступны пользователям для выбора в каталоге товаров.
Режим демонстрации в каталоге - отвечает за отображение режима демонстрации в каталоге. Это режим, при котором цены товаров скрываются. Его могут использовать покупатели для демонстрации своим клиентам. Чтобы скрыть цены у товаров достаточно установить чек-бокс Демонстрация в каталоге.
Настройки экспорта товаров для покупателей
Свойства при экспорте - в этом поле можно выбрать те свойства, которые должны быть записаны и выгружены в файле экспорта. Настройка этого поля актуальна, если на платформе отключена модерация товаров. Экспорт используется покупателями для выгрузки данных по товарам в файл и последующей загрузки на торговые площадки.
Форматы экспорта товаров - эта настройка позволяет выбрать те форматы экспорта товаров, которые должны быть доступны для покупателей в личном кабинете. А также включить возможность экспорта для пользователей без авторизации.
Хранить списки экспорта неавторизованных пользователей - в этом поле указывается количество дней, которое будут храниться созданные списки экспорта для неавторизованных пользователей, если это требуется.
Заказы и счета по заказам
Ключевое свойство товара в счете заказа - в поле указывается название свойства. По этому свойству будут сортироваться товары при печати заказа через личный кабинет. Сортировка выполняется по возрастанию этого свойства. Если свойство не указано, то сортировка не выполняется.
Каталог
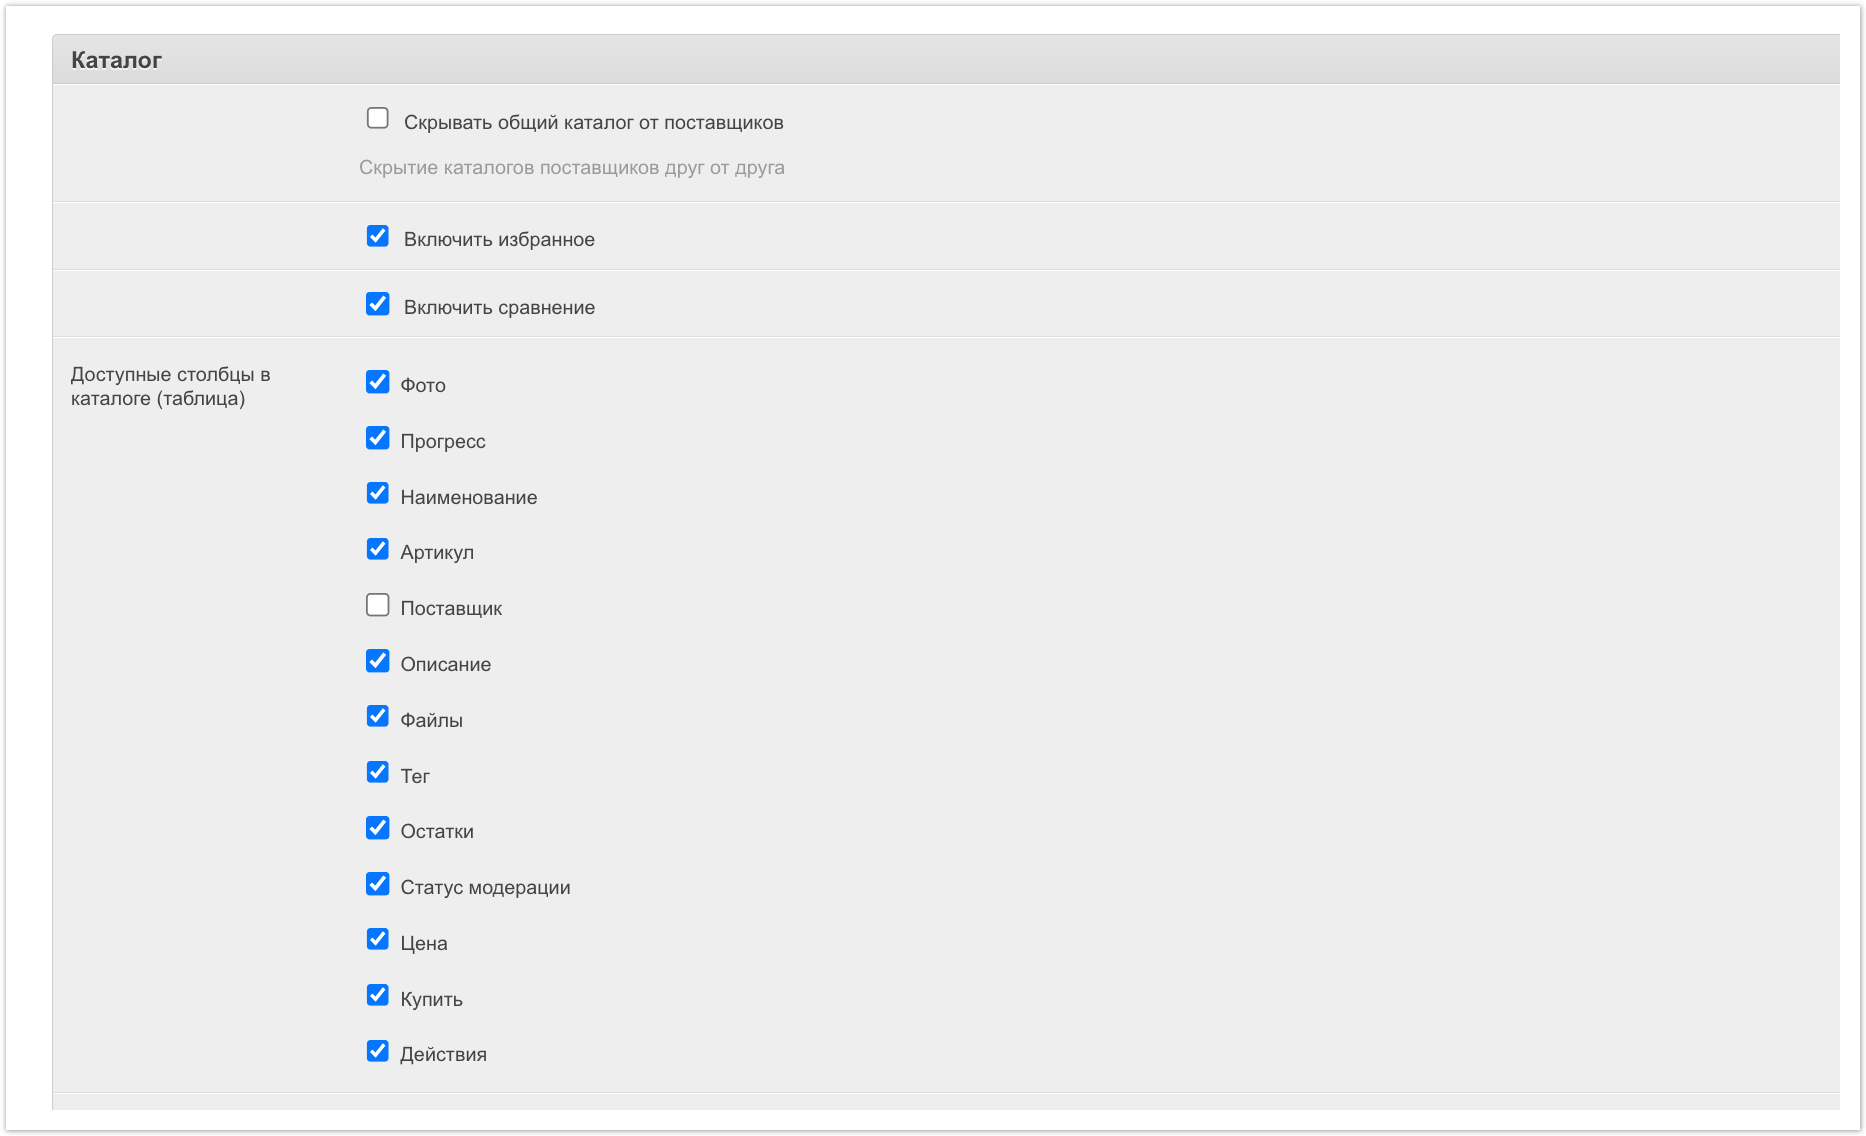
Скрывать общий каталог от поставщиков - настройка отвечает за скрытие каталогов поставщиков друг от друга, то есть они не смогут видеть товары и цены других поставщиков.
Включить избранное - включает вывод списка избранных товаров.
Включить сравнение - включает вывод списка сравнения.
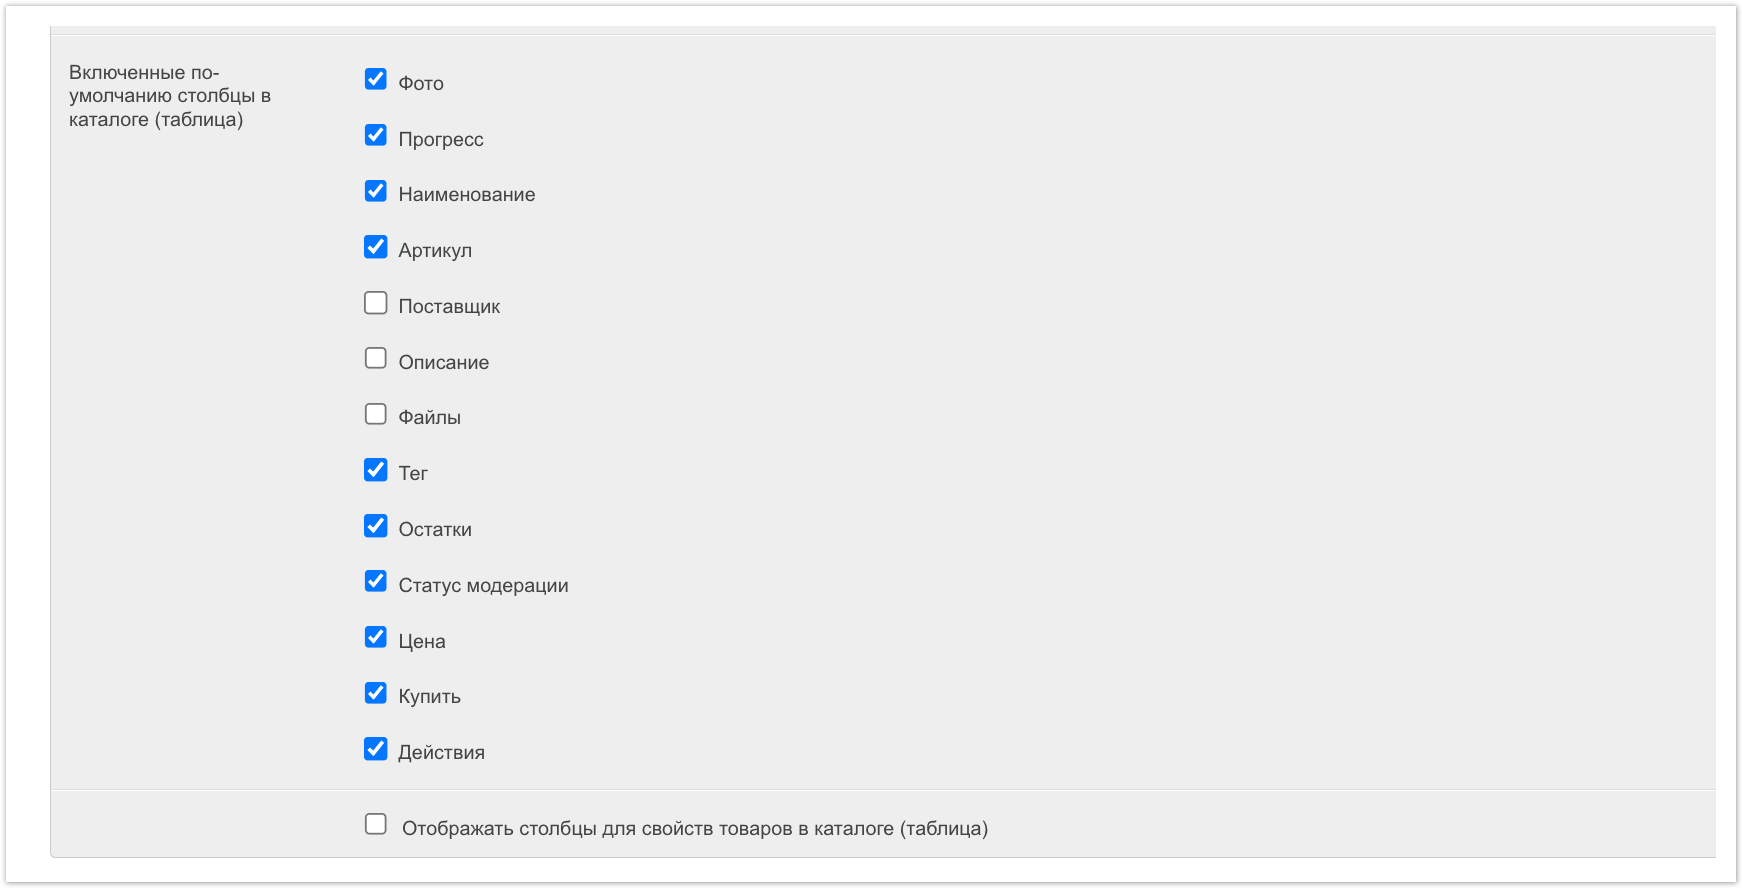
Доступные столбцы в каталоге (таблица) - выбранные столбцы могут выводится в каталоге в режиме отображения Таблица, если их перенести.
Включенные по умолчанию столбцы в каталоге (таблица) - выбранные столбцы будут выводится по умолчанию в каталоге в режиме отображения Таблица.
Отображать столбцы для свойств товаров в каталоге (таблица) - в режиме отображения Таблица можно будет также выводить свойства товаров.
Скидки
Значение свойств исключения для скидок - в этом поле можно выбрать значения свойств, которые будут исключать товар из действия скидки. То есть если товар имеет хотя бы одно из указанных в этом поле значений свойств, то скидка на него не будет применяться.
Типы цен исключения для скидок - в этом поле можно задать те типы цен, по которым скидки не будут распространяться.
Ставка вознаграждения - в этом поле указывается процент для вознаграждения. Это значение используется при расчете скидки в заказе.
Управление отправкой email
Удалять email логи после N дней - здесь указываются сроки хранение e-mail уведомлений. По истечению этого срока логи об отправке уведомлений будут удаляться.
Обмен
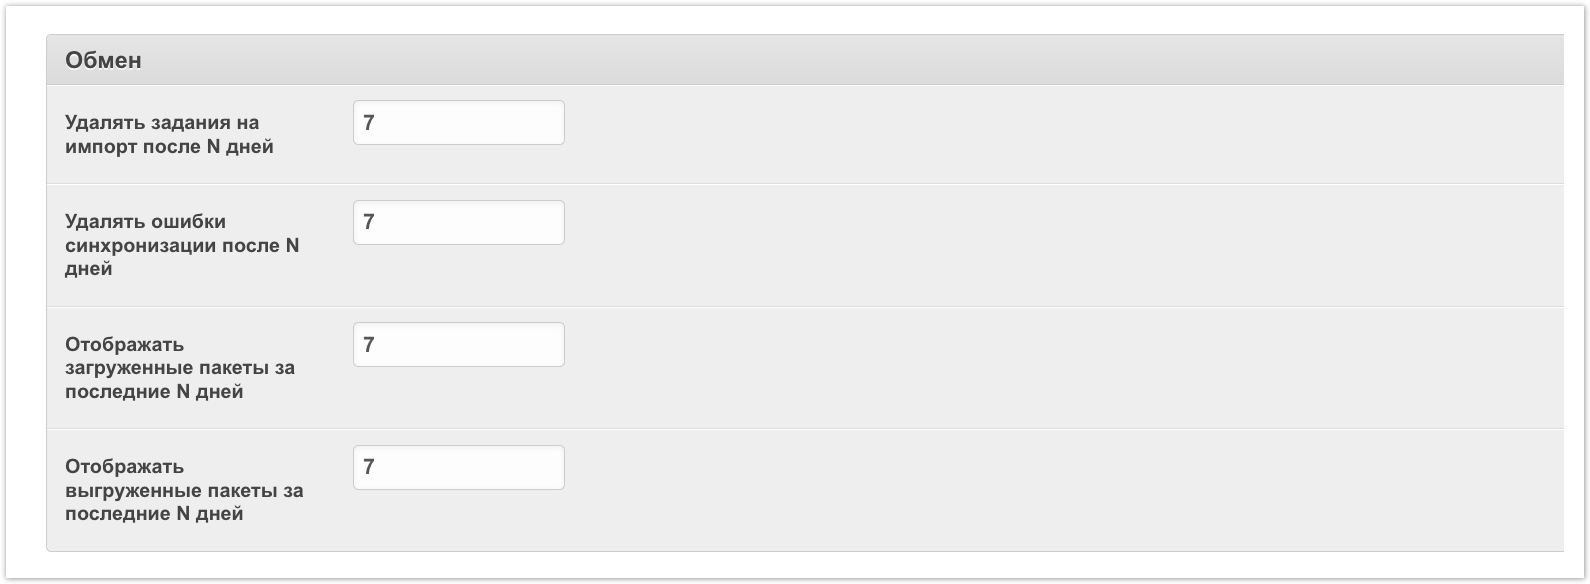
В этом разделе настраивается отображение пакетов данных, удаление заданий и ошибок при обмене данными с другими информационными системами.
Удалять задания на импорт после N дней - указывается количества дней, по прошествии которого выполняется удаление пакетов из очереди обмена. Эти данные выводятся в административной панели, раздел Очередь обмена.
Удалять ошибки синхронизации после N дней - указывается количество дней, после которого происходит удаление ошибок, возникших при работе обмена с внешними учетными системами. Данные по ошибкам выводятся в административной панели, раздел Ошибки синхронизации.
Отображать загруженные пакеты за N дней - указывается количество дней, после которого происходит удаление пакетов импорта. Эти данные отображаются в административной панели, раздел Пакеты обмена Импорт.
Отображать выгруженные пакеты за последние N дней - указывается количество дней, после которого происходит удаление пакетов экспорта. Эти данные отображаются в административной панели, раздел Пакеты обмена Экспорт.
Вход на сайт
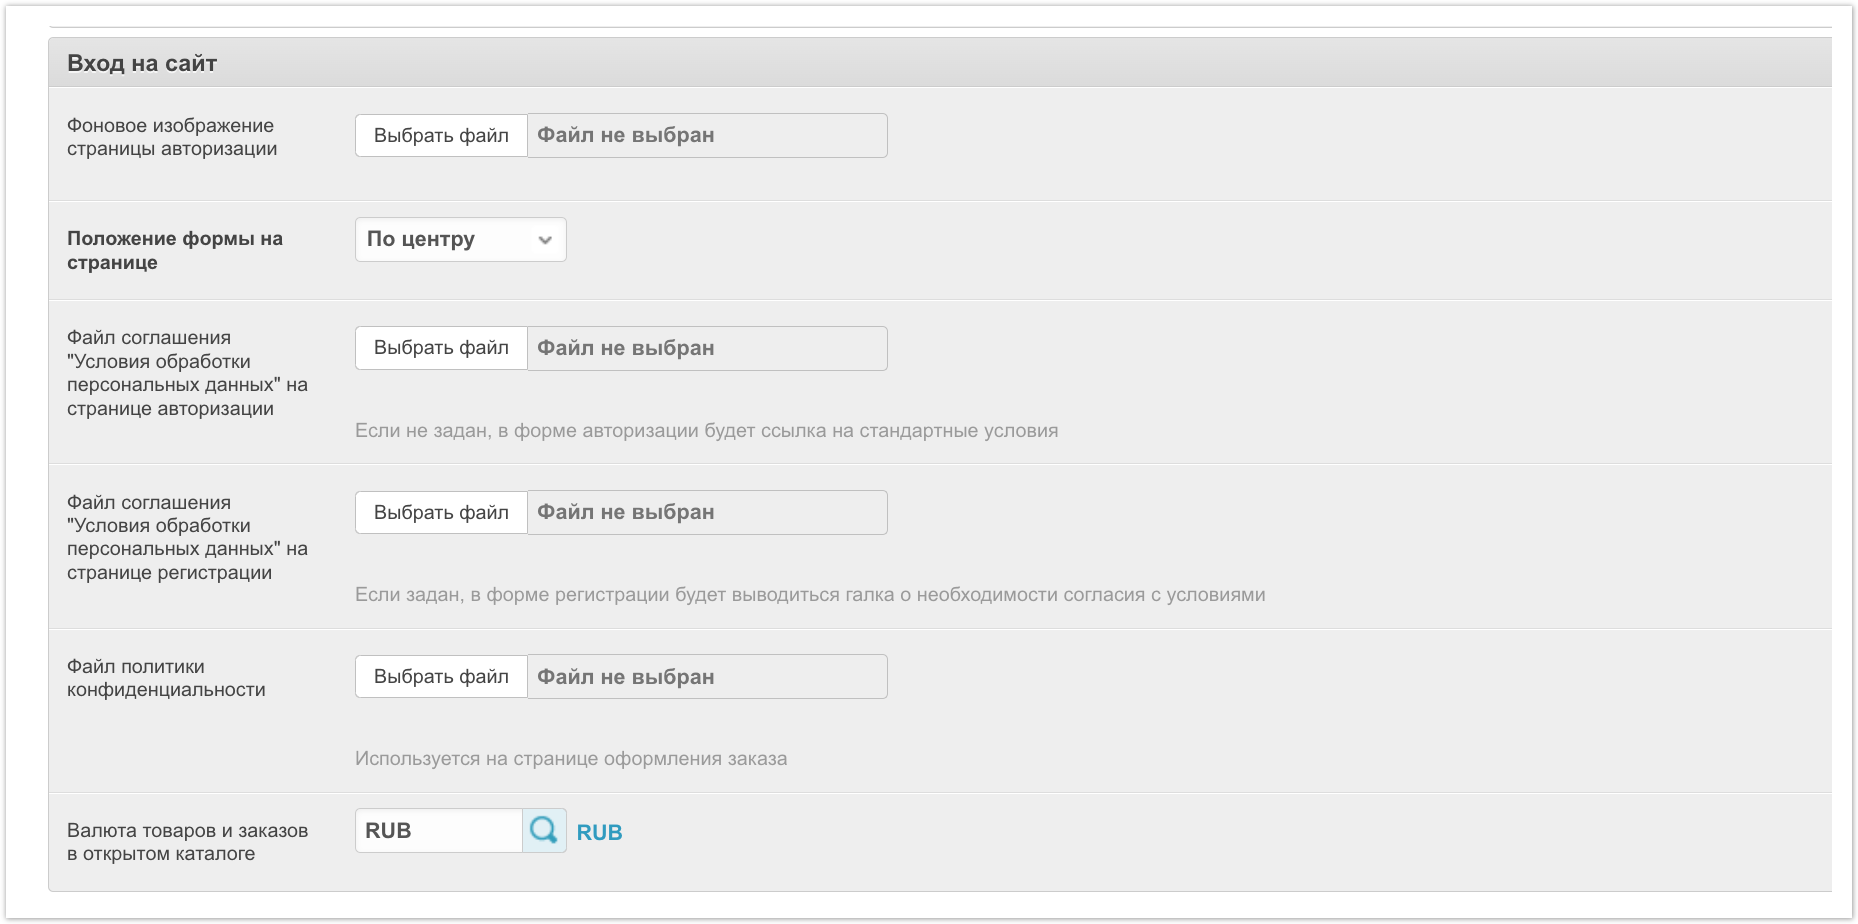
Фоновое изображение страницы авторизации - поскольку форма авторизации занимает не всю область окна, то можно загрузить фоновое изображение в стилистике вашей платформы.
Положение формы на странице - настройка отвечает за положение формы регистрации на странице. Доступные варианты: Слева, По центру, Справа.
Файл соглашения "Условия обработки персональных данных" на странице авторизации - в этом поле можно загрузить файл с условиями обработки персональных данных для отображения пользователю при авторизации на платформе.
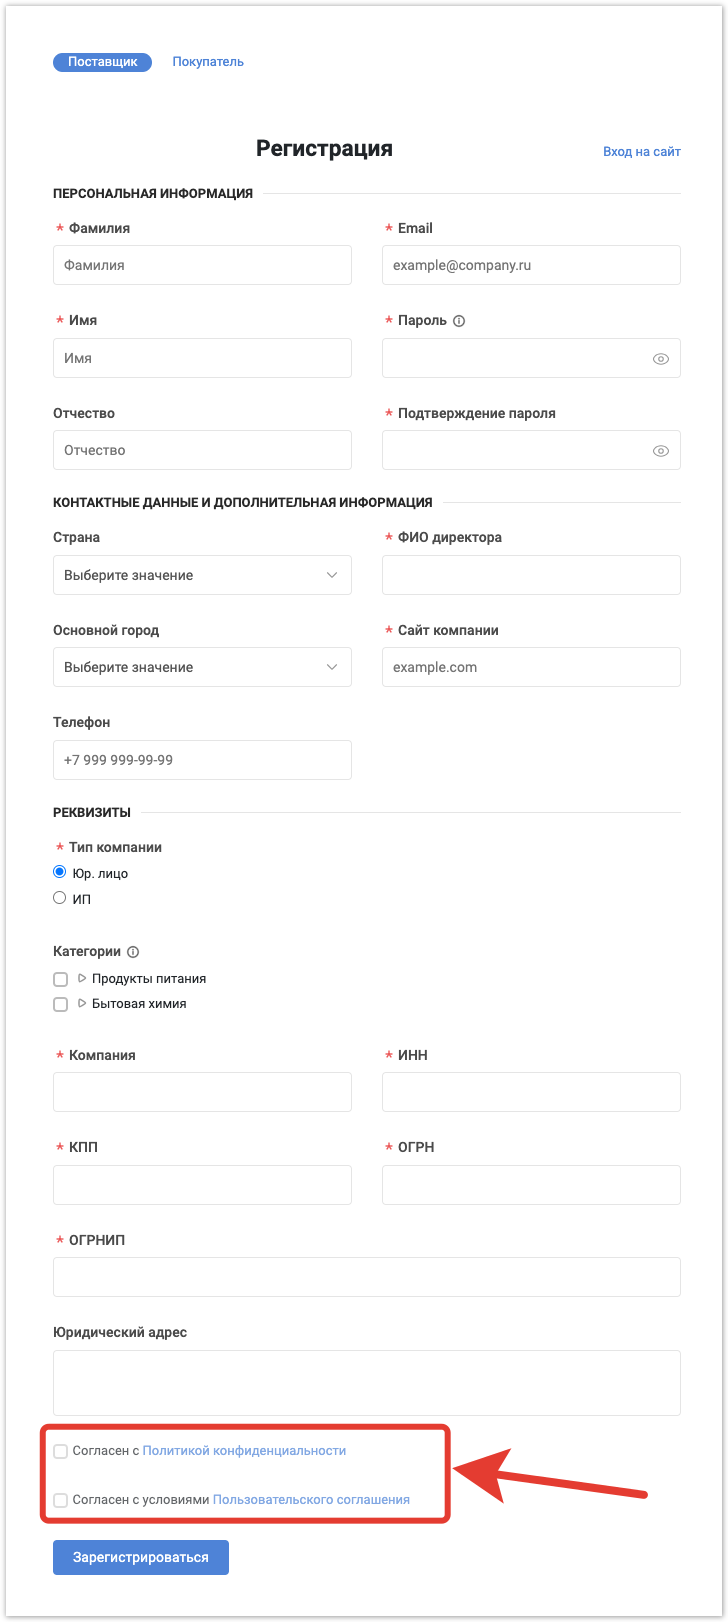
Файл соглашения "Условия обработки персональных данных" на странице регистрации - в этом поле можно загрузить файл с условиями обработки персональных данных для отображения пользователю при регистрации на платформе.
Файл политики конфиденциальности - в этом поле можно загрузить файл с вашей политикой конфиденциальности для отображения после авторизации на платформе и при регистрации.
Если файлы не были загружены, то пользователям будут отображаться стандартные условия обработки персональных данных и стандартная политика конфиденциальности.
Валюта товаров и заказов в открытом каталоге - в этом поле можно указать валюту, которая будет использоваться в открытом каталоге, например, при оформлении заказа без регистрации.
Система рейтинга
Рейтинг поставщика - настройка включает систему ведения рейтинга для поставщиков.
Ручной рейтинг поставщика - настройка работает только совместно с предыдущей настройкой. Если она включена, то рейтинг поставщика, вычисляется не на основании отзывов, а заполняется из поля Ручной рейтинг, в настройках поставщика.
Оценка по умолчанию - в этом поле указывается, какая оценка будет присвоена заказам, которые не были оценены пользователями.
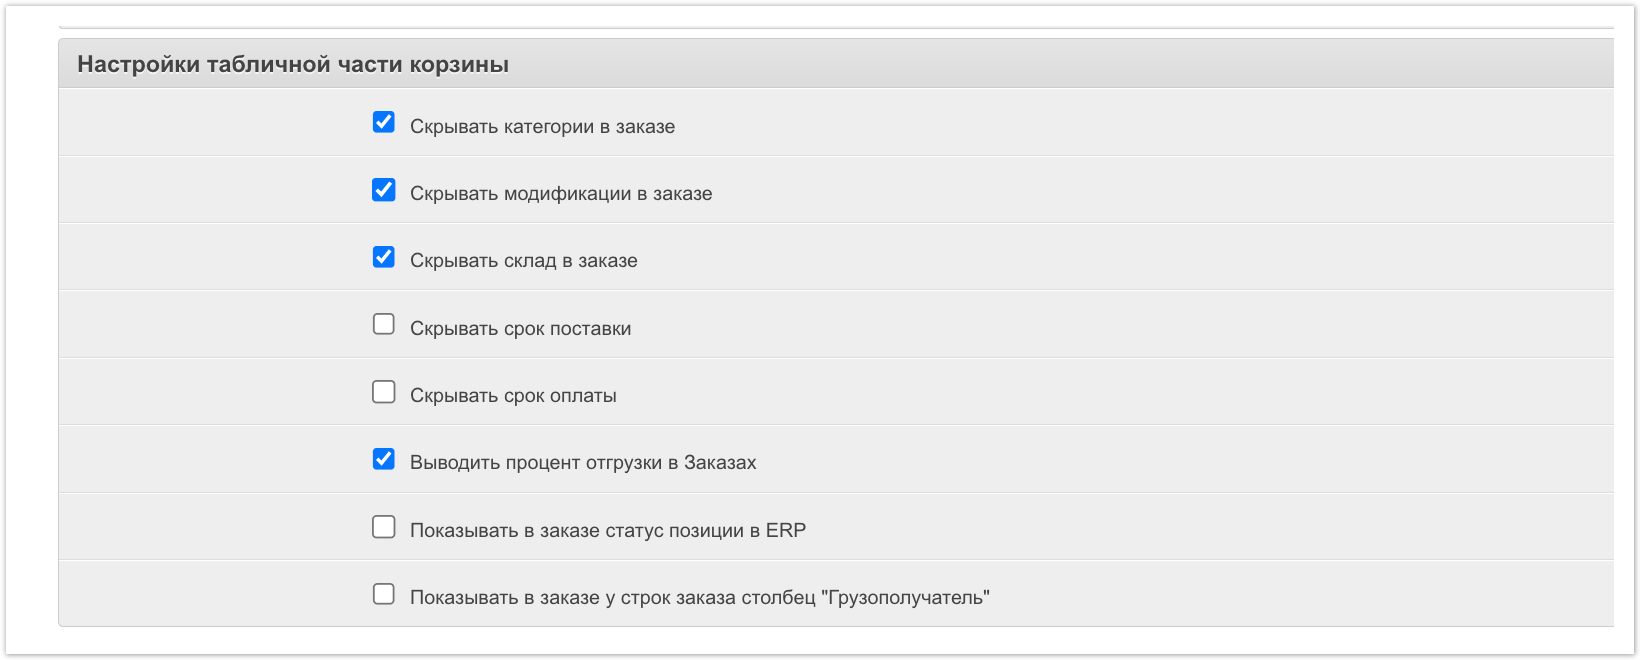
Настройки табличной части корзины
Скрывать категории в заказе, Скрывать модификации в заказе, Скрывать склад в заказе, Скрывать срок поставки, Скрывать срок оплаты - эти настройки позволяют скрыть определенные данные из карточки заказа в Корзине и в разделе Заказы.
Выводить процент отгрузки в Заказах, Показывать в заказе статус позиции в ERP, Показывать в заказе у строк заказа столбец "Грузополучатель" – эти настройки позволяют отобразить дополнительные данные по заказу в личном кабинете покупателя в Корзине и в разделе Заказы.
Вывод информационных страниц в навигационное меню
Вывод информационных страниц в навигационное меню - в выпадающем списке есть три значения: Полностью отключено, Внизу меню, Над меню. Выбранное значение регулирует, где именно будет располагаться блок Информация.
Модерация товаров
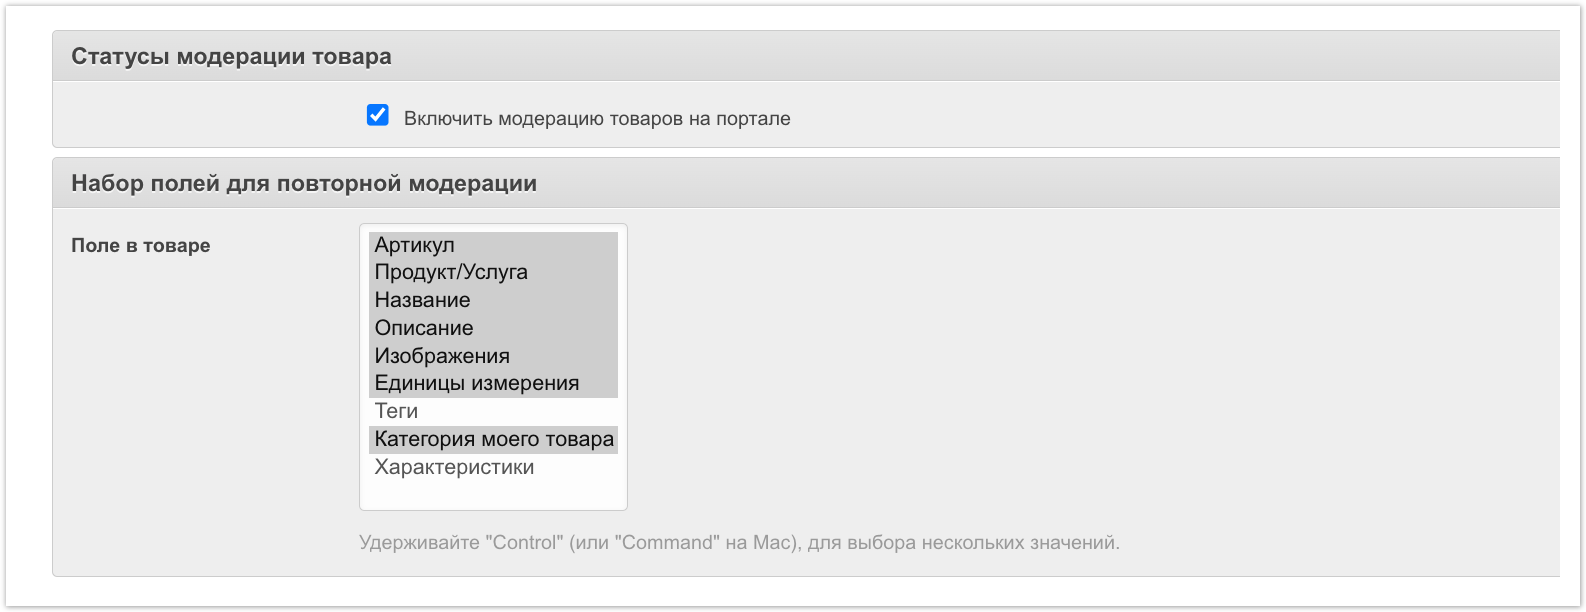
Включить модерацию товаров на портале - эта настройка позволяет включить функционал модерации товаров. Модерация товаров — это элемент PIM системы. Она позволяет менеджеру платформы проводить проверку товара до его публикации в каталоге покупателей.
Поля в товаре - в этой настройке можно выбрать набор полей для повторной модерации, то есть если по одному из выбранных полей для товара произойдут изменения, то он будет отправлен на повторную модерацию.
Google Analytics
В этом разделе настраивается отслеживание статистики посещаемости сайта с помощью Google Analytics. Здесь необходимо указать Идентификатор аккаунта Google Analytics и Домен сайта GA.
Рекламация
Информация по созданию рекламаций - в этом поле можно напечатать текст с инструкцией для пользователей. Например, можно указать, какие документы должны быть приложены или время рассмотрения рекламации. Эта информация будет отображаться при оформлении запросов на возврат товара. Текст должен содержать не более 1000 символов.
Настройка заказа из открытой части
Заказ из открытой части каталога - эта настройка регулирует возможность оформить заказ без регистрации для юридических и физических лиц.
Время хранения корзин открытой части, без оформления заказа (дней) - здесь указывается количество дней, в течение которых корзина будет сохранятся, даже если заказ не был оформлен.
Настройки отзывов и комментариев
Включить отзывы по заказам - возможность включить или отключить отзывы по заказам.
Включить комментарии по заказам - возможность включить или отключить комментарии по заказам.
Включить комментарии по услугам - возможность включить или отключить комментарии по услугам.
Шаблоны рекламаций
Шаблоны рекламаций - в этом поле можно загрузить файлы с примером оформления рекламаций. Шаблон будет отображаться при оформлении запросов на возврат товара. Шаблонов может быть загружено несколько, но мы рекомендуем использовать не более 5 файлов и каждый должен быть размером до 10 мб.
Элементы вашего контента для Дополнительной панели
В последнем блоке можно настроить элементы дополнительного контента, если был подключен их вывод.
Для добавления элементов вашего контента в дополнительную панель нужно указать URL-адрес страницы, а далее можно загрузить изображение и заполнить поле Текст для ссылки. Текст может быть указан на разных языках, если используется мультиязычность. Настройка В новом окне позволяет открывать страницу в новом окне, тем самым не уходя со страницы платформы.
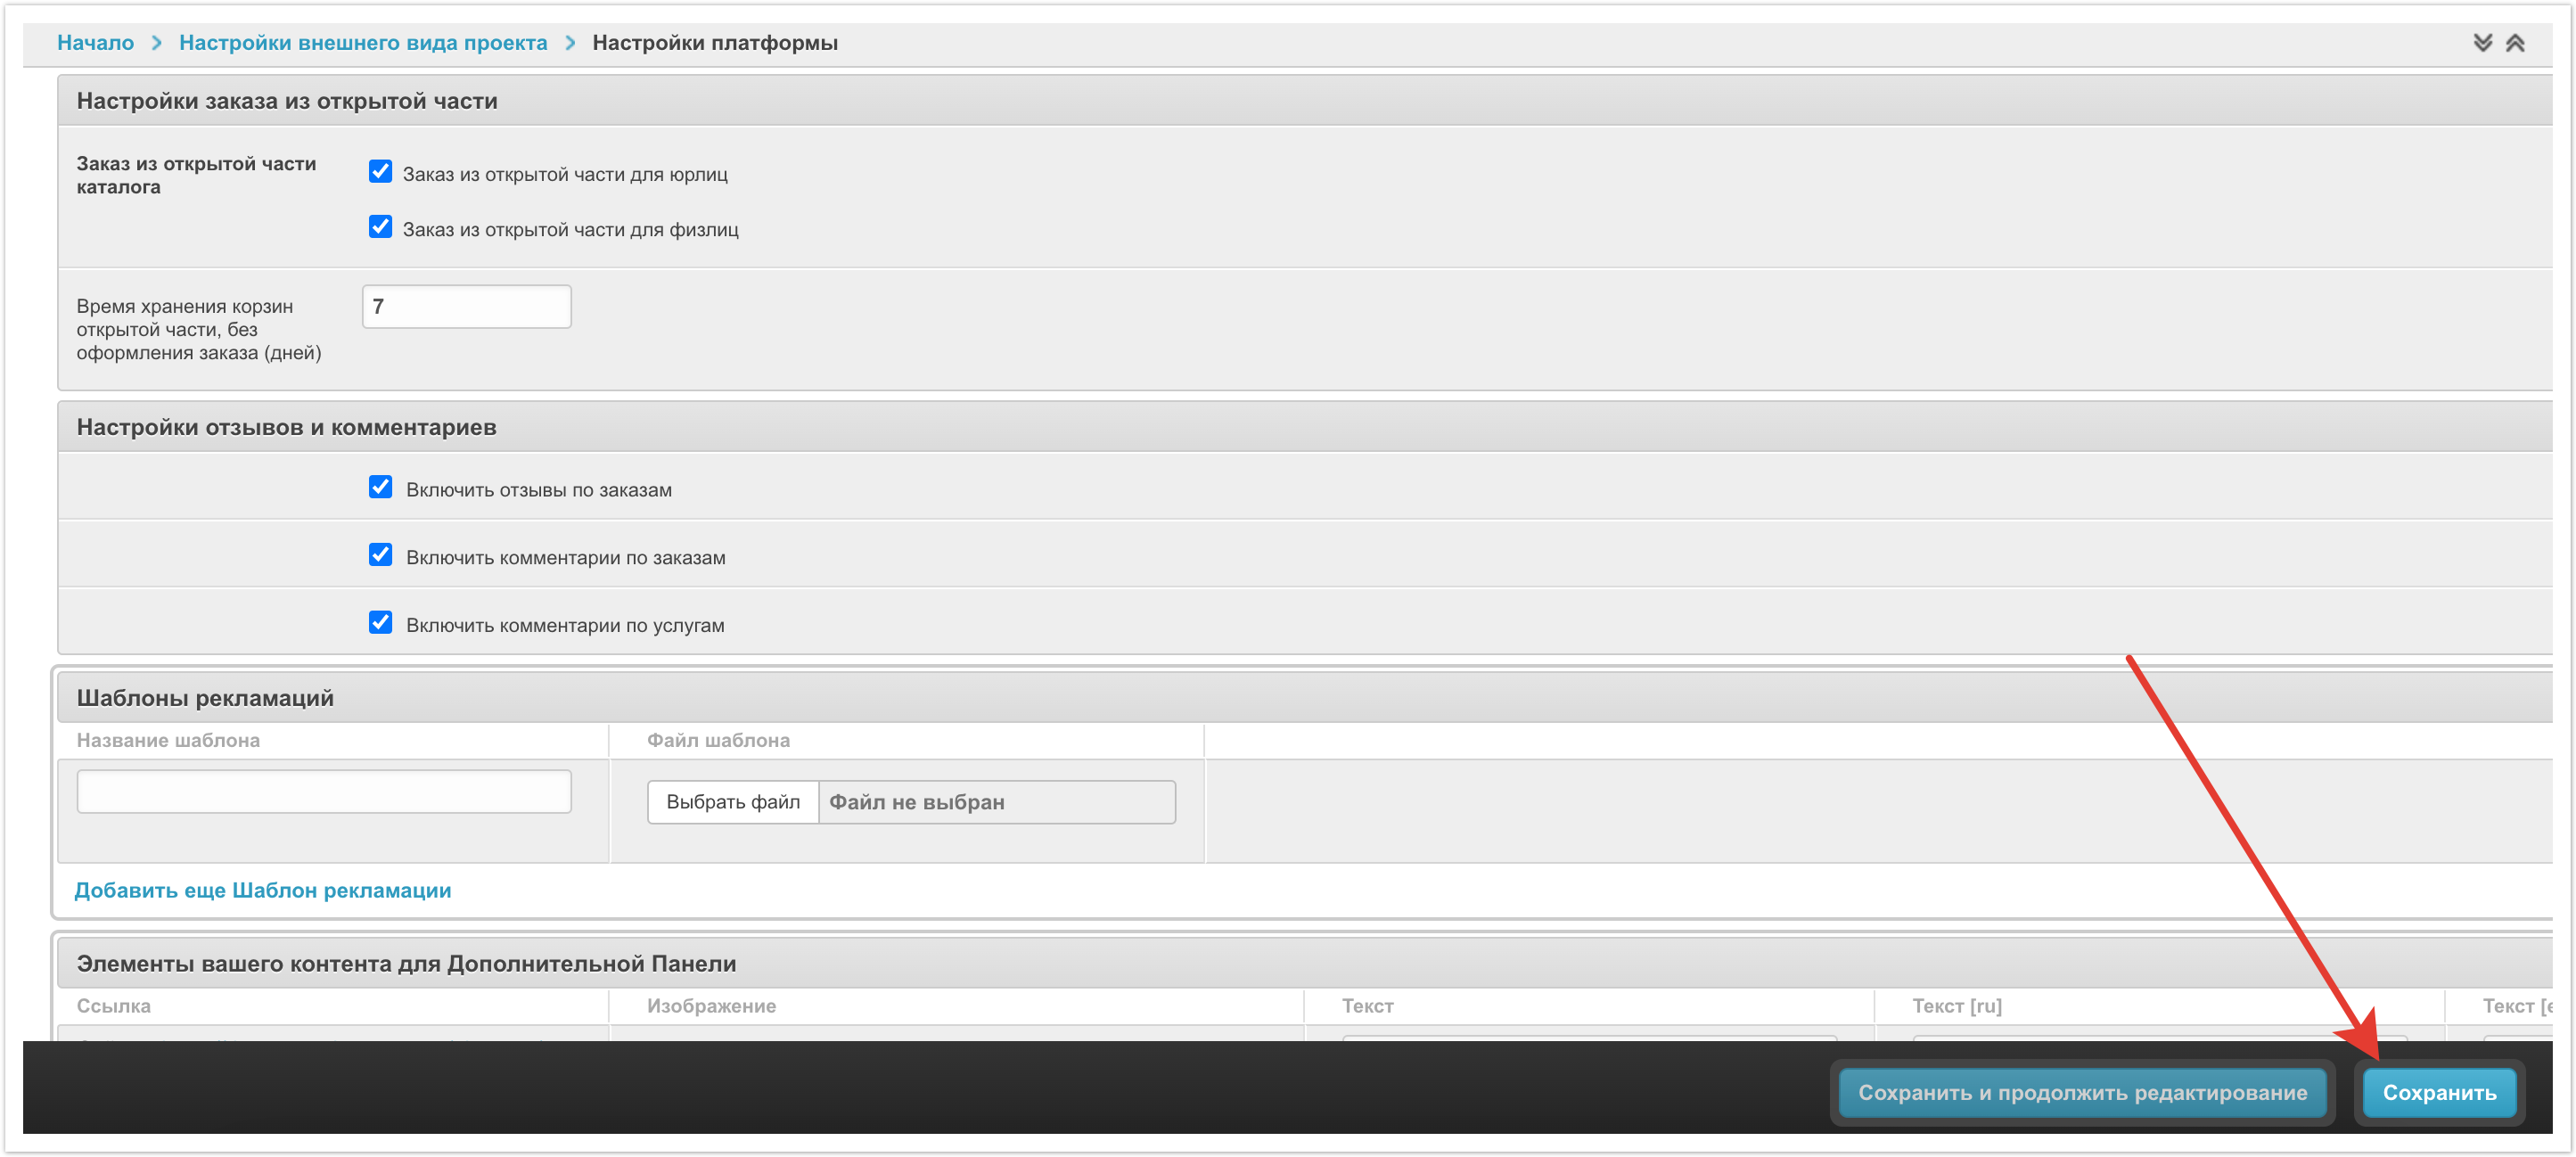
Для того чтобы сохранить все внесенные изменения необходимо нажать кнопку Сохранить в правом нижнем углу страницы.

