
| Sv translation | ||||||||||||||||||||||||
|---|---|---|---|---|---|---|---|---|---|---|---|---|---|---|---|---|---|---|---|---|---|---|---|---|
| ||||||||||||||||||||||||
Вы можете ознакомиться с разделом с помощью видео:
Управление покупателямиЧтобы перейти к разделу, кликните по кнопке Покупатели в административной панели.
Откроется таблица с наиболее важной информацией о покупателях.
Если вас интересует конкретный покупатель, вы можете воспользоваться поиском.
В случаях, когда требуется отображение только существующих или только удаленных покупателей, примените фильтр.
Также есть возможность удаления с возможностью восстановить покупателя, восстановления удаленного покупателя и удаления без возможности восстановления. Для этого выберите покупателей с помощью чекбоксов, а затем действие из панели массовых операций.
Удалить — покупатели будут удалены, но вы сможете восстановить их. Показать удаленные профили в таблице можно с помощью фильтра Показать все, включая удаленные. Восстановить — удаленные покупатели будут восстановлены. Удалить навсегда — удаление без возможности восстановления.
В столбце Покупатель отображается название покупателя, это может быть как компания, так и физическое лицо.
Далее идут столбцы, относящиеся к синхронизации с ERP-системами.
Синхронизовано — если покупатель синхронизирован, будет отображаться значок Требуется синхронизация — если синхронизация не требуется, будет отображаться значок Дата синхронизации — в поле отображается дата последней синхронизации при наличии подключенной интеграции.
Может делать заказы — по умолчания все покупатели могут оформлять заказы, но администратор платформы может ограничить эту возможность вручную. Чтобы запретить или разрешить покупателю заказ товаров, перейдите в карточку покупателя, кликнув по его названию, а затем снимите или выберите чекбокс.
При снятом чекбоксе Может делать заказы покупателю будут доступны все действия на сайте, включая добавление товаров корзину, кроме оформления заказов. Настройка покупателяВ карточке покупателя вы можете просматривать информацию и вносить какие-либо изменения.
Требуется синхронизация — если необходима синхронизация покупателя, будет установлен чекбокс. Компания — в случае, если покупателем является юридическое лицо, в поле будет отображаться название компании. Редактировать компанию — при нажатии на кнопку откроется окно изменения компании покупателя. Если покупатель является физическим лицом, кнопка будет отсутствовать. Может делать заказы — включение и выключение возможности делать заказы. Группы покупателей — вы можете добавить покупателя в одну или несколько групп пользователей. Сумма для учета в программе лояльности — общая сумма, на которую покупатели должен оформить заказы, чтобы попасть на первую ступень программы лояльности. Дни доставки — выберите с помощью чекбоксов дни, в которые будут доставляться товары.
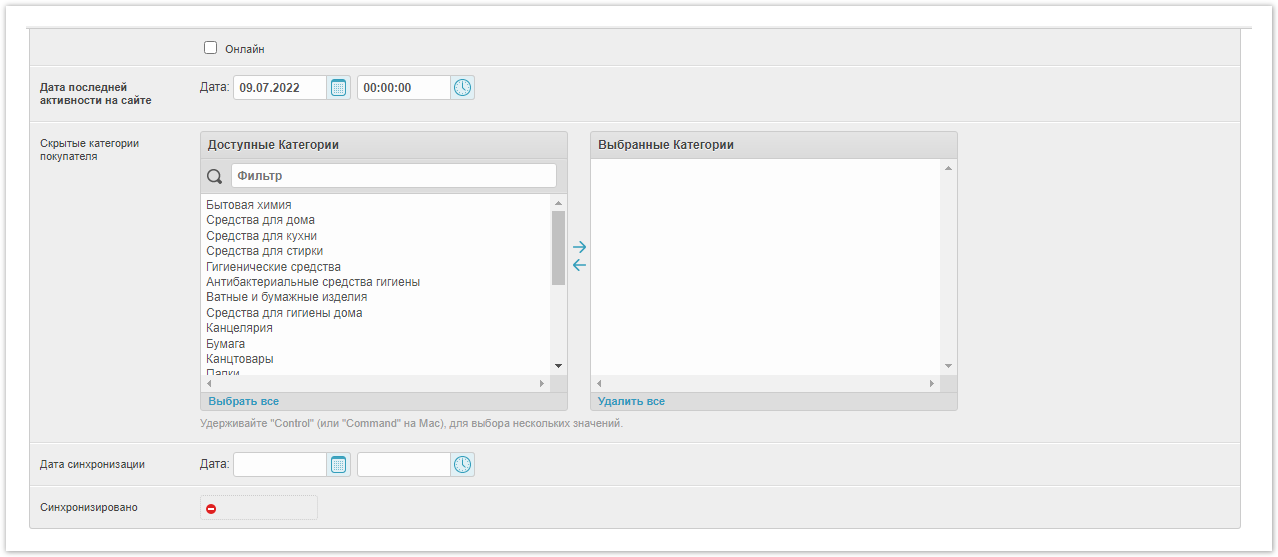
Онлайн — чекбокс автоматически проставляется, когда покупатель находится на сайте. Дата последней активности на сайте — в поле отображается дата и время последнего посещения сайта. Скрытые категории покупателя — выберите, какие категории на сайте будут скрыты от покупателя. Дата синхронизации — дата и время последней синхронизации с EPR-системой. Синхронизировано — по аналогии с таблицей покупателей показывает, был синхронизирован товар или нет.
Физические лица — если покупатель является физическим лицом, в этом поле будет находиться профиль покупателя. Договоры на каталог — в разделе находятся договоры покупателя, заключенные с поставщиками. Также вы можете создать новый договор с помощью кнопки Добавить еще один договор на каталог. Долг — долги покупателя перед поставщиками по каждому договору. В отдельных полях указана сумма долга и сумма, которая уже внесена в счет долга. Более подробно о финансовом учете — в этой статье. Профили - ниже будет подробное описание полей этого раздела. Загруженные покупателем файлы - список файлов, которые покупатель загрузил на платформу. Далее про настройки профиля.
Сайт компании — адрес сайта покупателя. Телефон — актуальный телефон покупателя. Откуда о нас узнали? - источник, откуда покупатель узнал про платформу. Укажите число розничных точек - количество розничных точек продаж. Наличие интернет-магазина - есть ли у покупателя собственный интернет-магазин. Укажите CMS - если покупатель использует CMS, то можно ее заполнить. Страна — государство, в юридическом поле которого работает покупатель. Основной город — город, где находится главный офис компании. Способ доставки — в выпадающем меню выберите один из способов доставки, заведенных на платформе. Помимо этого, можно создать новый способ с помощью кнопки «+». Города — дополнительные города, в которых присутствует покупатель. Менеджеры — в поле будут отображаться один или несколько менеджеров покупателей.
Менеджеры заказов — в этом поле выбираются менеджеры, которые занимаются обработкой заказа покупателя. Информация о новых заказах — при установленном чекбоксе на электронную почту покупателя будут отправляться оповещения о новых заказах. Информация об изменении заказов — при установленном чекбоксе на электронную почту покупателя будут отправляться оповещения об изменении заказов. Информация об изменении статусов заказов — при установленном чекбоксе на электронную почту покупателя будут отправляться оповещения об изменении статусов заказов. Если вы вносили какие-либо изменения, нажмите кнопку Сохранить, чтобы они вступили в силу.
|


| Sv translation | ||||||||||||||||
|---|---|---|---|---|---|---|---|---|---|---|---|---|---|---|---|---|
| ||||||||||||||||
Buyer managementTo go to the section, click on the Buyers button in the administrative panel.
A table will open with the most important customer information.
If you are interested in a specific buyer, you can use the search.
In cases where you want to display only existing or only deleted customers, apply a filter.
There is also the possibility of deleting, restoring and deleting without the possibility of restoring one or more buyers. To do this, select buyers using checkboxes, and then select an action from the bulk operations panel.
Delete — customers will be deleted, but you can restore them. You can show deleted profiles in the table using the Show all filter, including deleted ones. Restore — deleted customers will be restored. Permanently delete — deletion without the possibility of recovery.
The Buyer column displays the name of the buyer, it can be either a company or an individual.
Next are the columns related to synchronization with ERP-systems.
Synchronized — if the buyer is synchronized, the Synchronization needed — if synchronization is not required, the Synchronization date — this field displays the date of the last synchronization if the integration is connected.
May make orders — by default, all customers can place orders, but the platform administrator can manually restrict this ability. To prohibit or allow the buyer to order goods, go to the buyer's card by clicking on his name, and then uncheck or select the checkbox.
If the checkbox May make orders is cleared, the buyer will have access to all actions on the site, including adding goods to the cart, except for placing orders. Buyer setupIn the buyer's card, you can view information and make any changes.
Synchronization required — if the buyer needs to synchronize, the checkbox will be set. Company — if the buyer is a legal entity, the field will display the name of the company. Edit company — when you click on the button, a window for changing the buyer's company will open. If the buyer is an individual, the button will be absent. May make orders — turn the ability to place orders on or off. Buyer groups — you can add a buyer to one or more user groups. Loyalty bonus program — the total amount for which customers must place orders in order to get into the first step of the loyalty program. Delivery days — use the checkboxes to select the days on which the goods will be delivered.
Online — the checkbox is automatically checked when the buyer is on the site. Date of last activity on the site — the field displays the date and time of the last visit to the site. Buyer hidden categories — select which categories on the site will be hidden from the buyer. Synchronization date — date and time of the last synchronization with the EPR system. Synchronized — by analogy with the buyers table, it shows whether the product has been synchronized or not.
Individuals — If the buyer is an individual, this field will contain the buyer's profile. Catalog contracts — this section contains buyer's contracts concluded with suppliers. You can also create a new contract using the Add another Catalog contracts button. Debt — debts of the buyer to suppliers under each contract. In separate fields, the amount of the debt and the amount that has already been paid on account of the debt are indicated. Read more about financial accounting in this article. Profiles - below is a detailed description of the fields in this section. Customer uploaded files - a list of files that the buyer has uploaded to the platform. Next about profile settings.
Company site — the address of the website of the buyer. Phone — the customer's current phone number. How did you know about us? — the source where the buyer learned about the platform. Specify the number of retail outlets — the number of retail outlets. Availability of online store — does the buyer have his own online store. Choose CMS — if the buyer uses a CMS, then you can fill it out. Country — the state in the legal field of which the buyer operates. HeadQuarter city — is the city where the main office of the company is located. Delivery method — in the drop-down menu, select one of the delivery methods introduced on the platform. In addition, you can create a new method using the «+» button. Cities — additional cities in which the buyer is present. Managers — one or more buyer managers will be displayed in the field.
Order Managers — in this field, managers who are involved in processing the customer’s order are selected. New orders Information — when the checkbox is checked, notifications about new orders will be sent to the buyer's e-mail. Information on changes in orders — when the checkbox is checked, notifications about changing orders will be sent to the buyer's e-mail. Information on order status changes — when the checkbox is checked, notifications about changes in order statuses will be sent to the buyer's e-mail. If you have made any changes, click the Save button for them to take effect.
|


| Sv translation | ||||||||||||||||
|---|---|---|---|---|---|---|---|---|---|---|---|---|---|---|---|---|
| ||||||||||||||||
Gestão de clientesPara ir à seção, clique no botão Compradores no painel administrador.
Uma mesa será aberta com as informações mais importantes sobre os compradores.
Se você estiver interessado em um comprador específico, você pode usar a pesquisa.
Nos casos em que você deseja exibir apenas compradores existentes ou apenas remotos, aplique um filtro.
Há também a possibilidade de exclusão com a capacidade de restaurar o comprador, restaurar o comprador excluído e excluir sem a possibilidade de recuperação. Para fazer isso, selecione compradores usando caixas de seleção e, em seguida, uma ação do painel de operações em massa.
Remover — os compradores serão excluídos, mas você poderá restaurá-los. Você pode mostrar perfis excluídos em uma tabela usando o Show all, incluindo perfis excluídos, filtro. Restaurar — compradores excluídos serão restaurados. Excluir para sempre — exclusão permanente.
A coluna Comprador exibe o nome do comprador, que pode ser uma empresa ou um indivíduo.
A seguir estão as colunas relacionadas à sincronização com sistemas ERP.
Sincronizado — se o cliente estiver sincronizado, o ícone Sincronização necessária — se a sincronização não for necessária, um ícone Data de sincronização — o campo exibe a data da última sincronização se houver uma integração conectada.
Pode fazer pedidos — por padrão, todos os clientes podem fazer pedidos, mas o administrador da plataforma pode limitar essa habilidade manualmente. Para proibir ou permitir que um comprador peça mercadorias, vá até o cartão do comprador clicando em seu nome e, em seguida, desmarque ou selecione a caixa de seleção.
Quando a caixa de seleção Pode fazer pedidos é removido, o comprador poderá tomar todas as ações no site, incluindo a adição de itens ao carrinho, exceto para pedidos. Criar um compradorNo cartão do comprador, você pode visualizar as informações e fazer quaisquer alterações.
Sincronização é necessária — se for necessária uma sincronização do comprador, uma caixa de seleção será instalada. Empresa — se o comprador for uma pessoa jurídica, o nome da empresa será exibido no campo. Editar empresa — quando você clicar no botão, a janela para alterar a empresa do comprador será aberta. Se o comprador for um indivíduo, o botão estará faltando. Pode fazer pedidos — habilitar e desativar a capacidade de fazer pedidos. Grupos de compradores — você pode adicionar um comprador a um ou mais grupos de usuários. Valor a ser incluído no programa de fidelidade — o valor total para o qual os compradores devem fazer pedidos para chegar à primeira etapa do programa de fidelidade. Dias de entrega — use caixas de seleção para selecionar os dias em que as mercadorias serão entregues.
Online — a caixa de seleção é automaticamente inserida quando o comprador está no site. Data da última atividade — o campo exibe a data e a hora da última visita ao site. Categorias de compradores ocultos — escolha quais categorias no site serão ocultadas do comprador. Data de sincronização — a data e a hora da última sincronização com o sistema EPR. Sincronizado — por analogia com a tabela de compradores, mostra se o produto foi sincronizado ou não.
Pessoas físicas — se o comprador for um indivíduo, o perfil do comprador estará neste campo. Contratos de catálogo — a seção contém os contratos do comprador celebrados com fornecedores. Você também pode criar um novo contrato usando o botão Adicionar outro contrato. Dívida — as dívidas do comprador com fornecedores sob cada contrato. Campos separados indicam o montante da dívida e o valor que já foi contribuído para a dívida. Saiba mais sobre contabilidade financeira neste artigo. Perfis - abaixo estará uma descrição detalhada dos campos nesta seção. Arquivos enviados pelo comprador - uma lista de arquivos que o comprador carregou para a plataforma. A seguir, vamos falar sobre as configurações do perfil.
Site da empresa — o endereço do site do comprador. Telefone — o telefone real do comprador. Como você ficou sabendo sobre nós? - a fonte de onde o comprador soube da plataforma. Indique o número de pontos de venda - o número de pontos de venda. Disponibilidade de uma loja online - se o comprador tem sua própria loja online. Incluir CMS - se o comprador usar um CMS, você poderá preenchê-lo. País — o estado no campo jurídico do qual o comprador trabalha. Cidade — é a cidade onde está localizada a sede da empresa. Método de entrega — no menu suspenso, selecione um dos métodos de entrega estabelecidos na plataforma. Além disso, você pode criar um novo método usando o botão «+». Cidades — cidades adicionais em que o comprador está presente. Gerentes — um ou mais gerentes compradores serão exibidos no campo.
Responsáveis — neste campo, você seleciona os gerentes que estão envolvidos no processamento do pedido do comprador. Informações sobre novos pedidos — com a caixa de seleção instalada, notificações sobre novas encomendas serão enviadas para o e-mail do comprador. Informações sobre a alteração de pedidos — com a caixa de seleção instalada, as notificações sobre as alterações de pedidos serão enviadas para o e-mail do comprador. Informações sobre a alteração dos status dos pedidos — com a caixa de seleção instalada, as notificações sobre alterações nos status do pedido serão enviadas para o e-mail do comprador. Se você fez alguma alteração, clique em Salvar para que elas façam efeito.
|


