
...
| Sv translation | ||||||||||
|---|---|---|---|---|---|---|---|---|---|---|
| ||||||||||
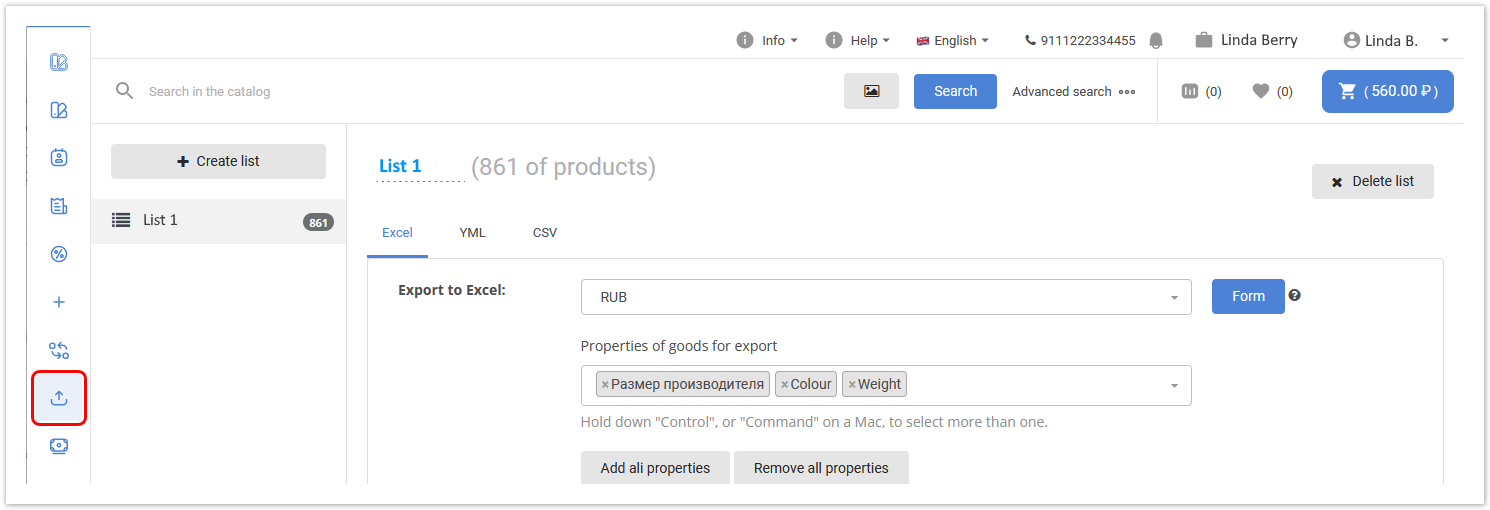
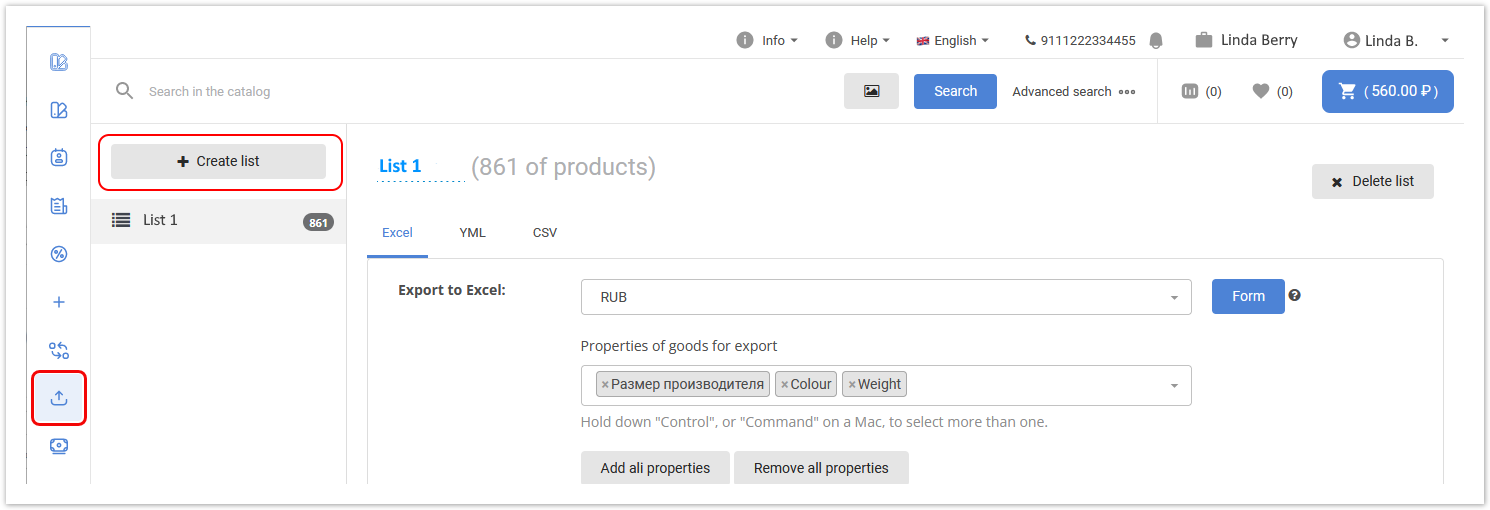
There are 3 ways to export product lists from the system to the online store. You can use static links in XLS, YML, and CSV formats to create a list of goods. Preparation of the list of products for exportTo export goods, click on the On the page that appears, you can upload the product according to the already prepared list of products. If the list of goods for uploading has not been created before, you will be prompted to create a new list.
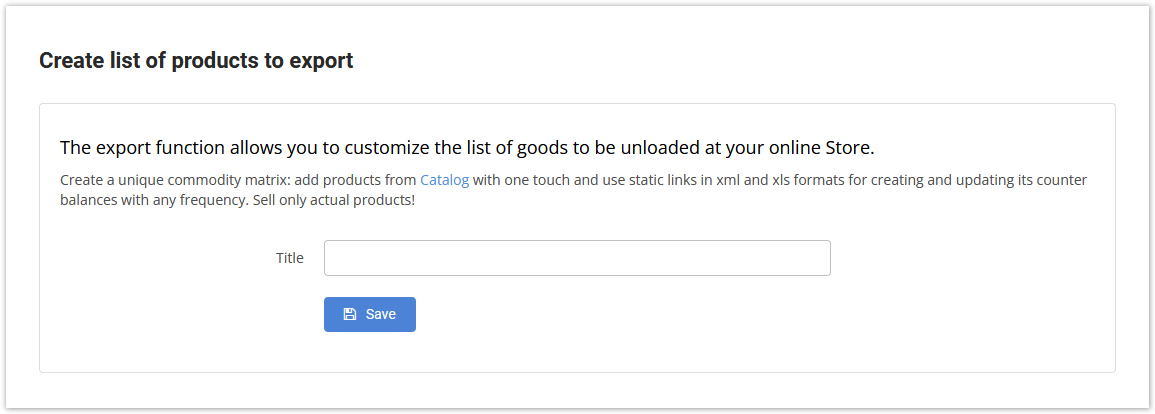
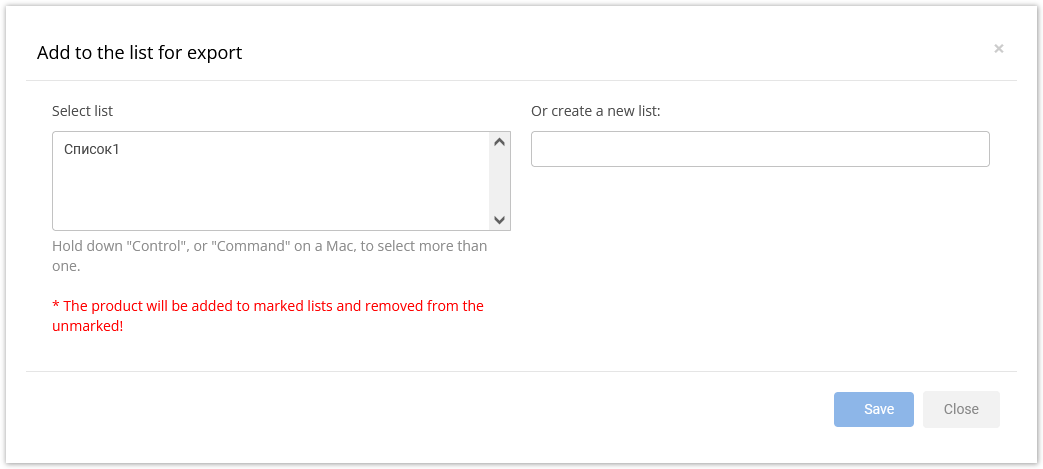
Create Product ListIf you have not created export lists before, then after clicking the
Enter the name, and click Save. If the list has already been created, then after clicking the
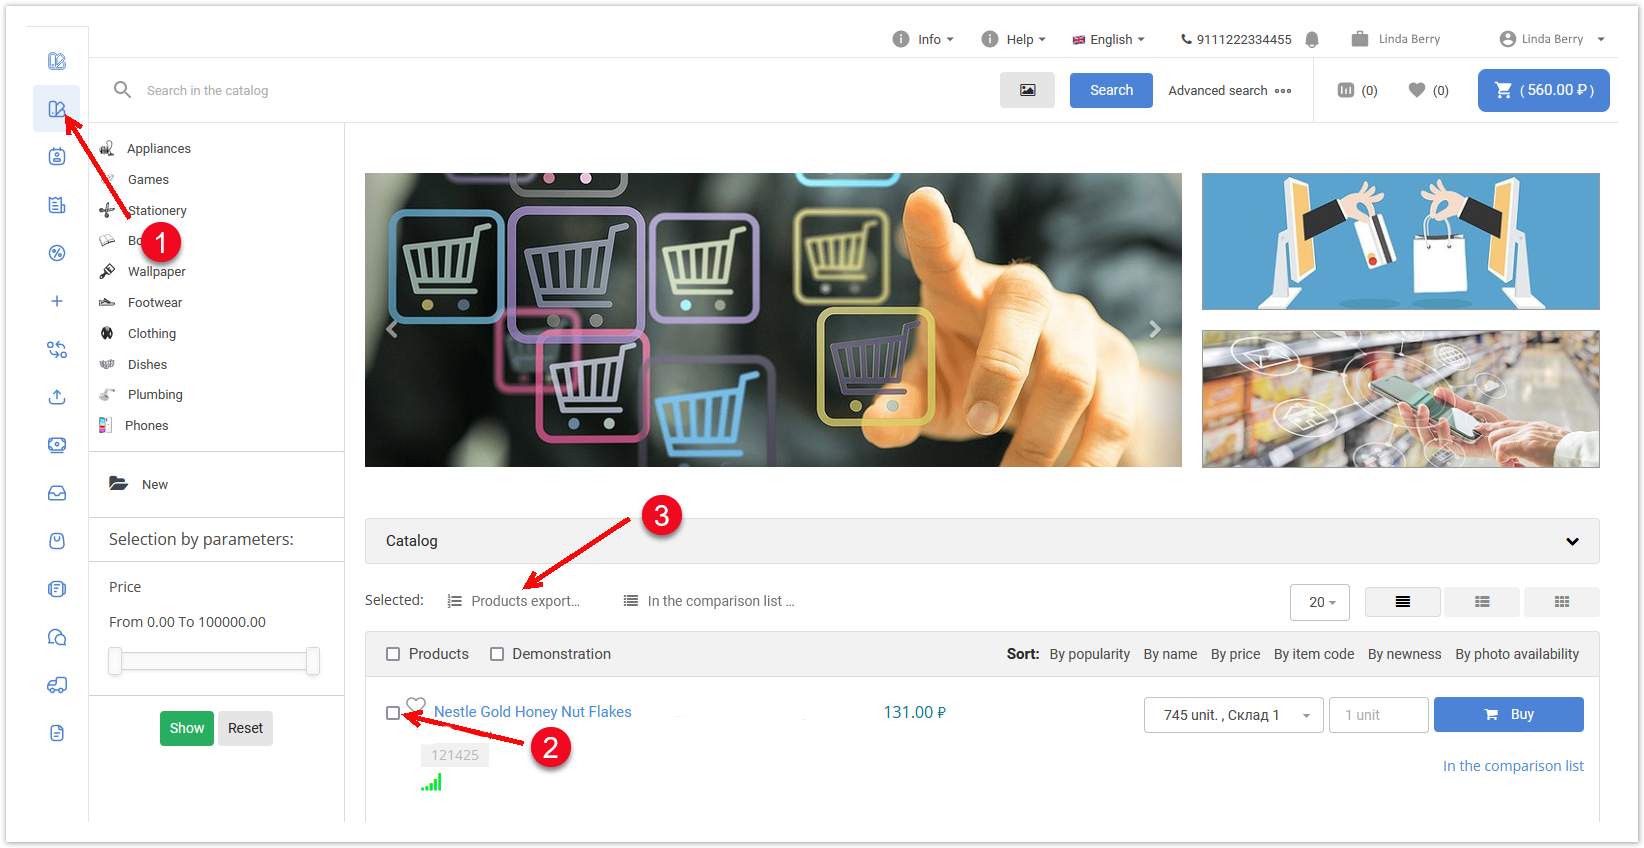
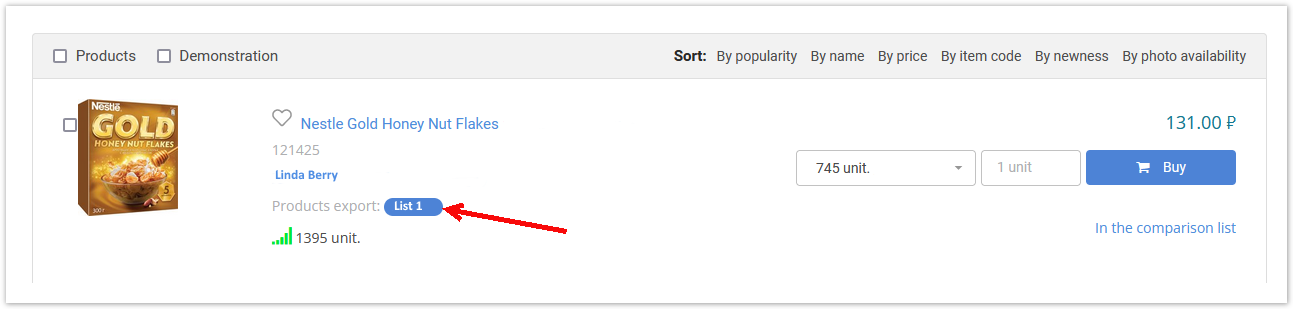
To add a new list, click Create list. Type the name of the list, and click Save. Adding products to the listAfter creating a list of products, you must add products to it. There are several options for this: Adding products from the product catalogIn the catalog, you can:
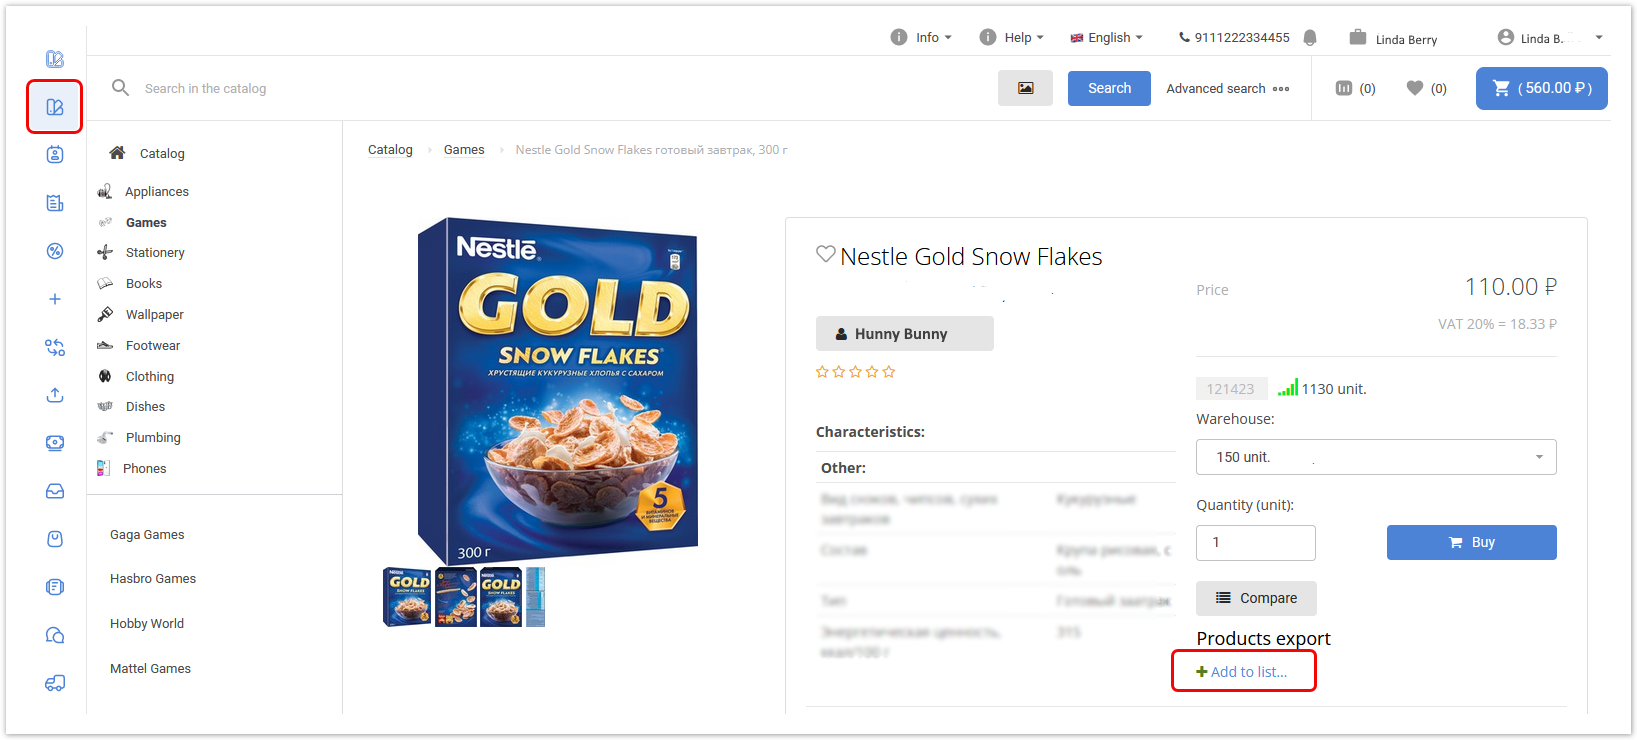
Adding to the list from the product cardOpen the product catalog by clicking the
Then you will be asked to choose the list - you can select an existing list (left field of the form) or create a new list (right field of the form) and click on the Save button. All selected products will be added to the list for export.
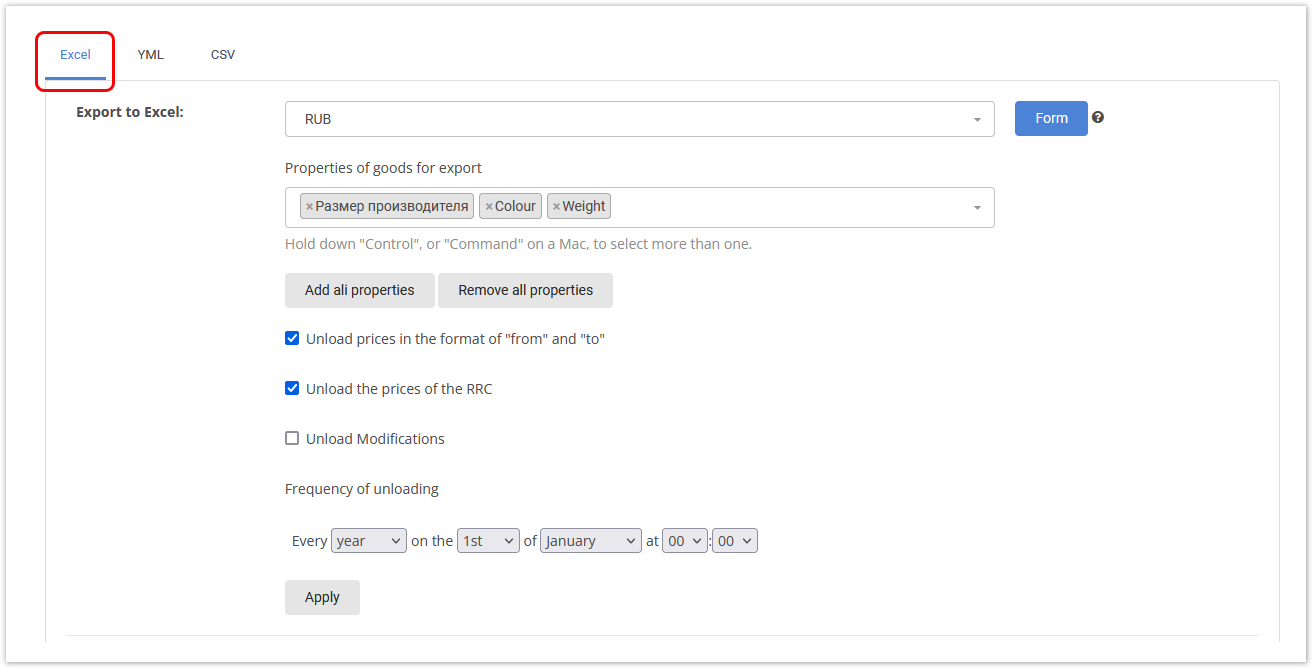
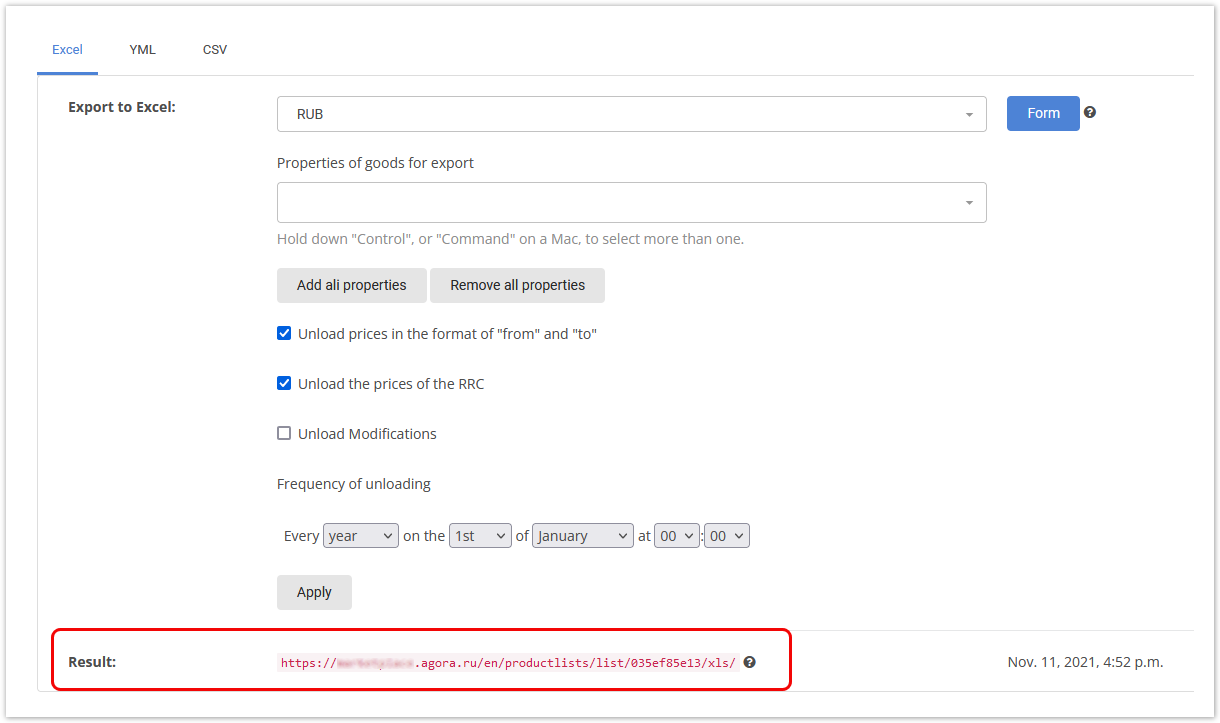
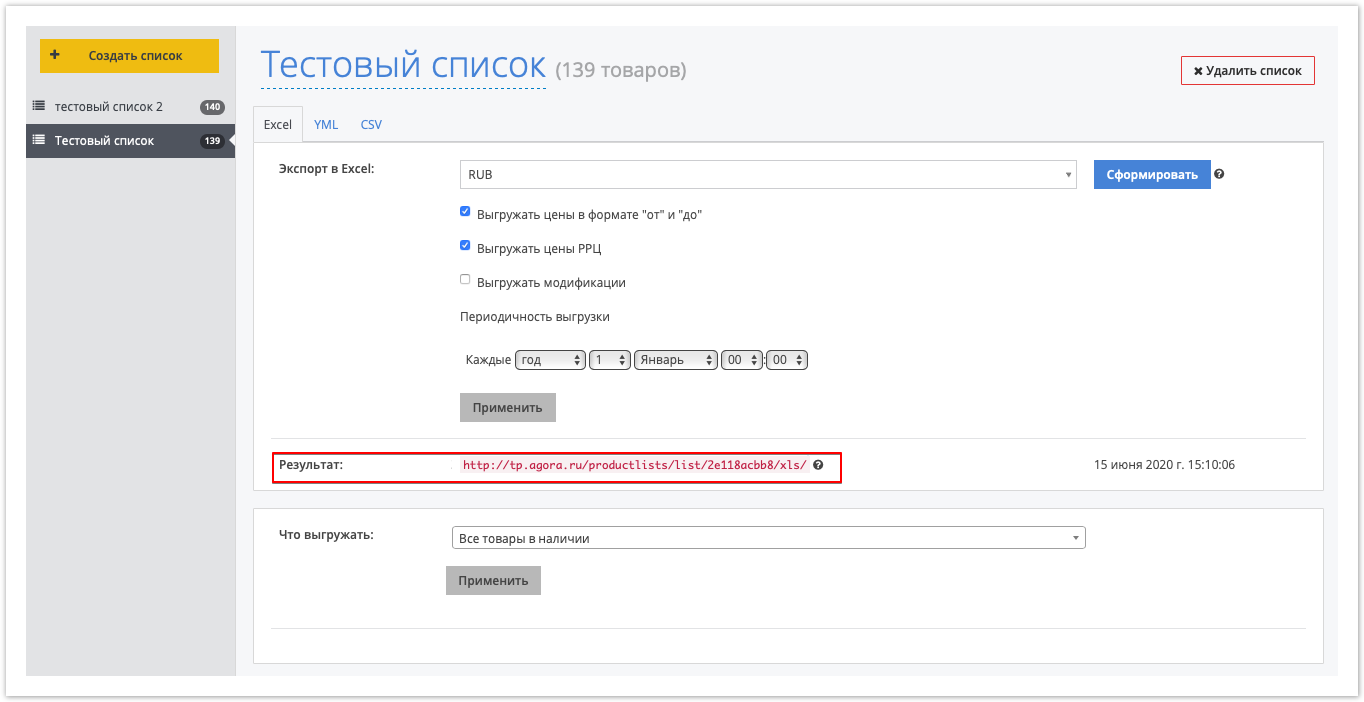
Export to ExcelTo export goods, click the
Before exporting, make the following settings:
After completing the settings, click the Apply button. In the What to upload section specify the following:
Click the Apply button. After selecting the goods for unloading and setting the export options, click the Form button. After that, the process of file formation will begin, the Form button will become inactive, the Cancel button appears, which allows you to cancel the process if an error occurs. When the export is finished, a link with the Excel file will appear in the Result area.
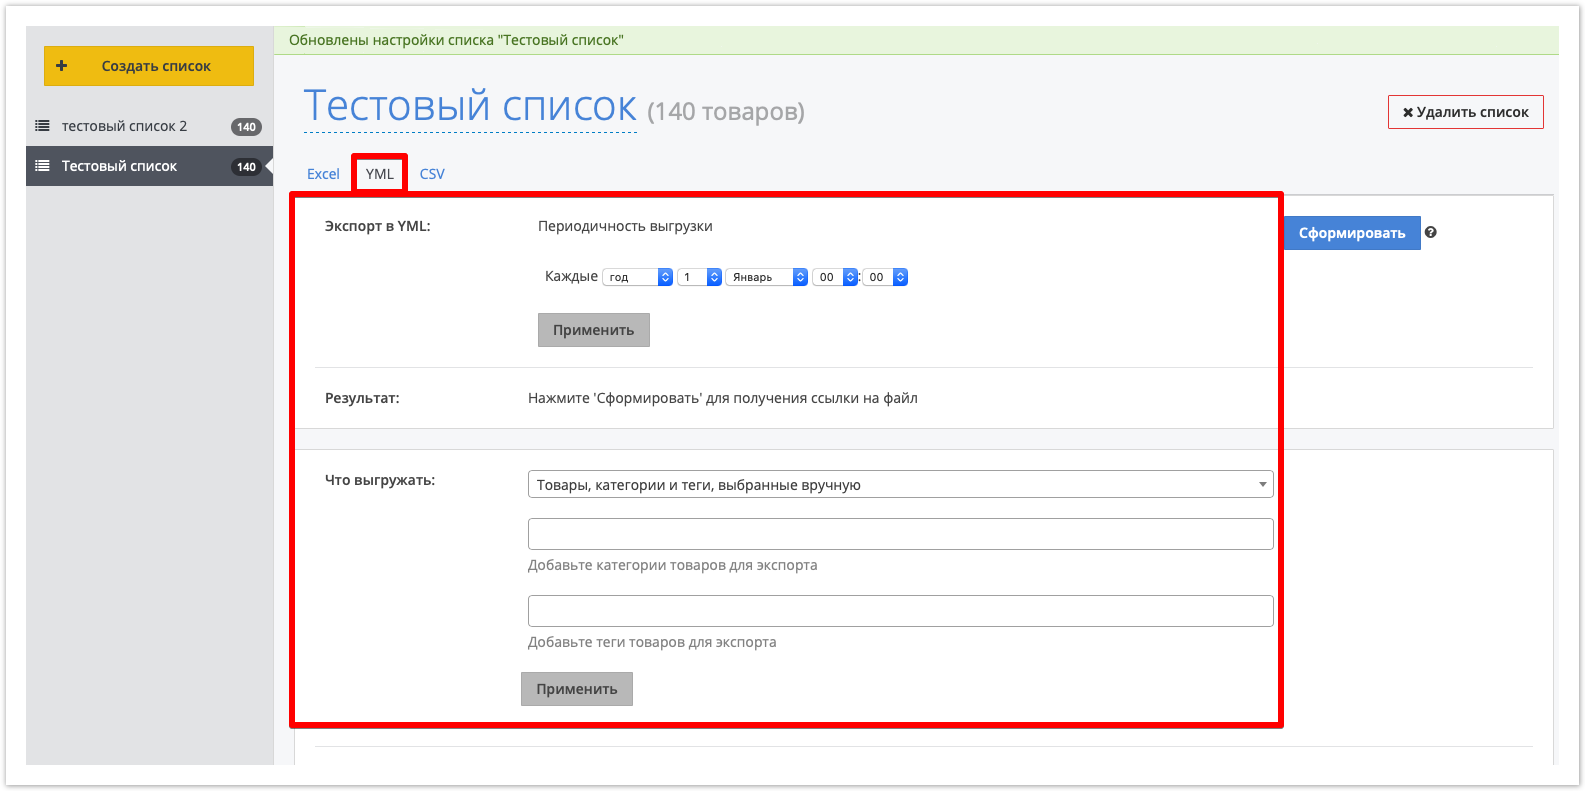
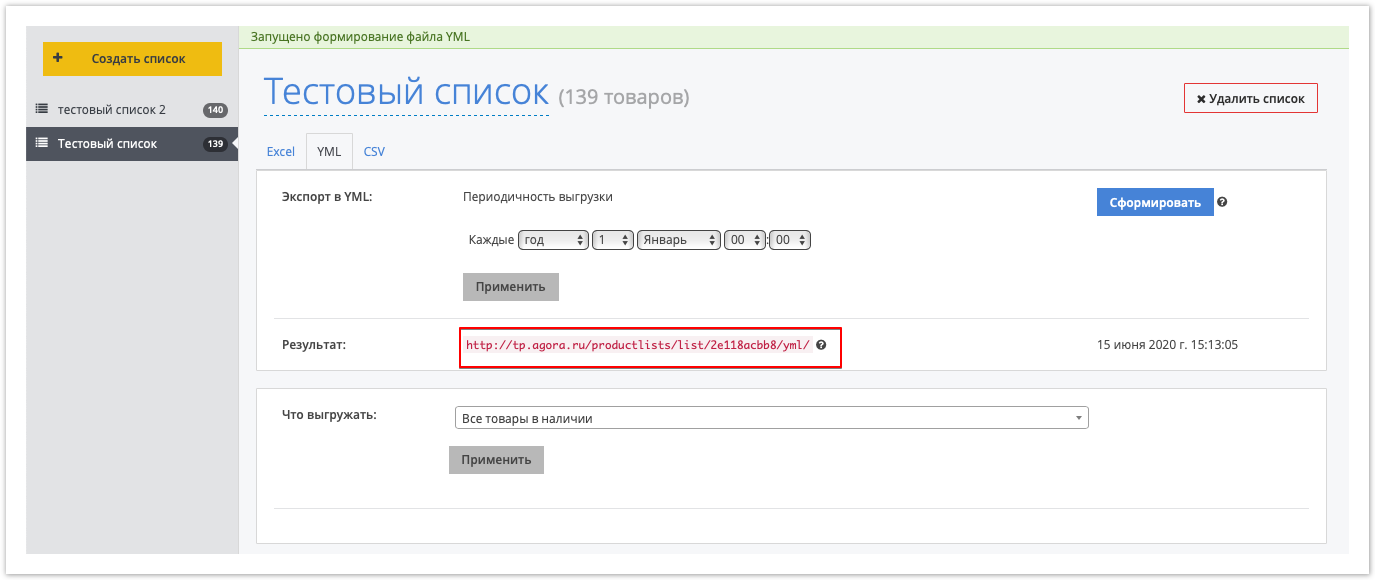
Export to YML
In this case, you can only select the frequency of unloading, after which you also need to click the "Apply" button.
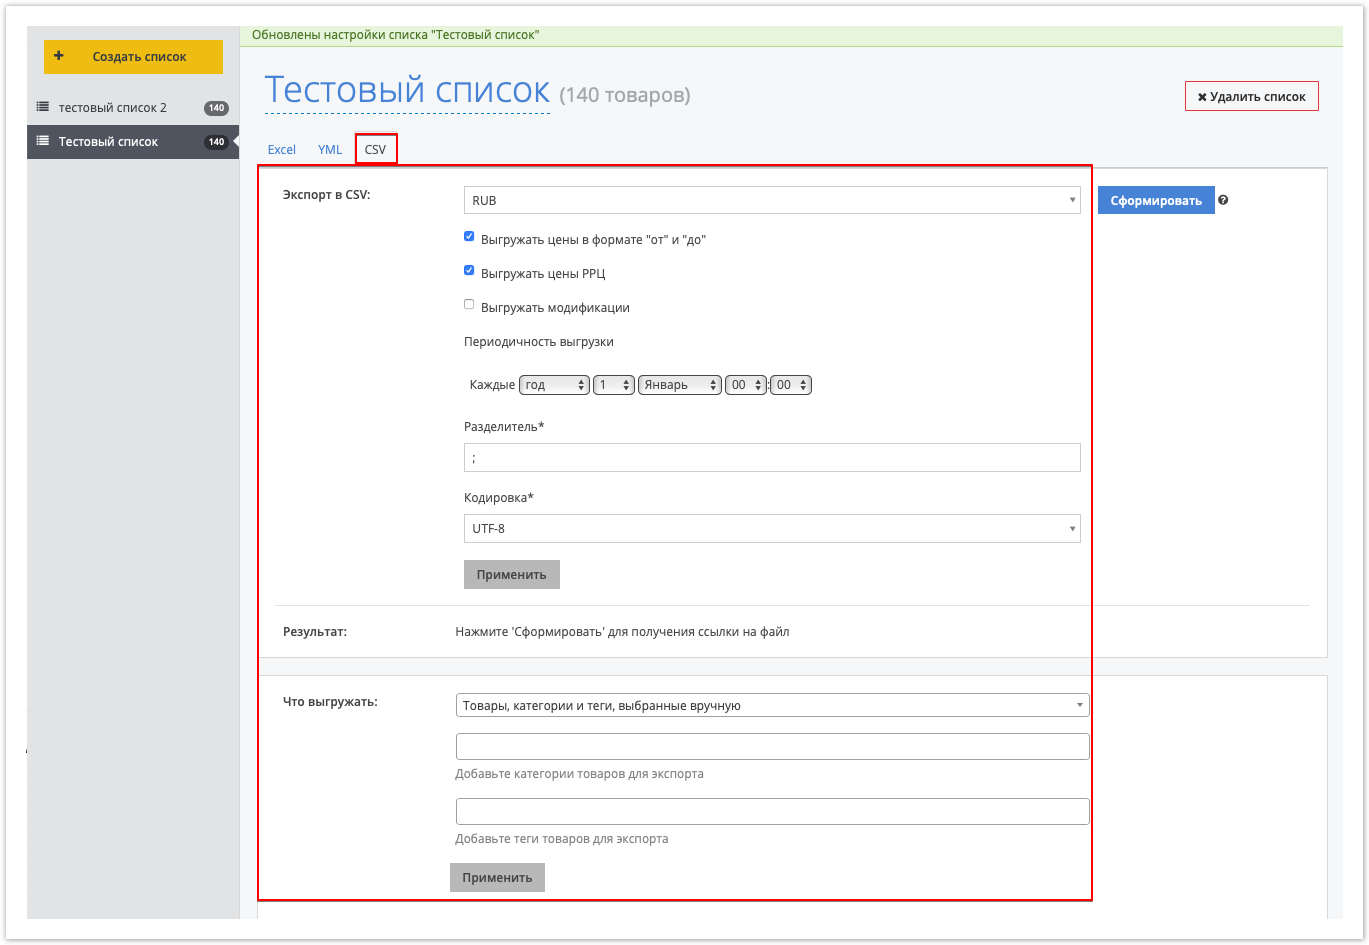
2.3. CSV ExportThis option is similar to Export to Excel, except for the need to specify a separator in the "Separator" field.
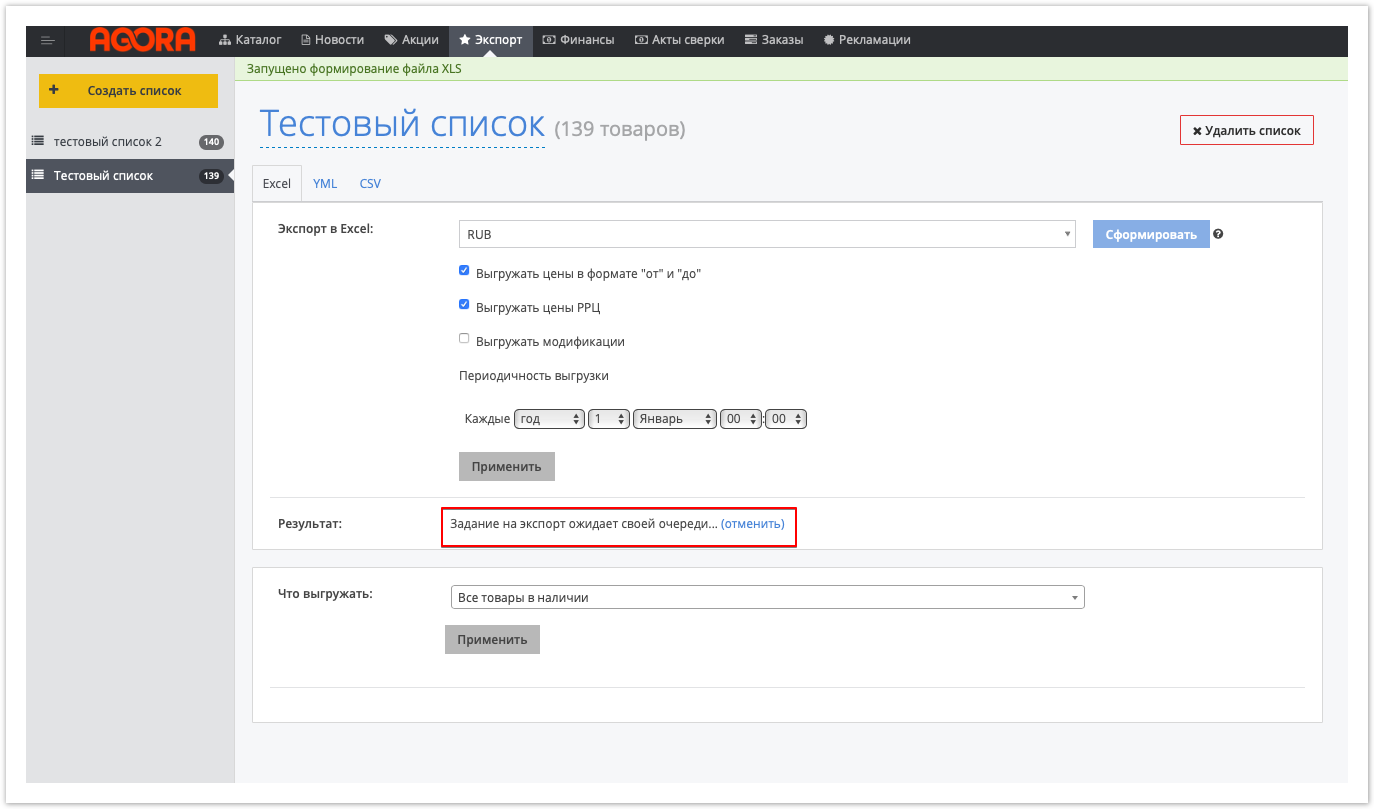
3. Export the list of productsAfter selecting the products for unloading and setting up export options in the required format, click on the "Generate" button .
After that, the process of forming the file will begin, the "Generate" button will become inactive, but the "Cancel" button will appear, which allows you to cancel the process if an error was made when setting the necessary parameters.
After the formation is completed, a link for downloading a file with the results of exporting the list of products will appear in the "Result" block. When setting the frequency of unloading, this link will be updated at the specified time.
|

...