
...
| Sv translation | ||
|---|---|---|
| ||
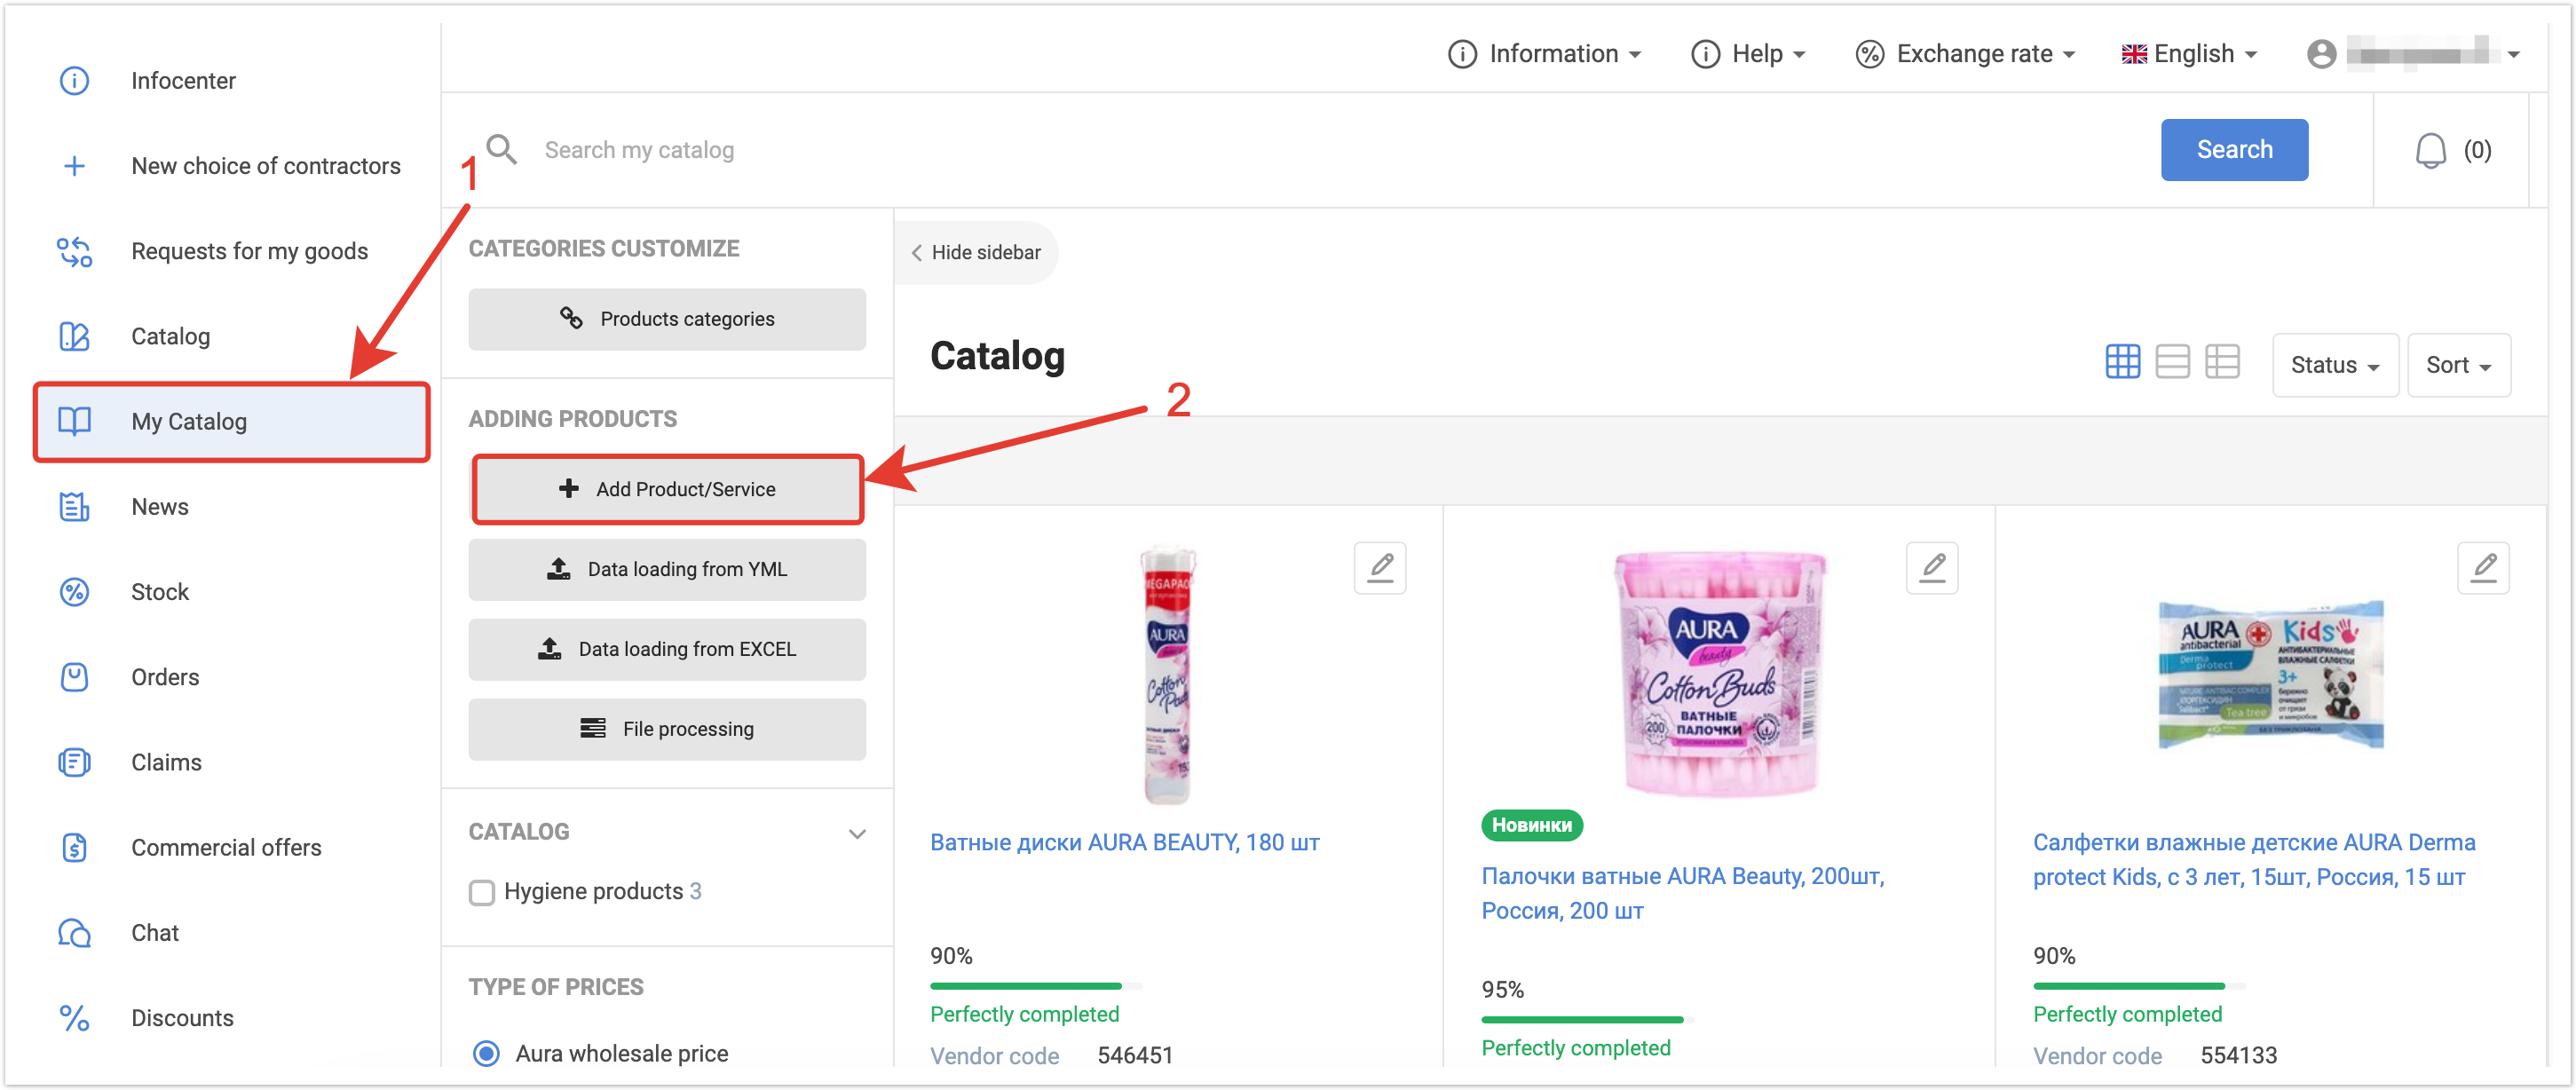
To create a product card manually, in your supplier’s personal account, go to the My Catalog section and click the Add Product/Service button.
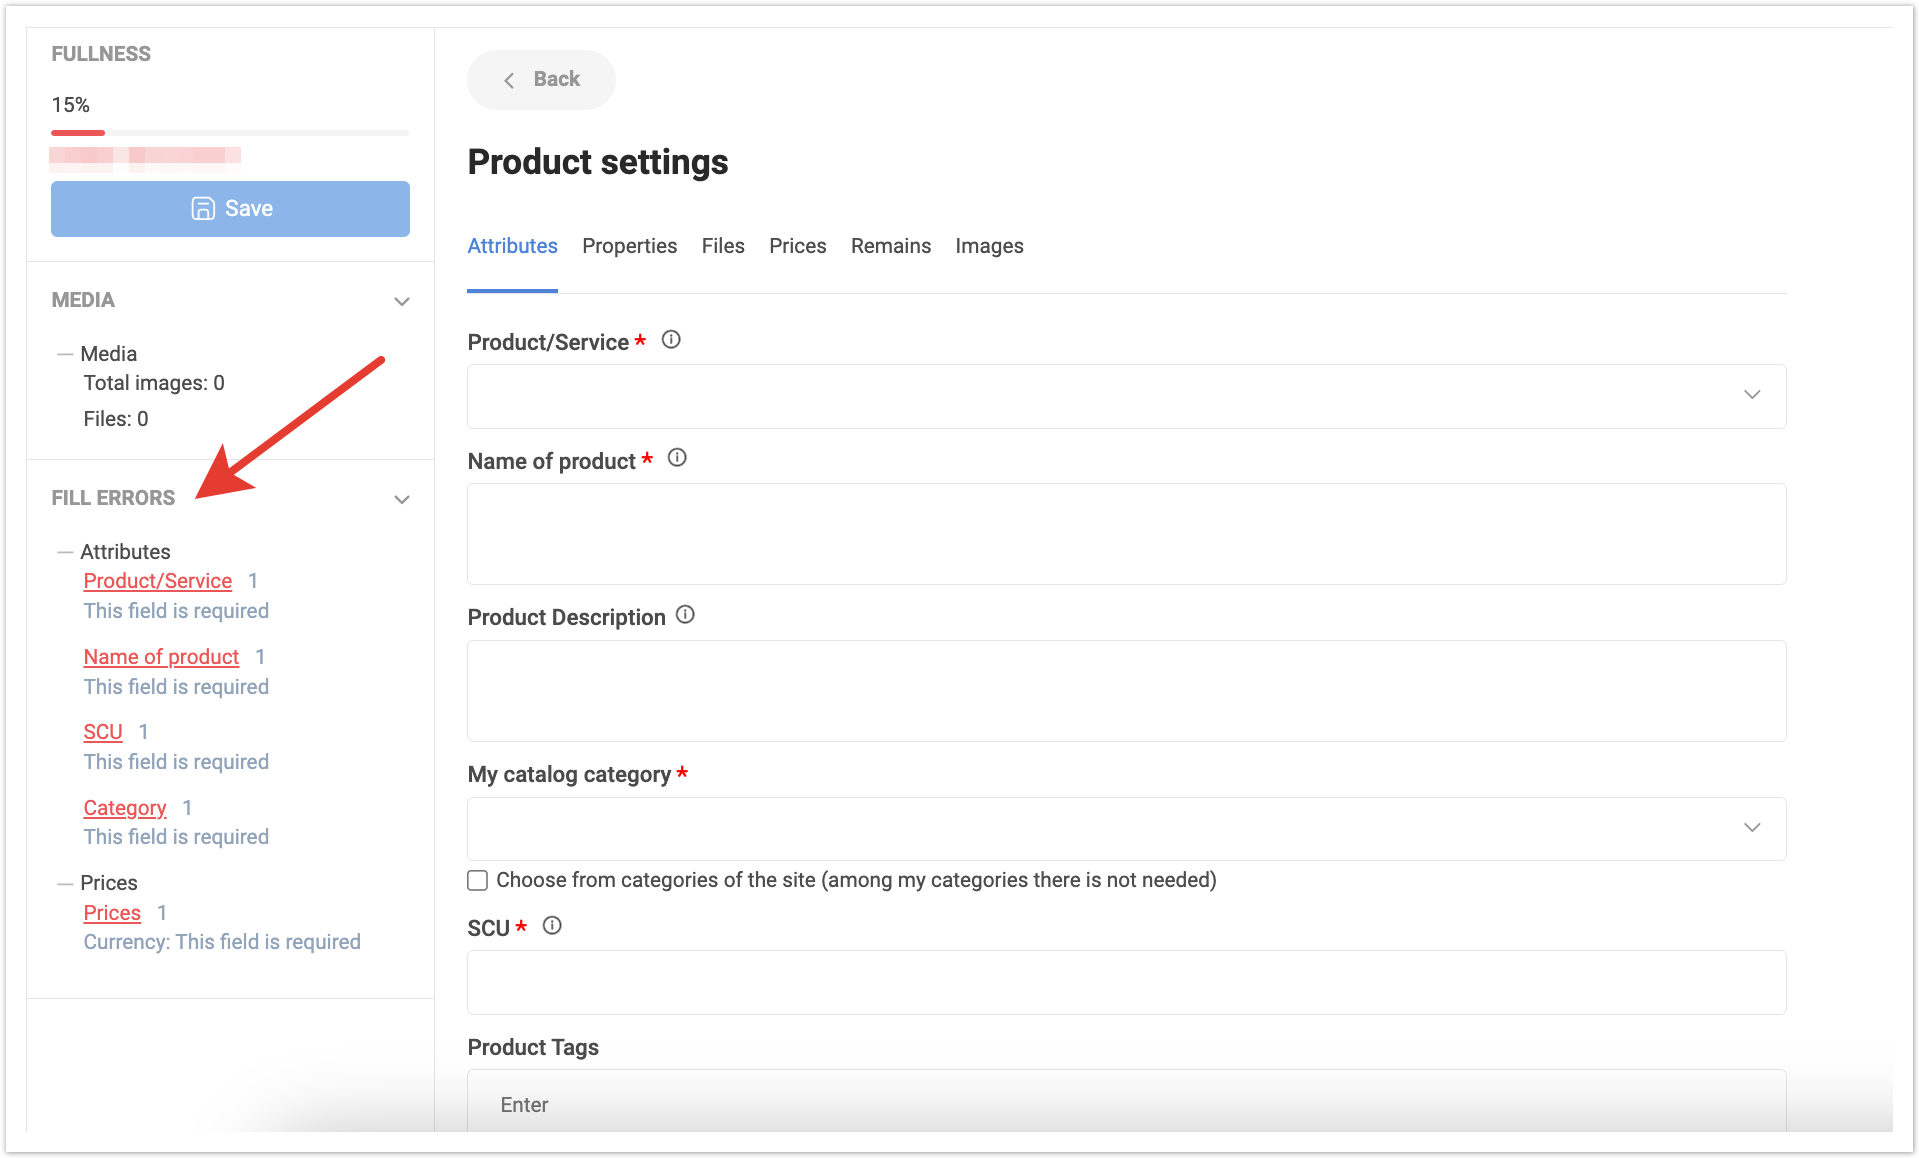
After this, a form for adding a product will open. On the left side of the window, the percentage of completion of the product card will be indicated, and below is information on media data, and in the Fill Errors block you can see which attributes must be filled in to add a product. Required fields are marked with a red asterisk.
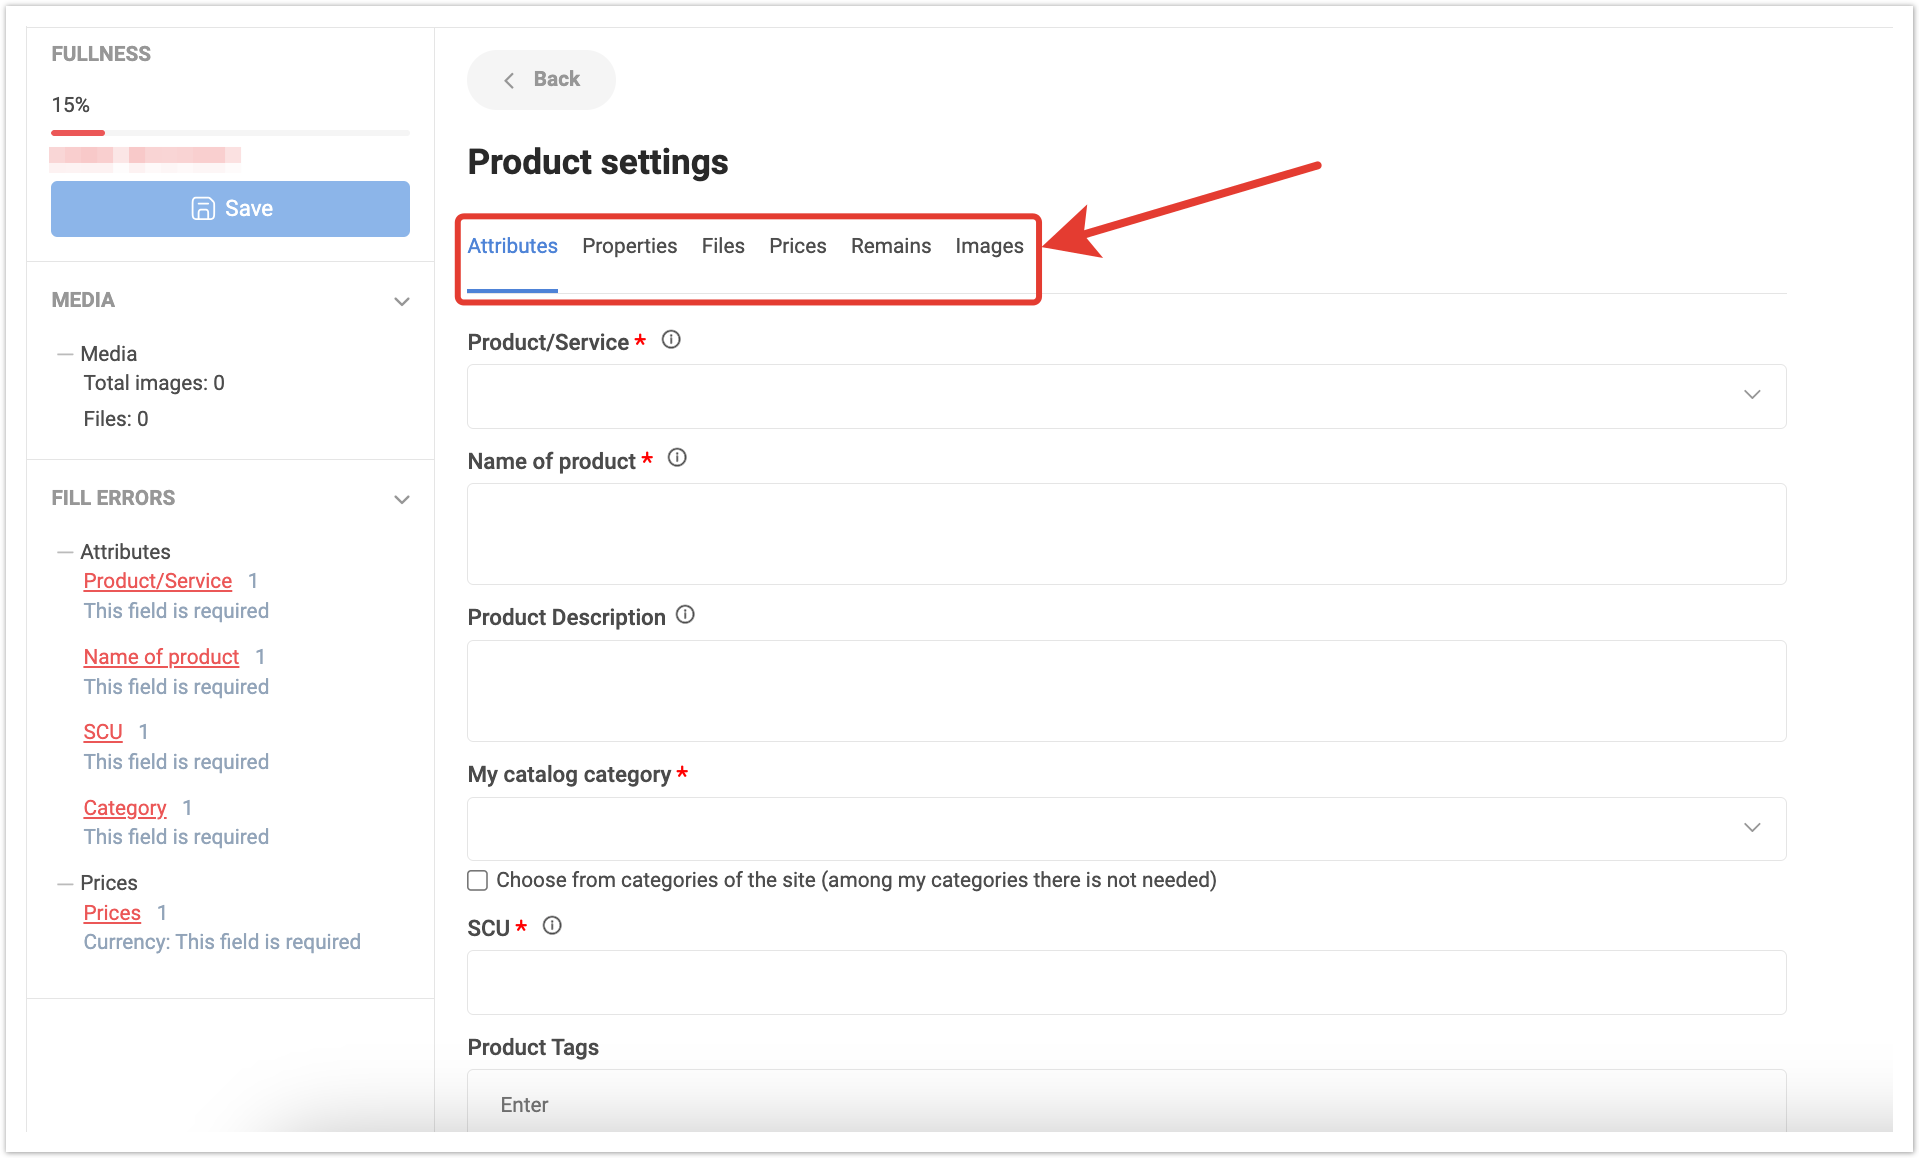
Product data is located on several tabs: Attributes, Properties, Files, Prices, Remains, Images.
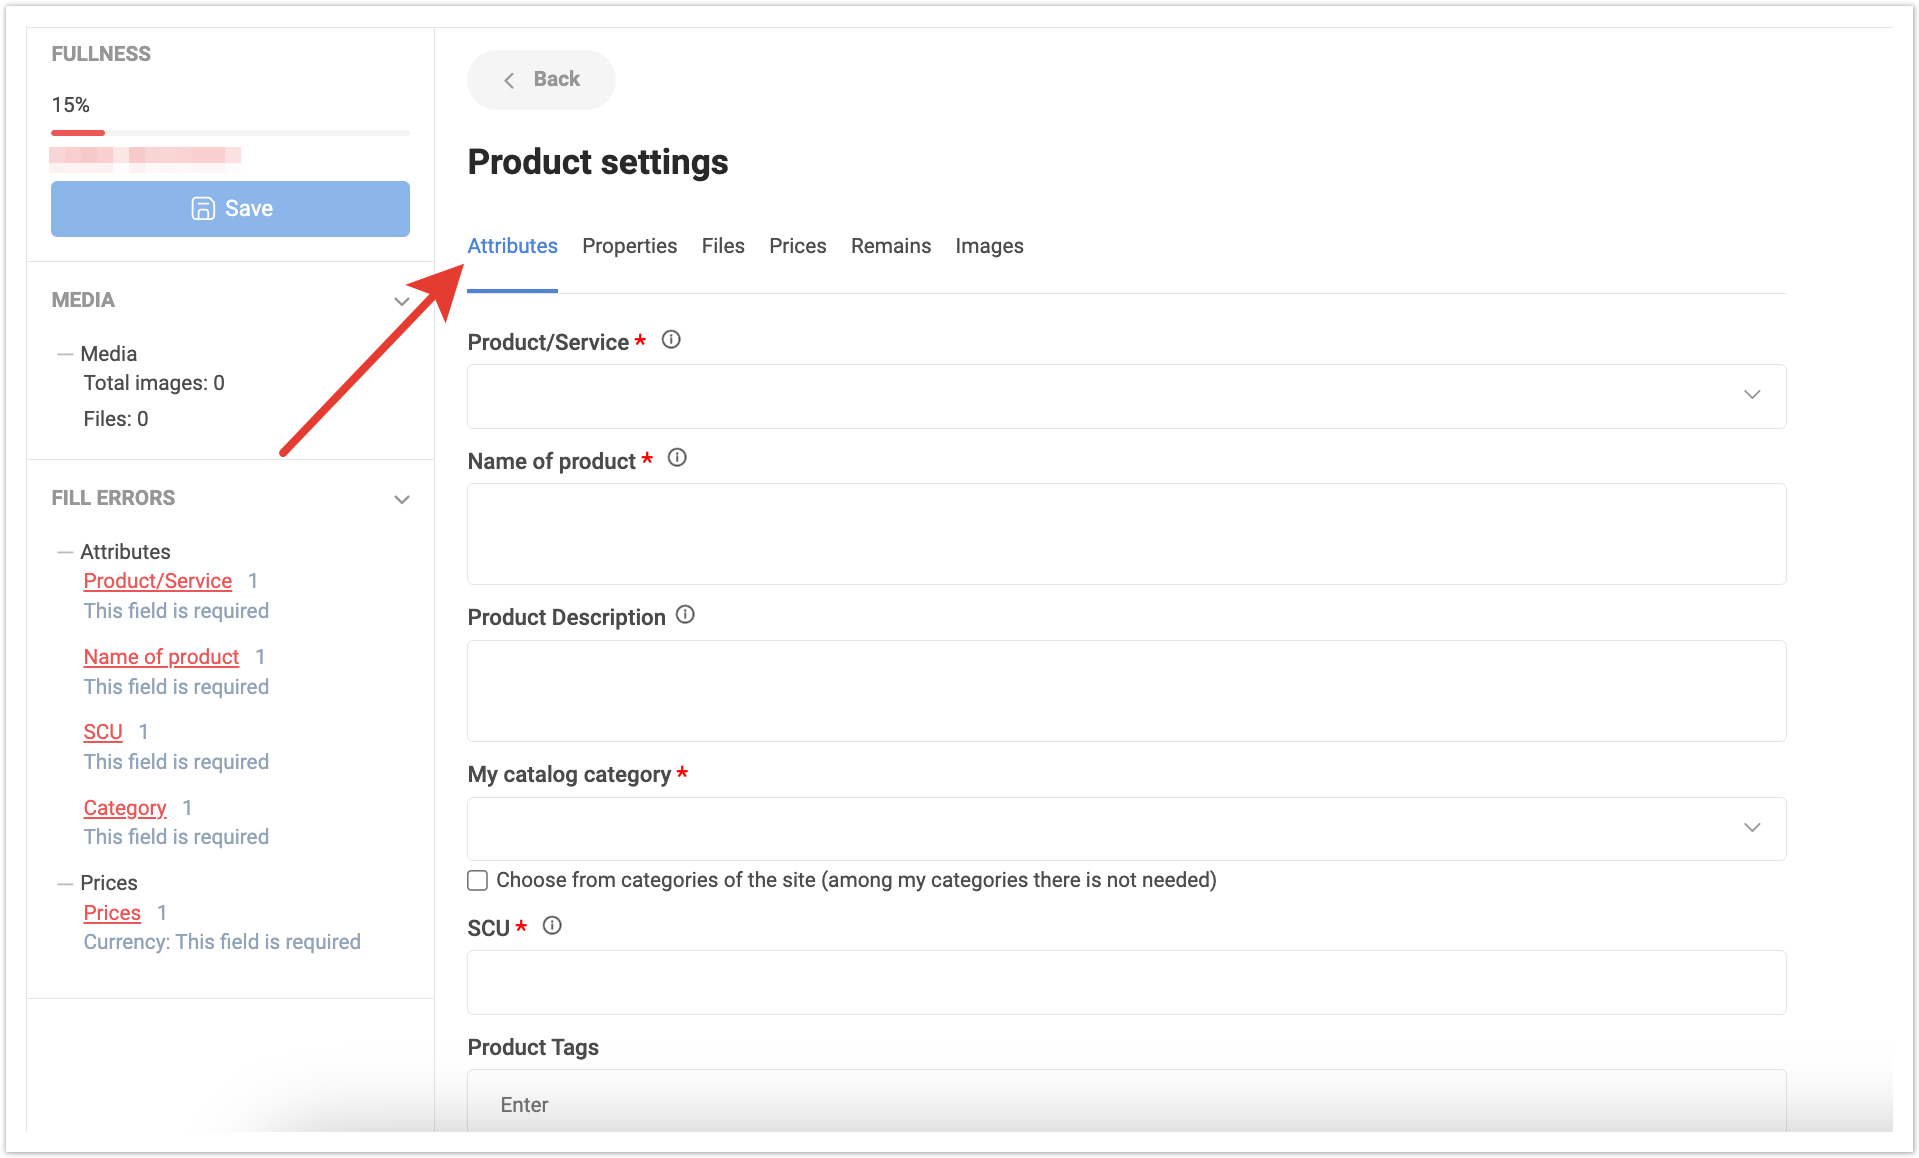
The Attributes tab contains the following data:
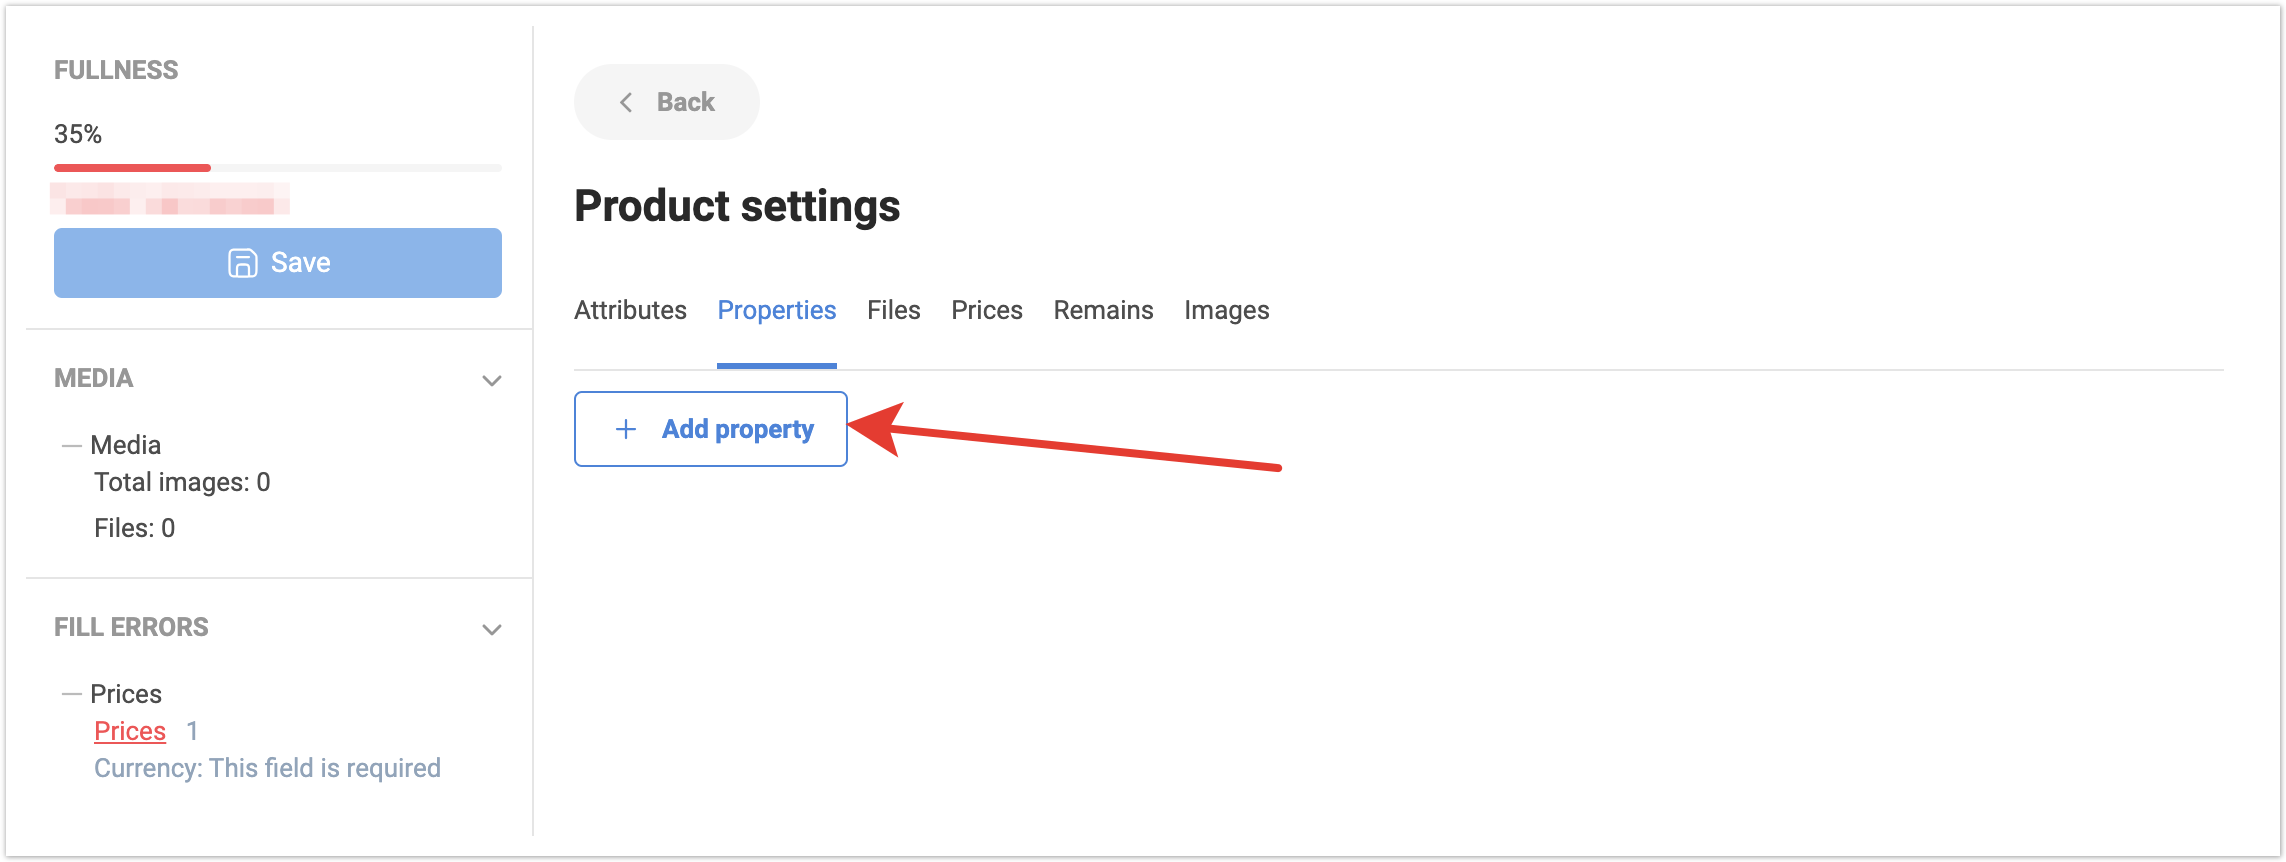
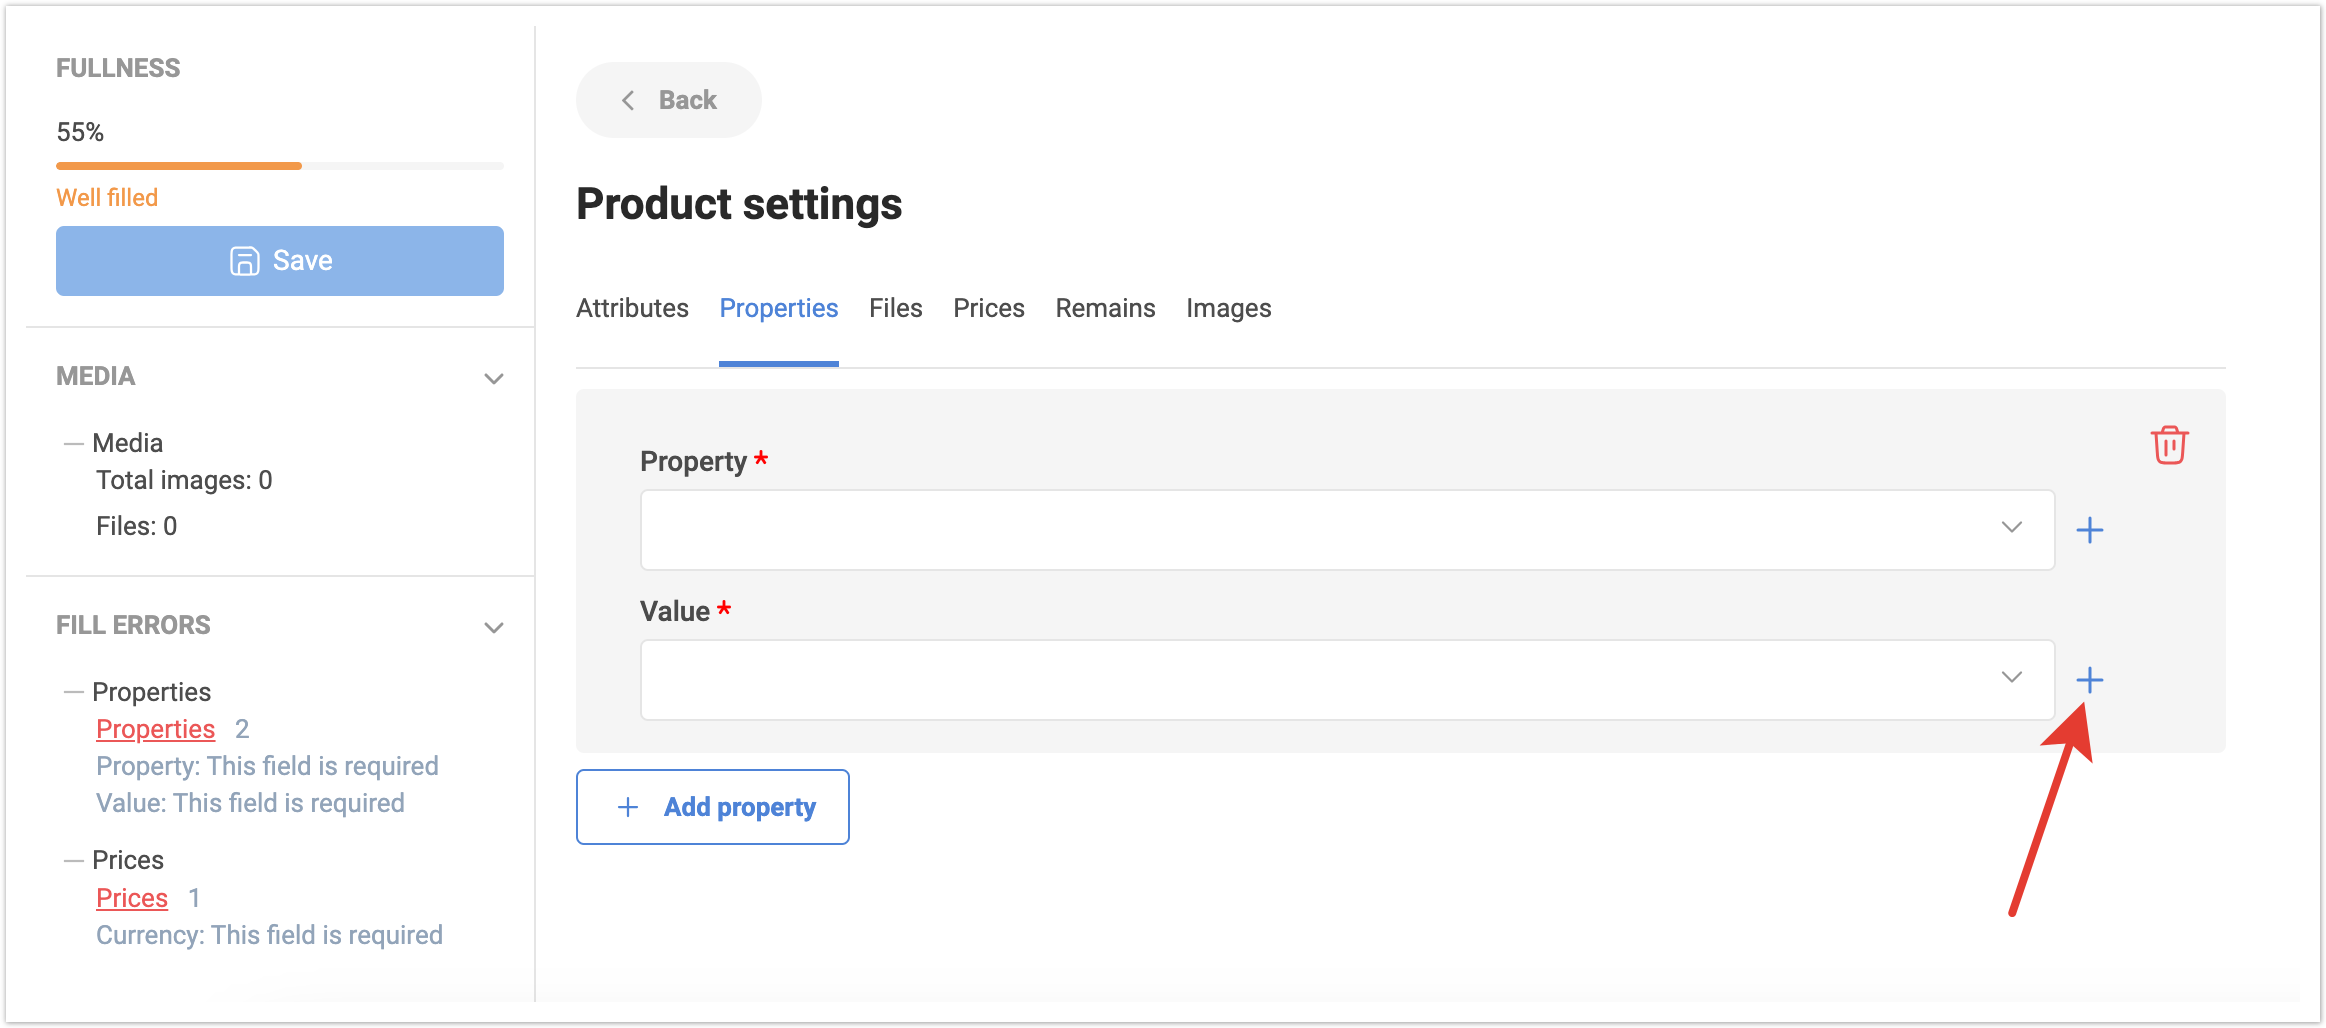
As you fill out the required fields, Fill errors will disappear from the list. On the Properties tab, you can add the properties required for the product. To do this, click on the Add property button.
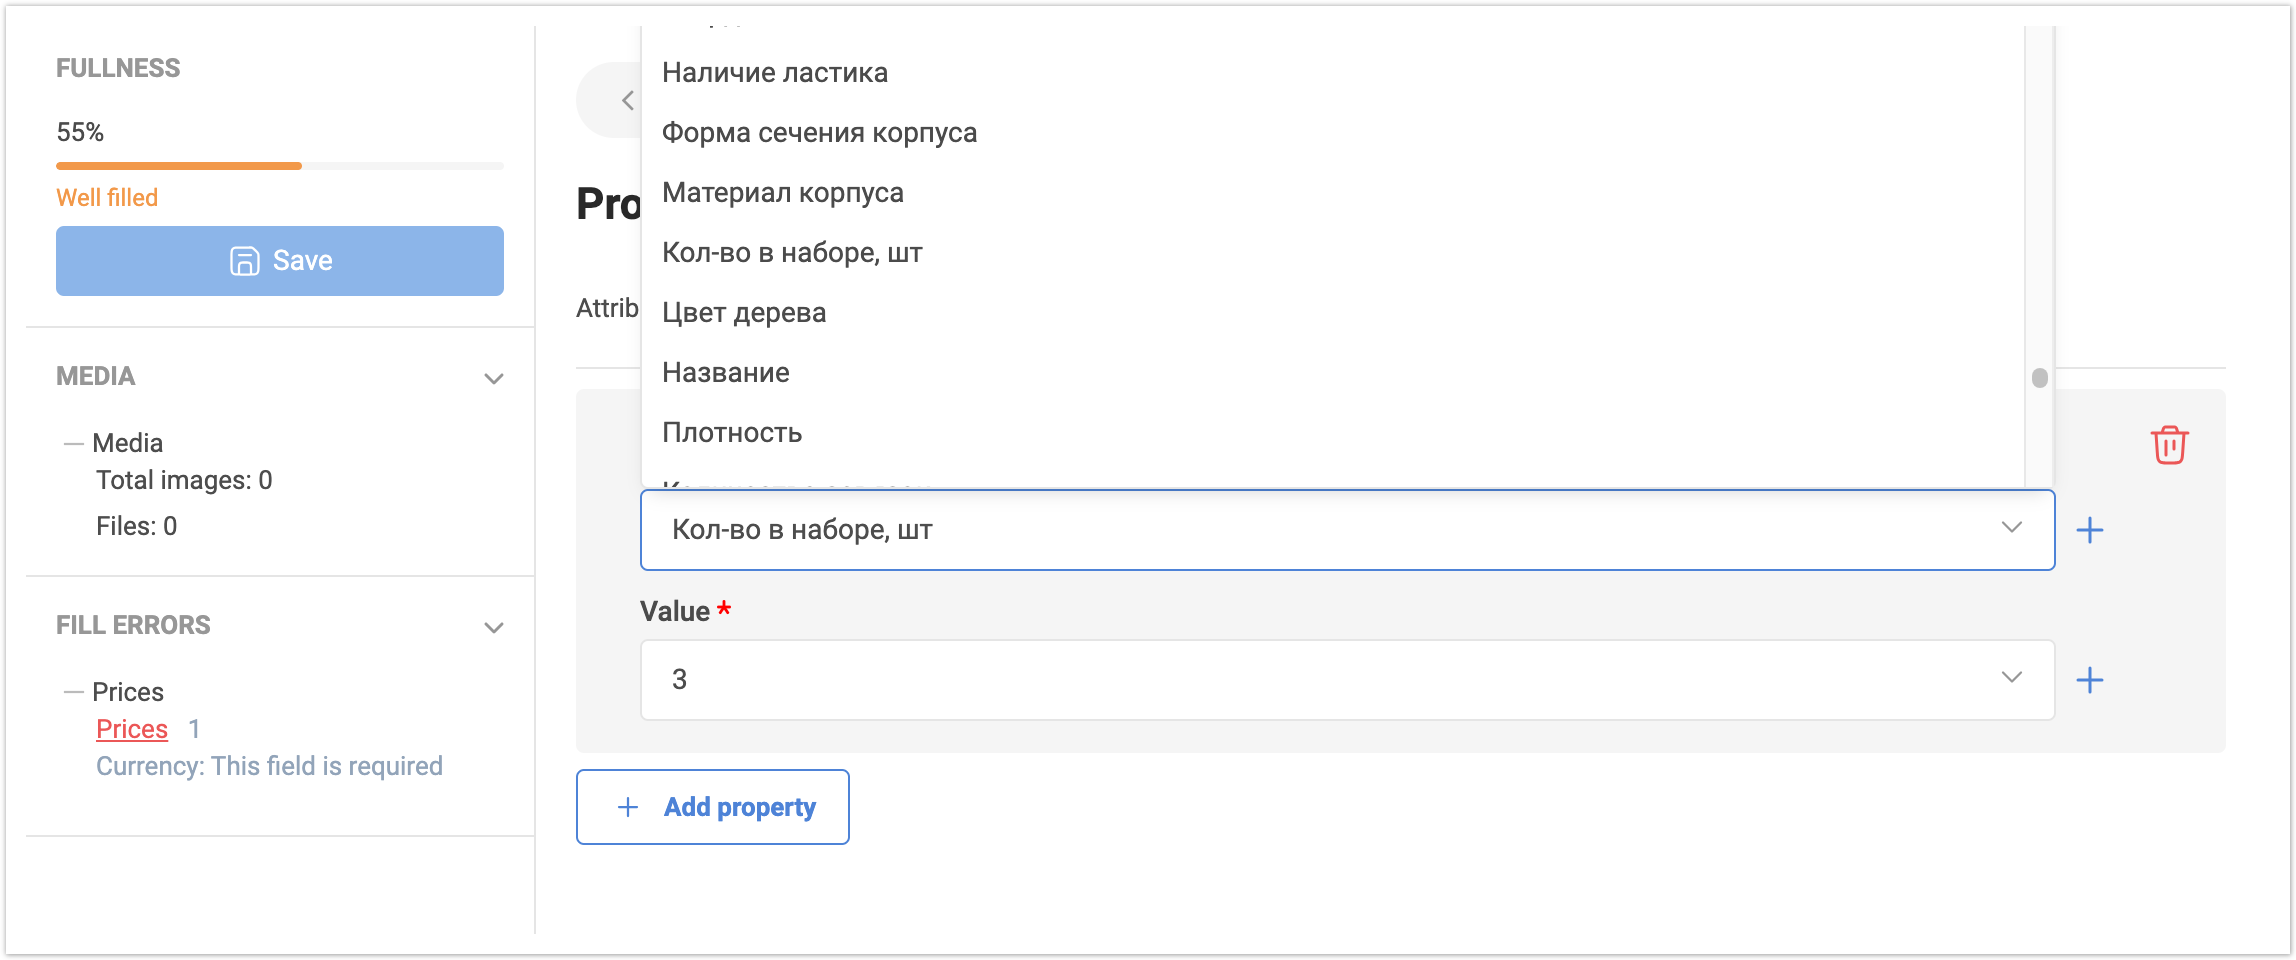
After this, you need to select the one you want to add in the list of properties, and then select its value from the list.
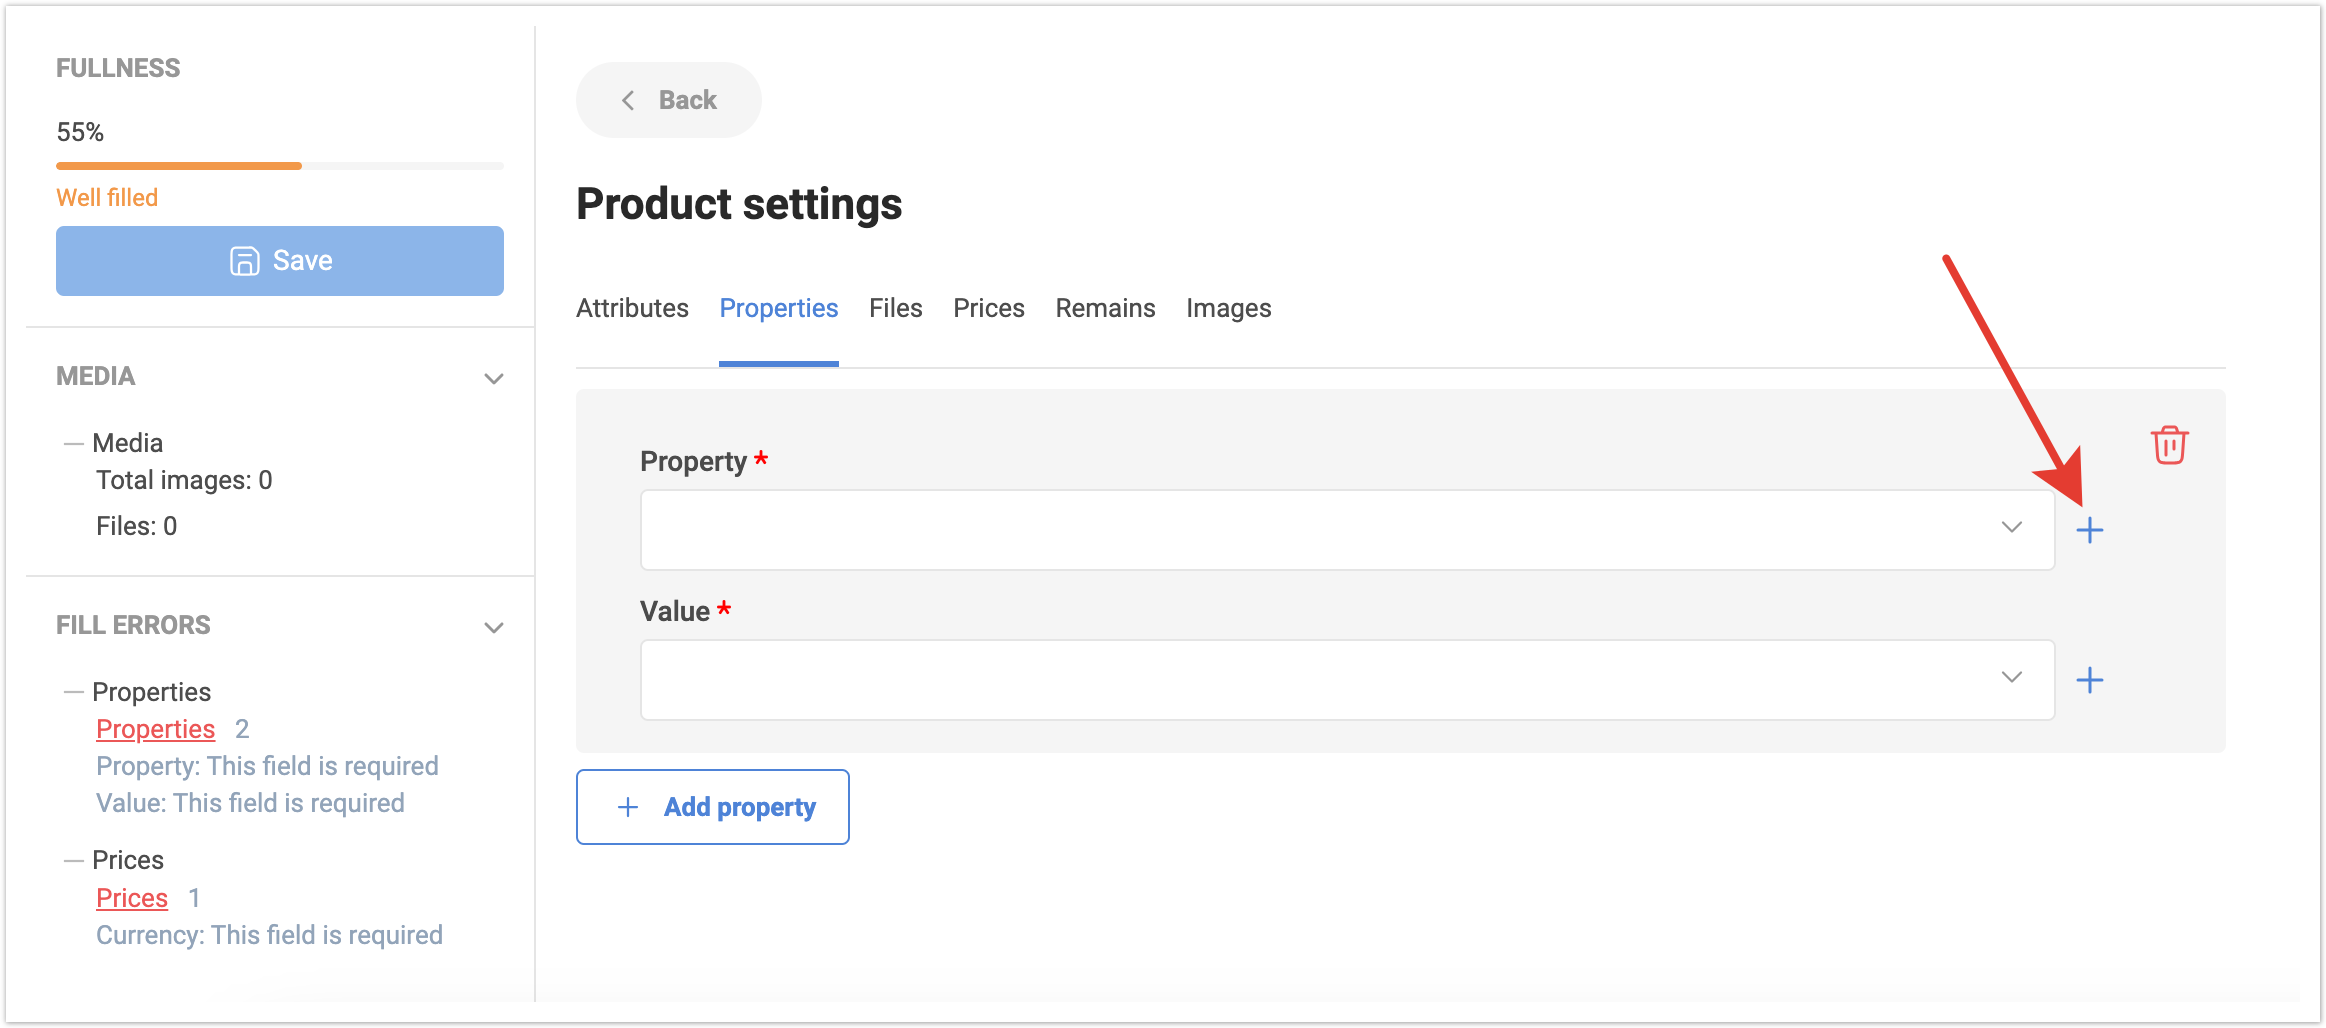
If you want to add a new property that has not been added before, you need to click on the button with the “+” symbol.
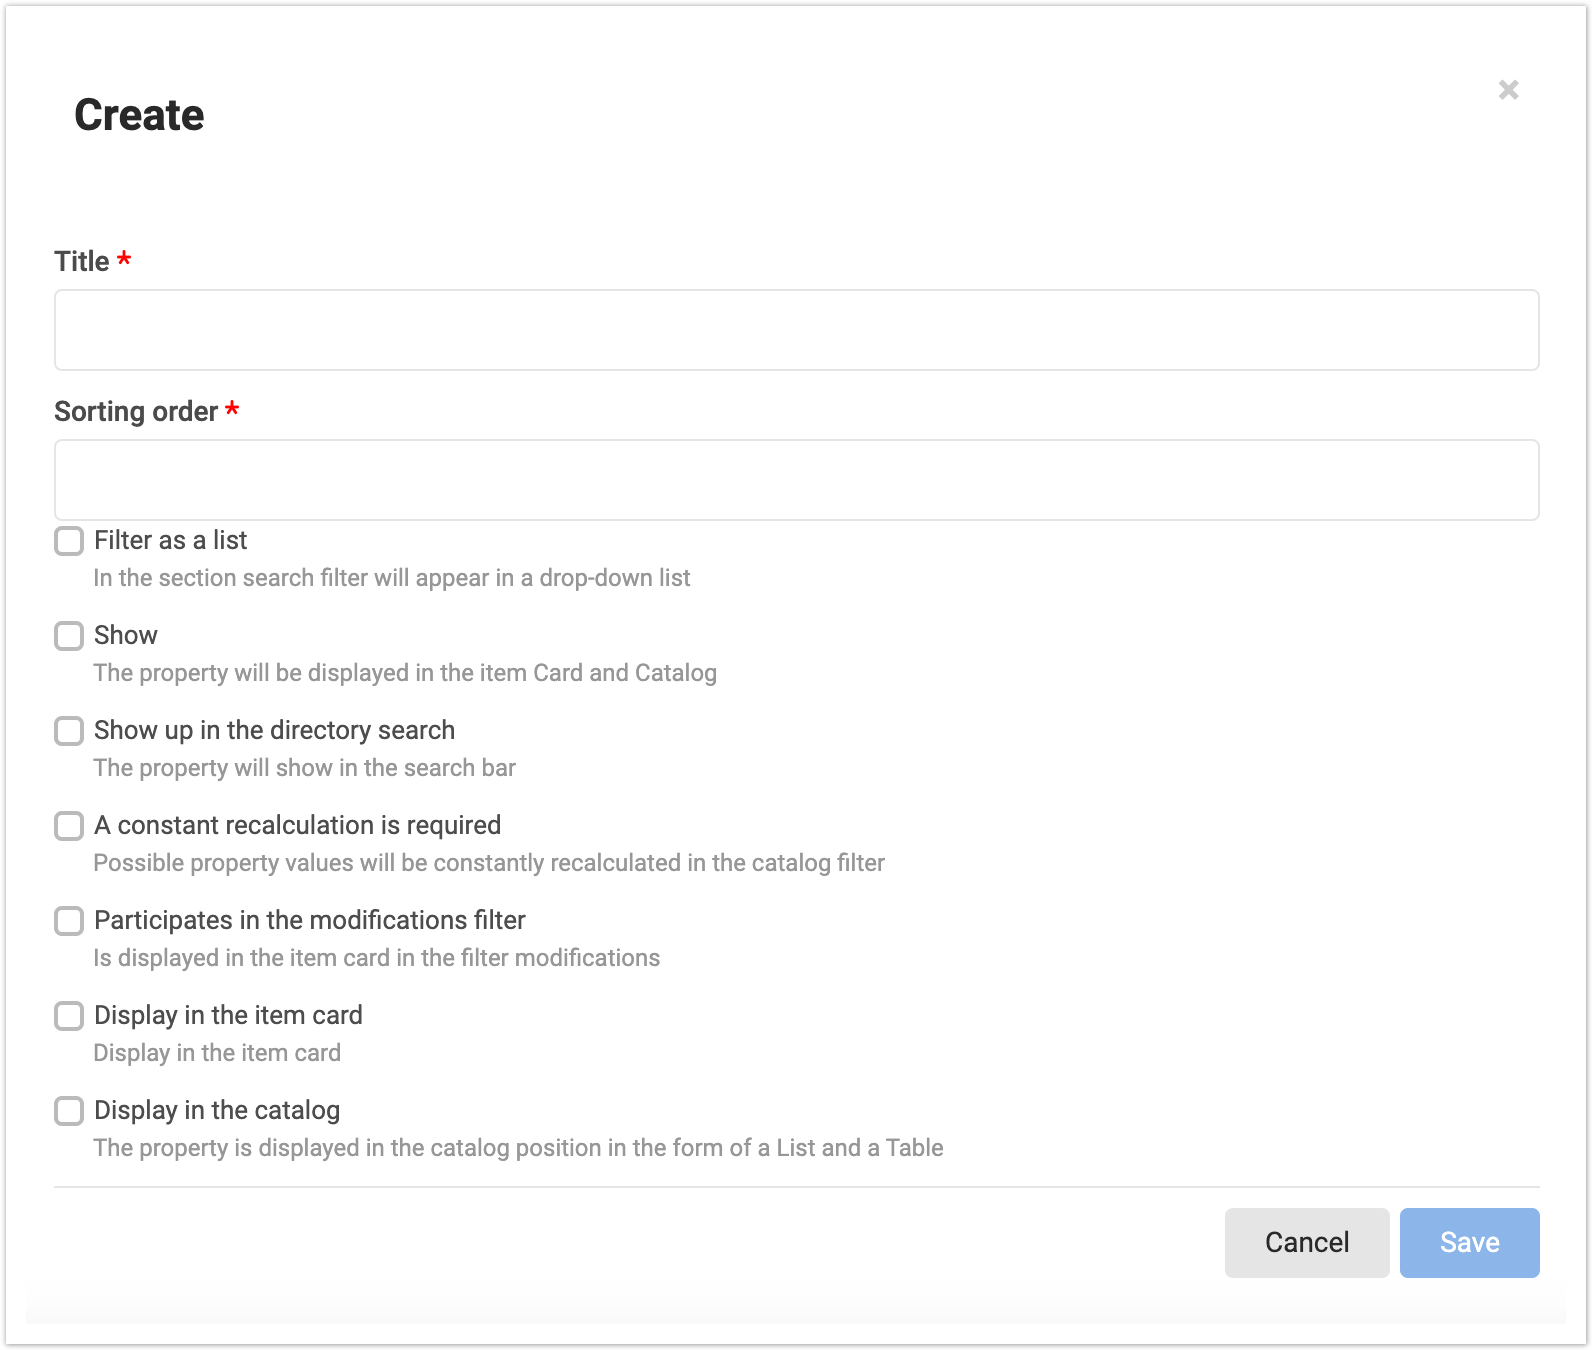
A window will open to add a new property. Here you will need to specify the Name and Sort Order. And then from the list of settings, select the properties you need for the added property. Filter as a list - in advanced search, the property will be displayed as a drop-down list from which you can select product property values. If the setting is disabled, then the property values will be displayed in the form of checkboxes, where you need to check the boxes. Display Show - this setting is responsible for displaying the property in the catalog and product card. If the property should not be displayed, then simply uncheck the checkbox. Show up in catalog the directory search - the setting controls the display of the property in the search bar. Constant recalculation is required - when you select a checkbox, the property values will be recalculated in the catalog filter. Participates in the modification filter - when you select a checkbox, this property can be selected from the modification filter in the product card. Display in product card - the setting controls whether the property will be displayed in the product card. Displayed in catalog the catalog -the setting controls whether the property will be displayed in the product catalog (if the catalog is displayed as a list or table).
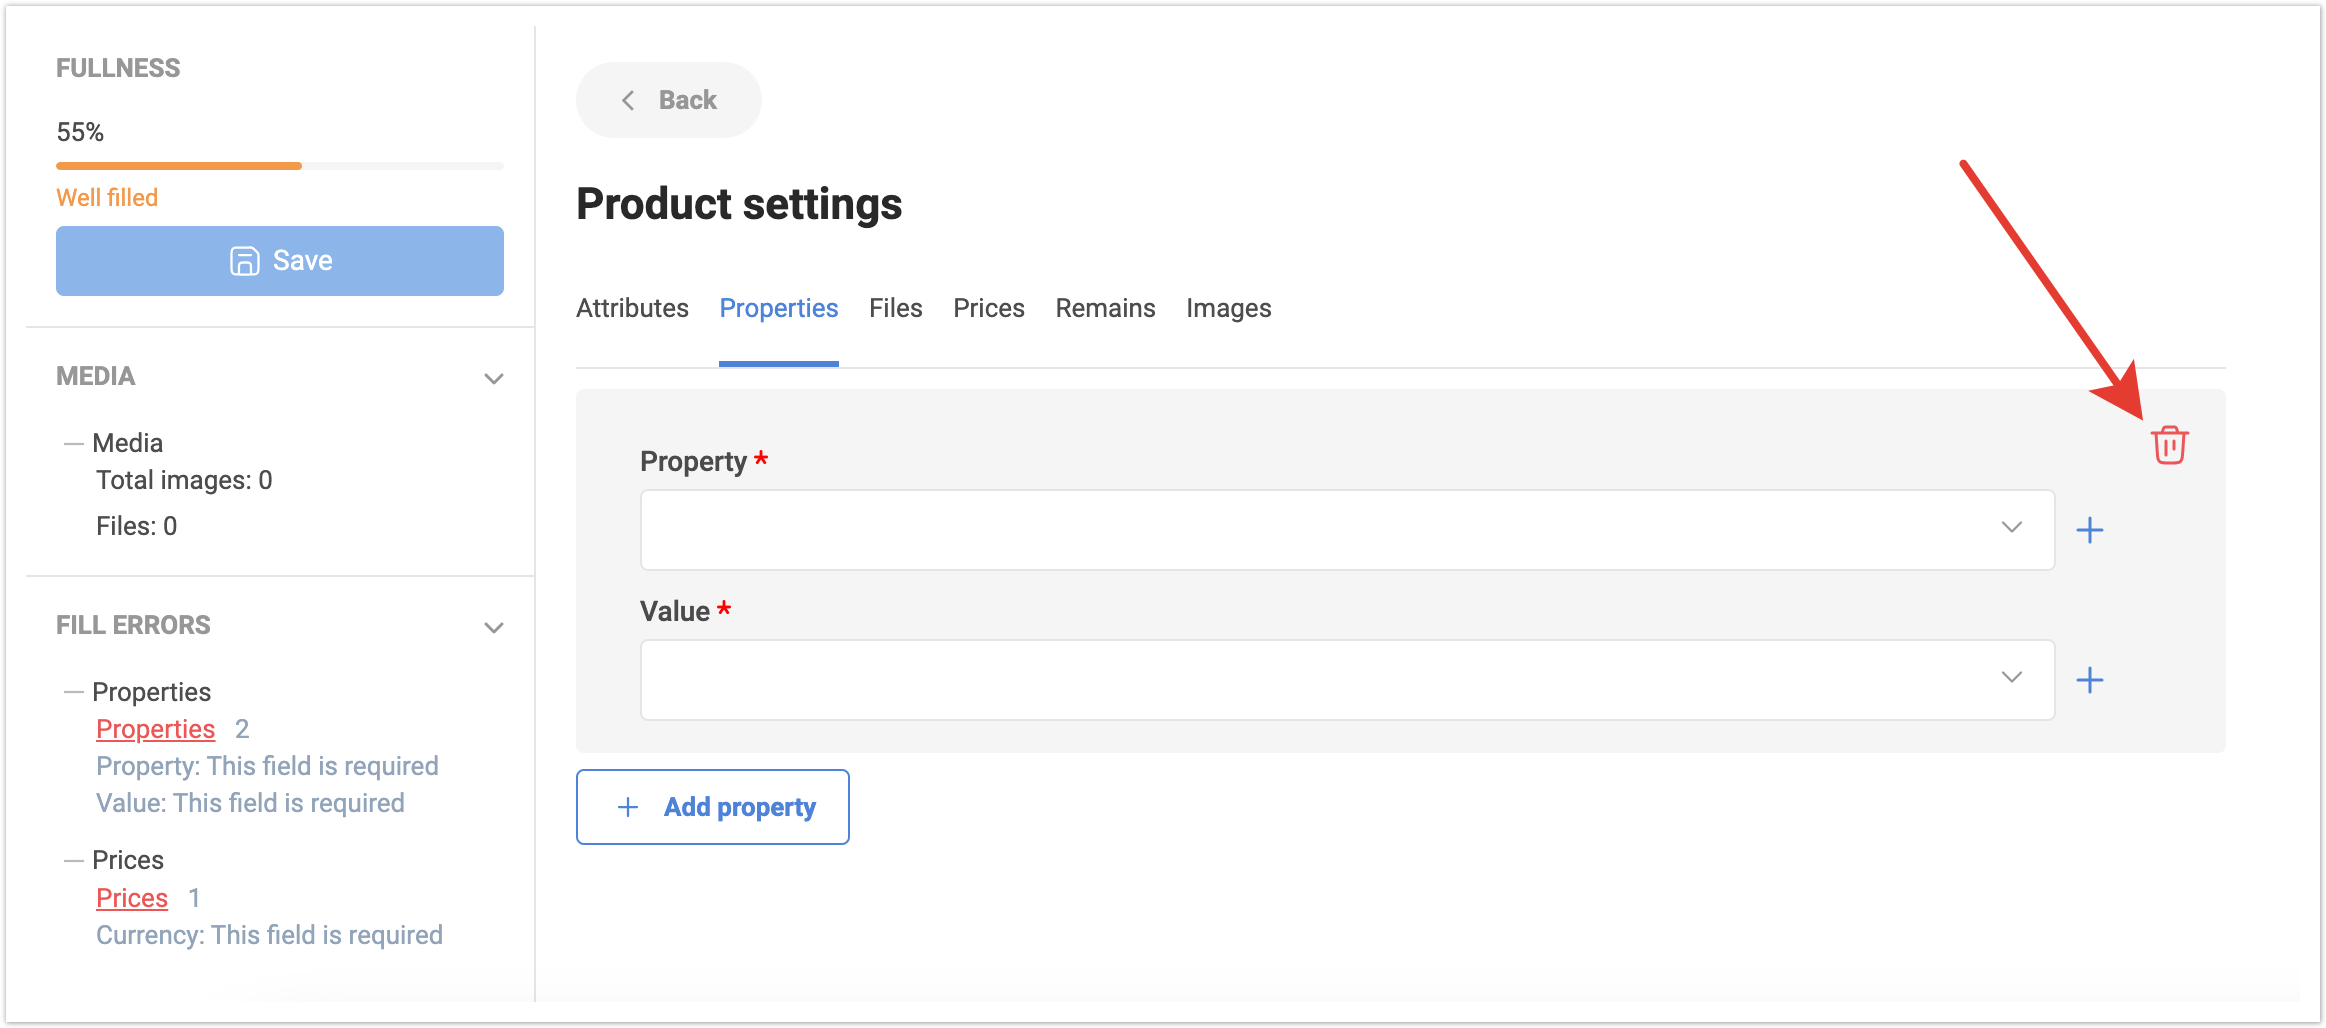
After filling in the fields, you need to click the Save button and the property will be added, then in the same way, click on the “+” button to add a value for this property.
If a property was added by mistake, you can delete it by clicking on the trash can symbol.
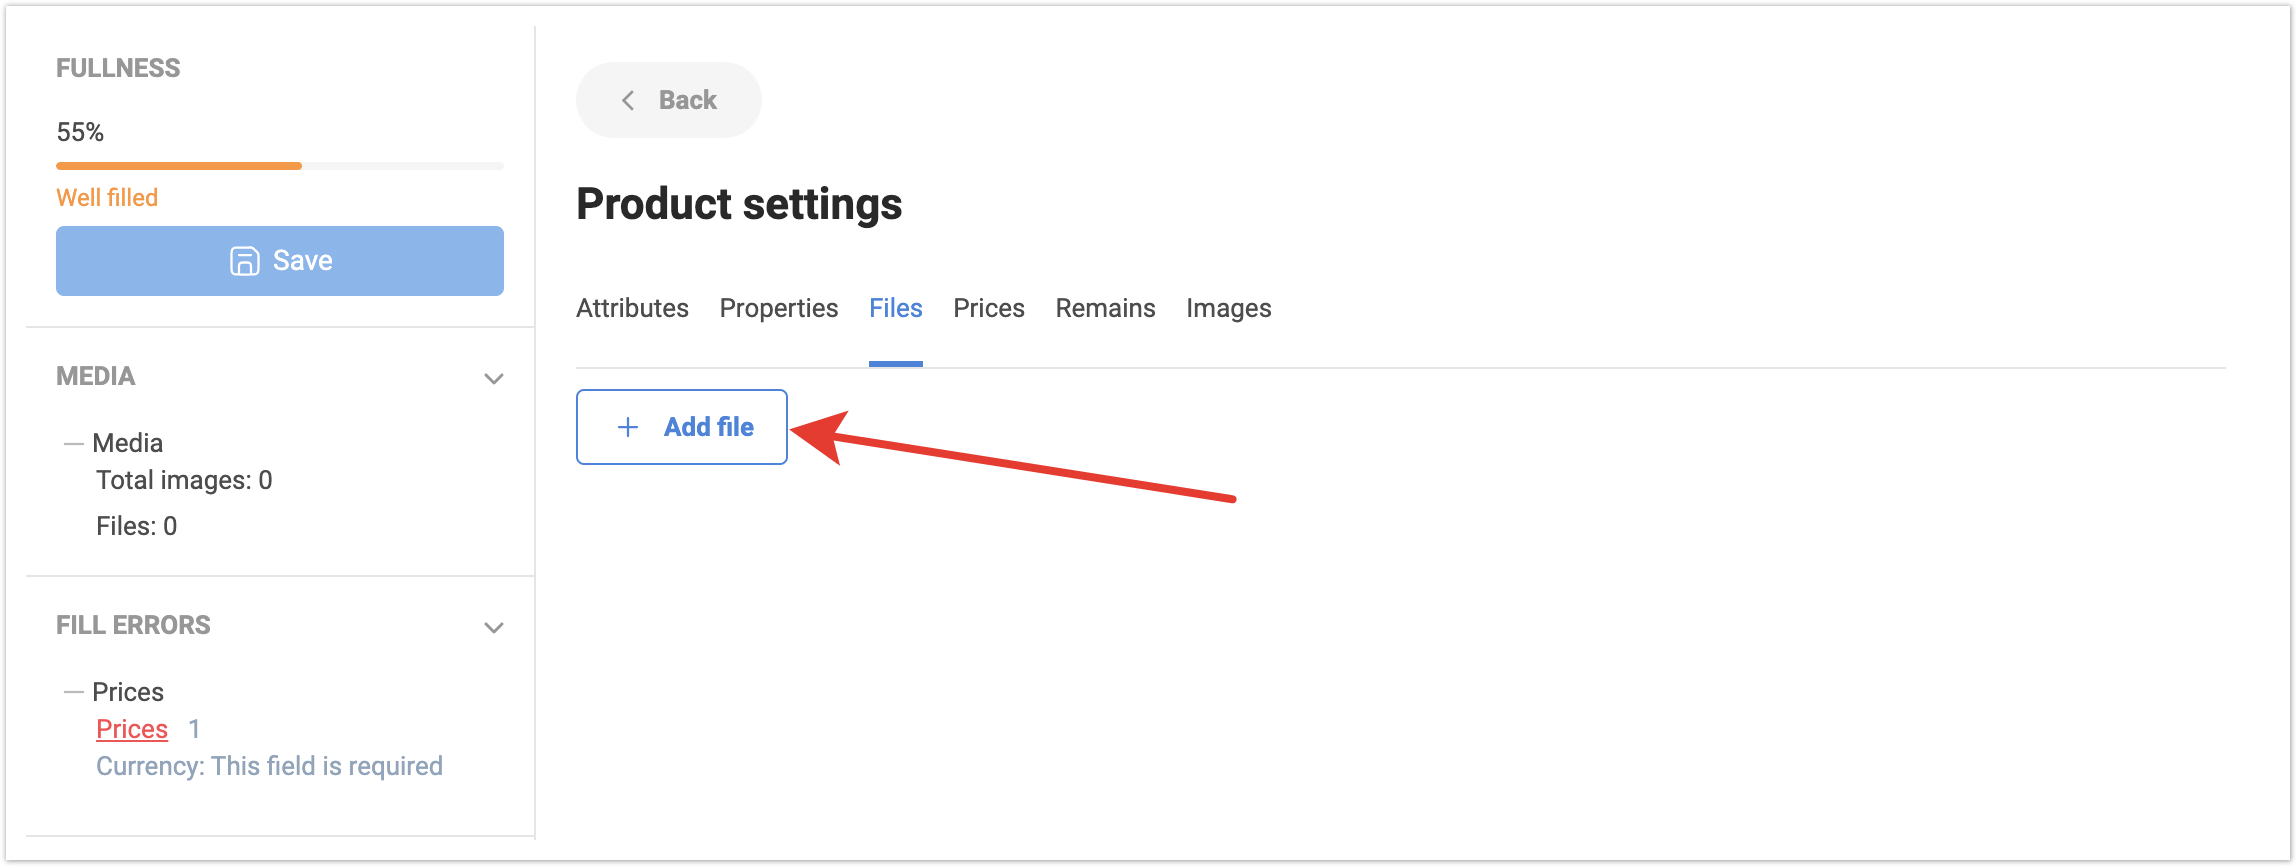
On the Files tab, there is an option to add additional files such as Certificates, Specifications, Instructions and any other files that need to be displayed to the end user on the product card. To add a file, you need to click on the Add file button, and then select it on your local computer.
You can also delete a previously downloaded file if it is no longer relevant.
On the Prices tab, you can add a price type value for a product. You need to specify the Currency - you can select it from the list using the search. In the Price field, specify the price value for the product. In the Price type field, select the previously entered price type. By clicking the Add price button, you can add several values for different types of prices for a product. Thus, depending on the selected price type, the price value for the product will differ.
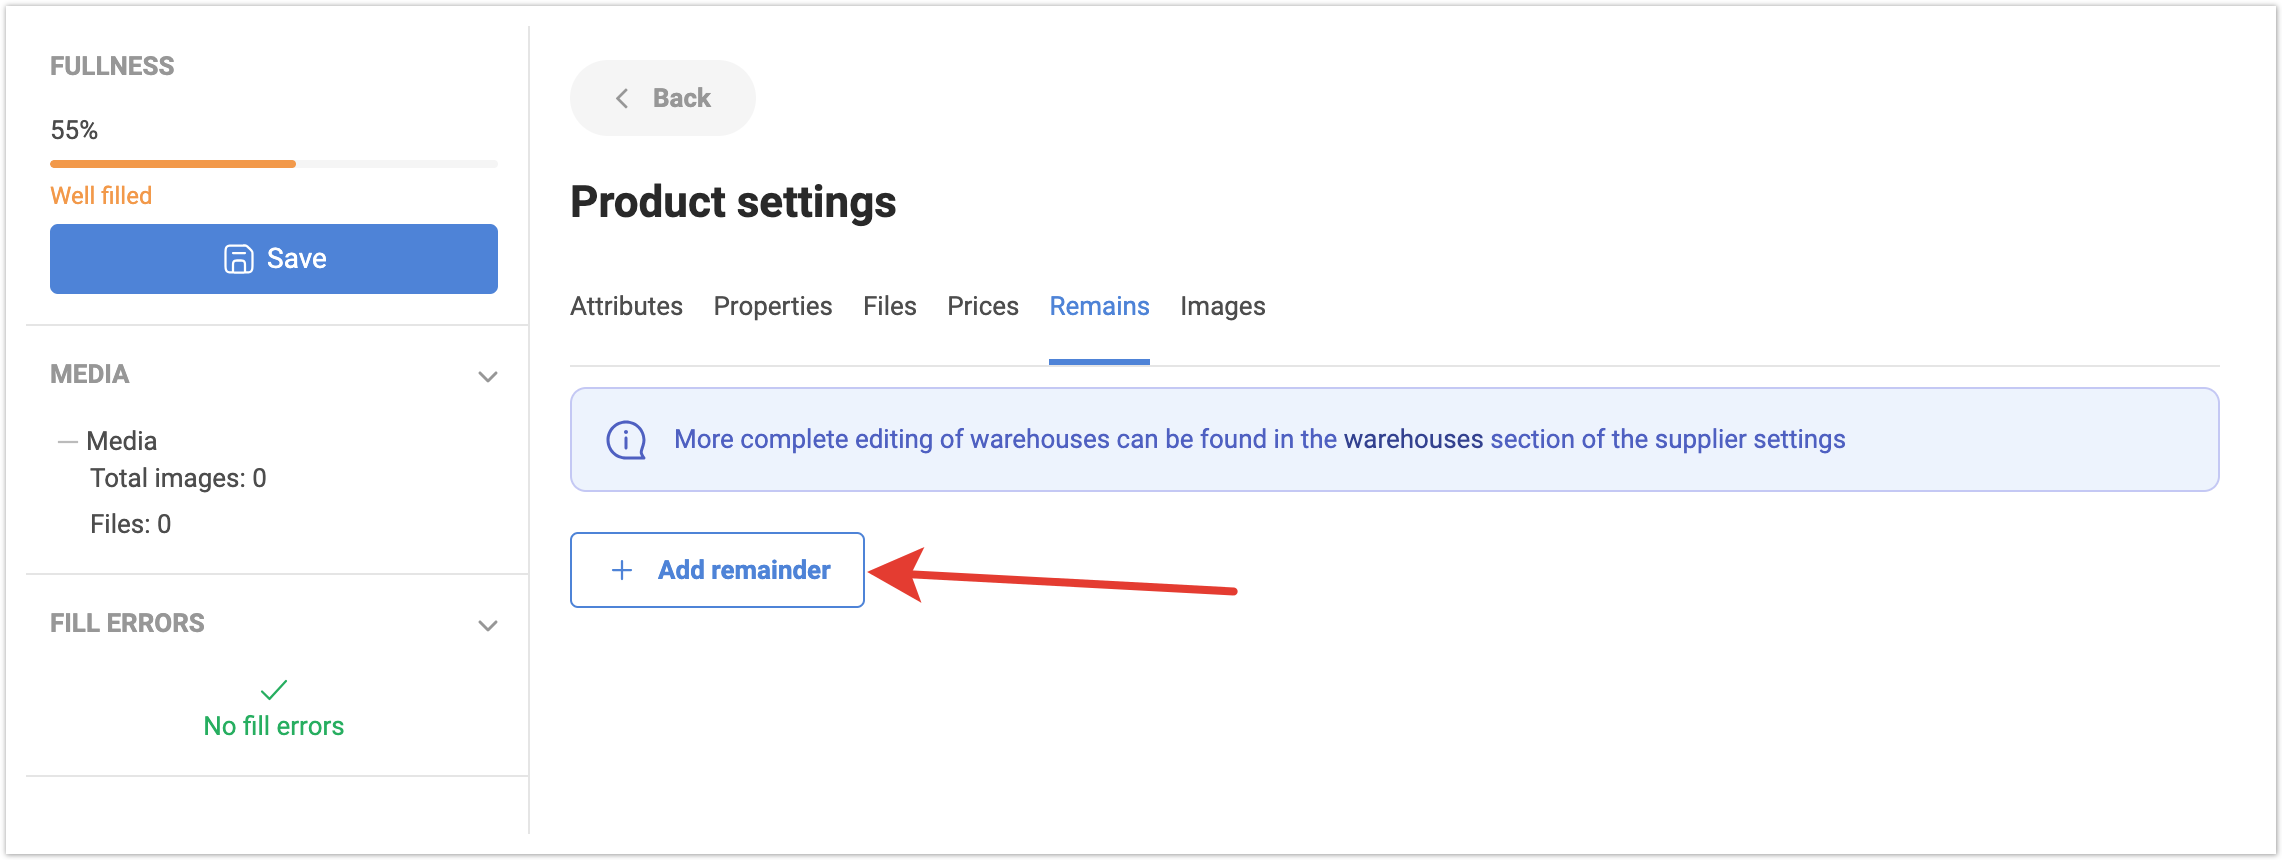
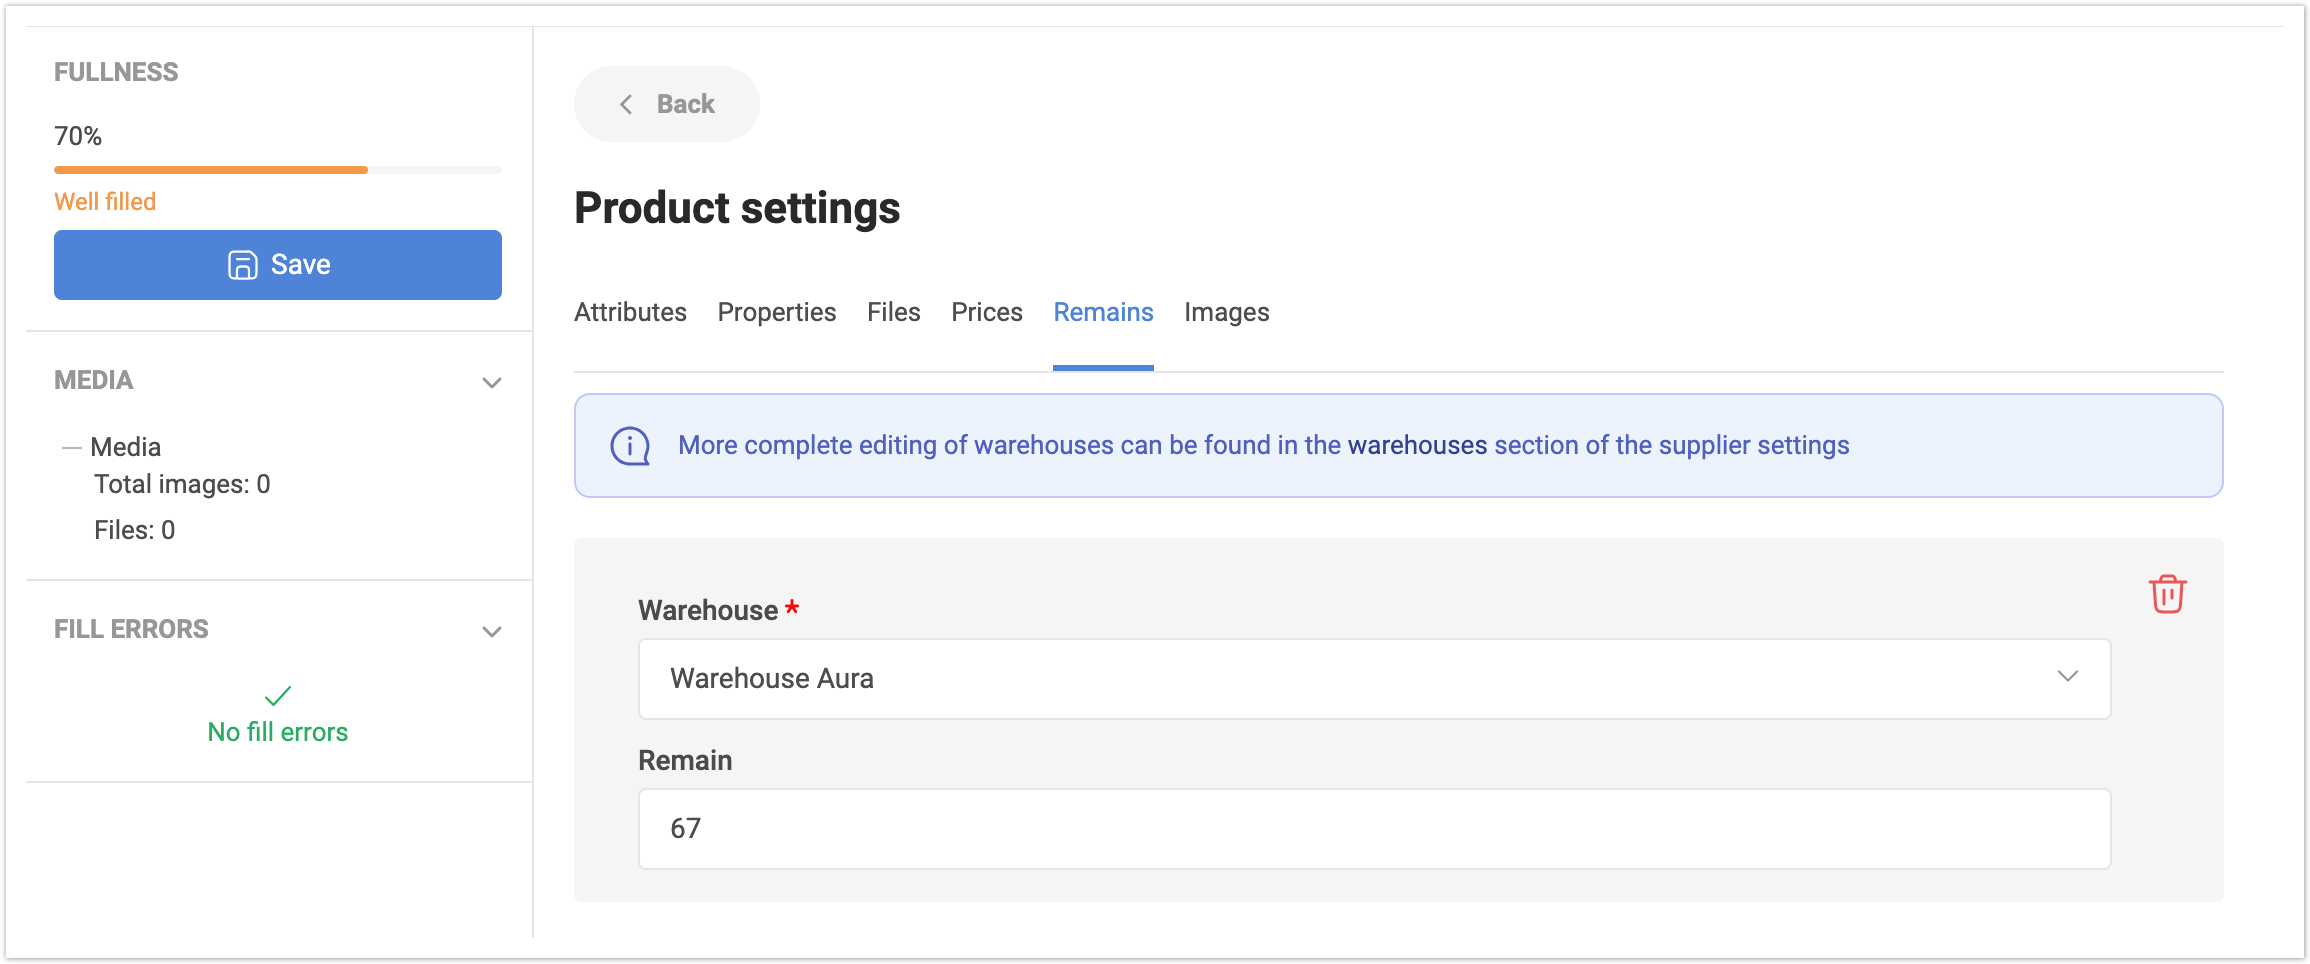
On the Remains tab, you can specify product balances in specific warehouses. To do this, click on the Add remainder button.
After this, select a warehouse from the list that you previously created at the profile settings stage, and indicate the balance in this warehouse. If an item is listed in several warehouses, then using the Add remainder button you can specify the balances in other warehouses for this item.
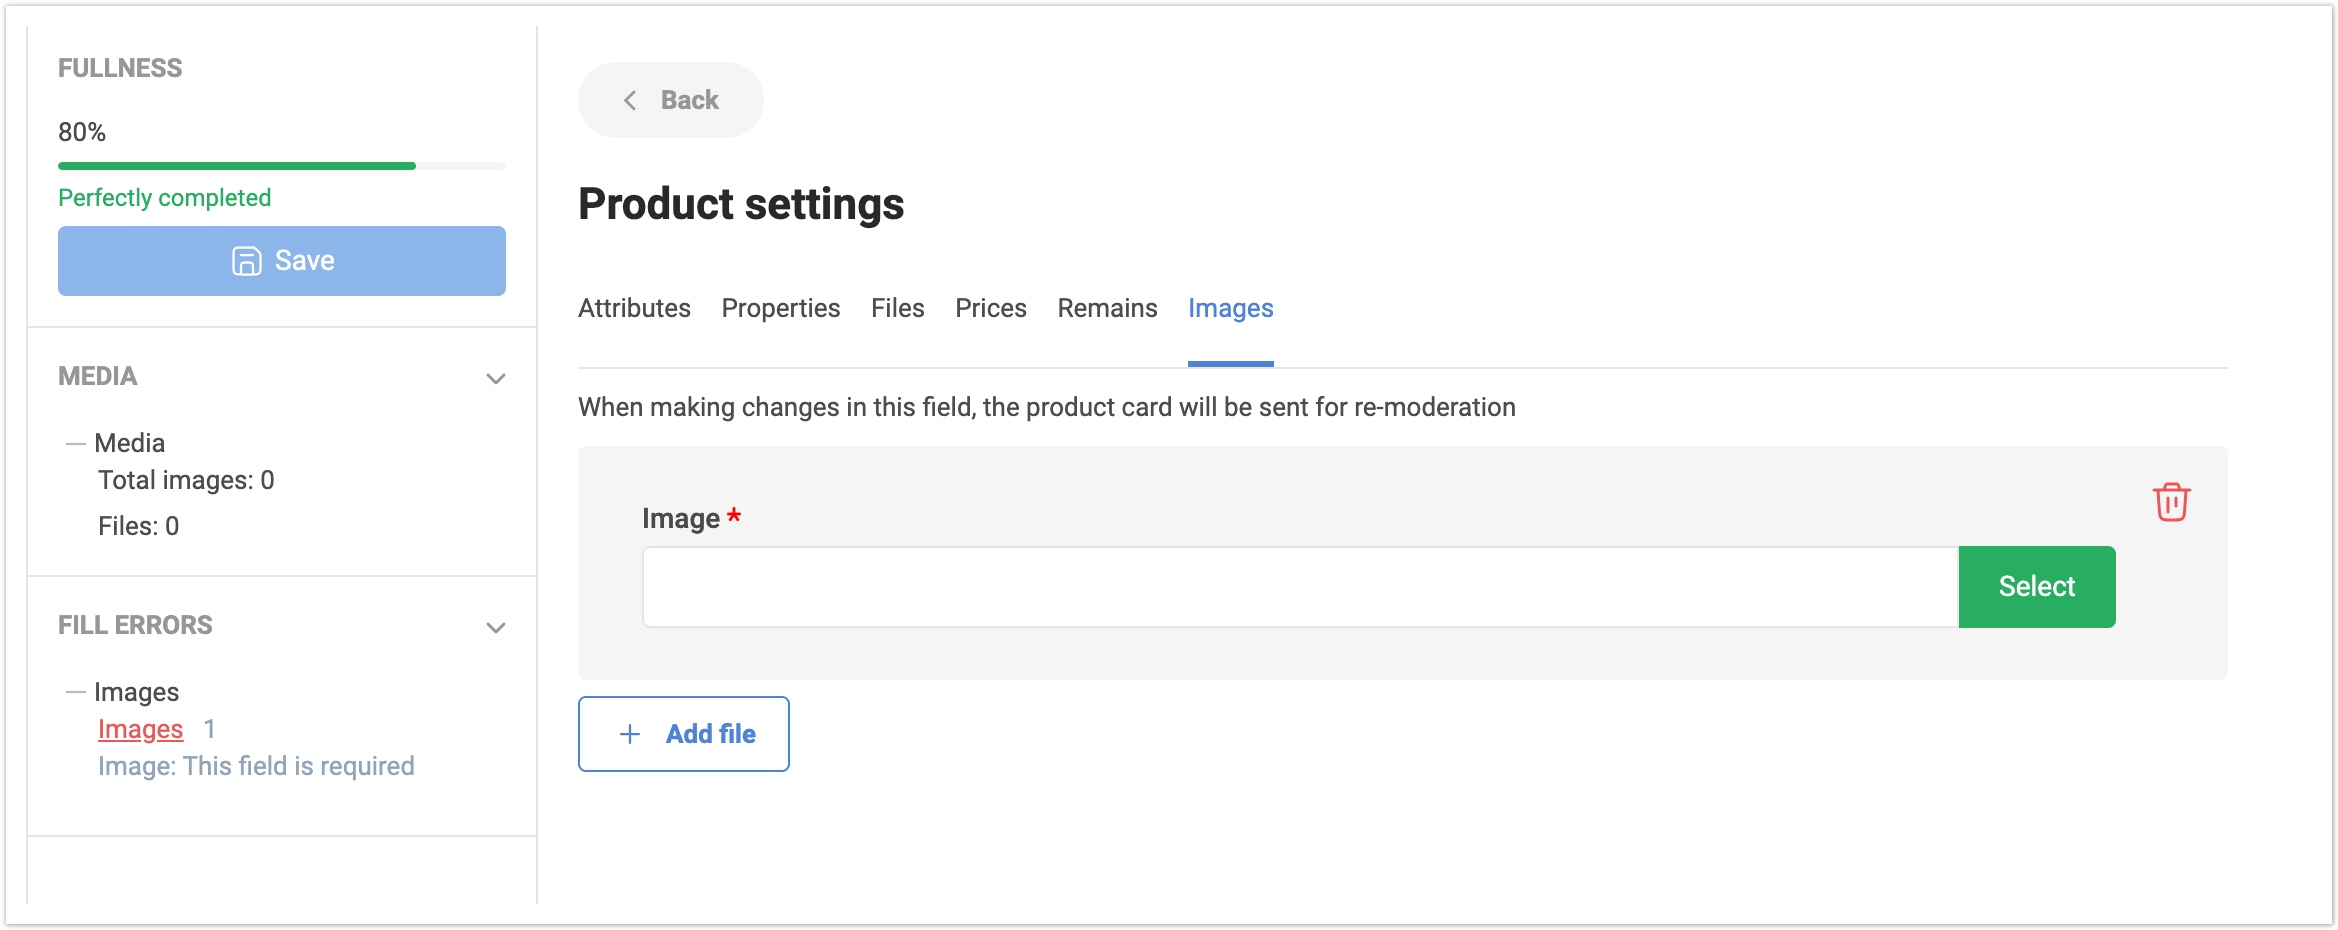
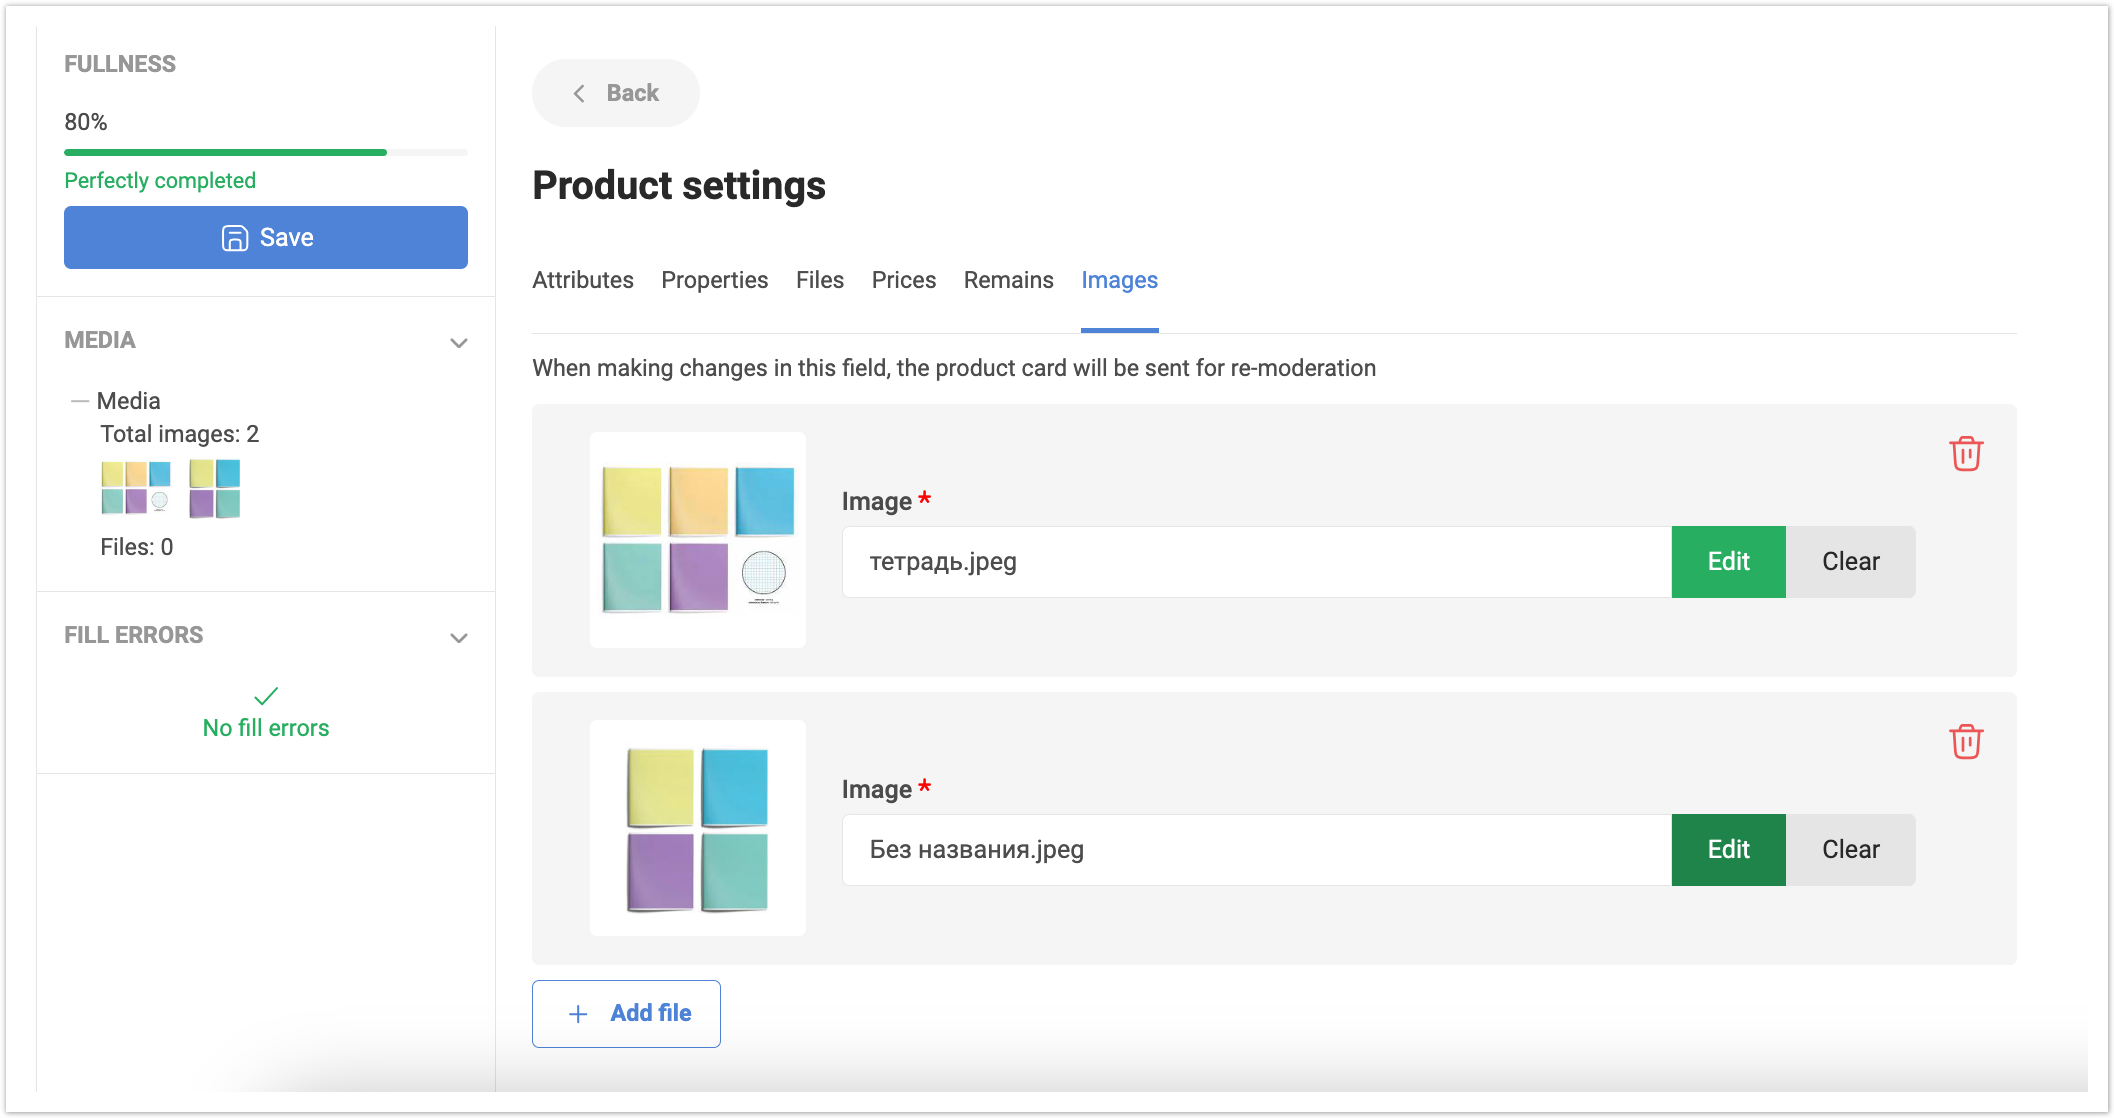
On the Images tab, you can upload images by product. To do this, click on the Add file button, and then click on the Select button to add a file from the local computer.
You can add multiple images, and you can also change or clear a previously uploaded image. If an image was uploaded by mistake, you can delete it.
After filling in all the required fields, you need to click the Save button to add the product to the catalog.
Subsequently, you will be able to manually edit the product if any changes have occurred to it. |


...