| Sv translation | ||||||||||
|---|---|---|---|---|---|---|---|---|---|---|
| ||||||||||
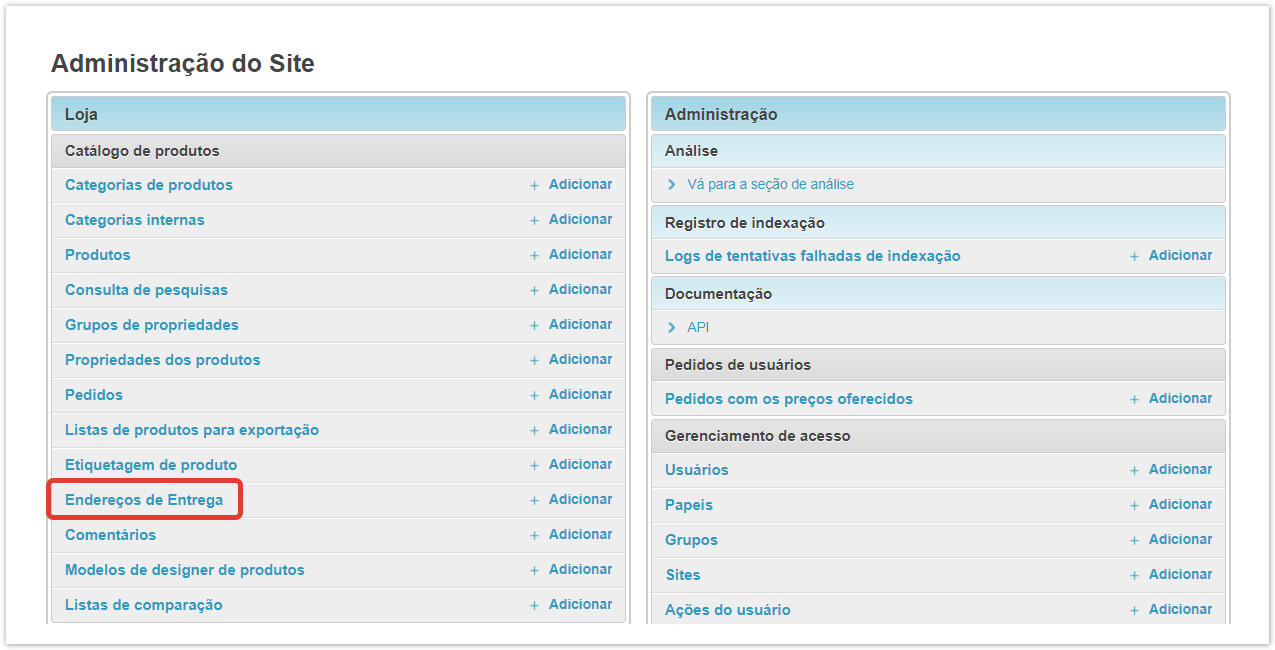
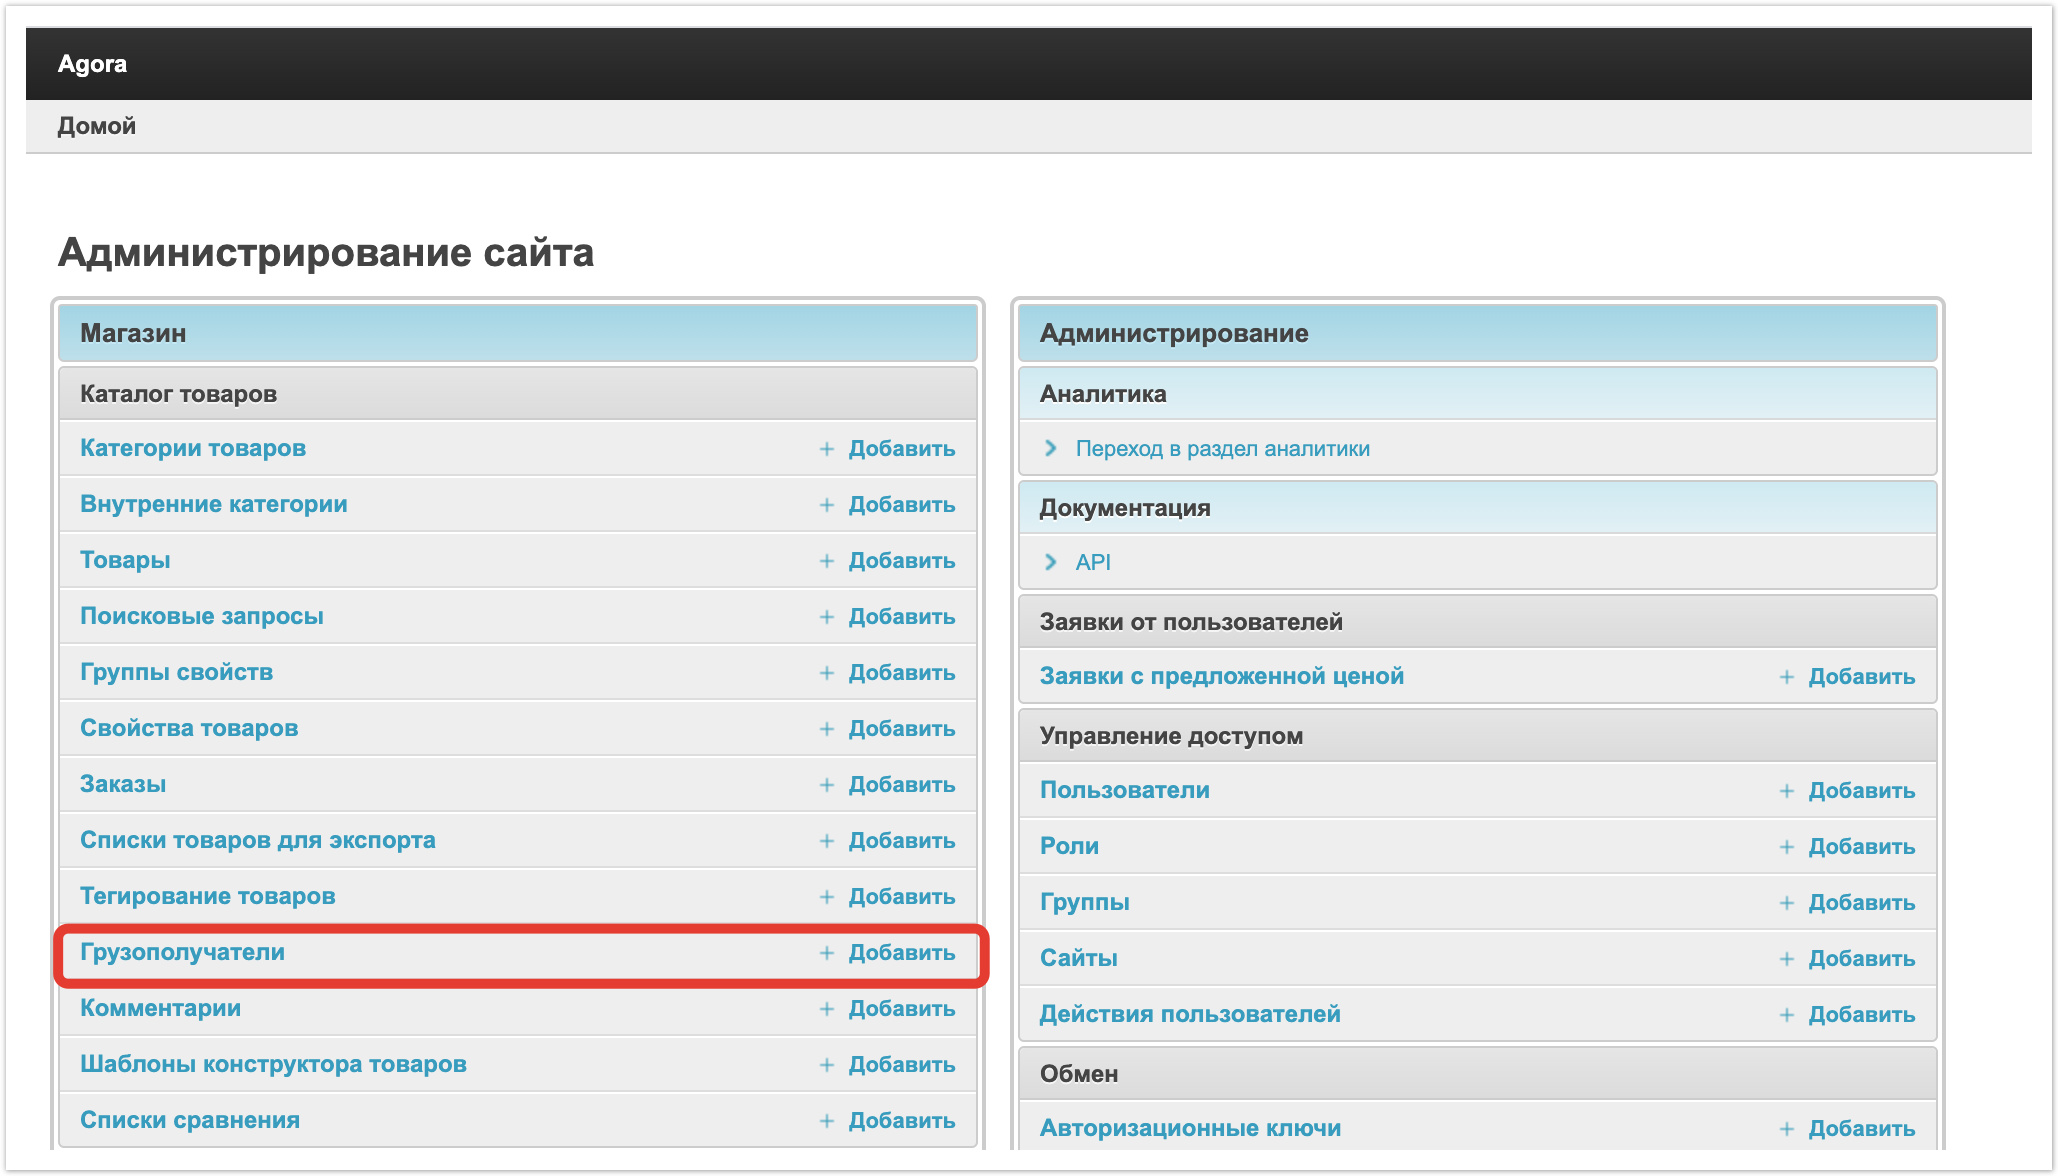
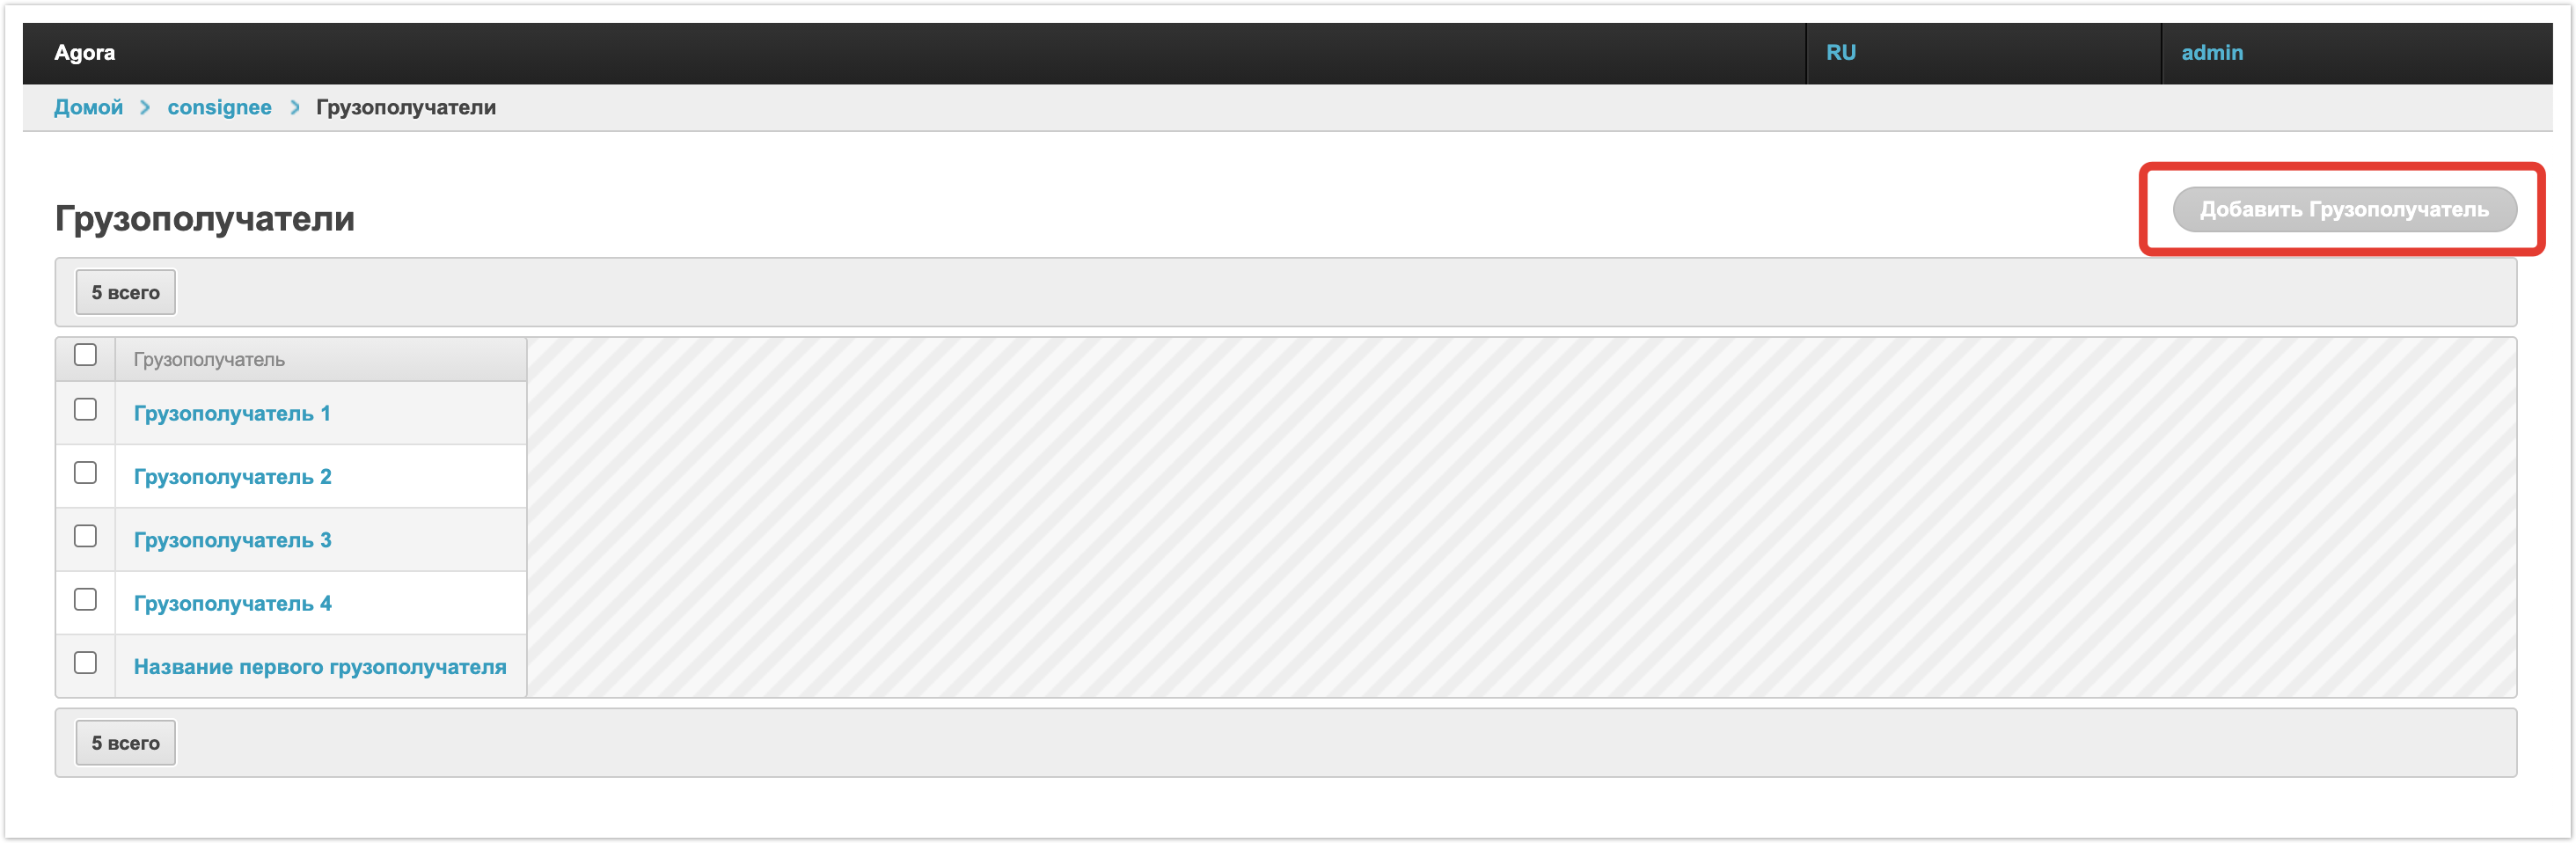
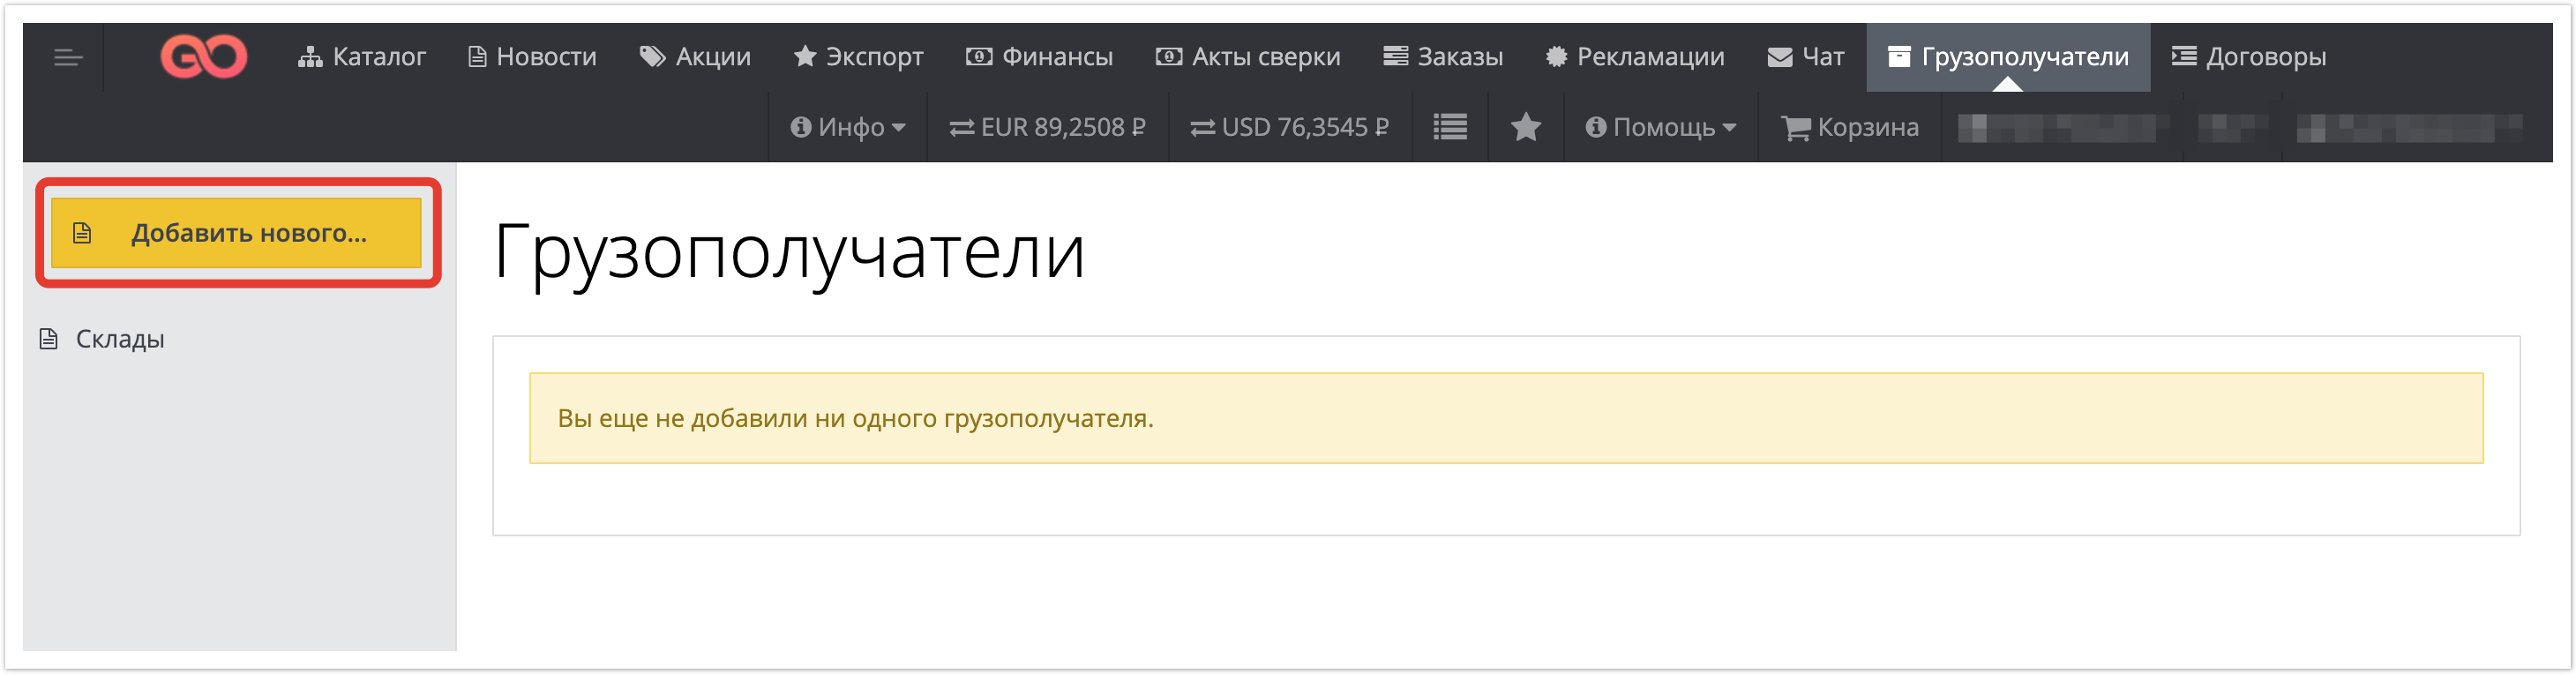
Шаблоны с реквизитами доставки могут заводиться в административной панели или личном кабинете покупателя. Впоследствии, при оформлении заказа в личном кабинете, в разделе Грузополучатели можно выбрать ранее созданные шаблоны. НастройкаПодробнее про грузополучателей рассказано в административной панелиДля того чтобы создать шаблон с реквизитами, в административной панели, расположенной по адресу название_проекта.agora.ru, выберите раздел Грузополучатели:
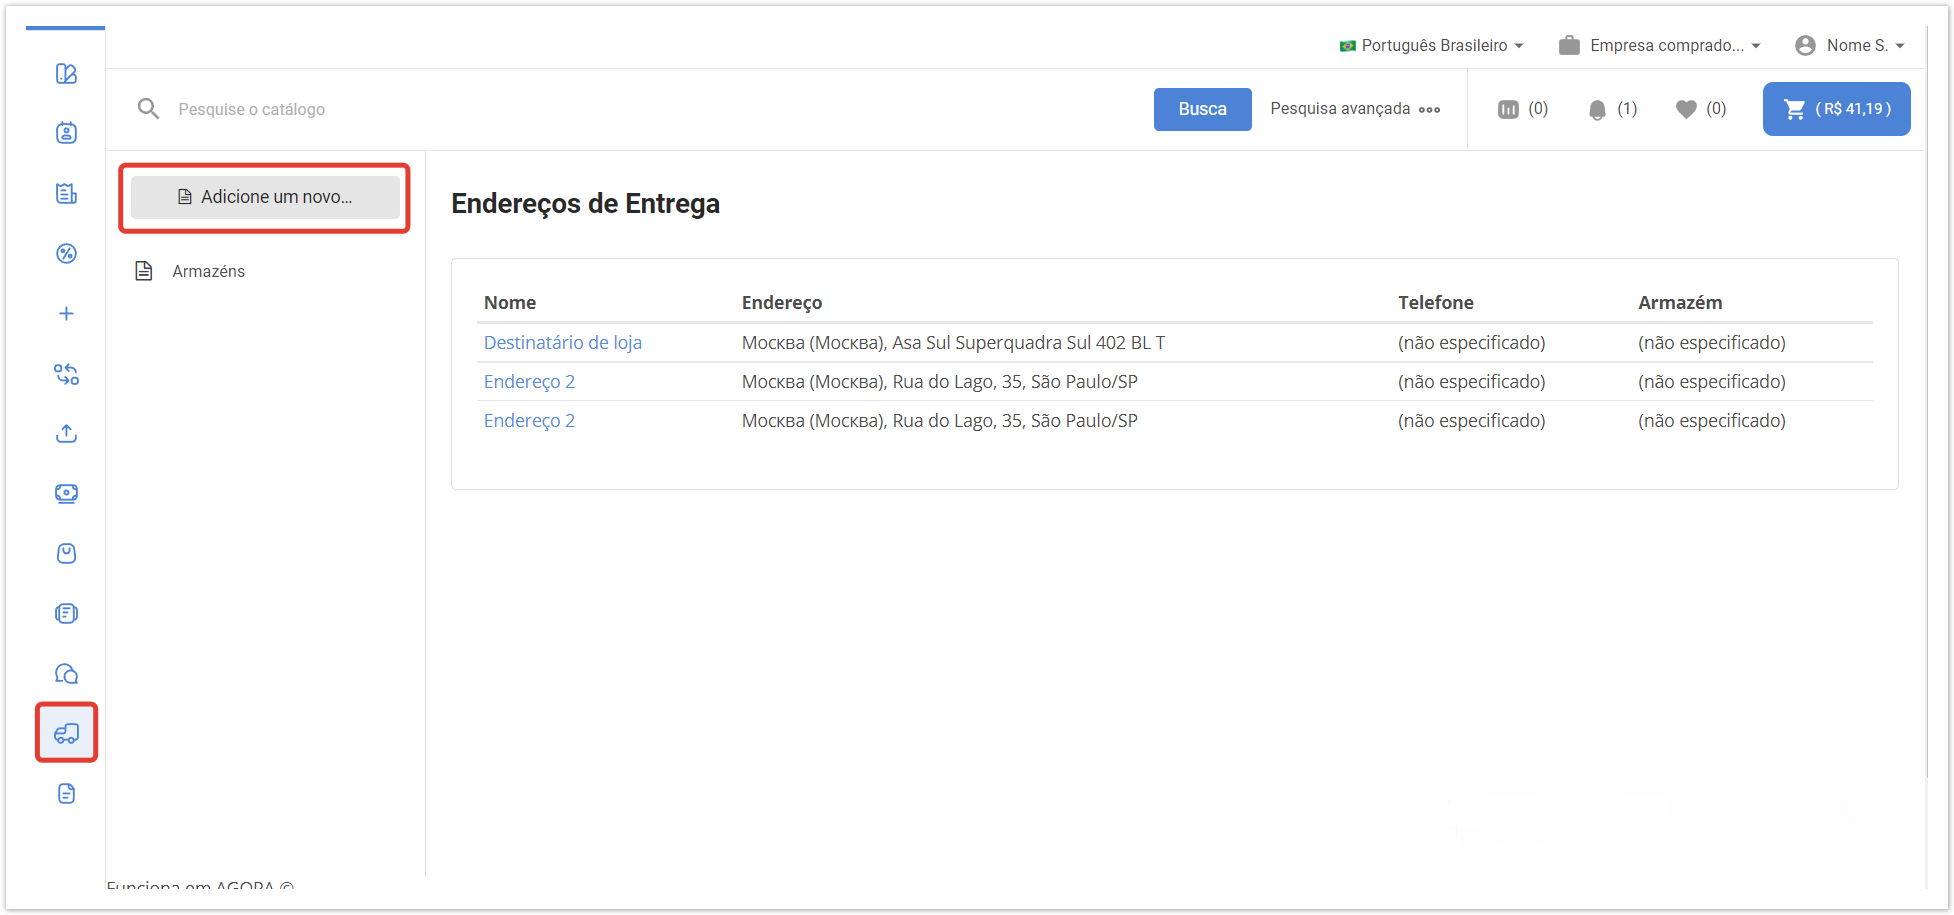
При переходе непосредственно в раздел есть возможность посмотреть все созданные на портале шаблоны грузополучателей или добавить нового грузополучателя с помощью кнопки Добавить Грузополучатель:
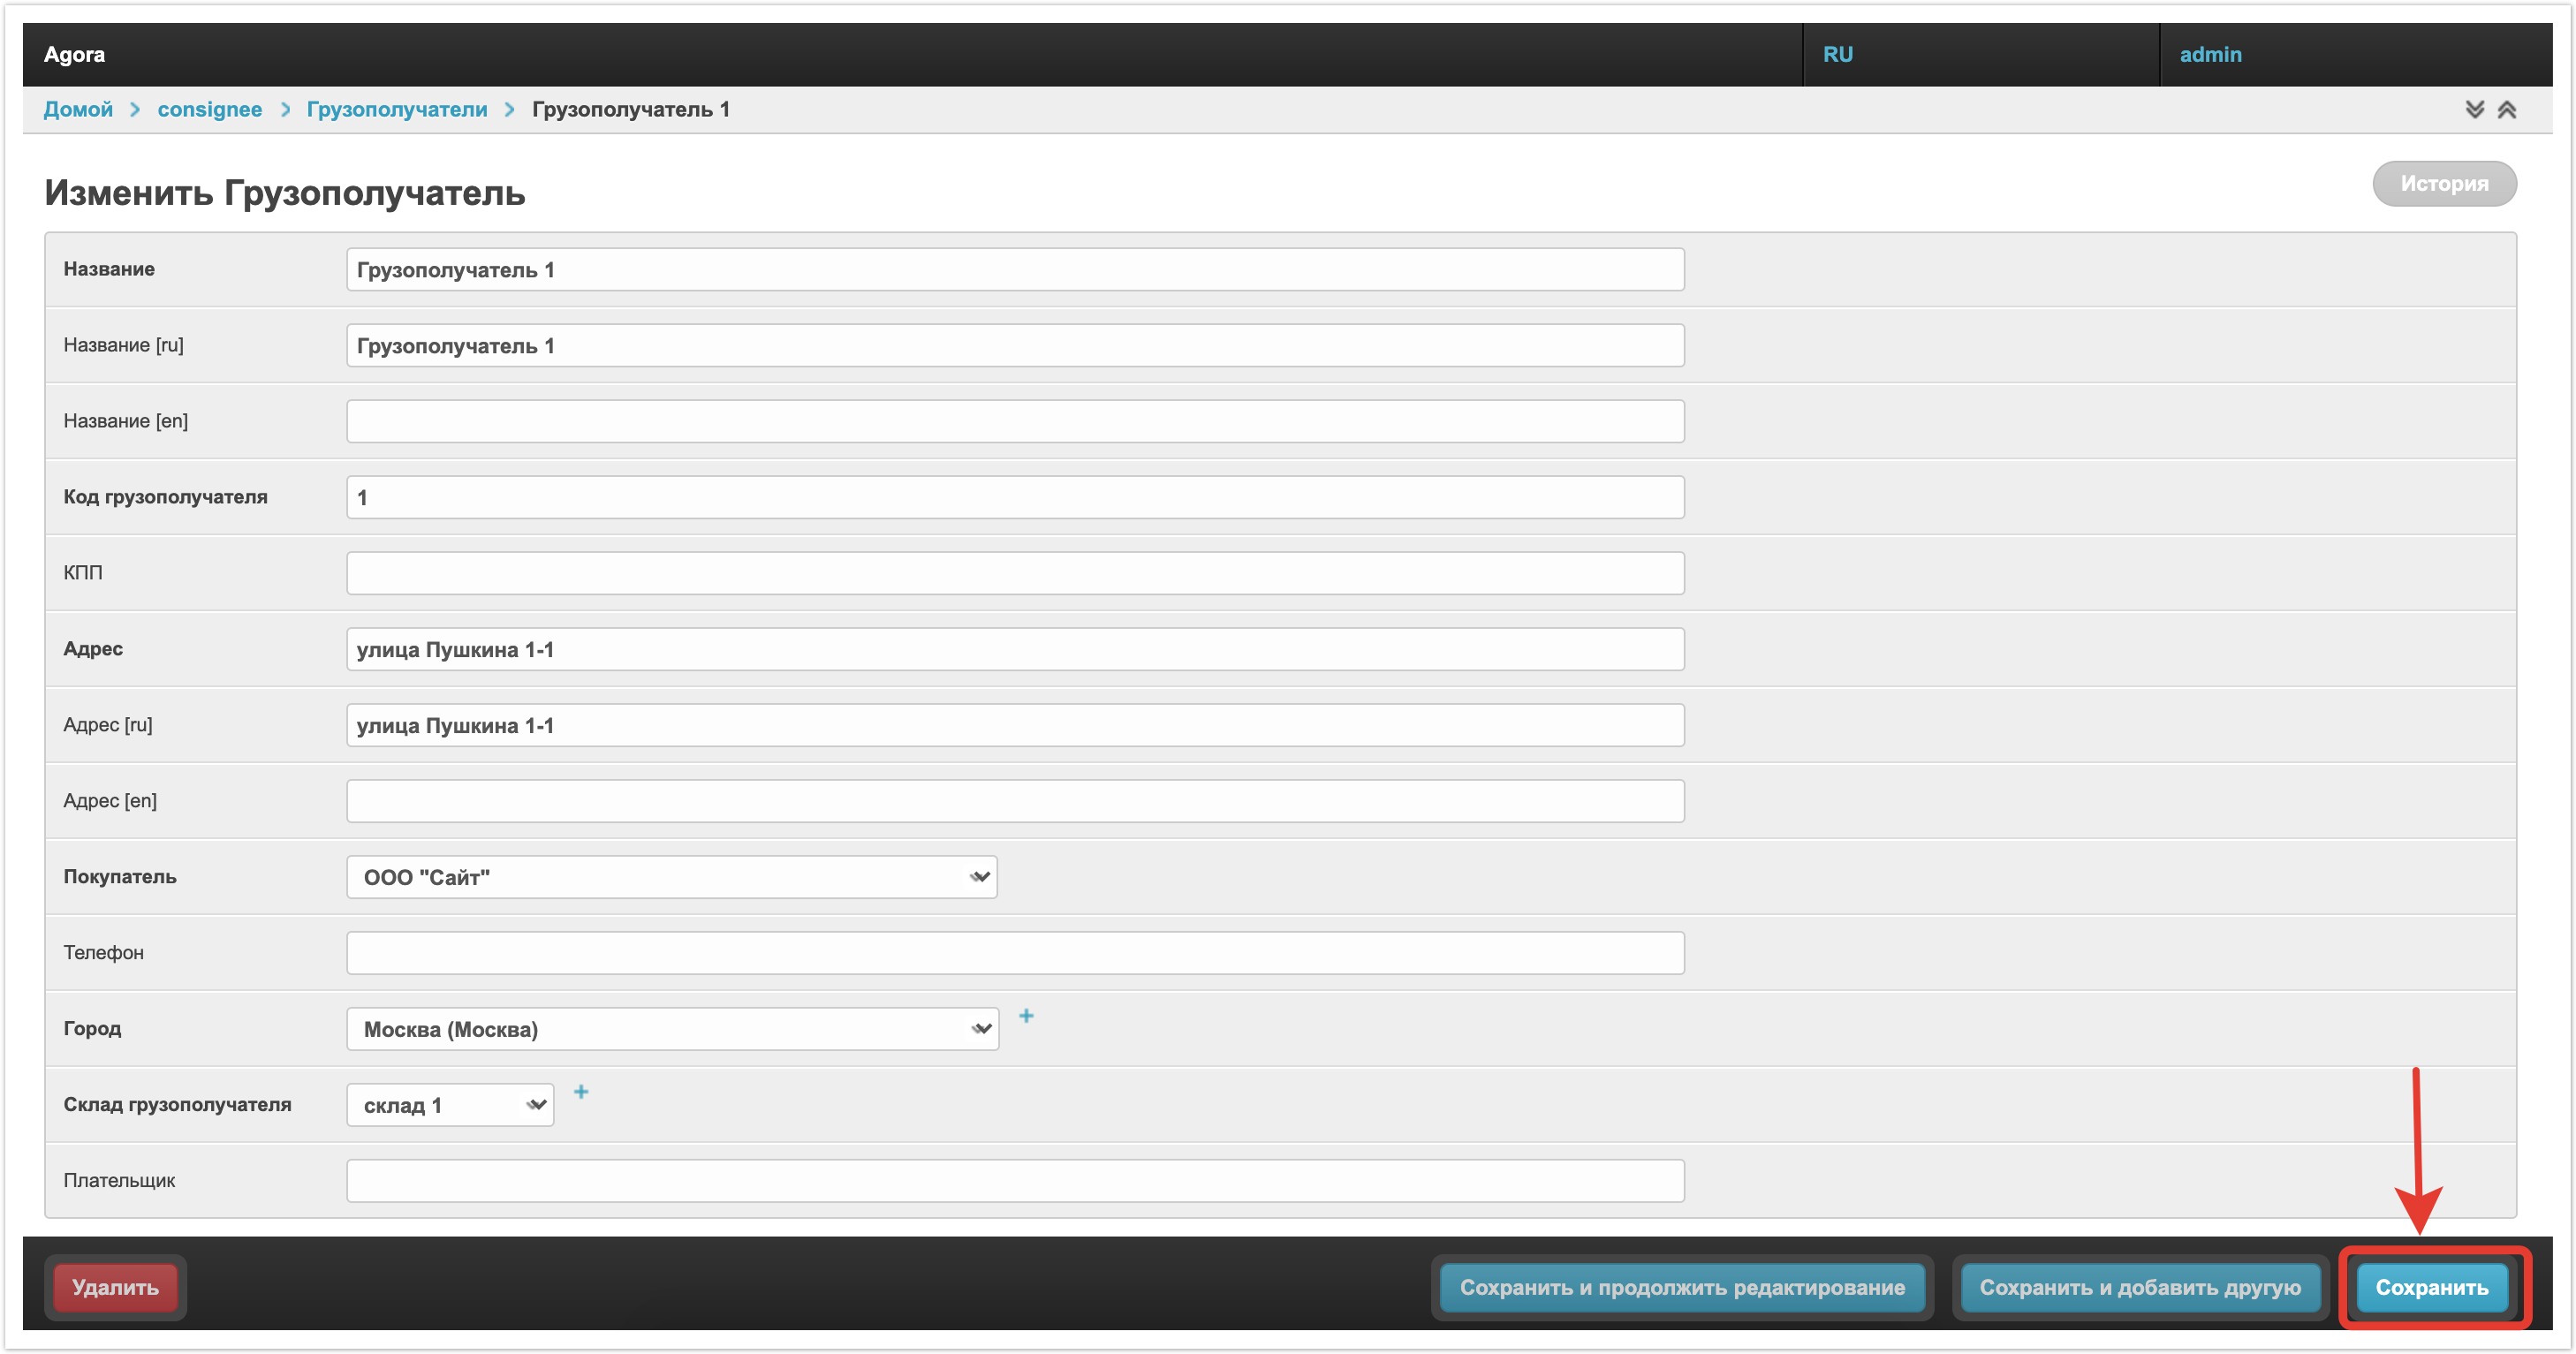
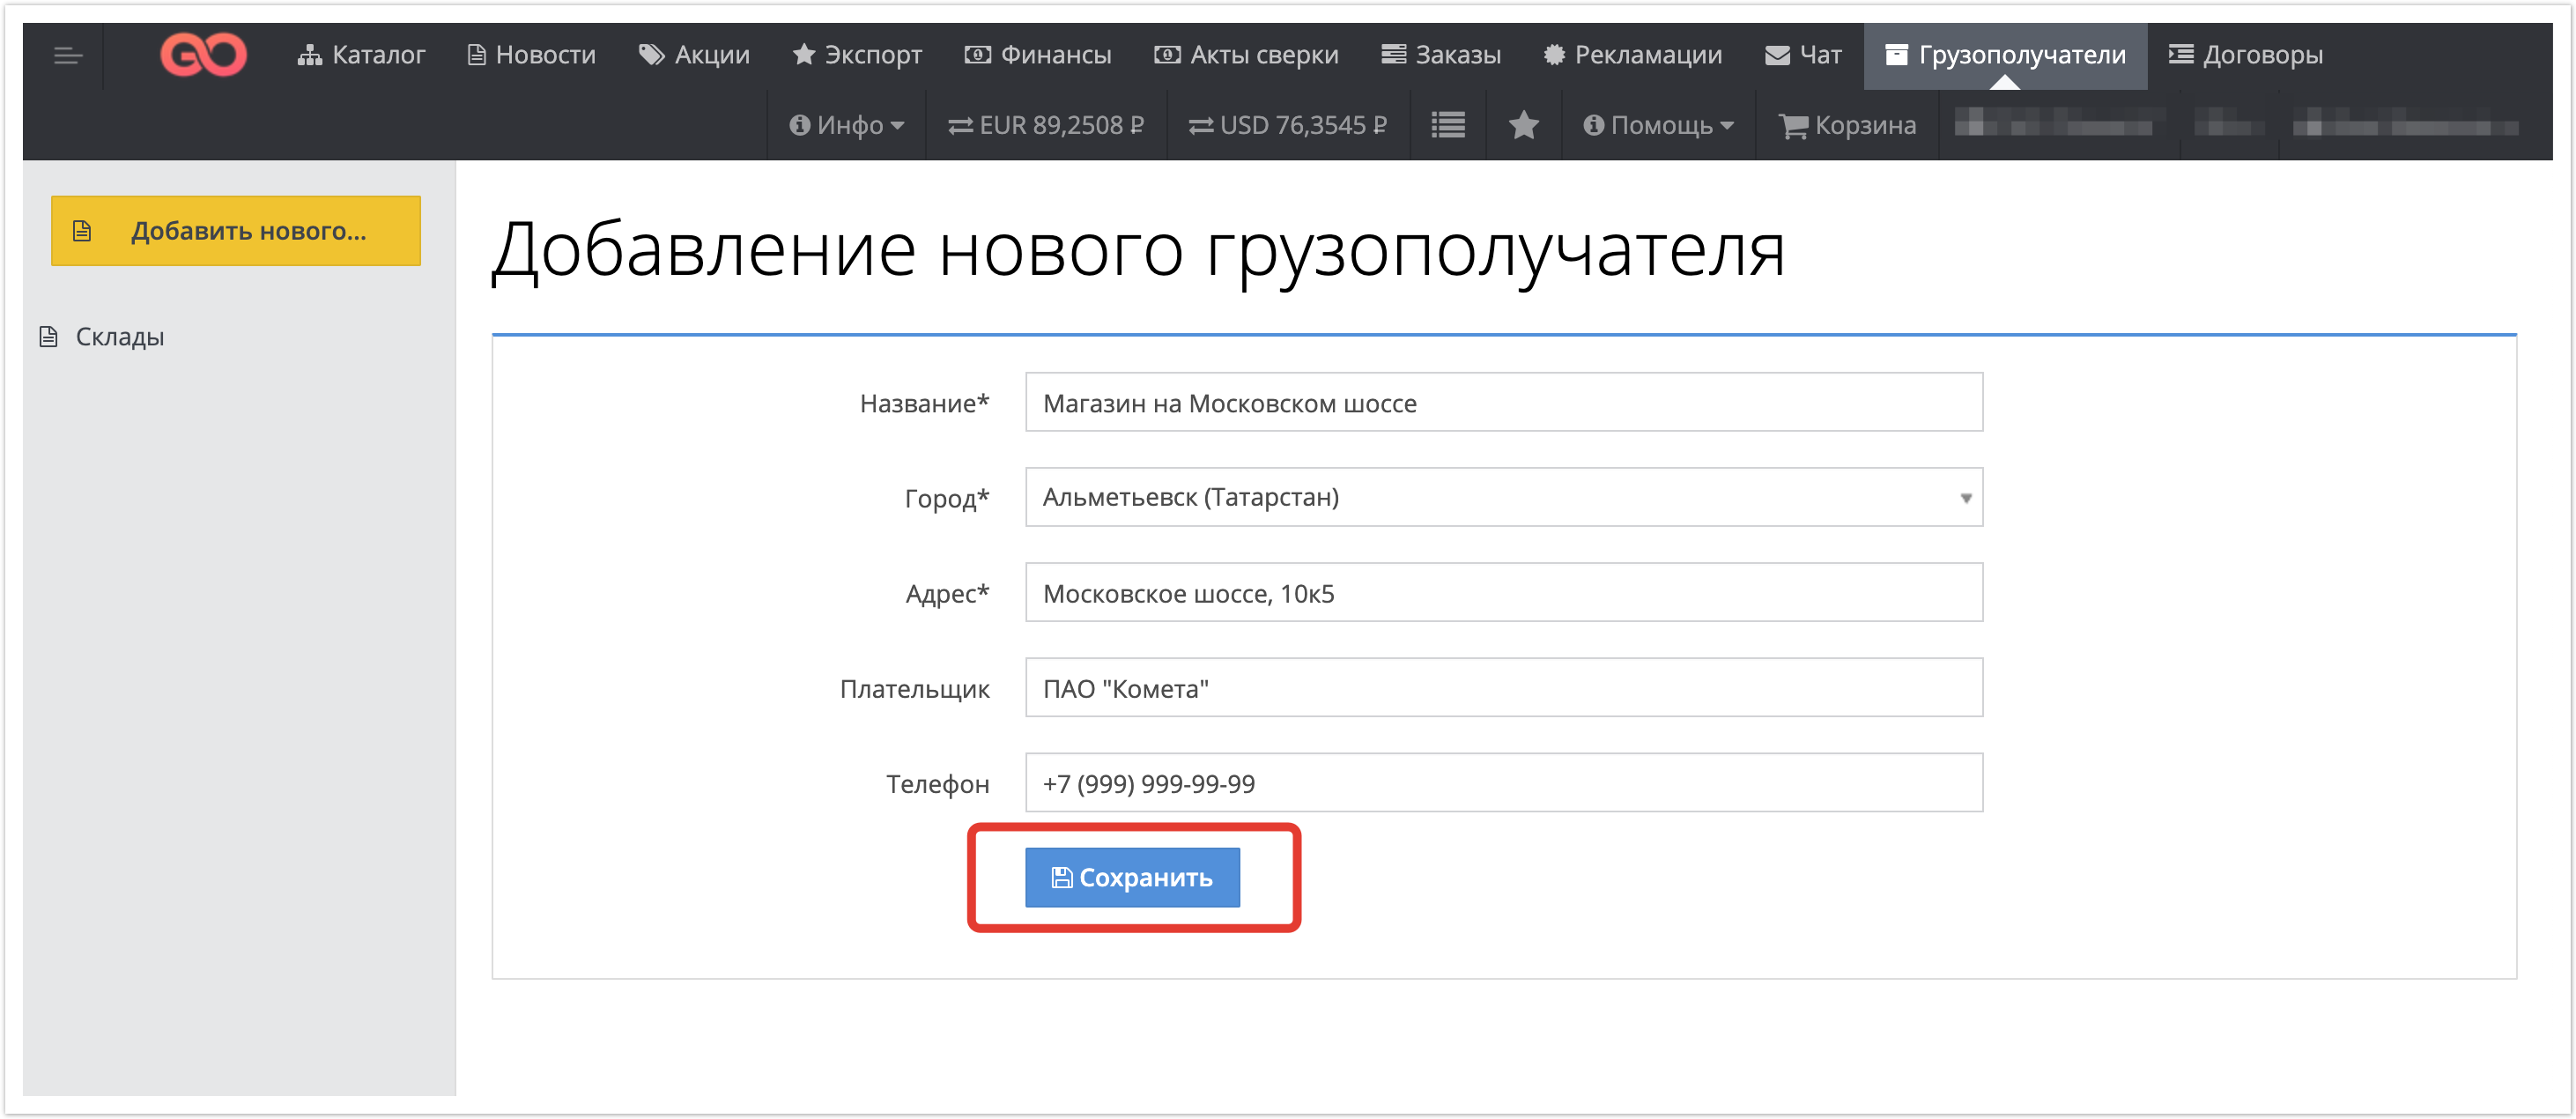
При переходе непосредственно в шаблон есть возможность редактировать реквизиты (название грузополучателя, адрес, телефон, склад и проч.). видео:
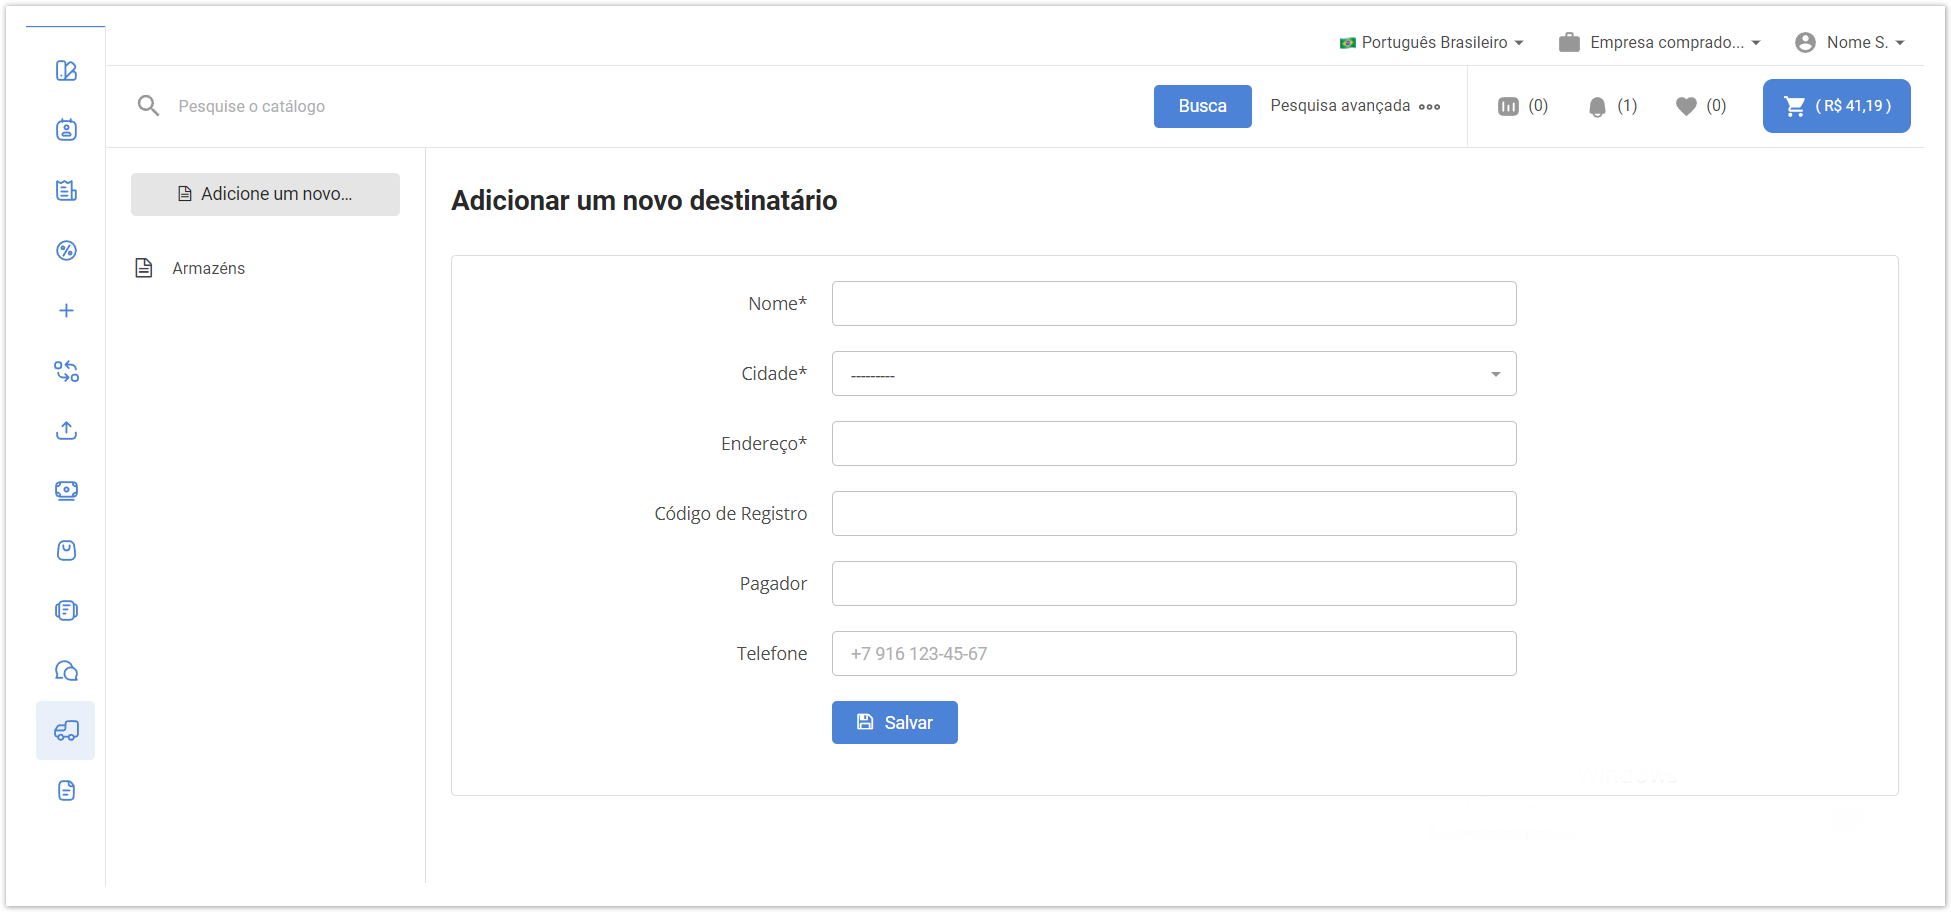
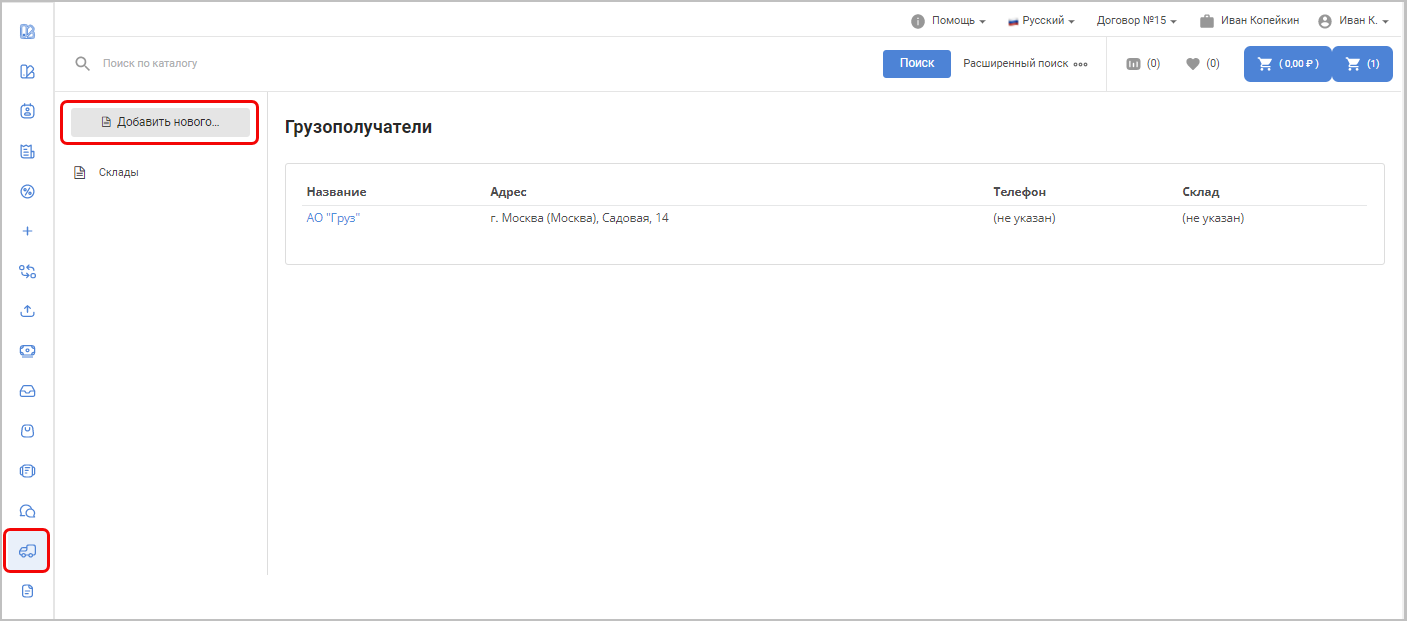
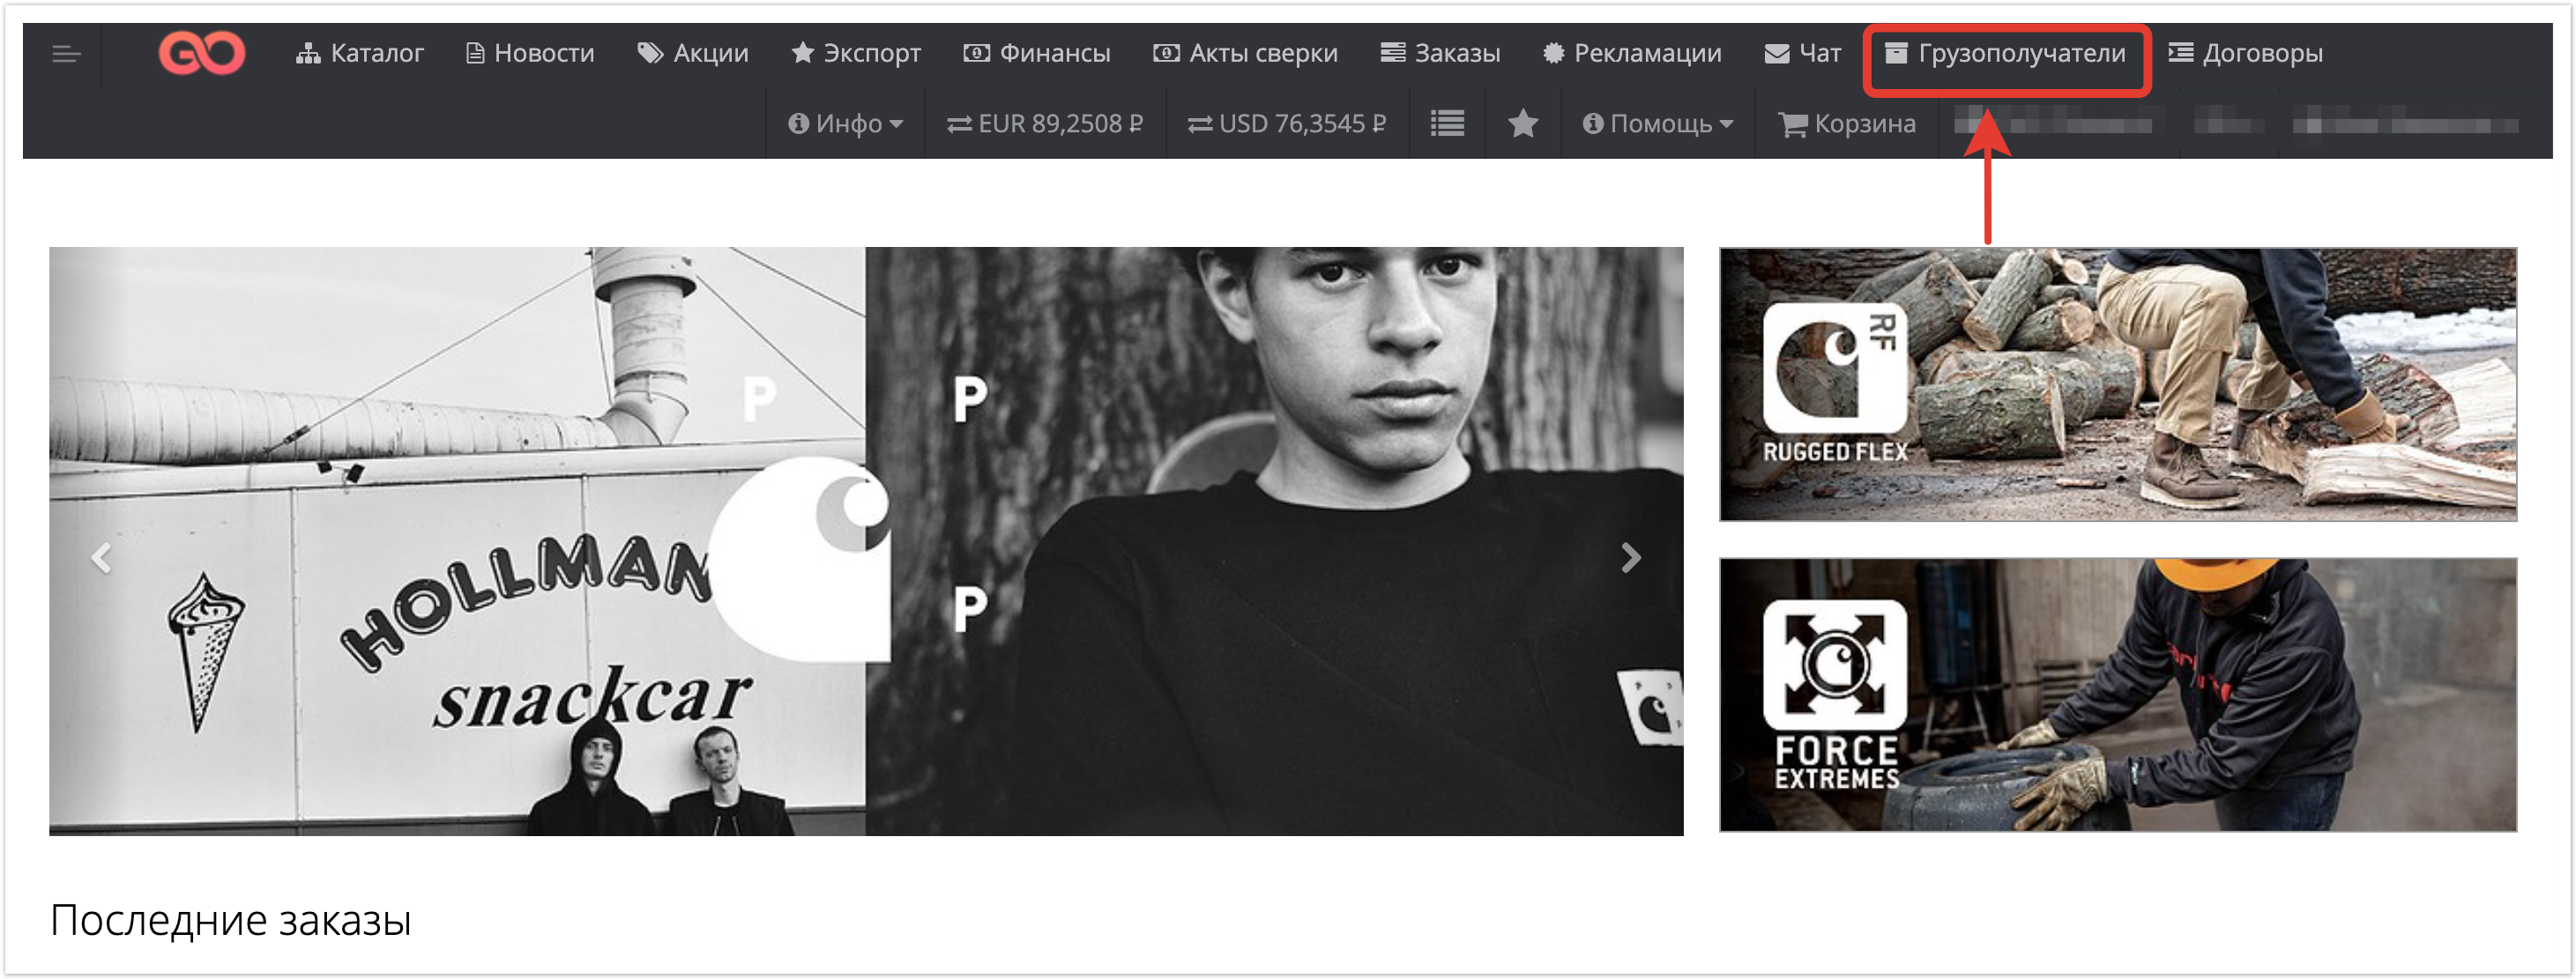
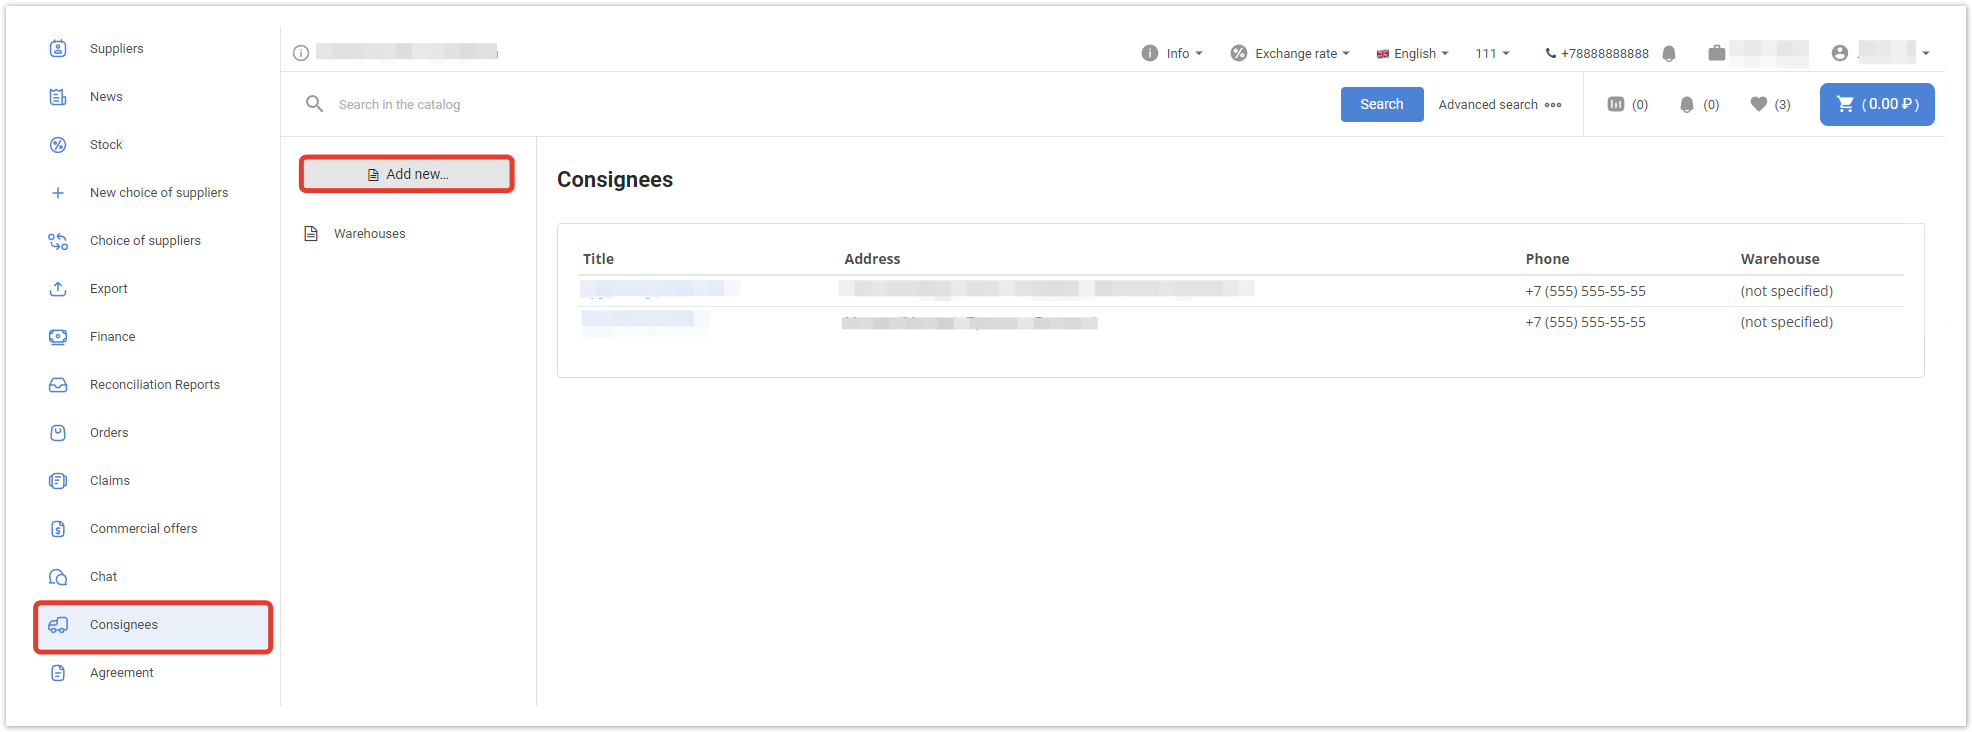
Настройка грузополучателей в личном кабинетеВ личном кабинете покупателя, расположенном по адресу название_проекта.agora.ru, работа с разделом Грузополучатели строится следующим образом: На панели справа нажмите на значок
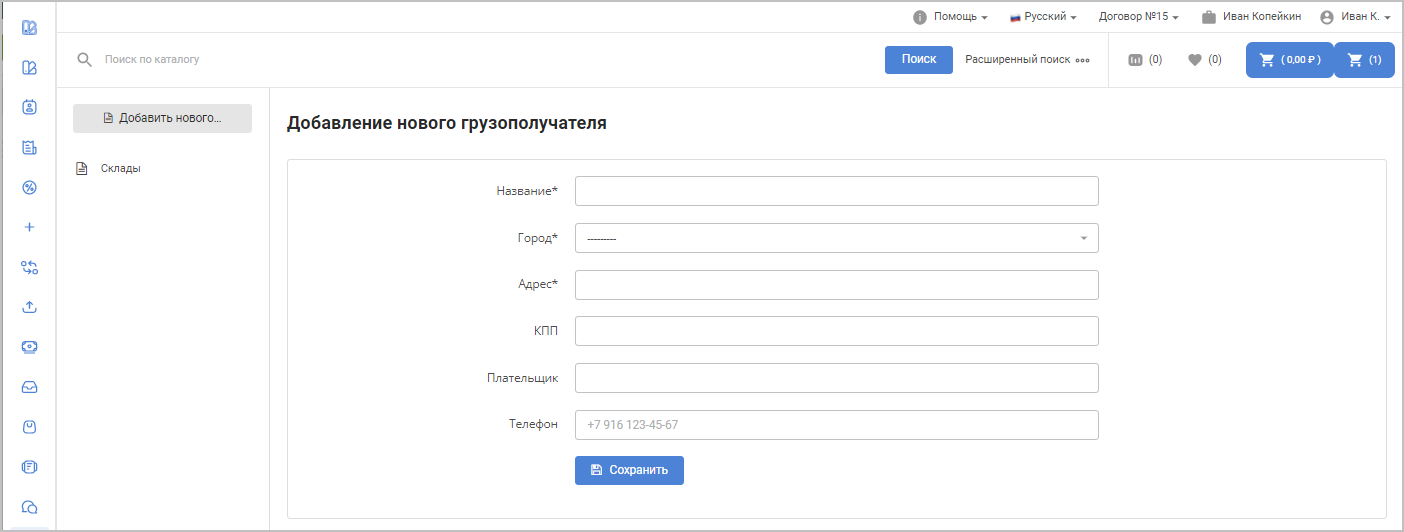
Далее необходимо заполнить все реквизиты (название, город, адрес и проч.) и нажать на кнопку Сохранить:
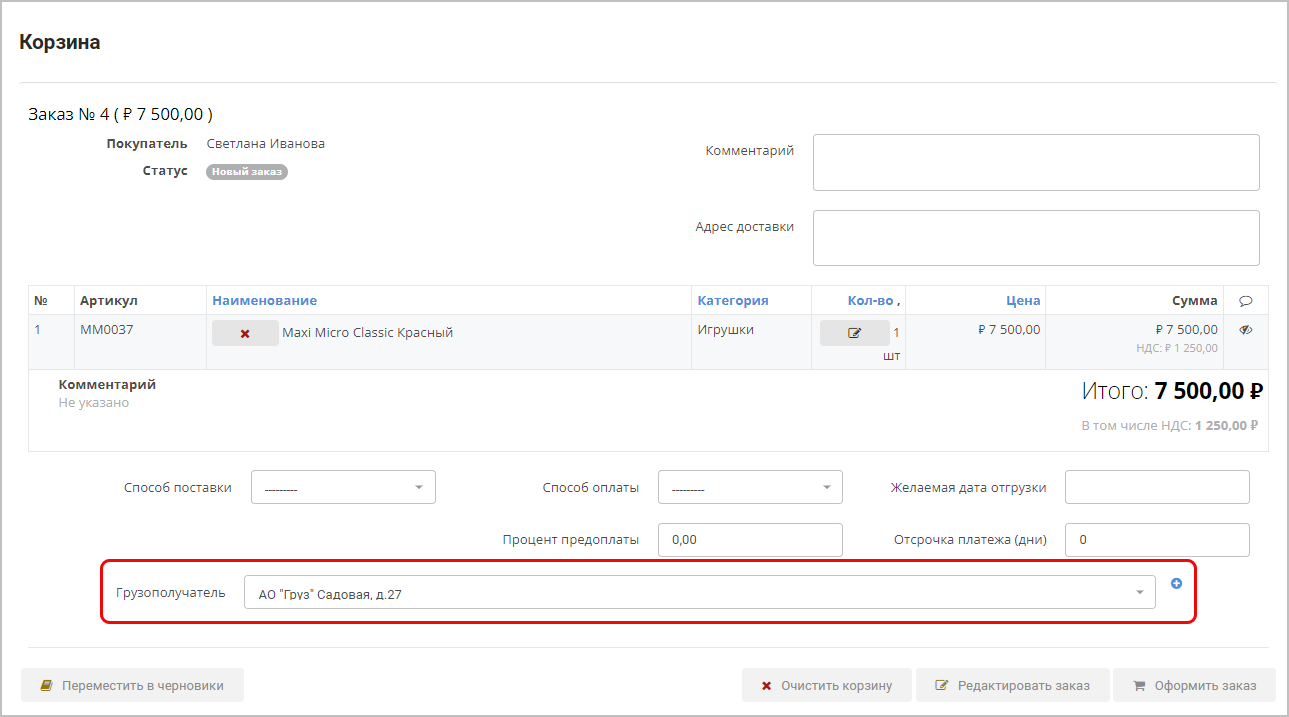
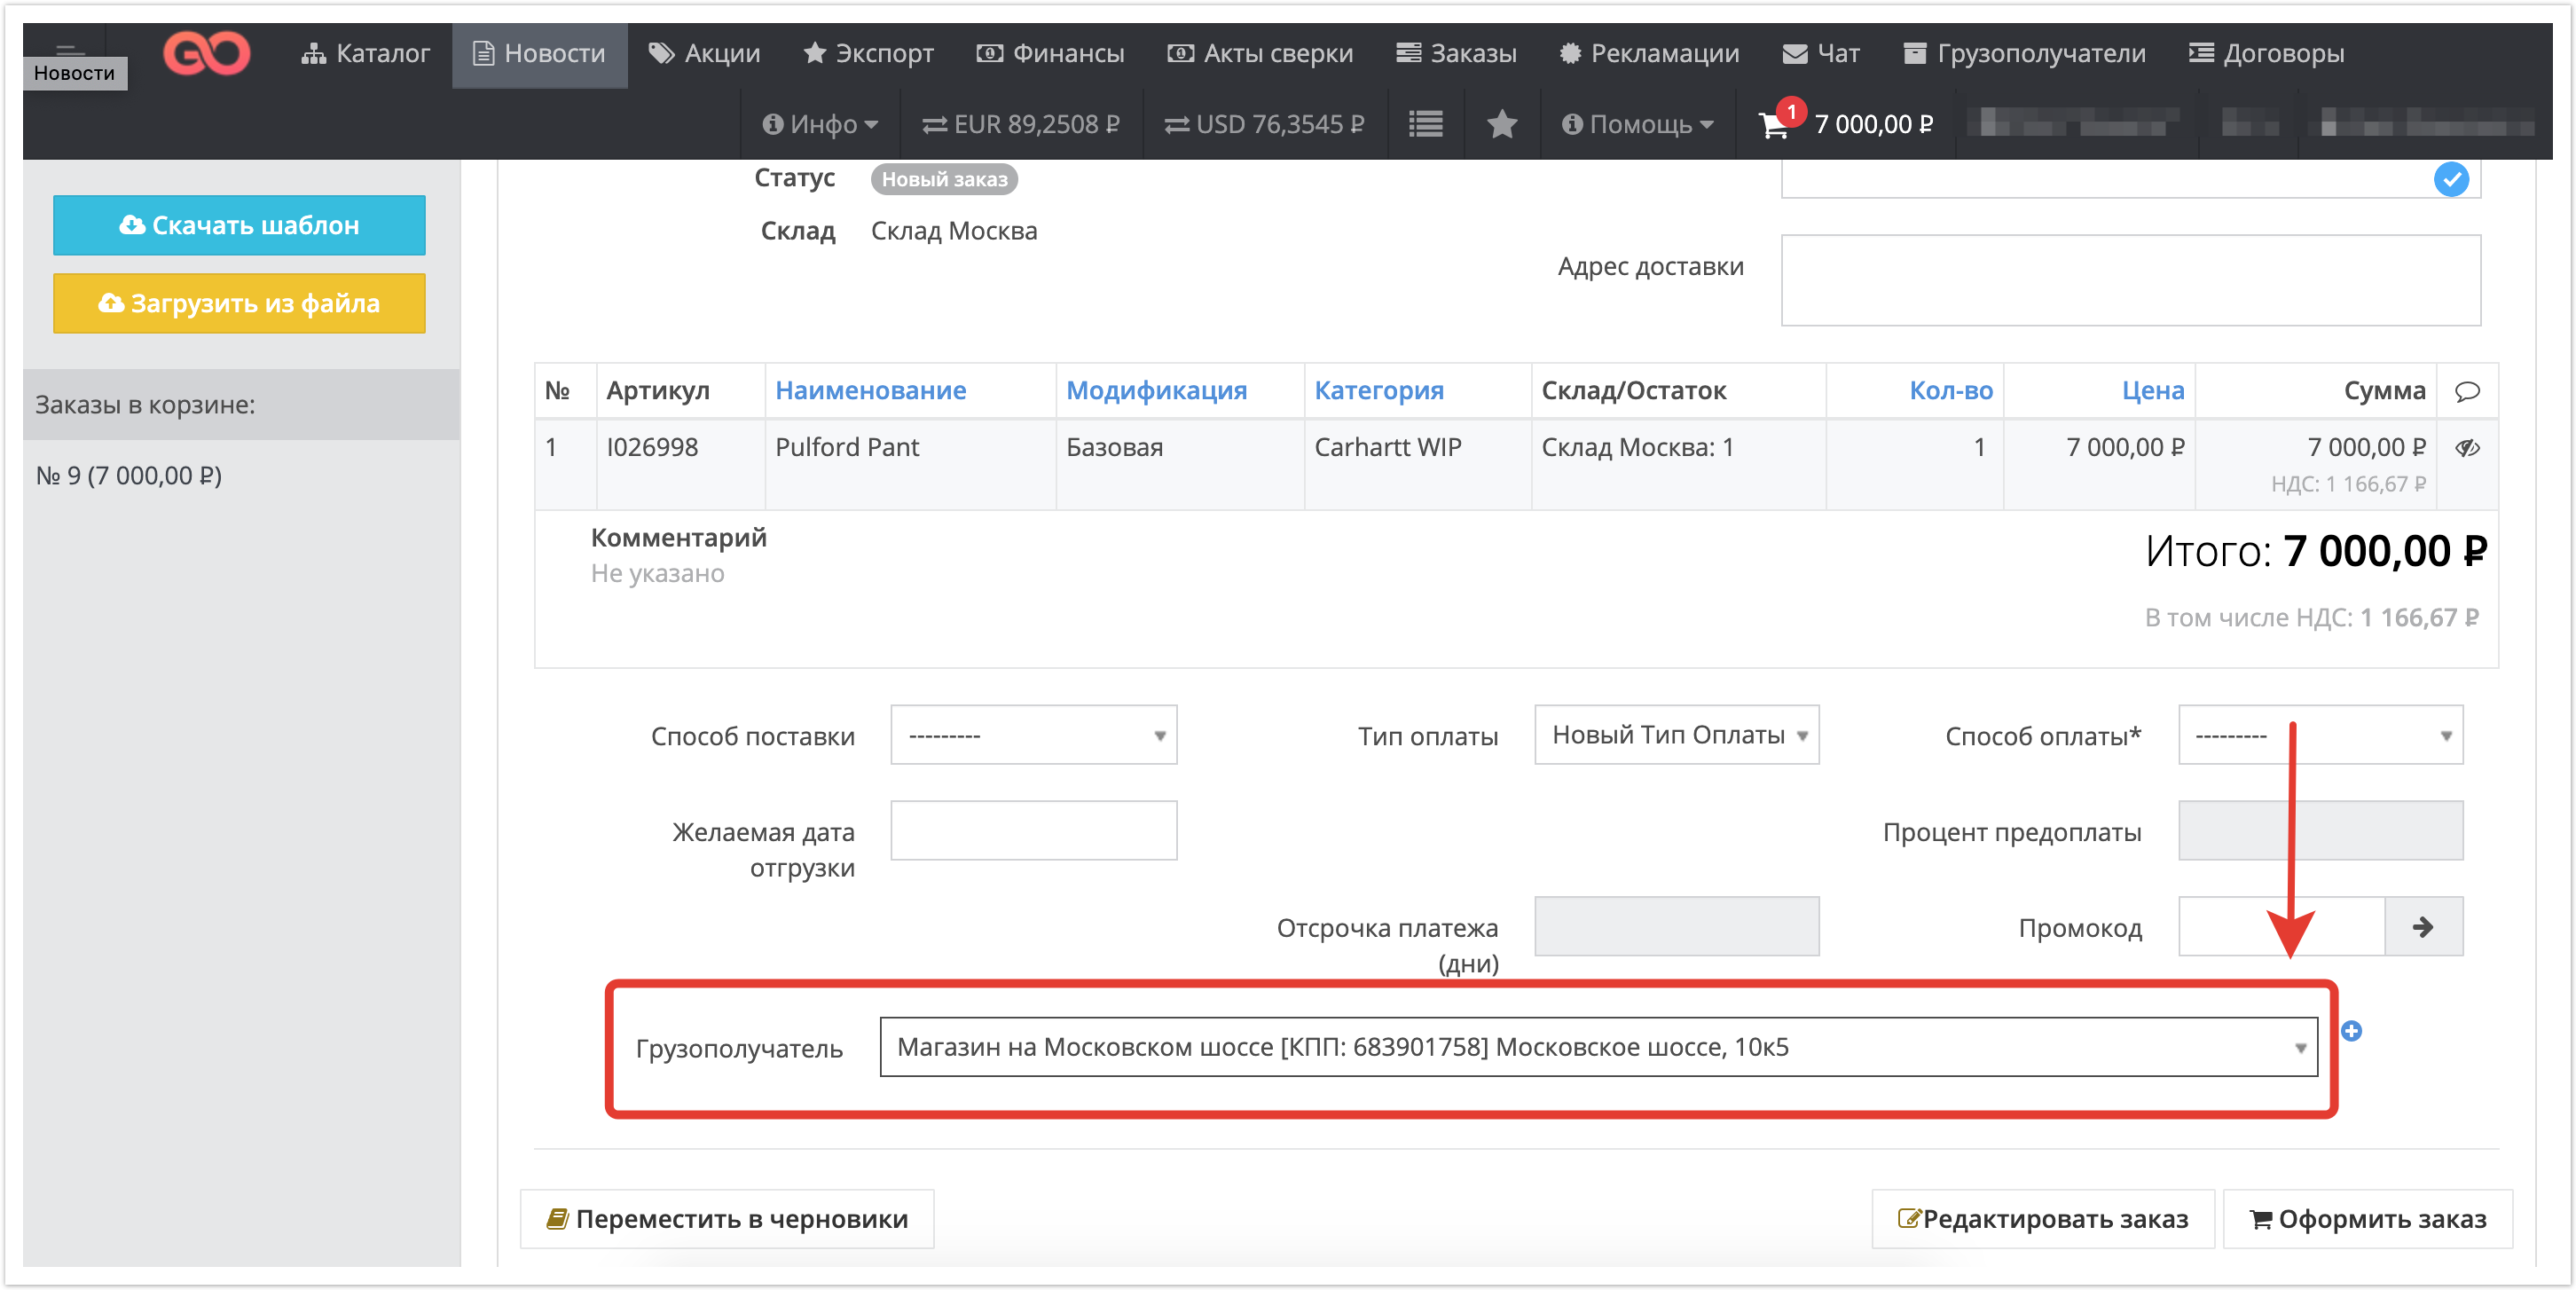
Добавление грузополучателя также возможно через панель администратора. Этот процесс описан на отдельной странице. Применение созданных шаблонов при оформлении заказаВсе грузополучатели покупателя будут доступны в в выпадающем списке, чтобы была возможность выбрать необходимый шаблон:
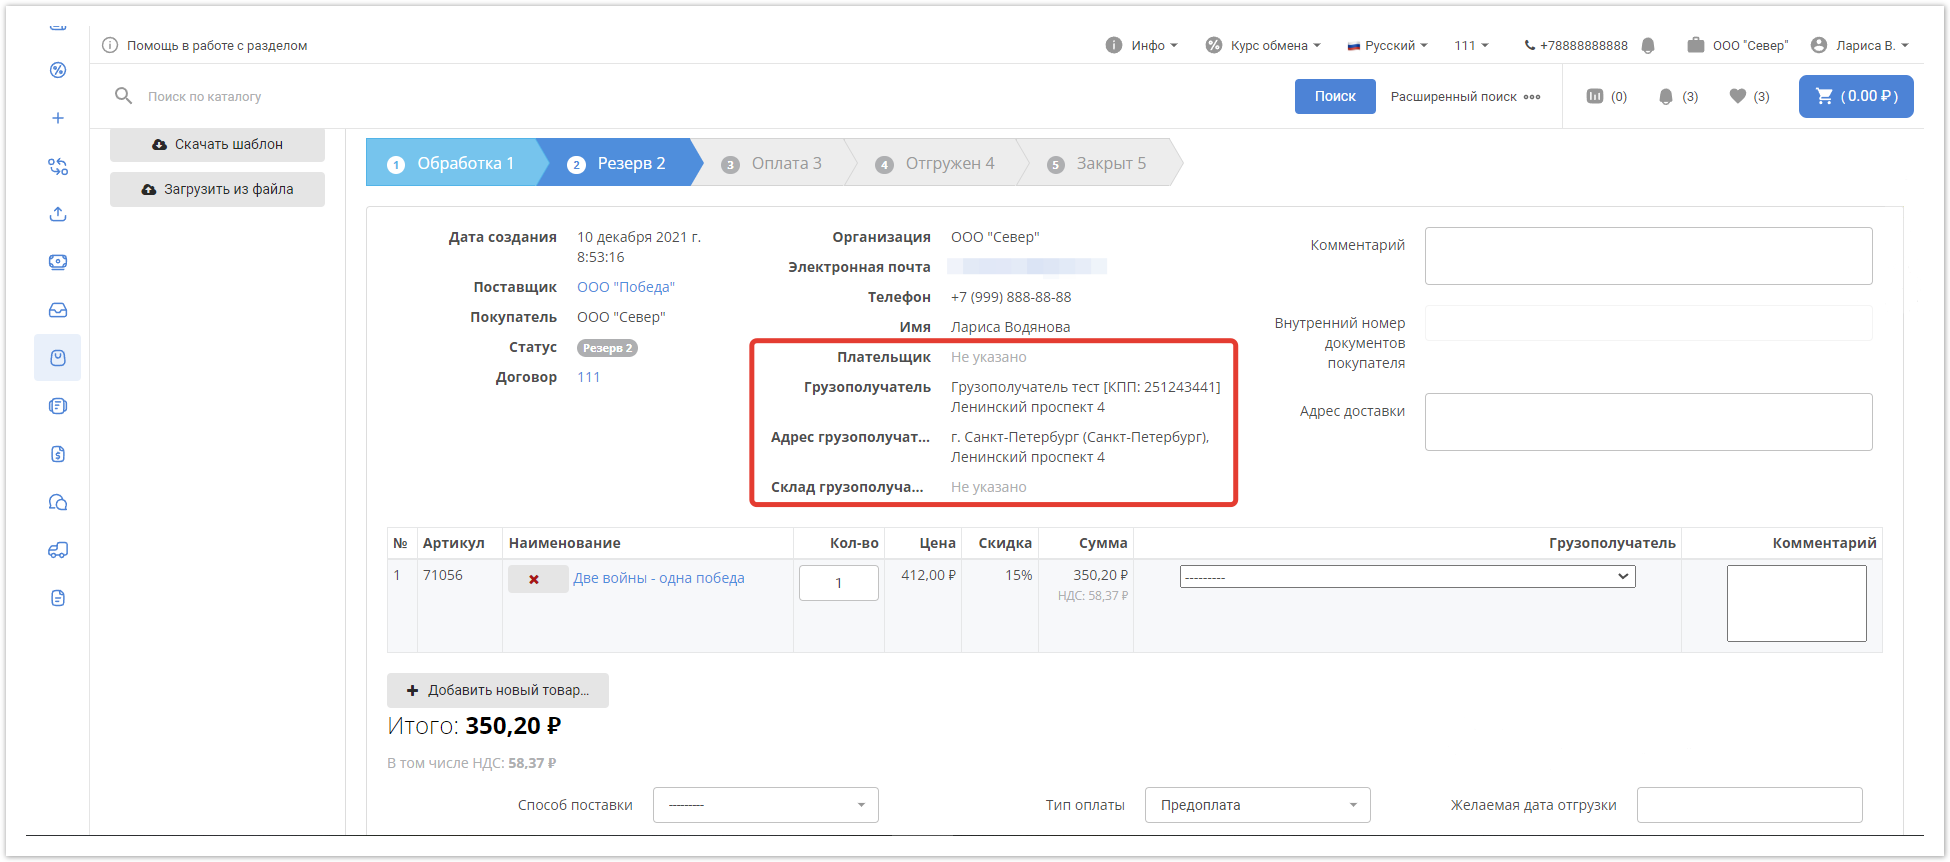
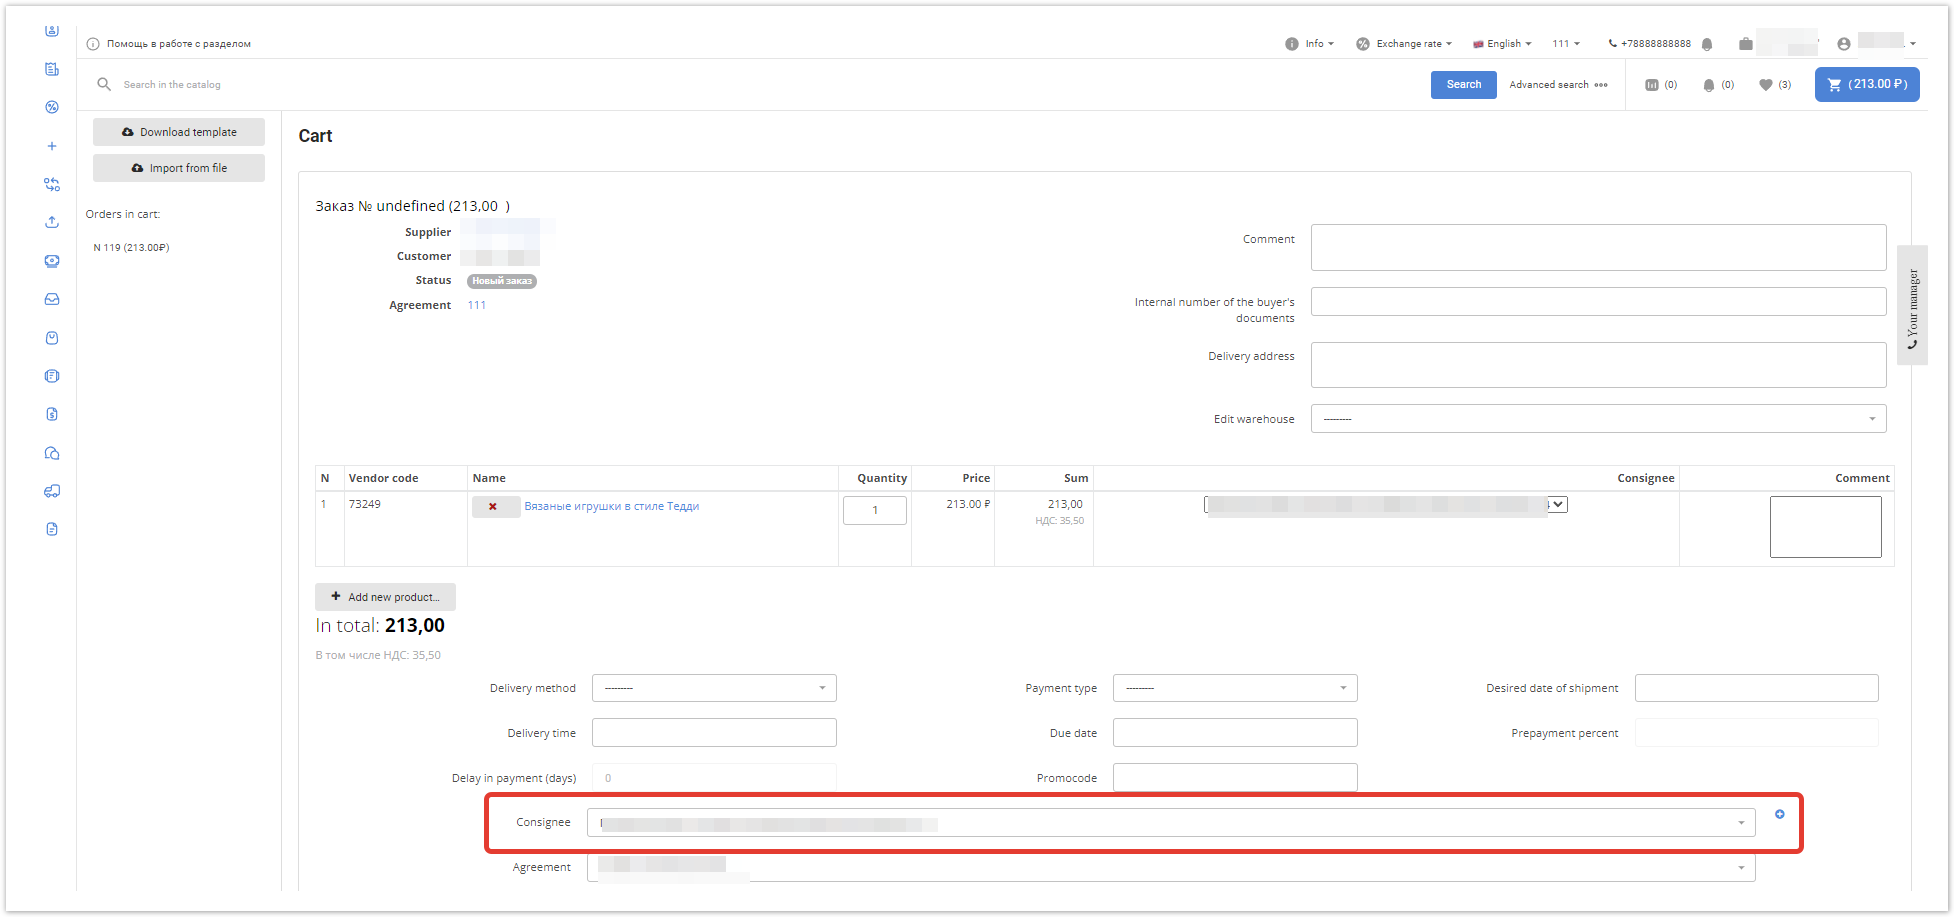
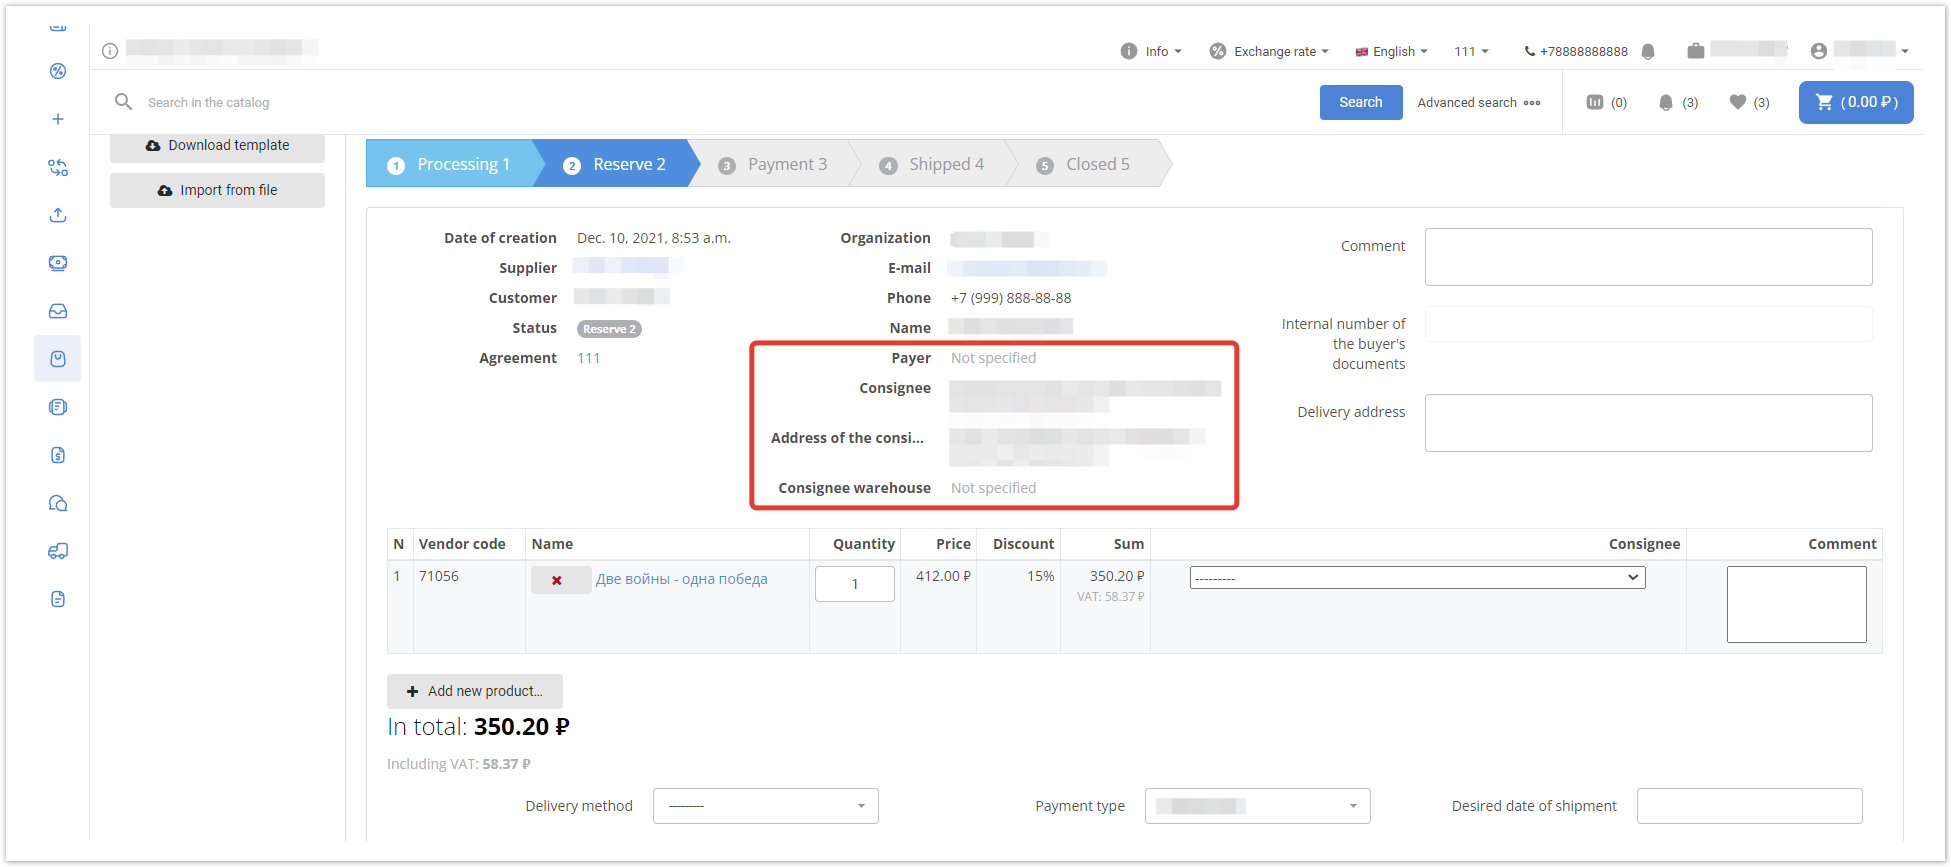
В оформленном заказе также будет отображаться информация о грузополучателе:
|

| Sv translation | ||
|---|---|---|
| ||
In the administrative panel, the Consignees section is available in the Shop - Product catalog section:
When you go directly to the section, you can see all the templates of consignees created on the portal, or add a new consignee using the "Add Consignee" button:
When you go directly to the template, you can edit the details. To save the changes made, you must click the "Save" button at the bottom of the page: In the customer's personal account, work with the Consignees section is structured as follows:
The section is available at the top of the page along with all the main sections of the personal account:
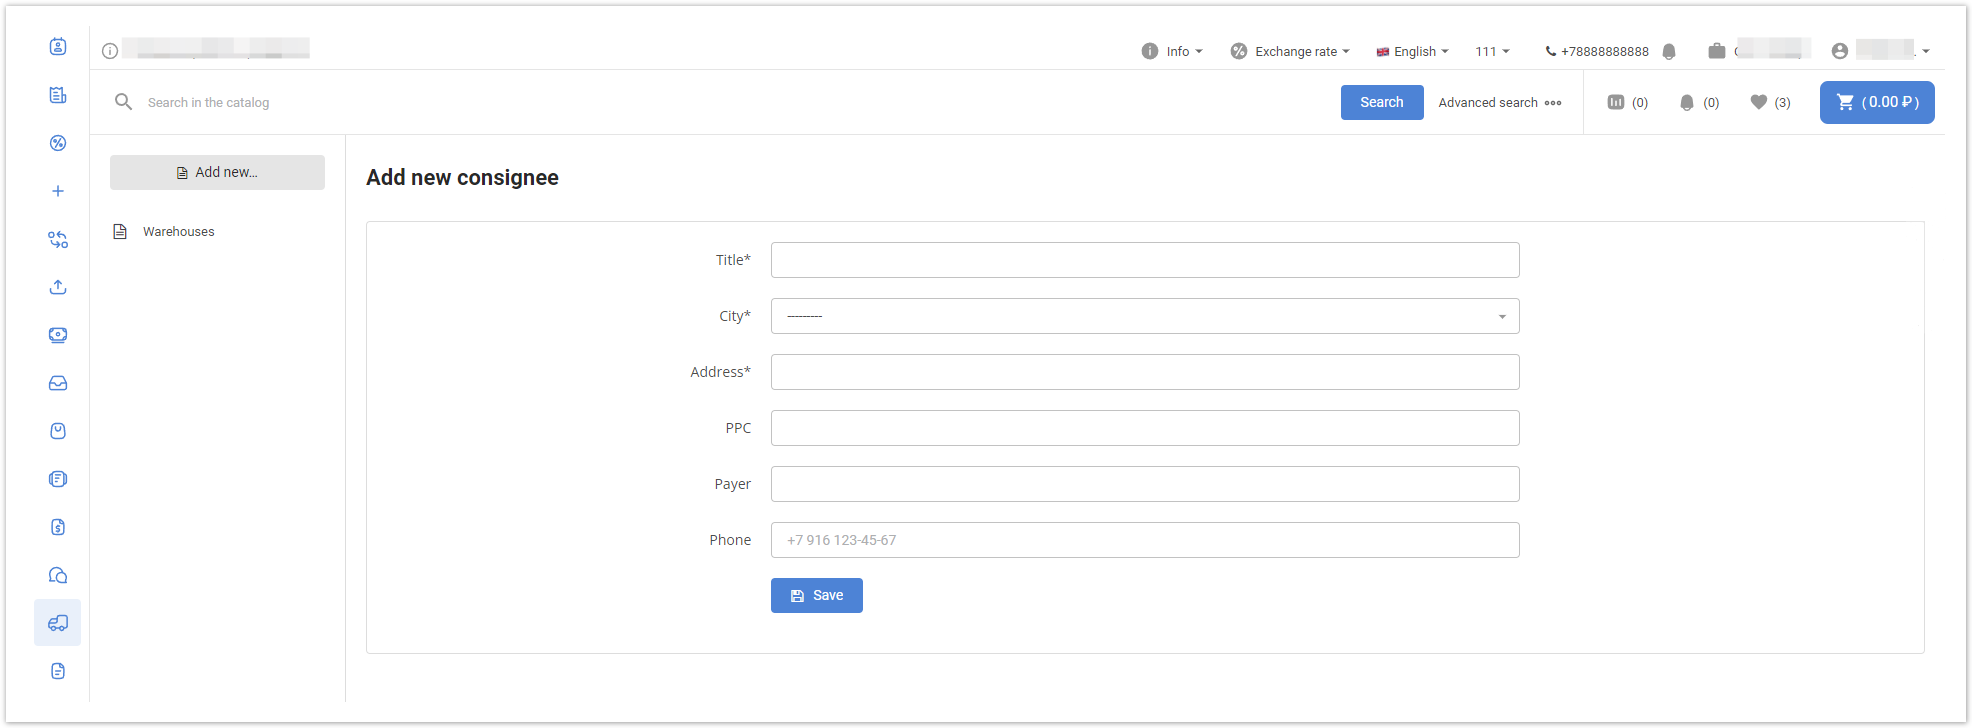
In this section, the customer has the opportunity to create a new template with details. This can be done by clicking on the "Add new ..." button:
Then fill in all the details and click on the "Save" button: Templates with delivery details can be created in the administrative panel or in the buyer's personal account. Subsequently, when placing an order in your personal account, in the Consignees section, you can select previously created templates. Setting up consignees in your personal accountIn the buyer's personal account located at project_name.agora.ru, work with the Consignees section is structured as follows: In the panel on the right, click on the icon
Next, you need to fill in all the details (name, city, address, etc.) and click on the Save button:
Adding a consignee is also possible through the admin panel. This process is described on a separate page. Application of the created templates at checkoutAll consignees of the buyer The use of the created templates is possible when placing an order. All consignees of the customerwill be available in the drop-down list to be able to select the required template:
The completed order will also display information about the consignee: 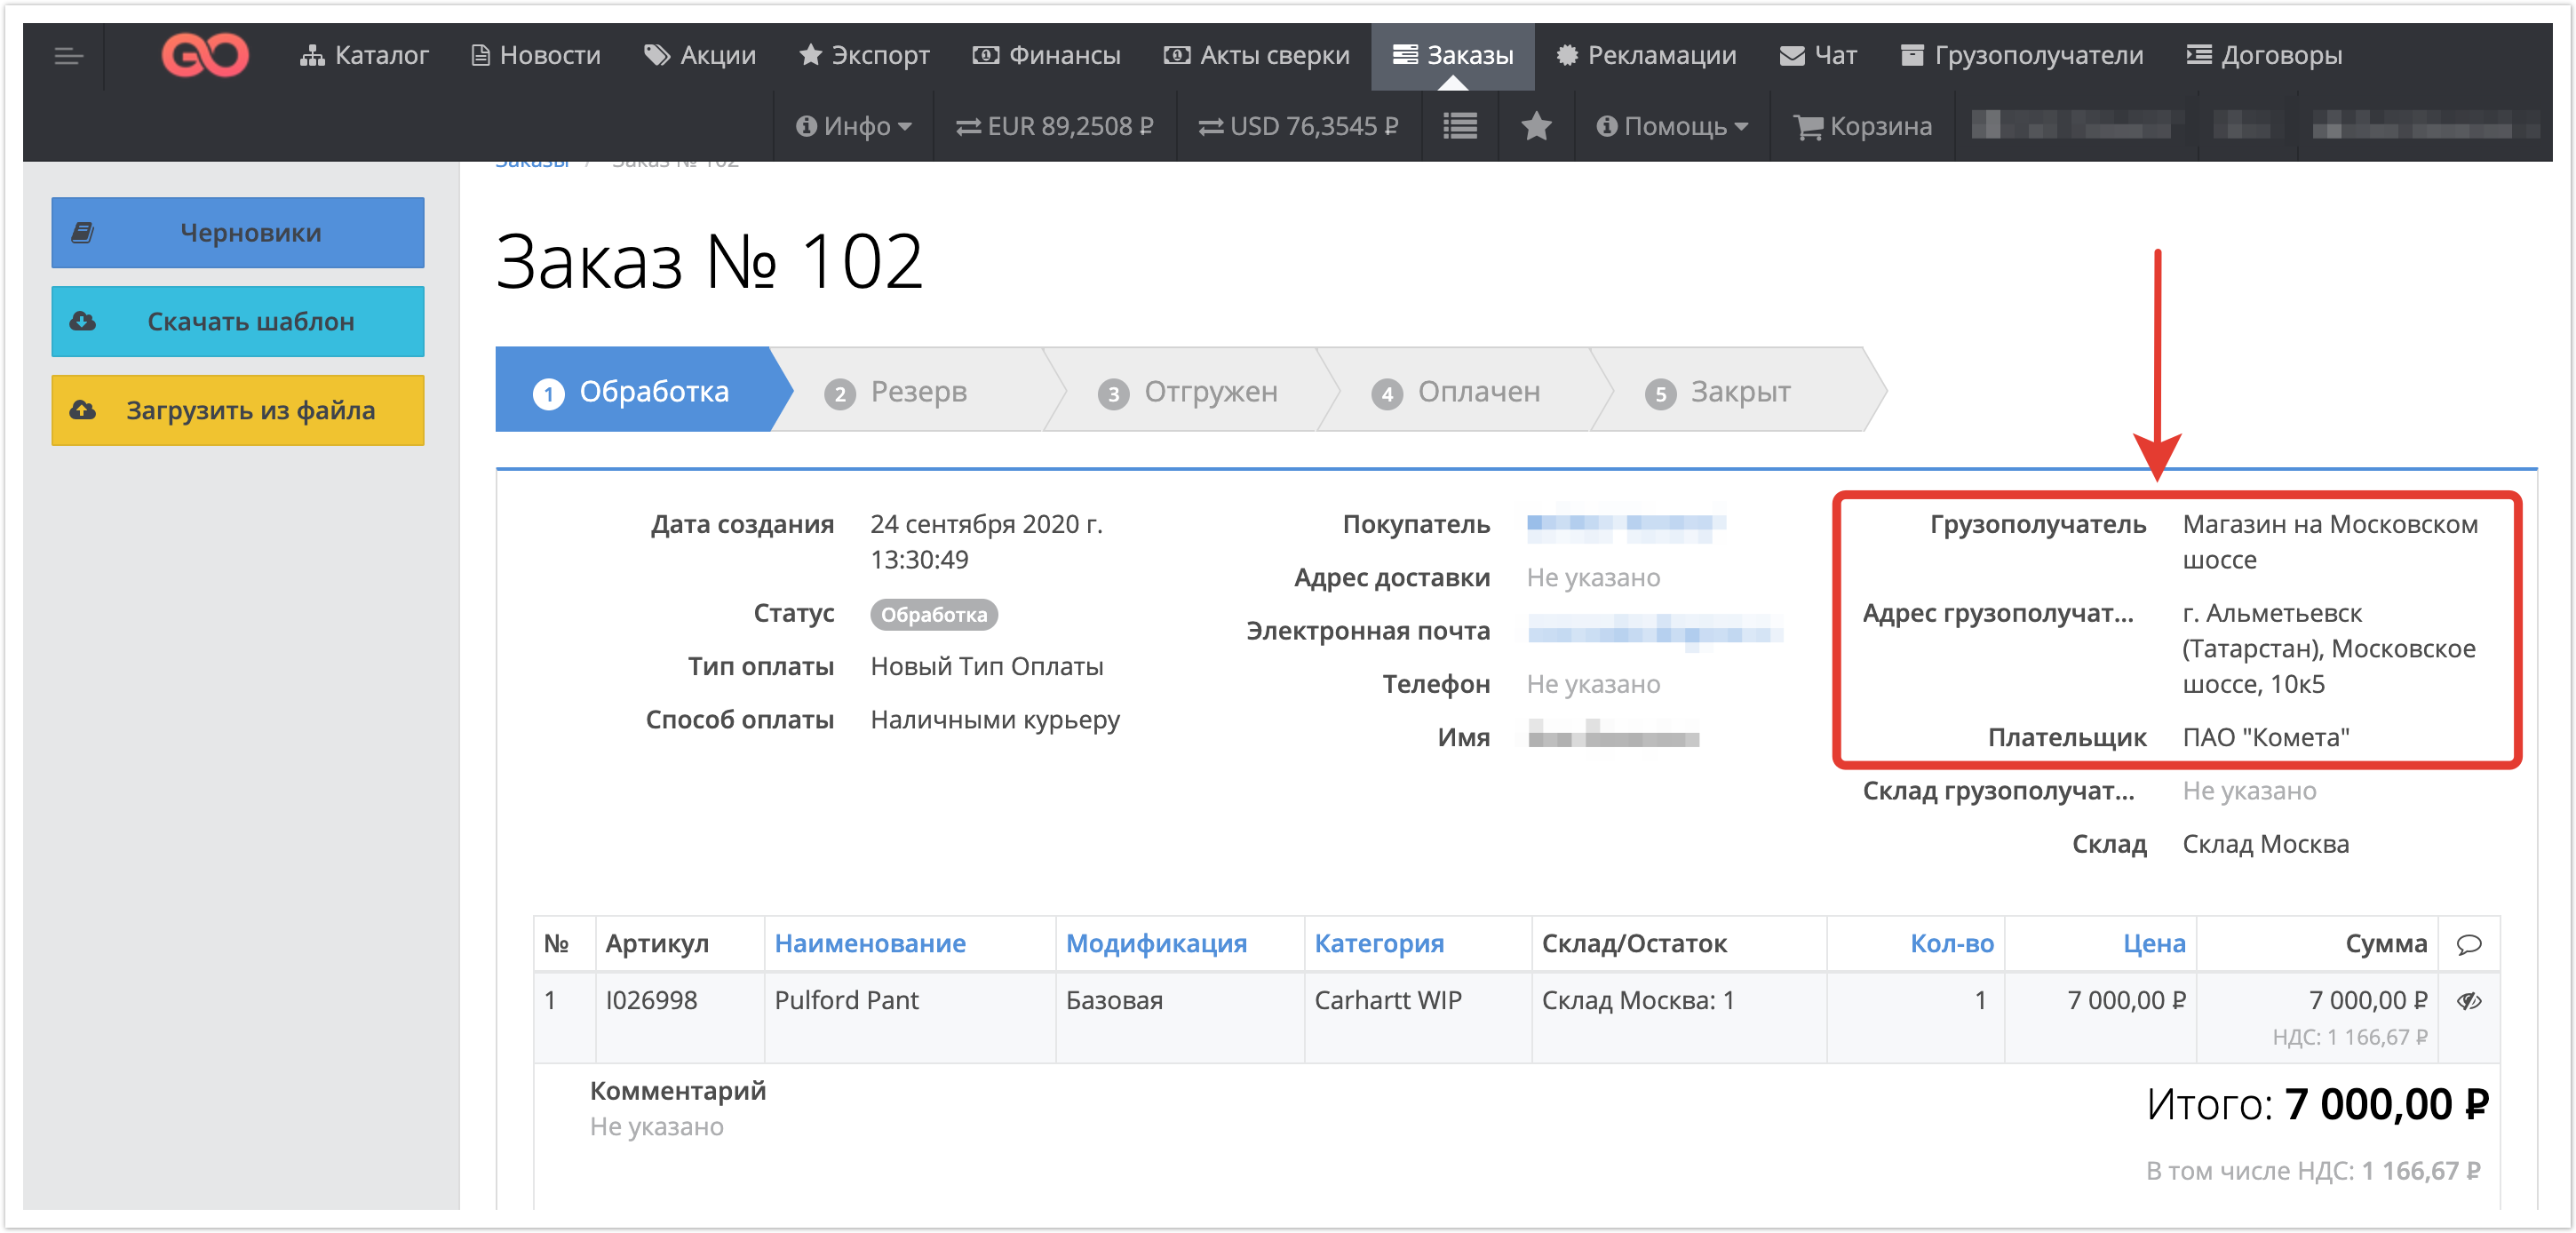
|
| Sv translation | ||
|---|---|---|
| ||
Modelos com detalhes de entrega podem ser inseridos no painel administrativo ou conta pessoal do comprador. Posteriormente, ao fazer um pedido em sua conta pessoal, na seção Consignees, você pode selecionar modelos criados anteriormente. Configuração deconsignes no painel administrativoconsignados em sua conta pessoalNa conta pessoal do comprador, localizada no endereço name_projectPara criar um modelo com detalhes, no painel administrativo localizado em project_name.agora.ru, selecione a obra com a seção Consignees:
de Endereços de Entrega é construída da seguinte forma: No painel direito, clique no
Em seguida, você precisa preencher todos os detalhes (nome, cidade, endereço, etc.) e clicar no botão Salvar:
Também é possível adicionar um destinatário através do painel administrativo. Esse processo é descrito em uma página separada. Aplique os modelos criados no checkoutTodos os consignes do comprador estarão disponíveis na lista de drop-down para que seja possível selecionar o modelo necessário:
|