
...
| Sv translation | |||||||||||||||||
|---|---|---|---|---|---|---|---|---|---|---|---|---|---|---|---|---|---|
| |||||||||||||||||
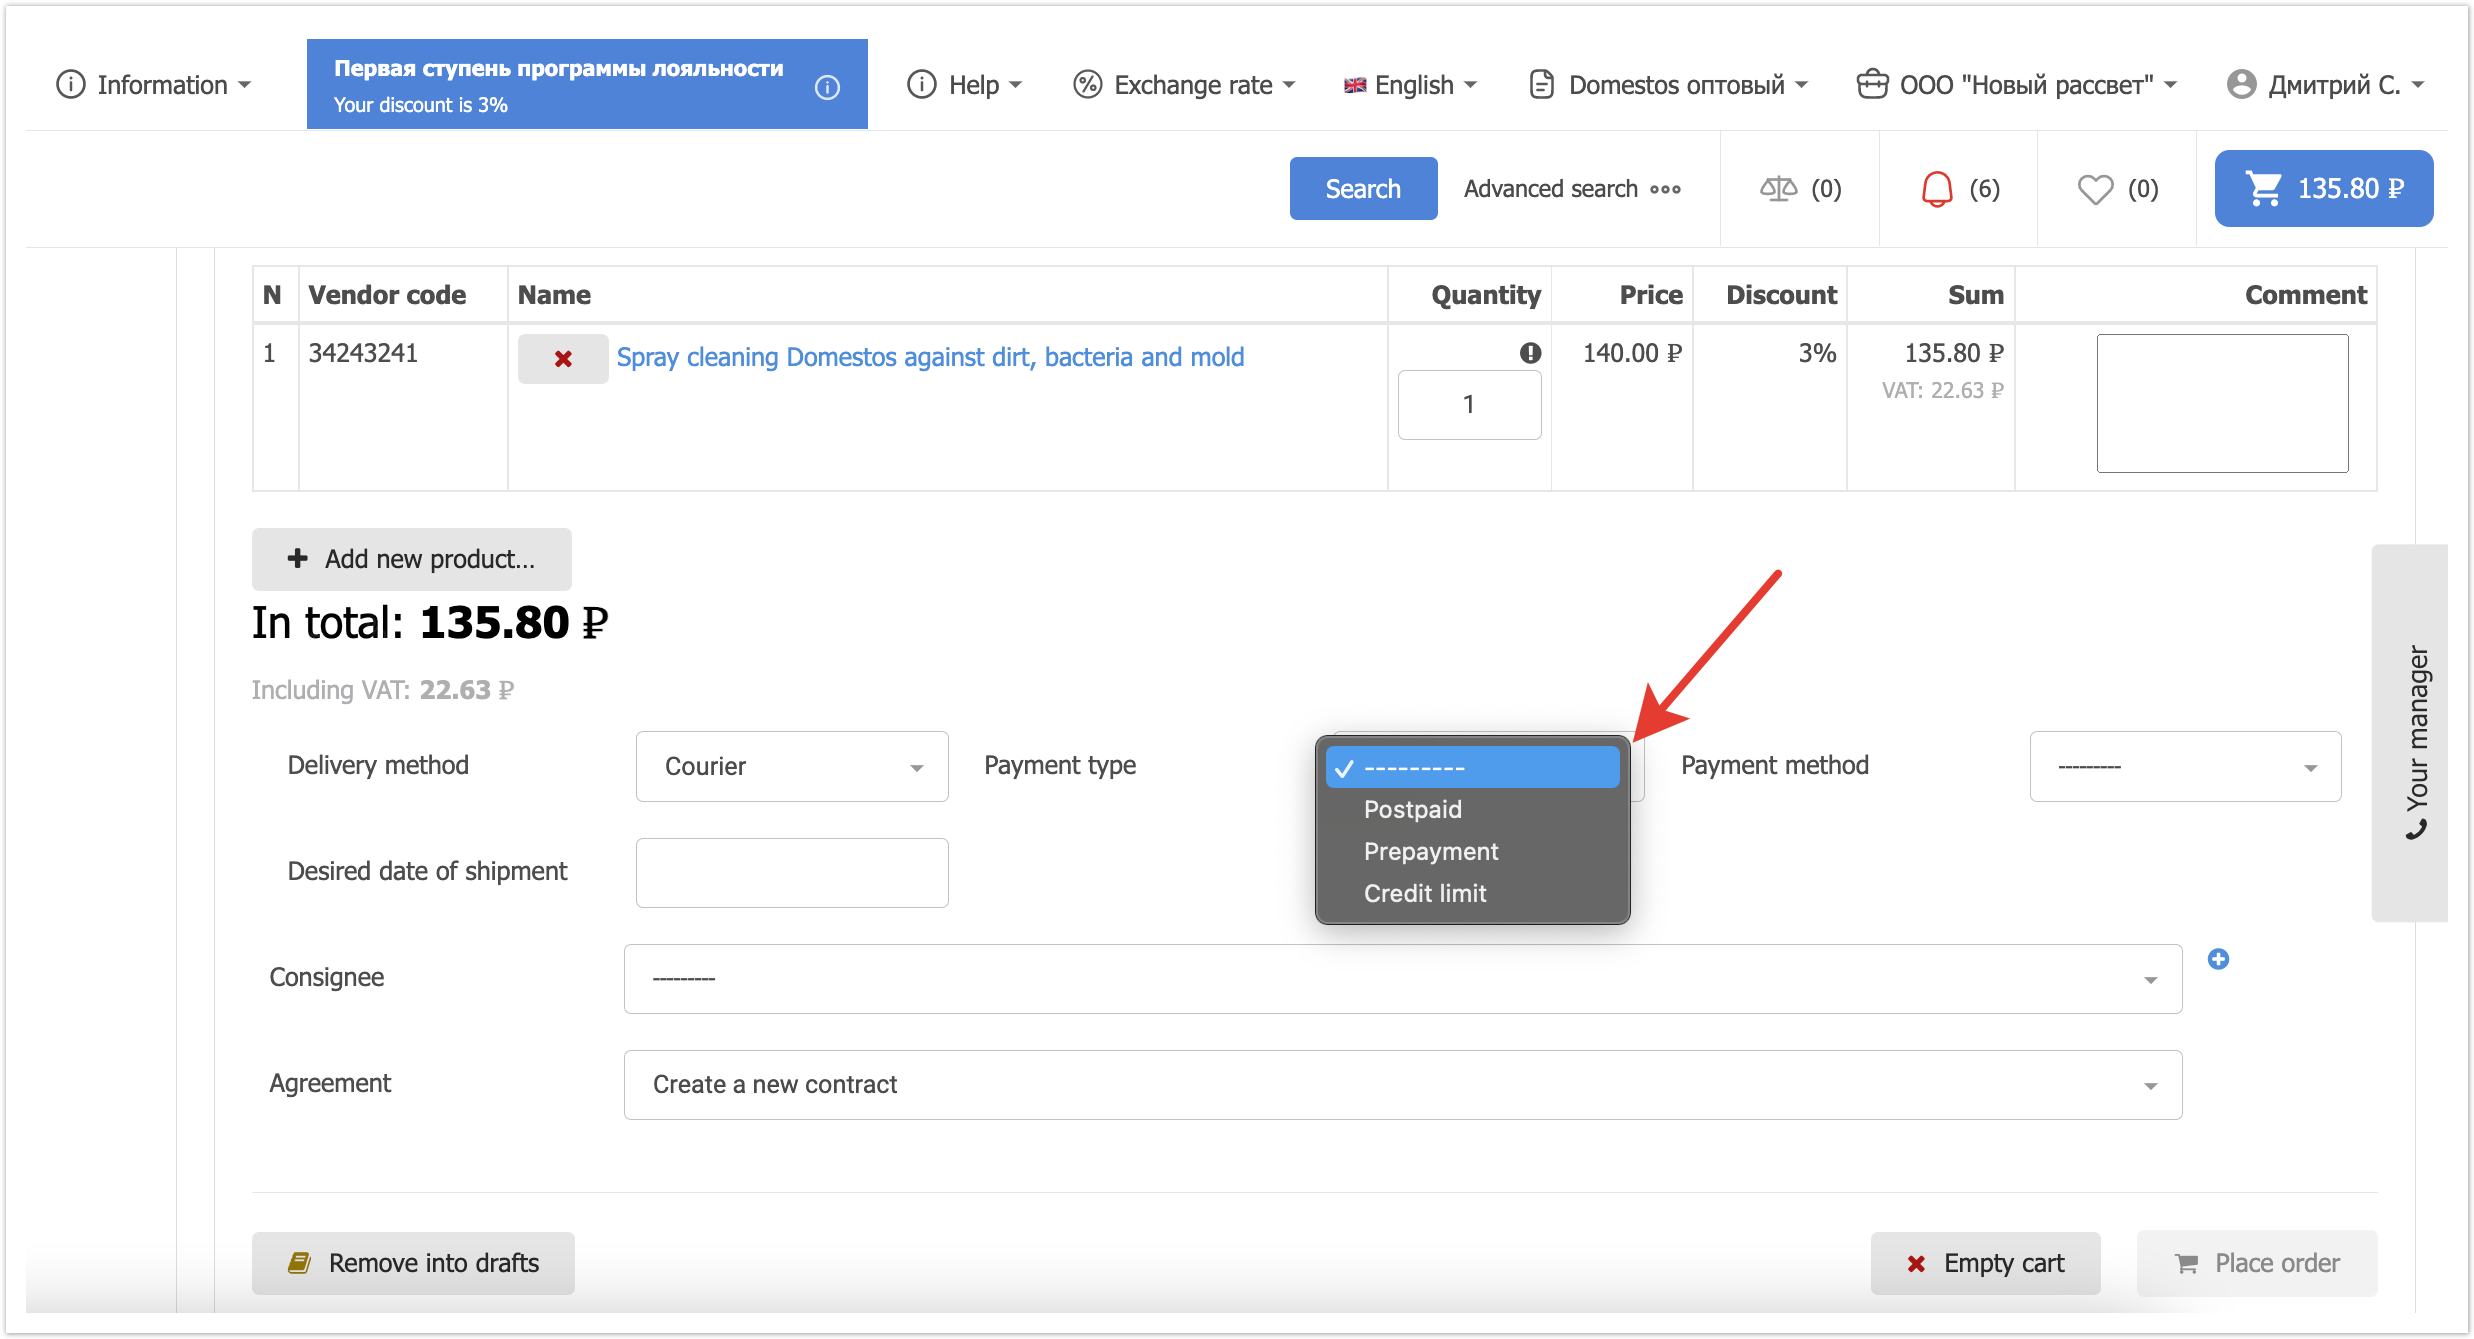
Types of payment in the buyer's personal accountThe buyer can choose the type of payment in the shopping cart when placing an order.
Depending on the selected payment type, the line of order statuses will also change. If you want to create an individual status bar for a project, then you first need to add a payment type, since the status bar is associated with the payment type. Adding a new payment type can be done using the instructions below. Next, you can customize the status bar itself. Detailed information on setting it up is described on the page.
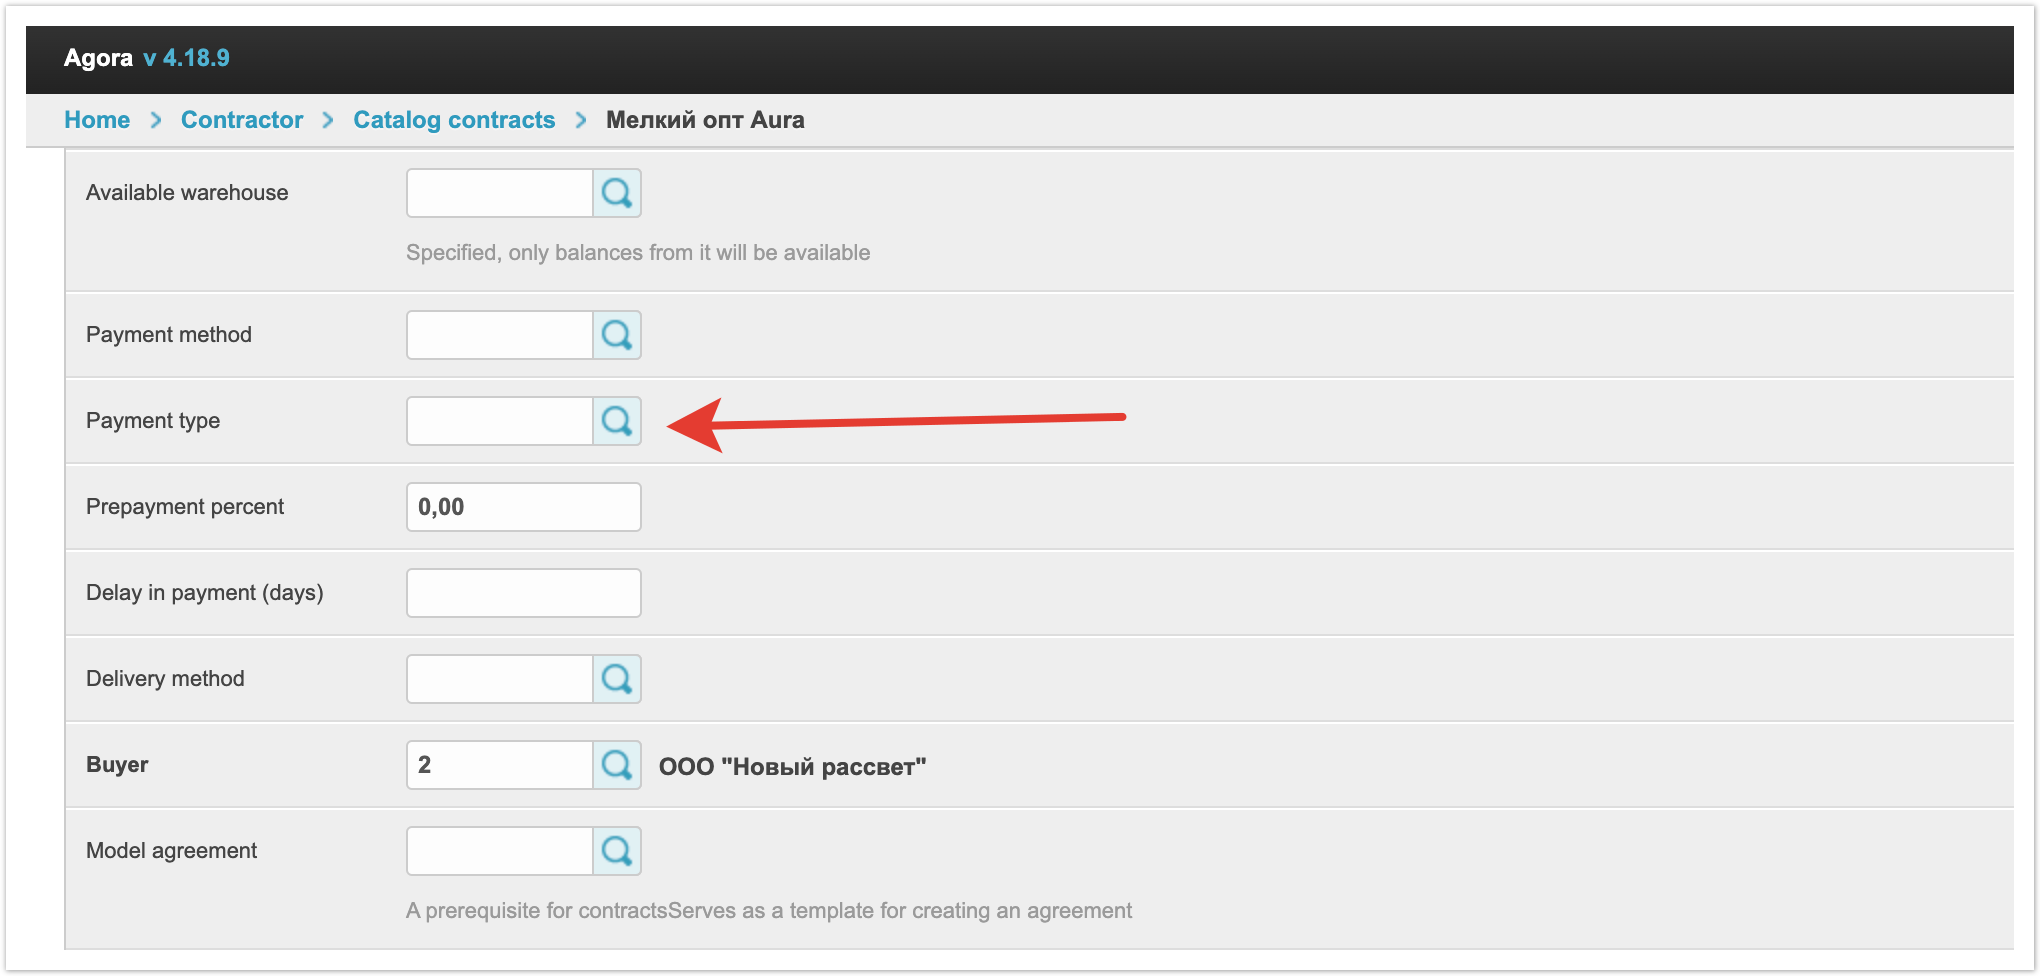
In addition, the type of payment may be specified in the buyer's contract. In this case, the buyer will not see a field for selection in the shopping cart, and when placing an order under the selected contract, the payment type will be filled in from this contract.
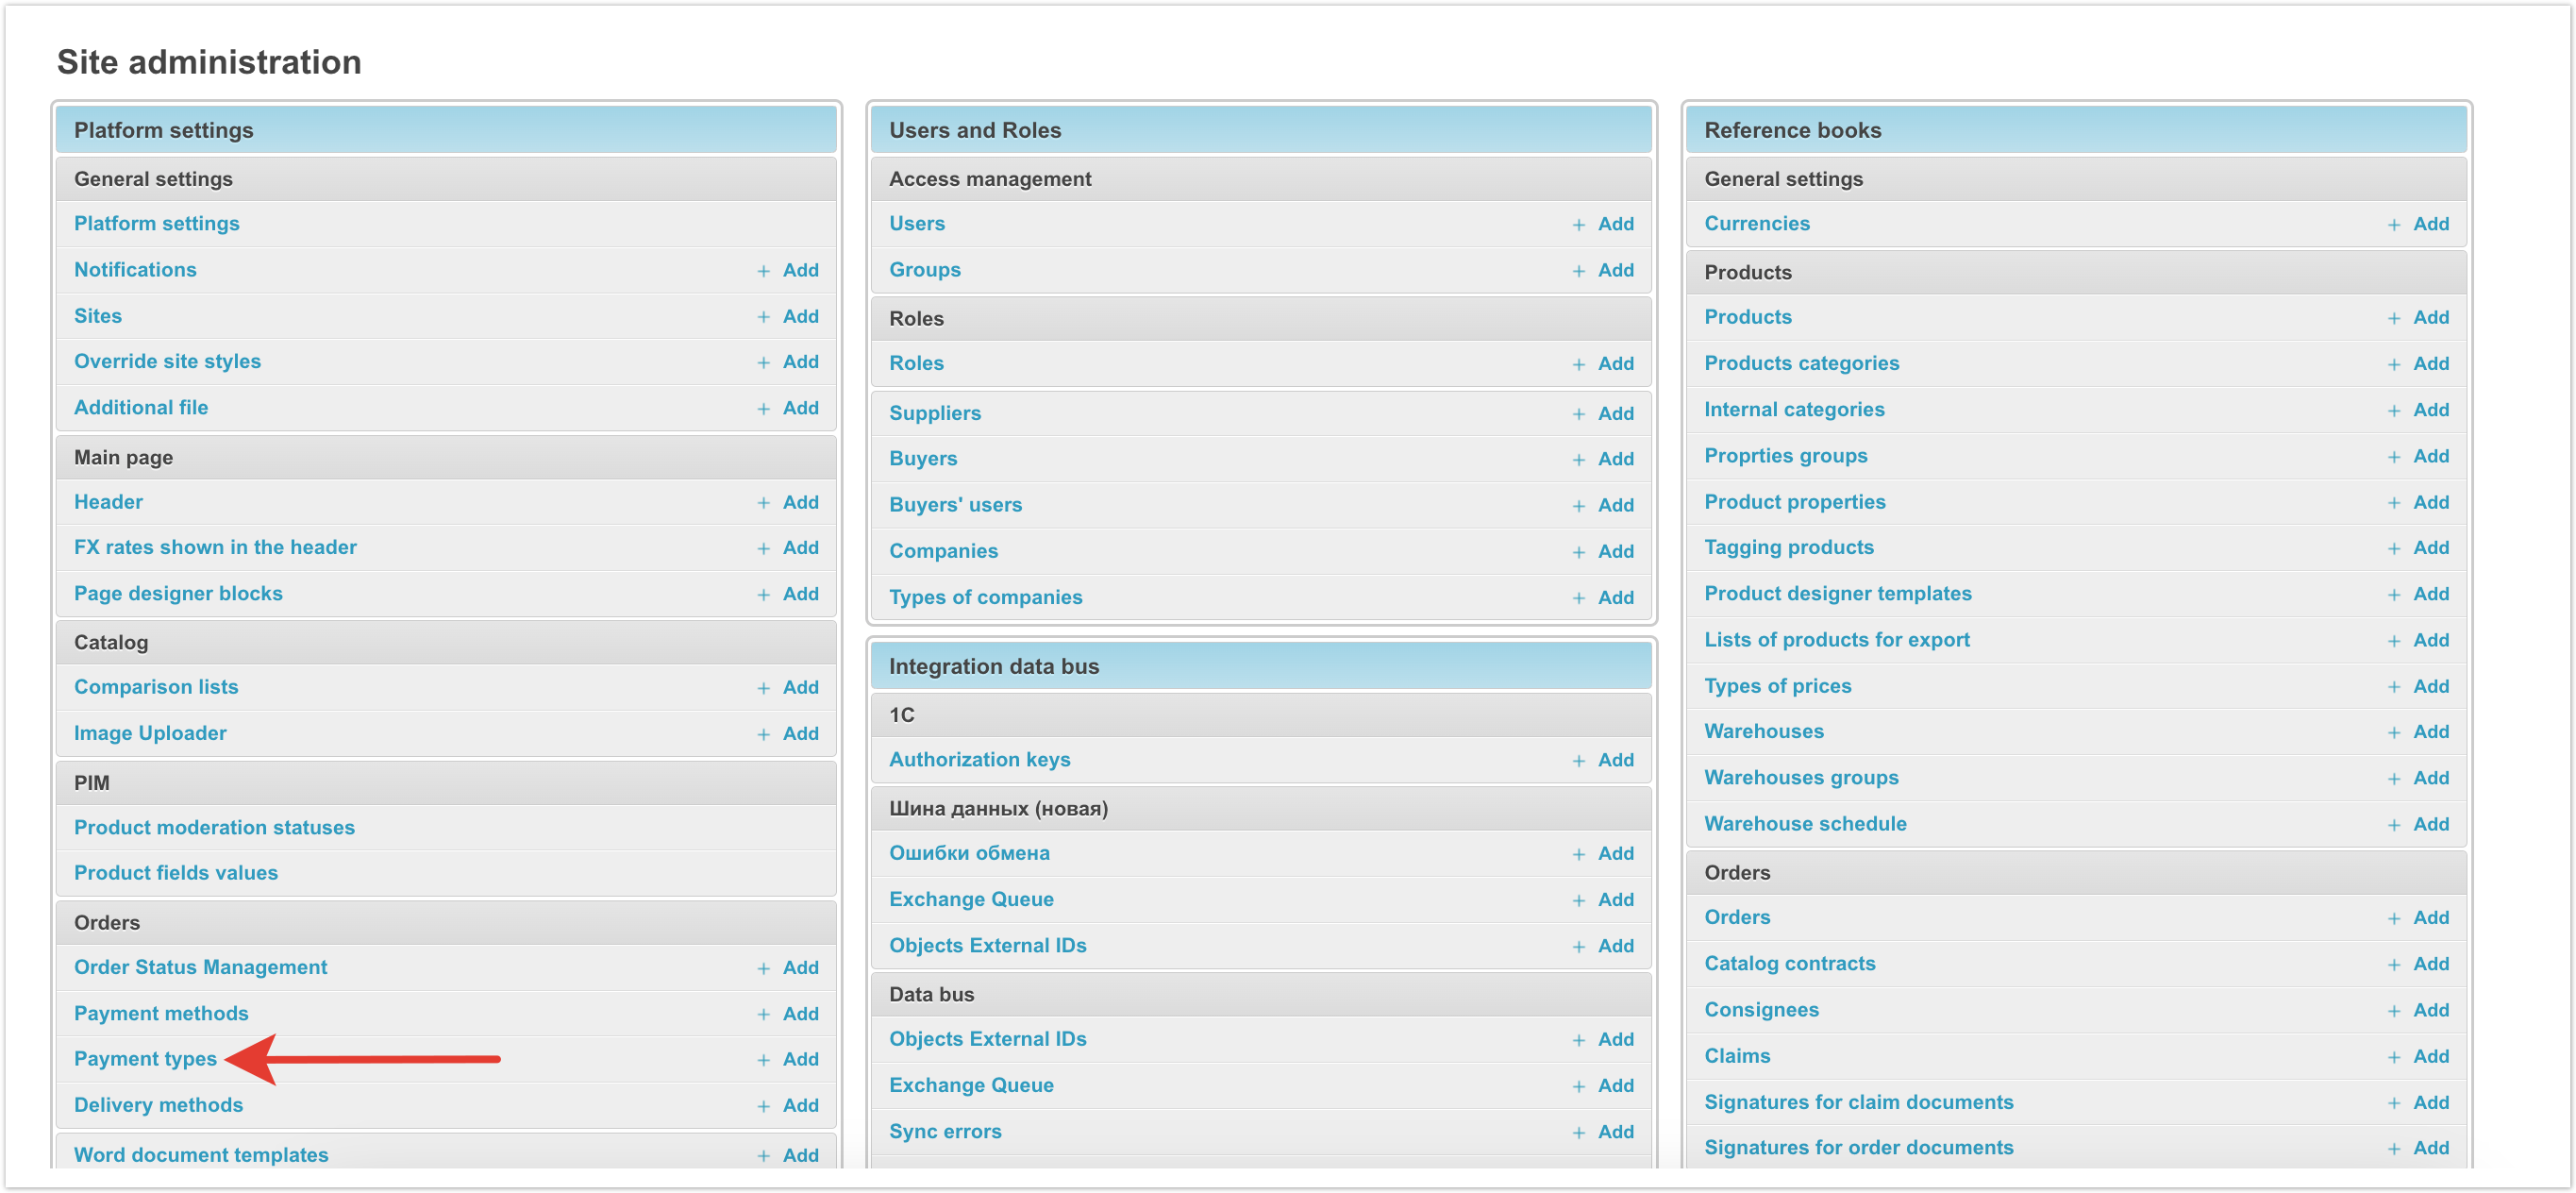
Setting up payment types in the admin panel
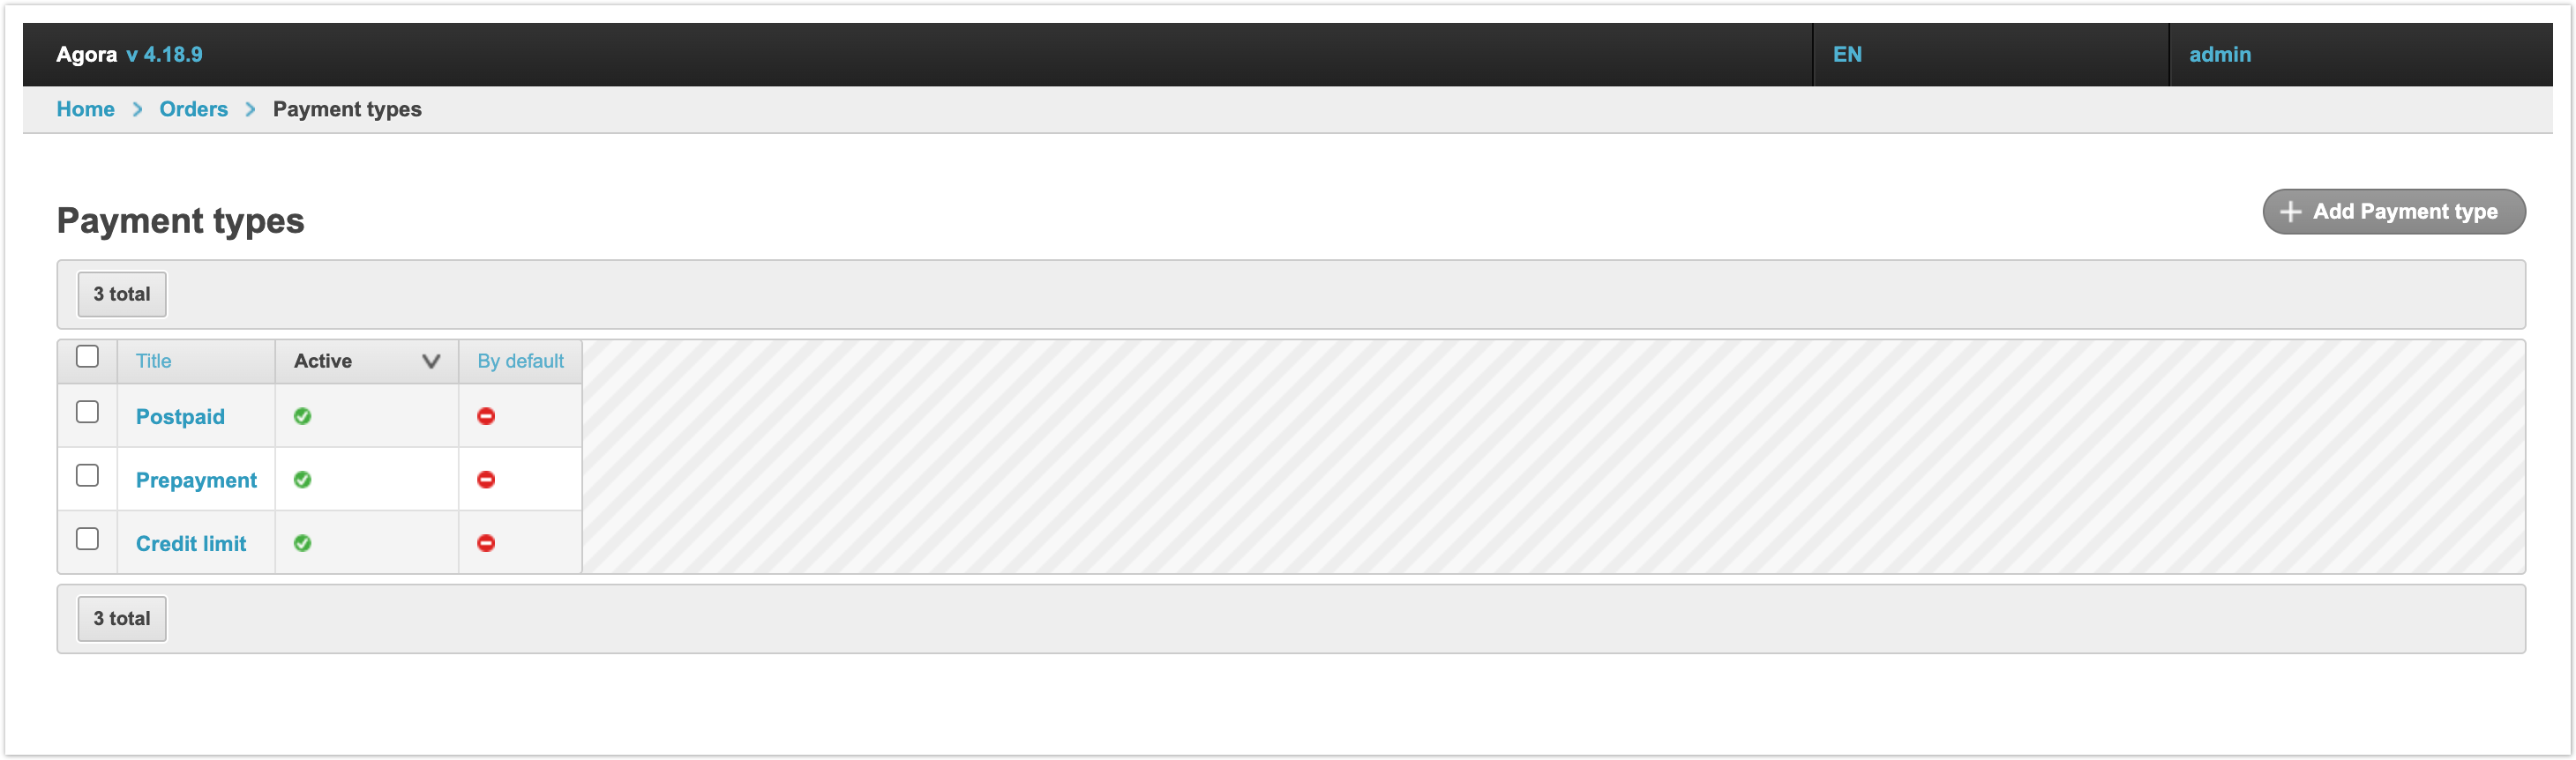
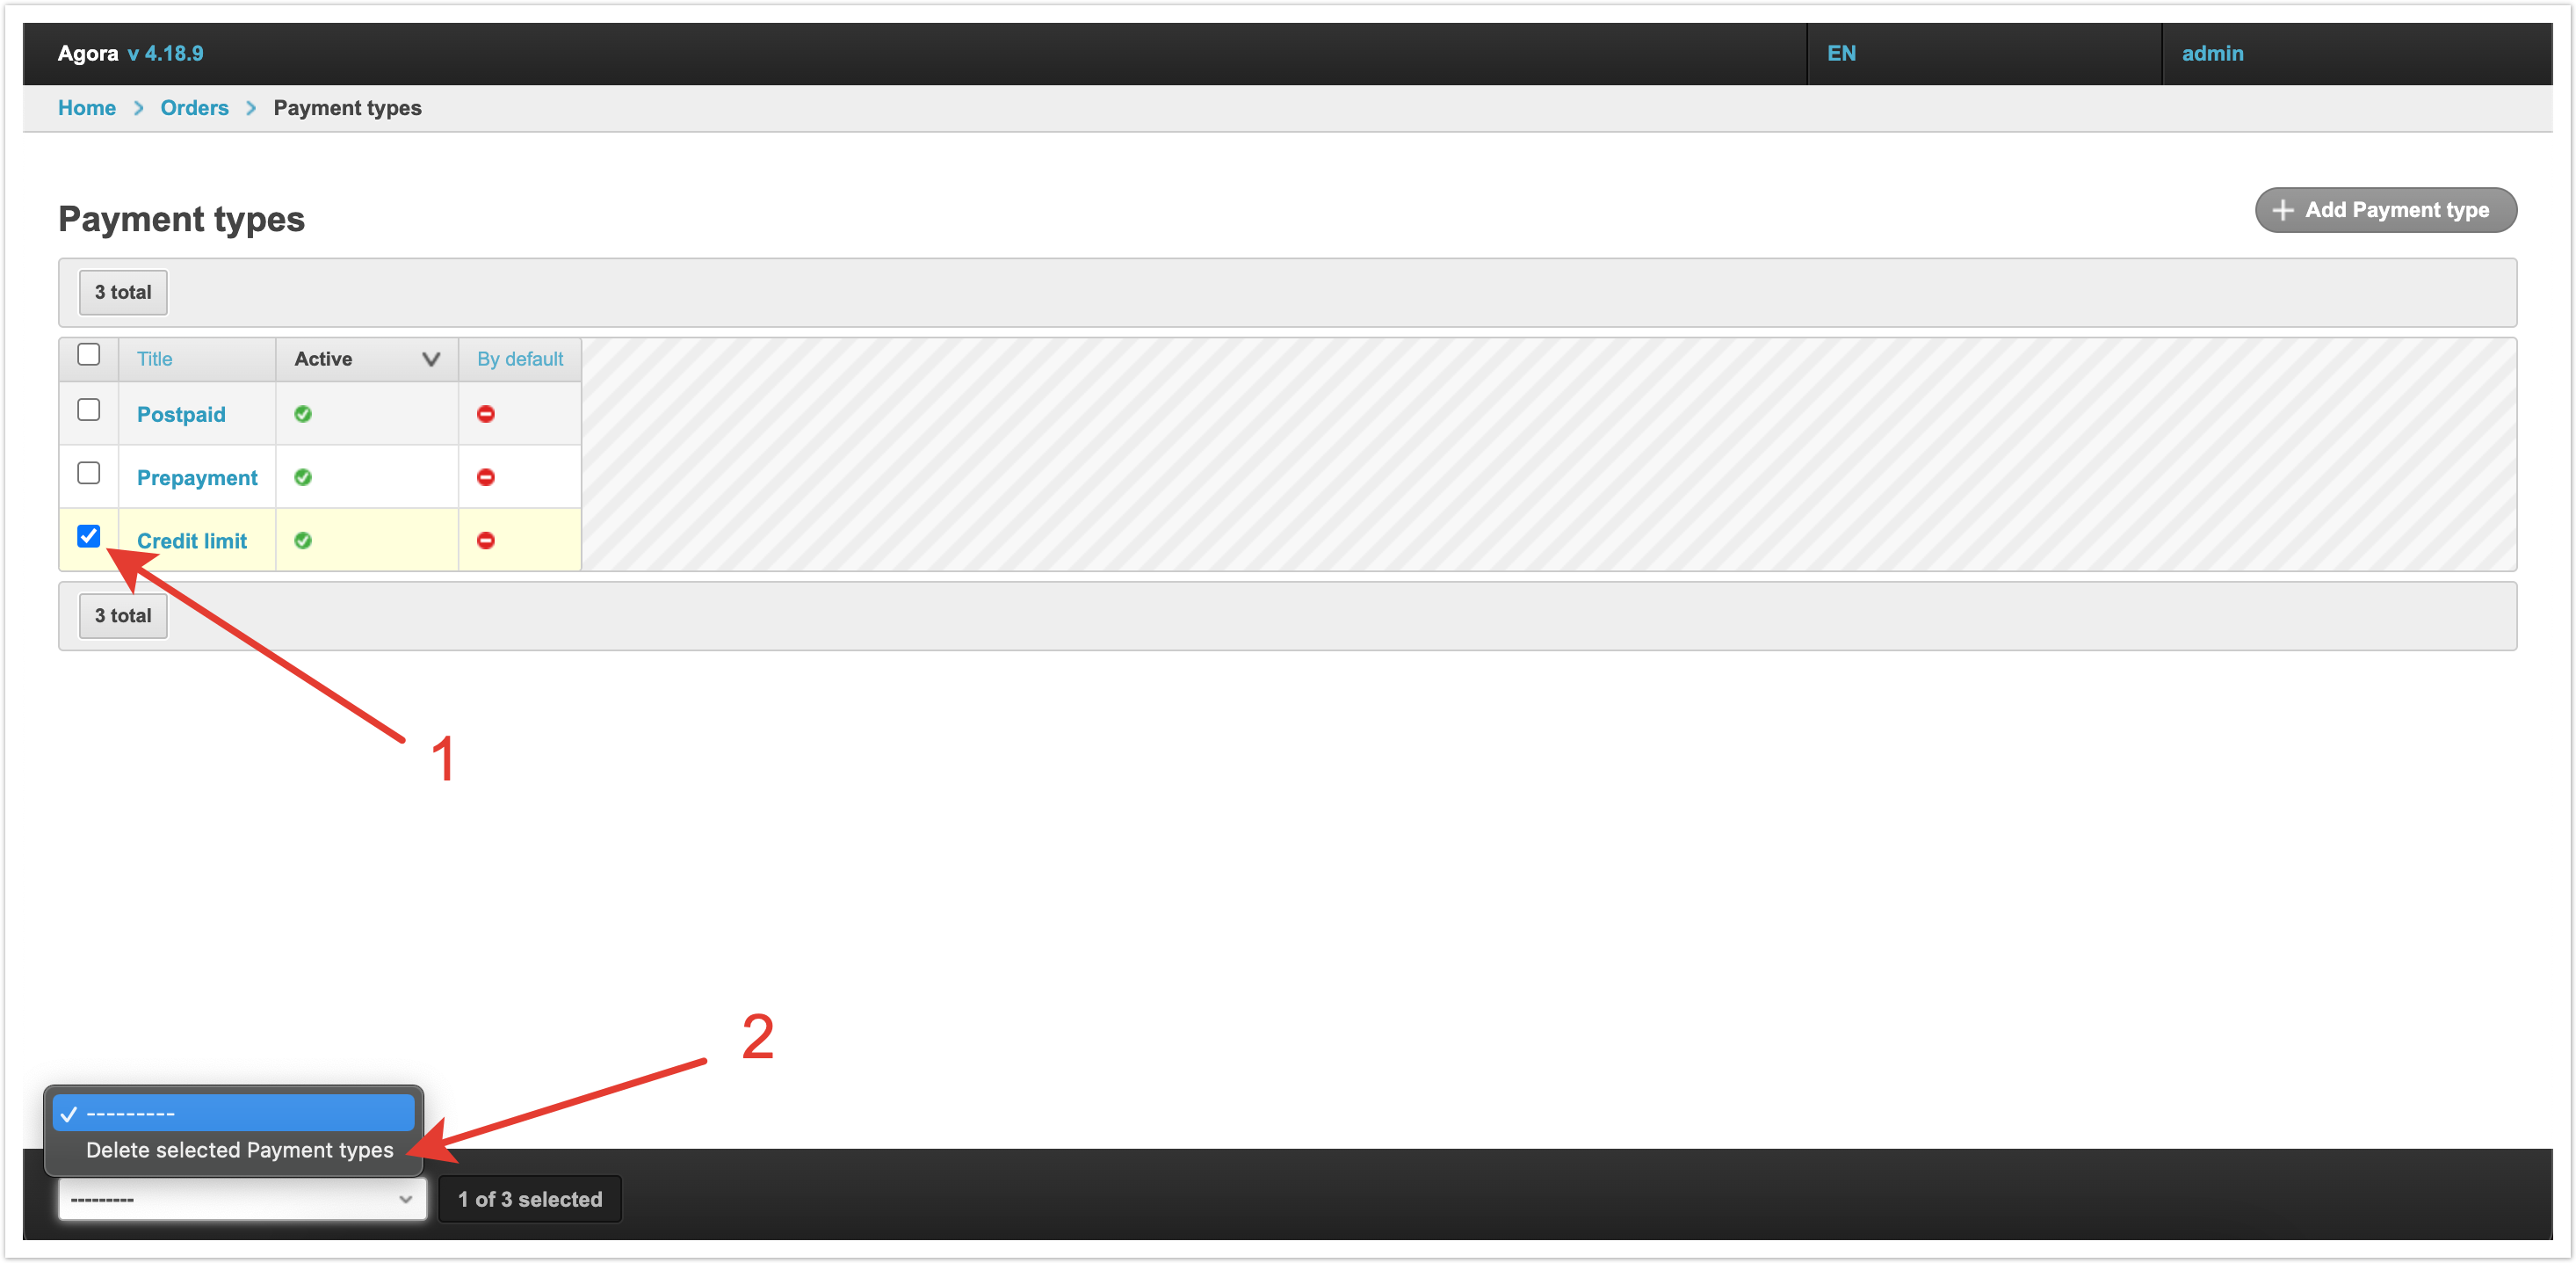
Inside the section, you can see previously entered payment types and their status.
The Active column provides information about which payment types are currently used on the platform when placing an order. The By default column indicates what type of payment will be filled in the cart by default. If you need to delete any type of payment, then just select it, and then select Delete selected Payment types from the drop-down list at the bottom left.
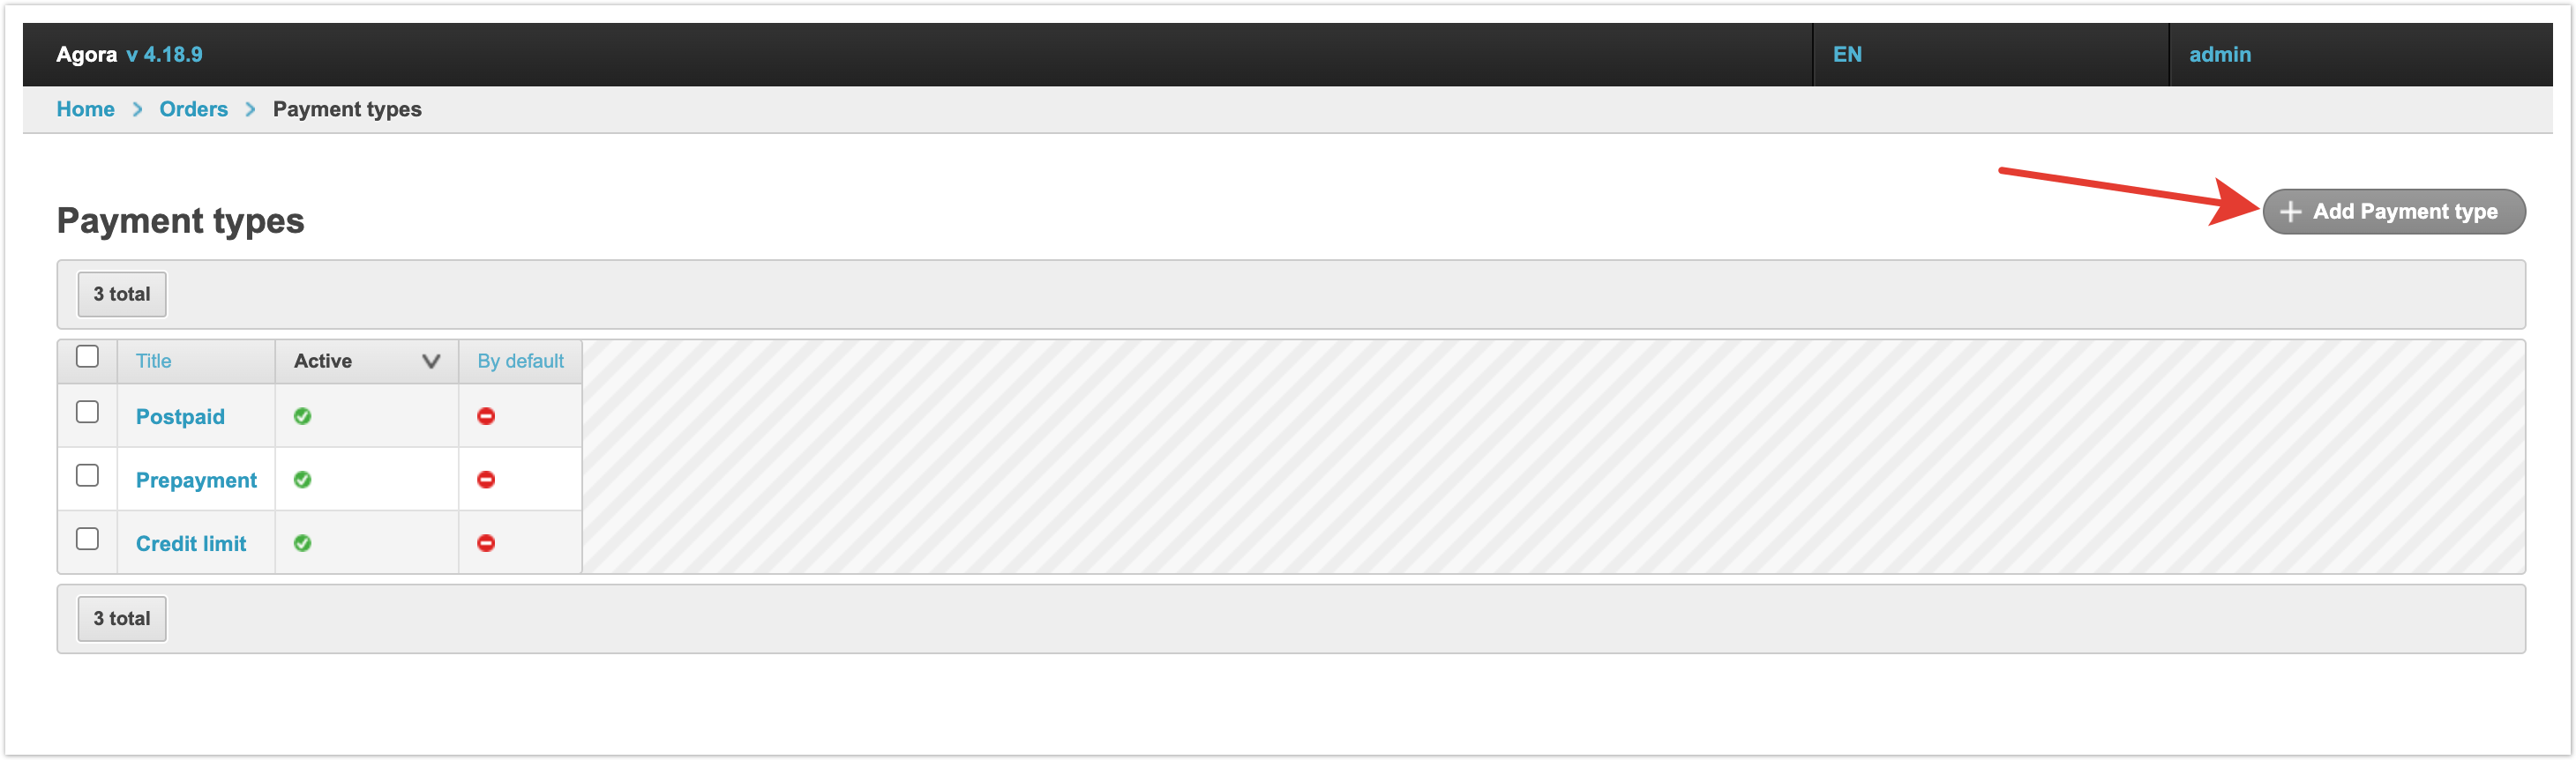
To add a new payment type, click the Add Payment Type button.
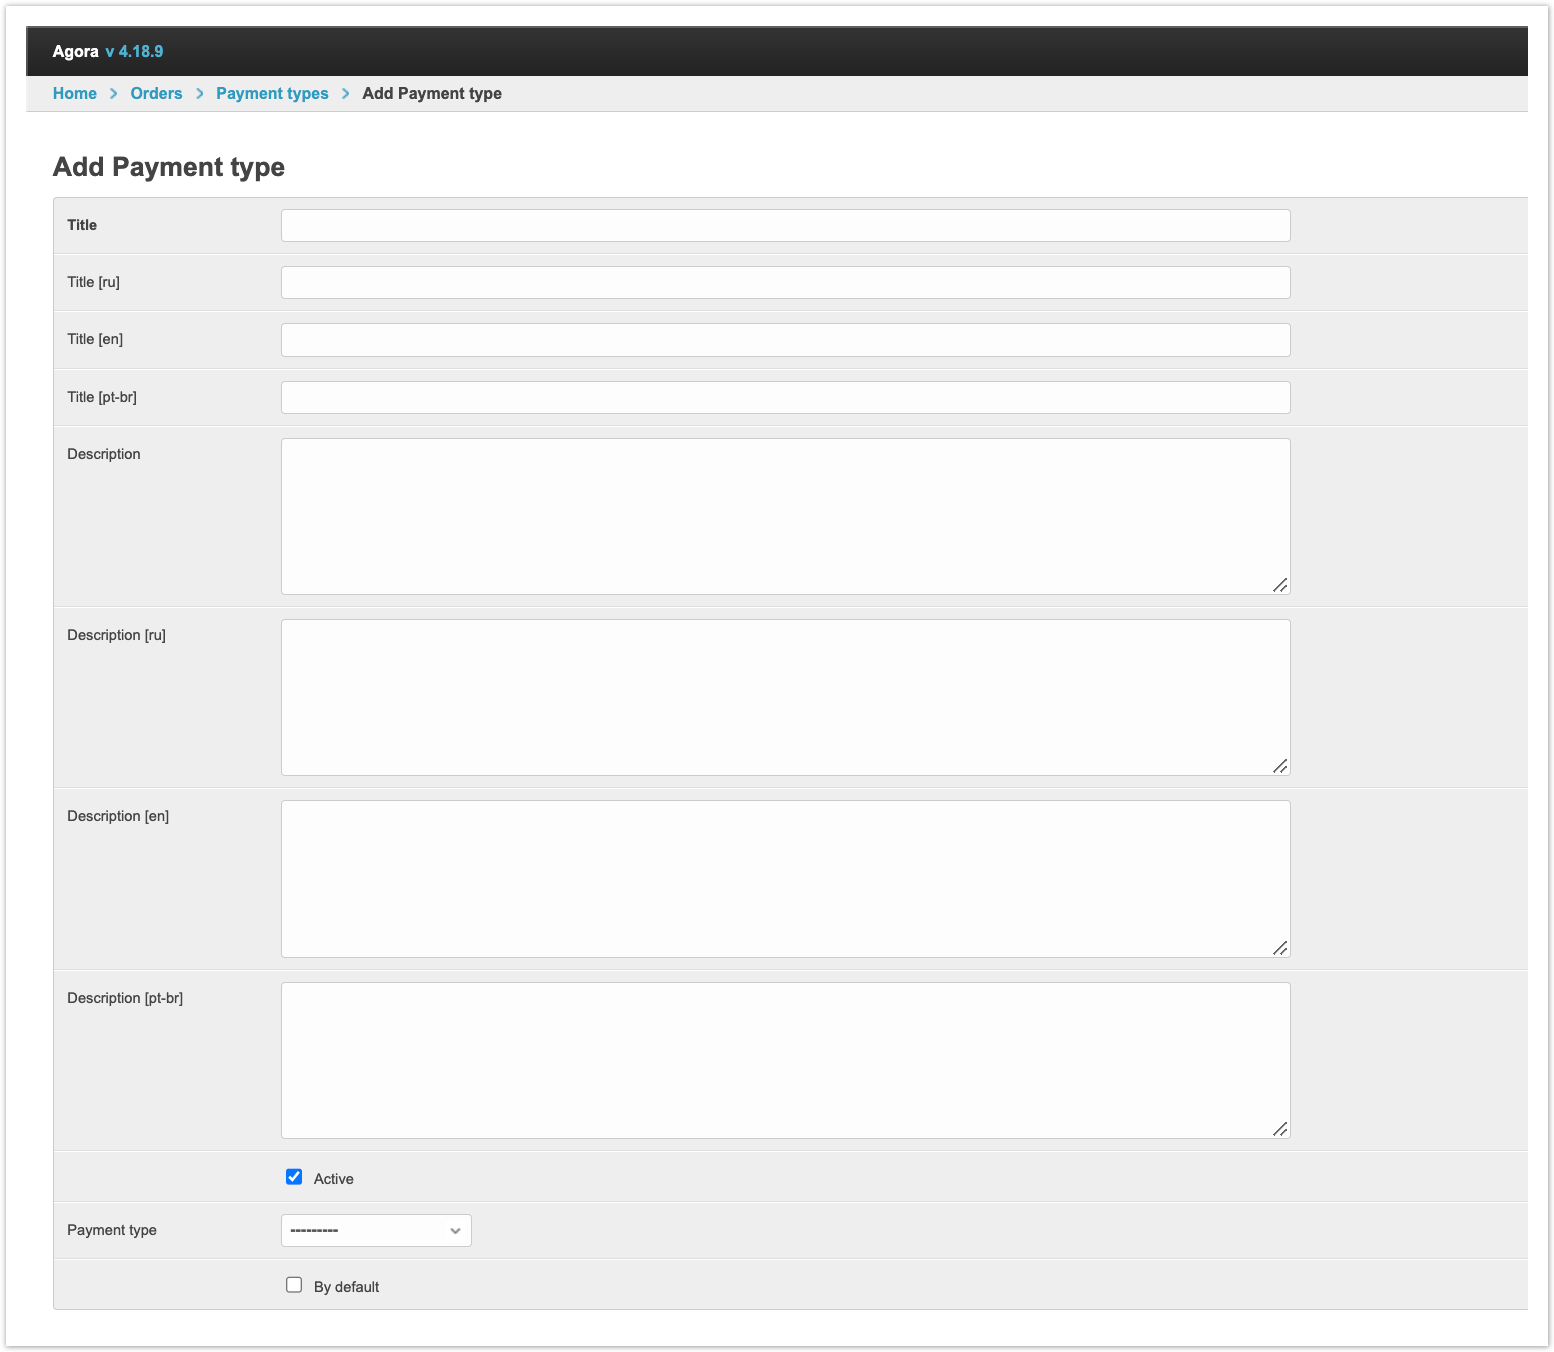
Next, a form for adding a new payment type will open. Consider what fields you need to fill in to add.
Title - this field specifies the name of the payment type. This name will be displayed in the shopping cart when placing an order. The name can be specified in different languages for platforms using multilingualism. Description - in these fields you can specify additional explanations for this type of payment, which may be useful to the platform administrator. The description can also be specified in different languages. The Active checkbox is responsible for the ability to use this type of payment to place an order. If the payment type is not active, then it will not be available in the customer's shopping cart when placing an order. Payment type - there are 4 values in the drop-down list: Prepayment, Postpayment, Partial prepayment, Credit limit. The type of payment is associated with the sequence of further transition of order statuses. For example, with a prepaid system, the order is first paid for, then shipped, and with a postpaid system, the order is first shipped and then paid for. Therefore, it is important to choose the right type of payment that will fit the type of payment you are creating. The following are examples of statuses for wage types:
If the type of payment that corresponds to the entered type is in the list, then it can be selected. If no value matches, then the field can be left blank. You can enable the By default setting, then this type of payment will be substituted by default when placing an order. For correct work, it is better to choose one type of payment by default. After all the necessary data has been filled in, you need to click on the Save button and the payment type will appear in the list.
|


...