| Sv translation | ||||||||||||||
|---|---|---|---|---|---|---|---|---|---|---|---|---|---|---|
| ||||||||||||||
Подробную информацию по настройке баннеров можно также получить из видео:
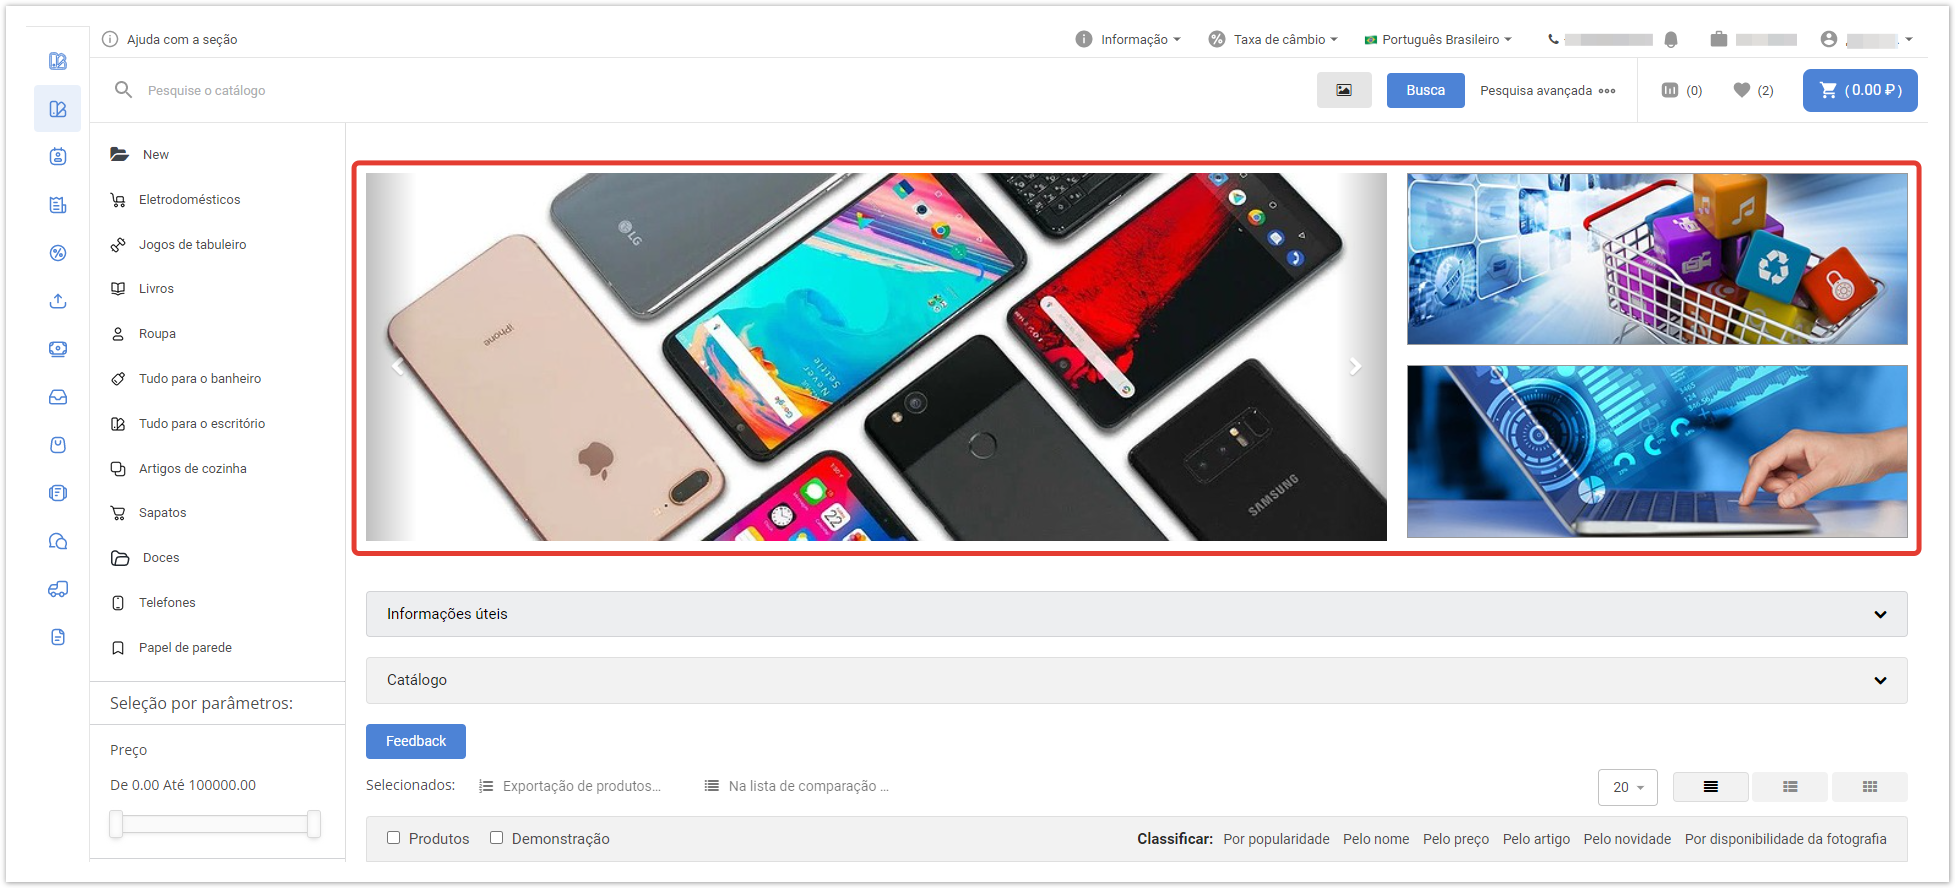
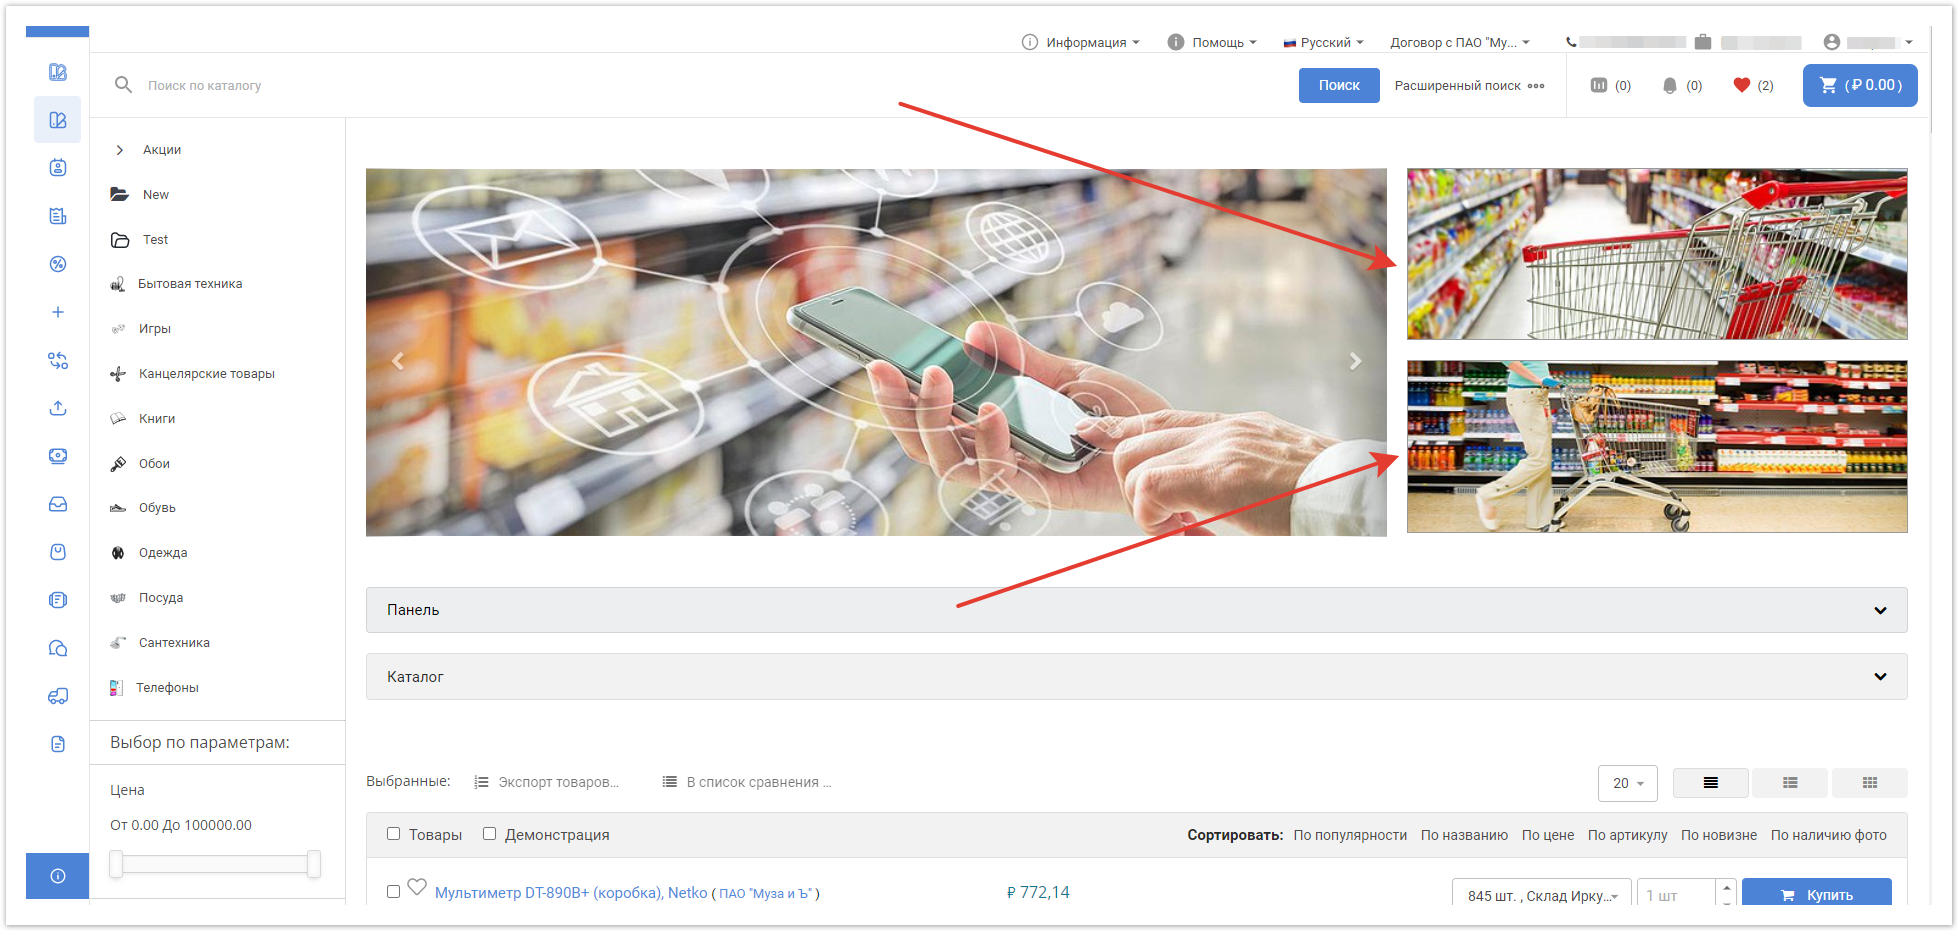
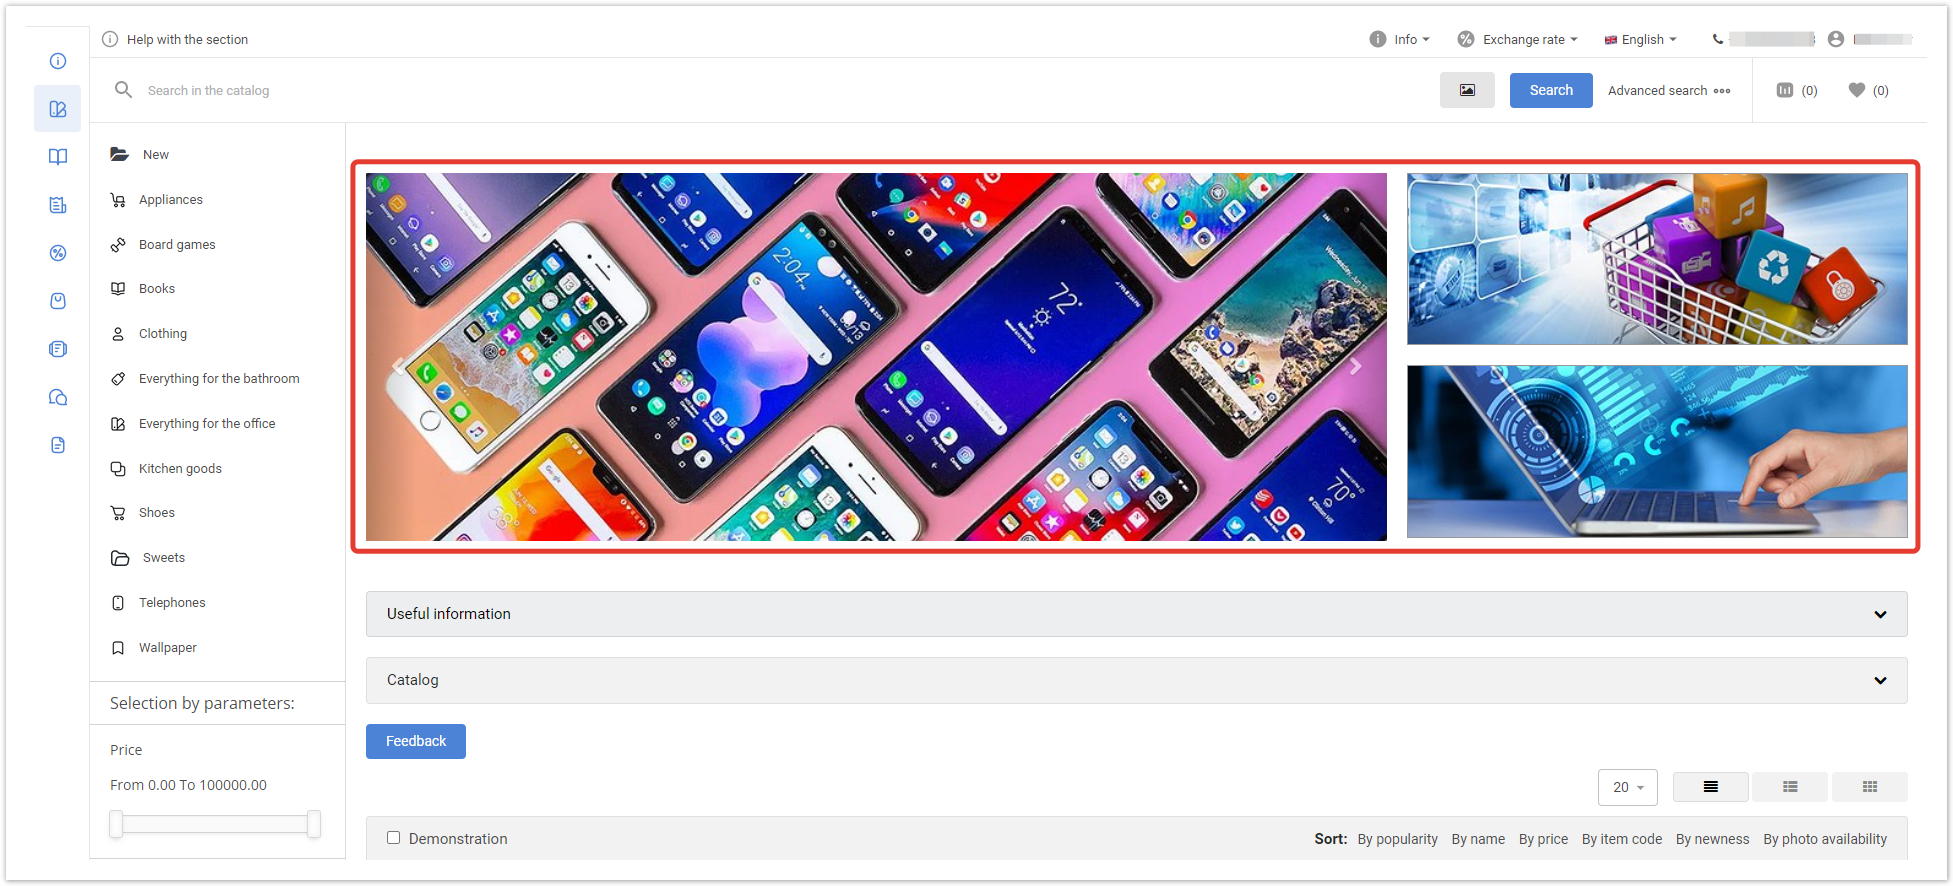
Баннеры в каталогеВ каталоге баннеры отображаются в верхней части страницы.
Существует 2 типа баннеров:
Баннер-слайдер — позволяет задать несколько картинок, перелистываемых автоматически или вручную:
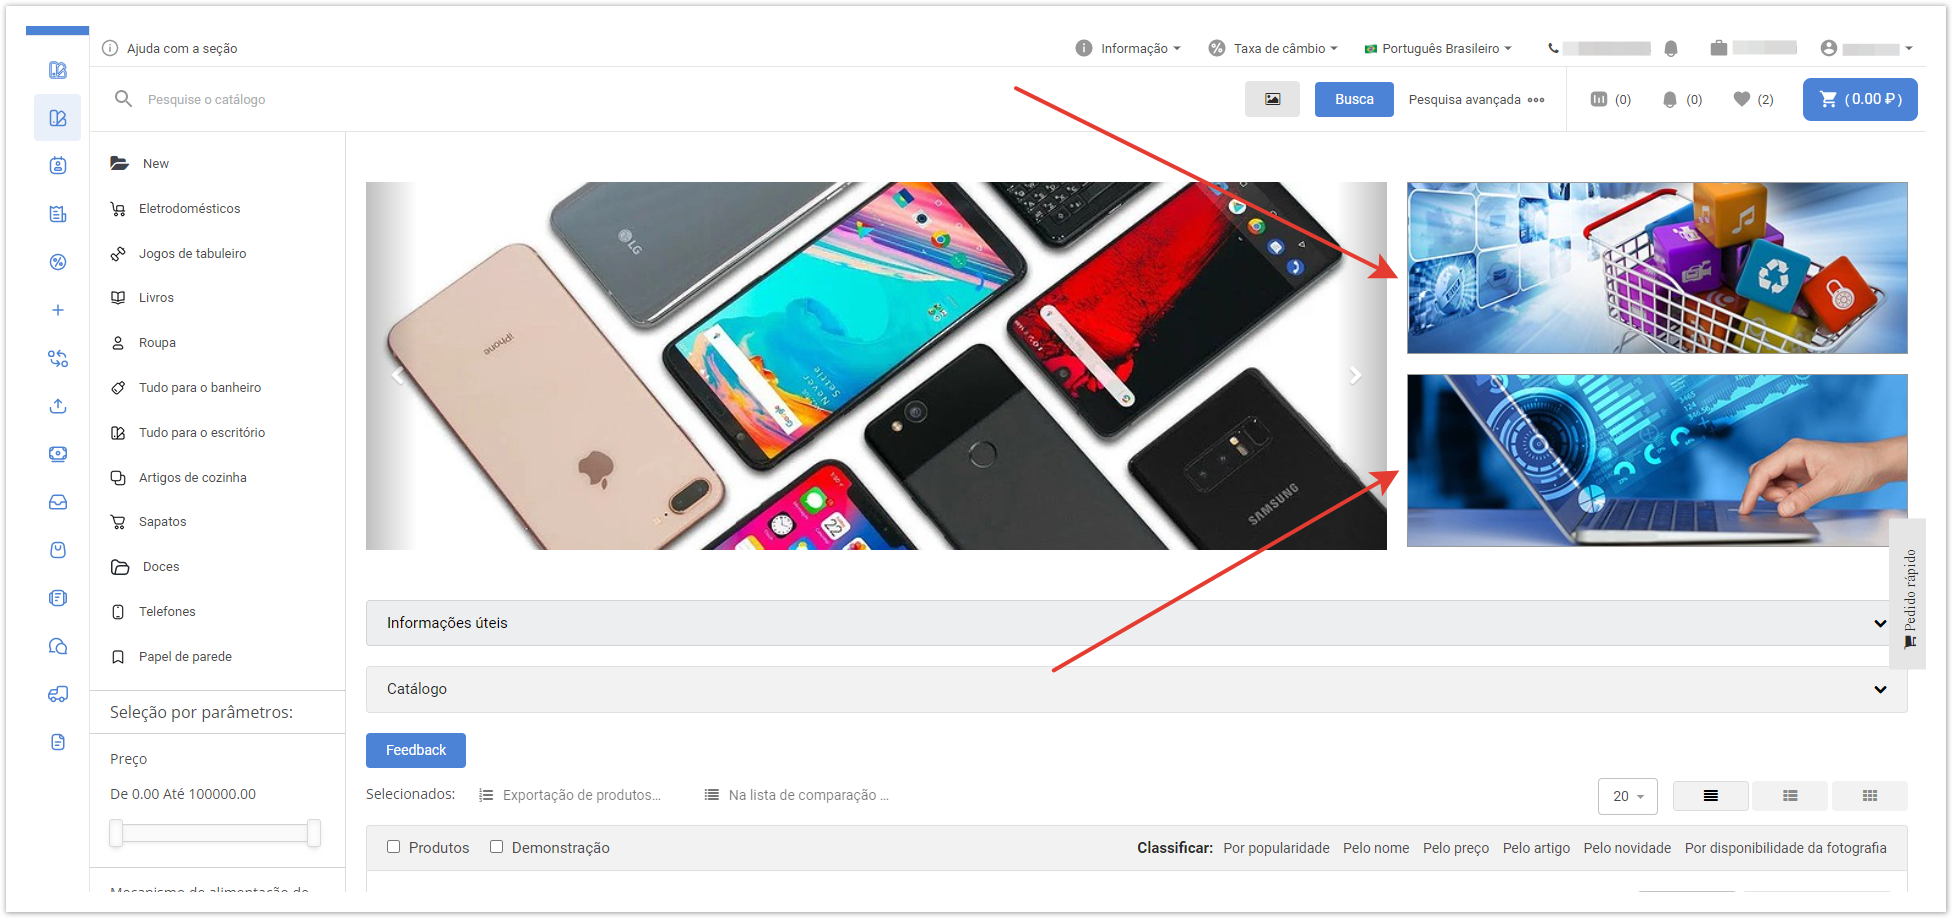
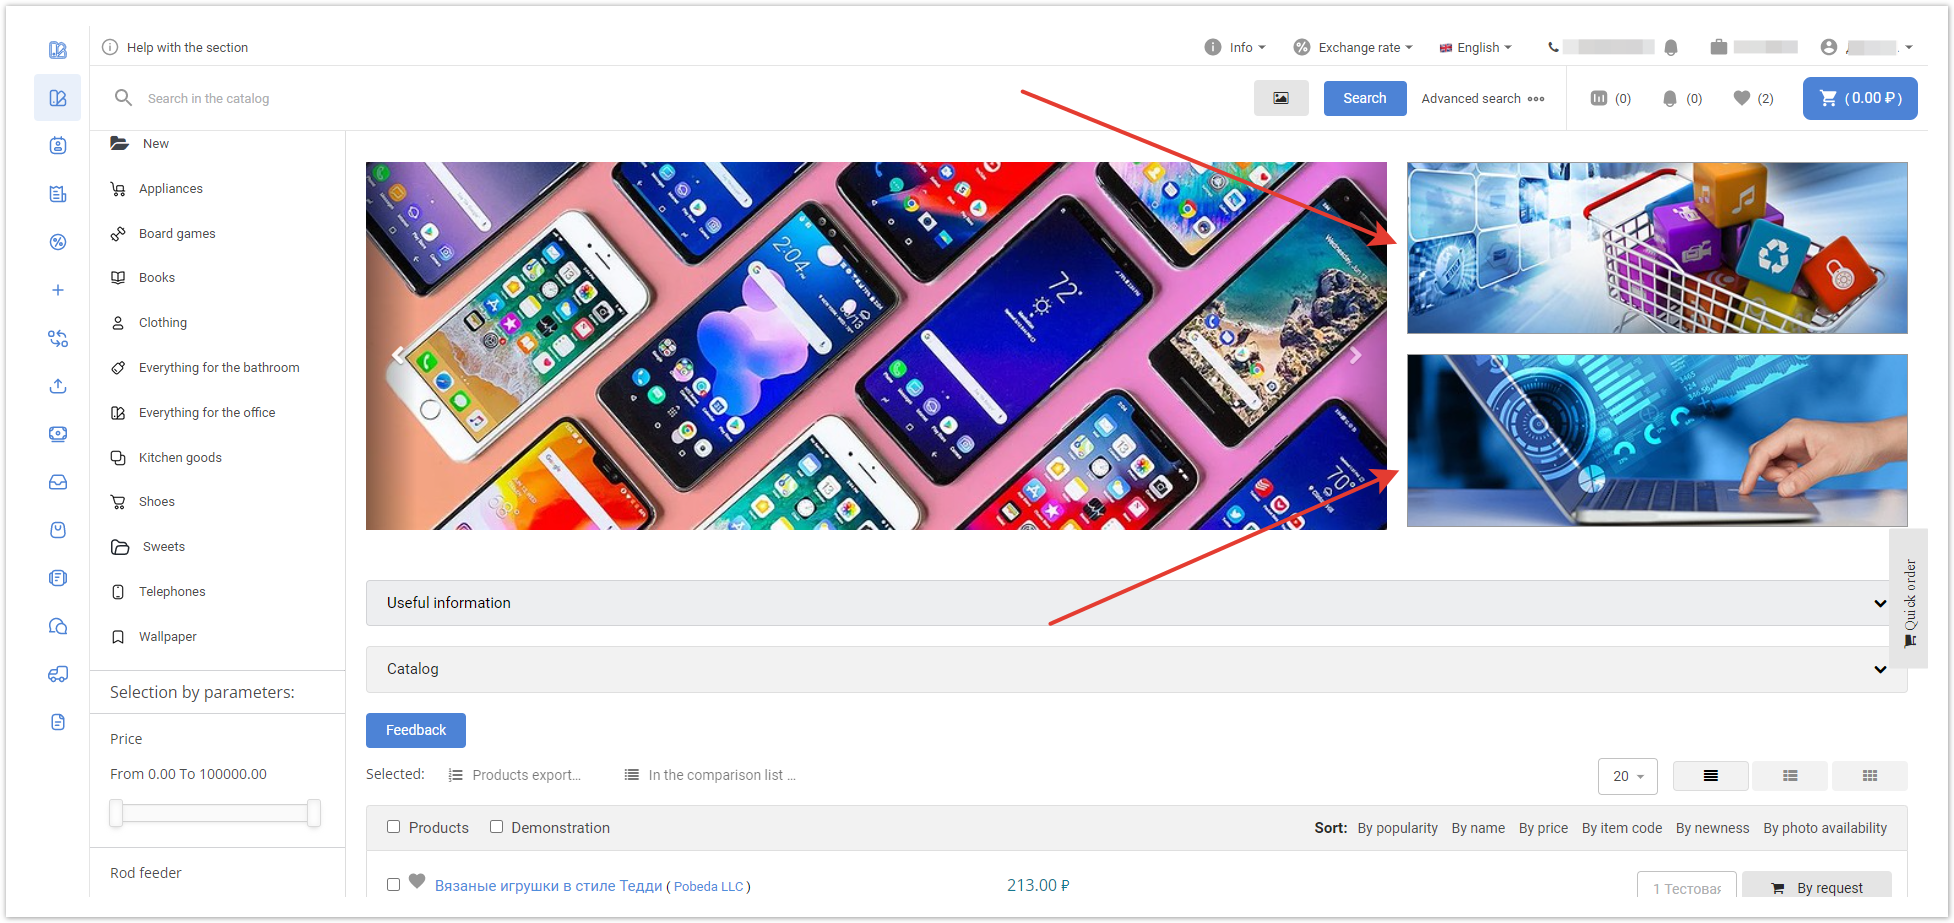
Верхний/нижний баннер — статическое изображение, отображаемое без каких-либо эффектов:
Для корректного отображения рекомендуется использовать баннеры следующих размеров:
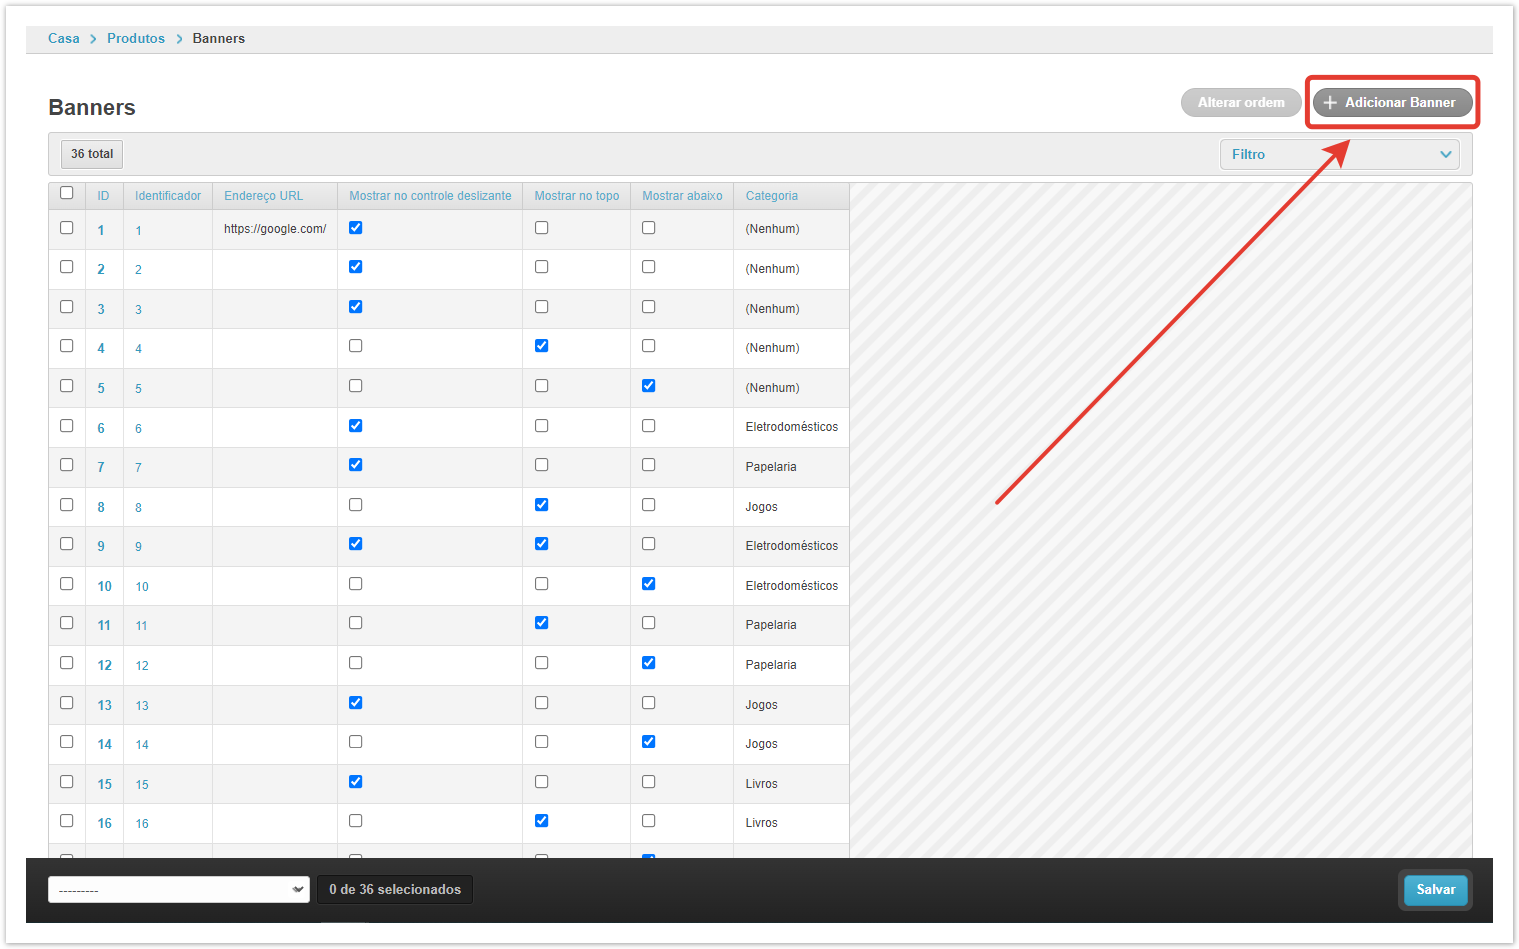
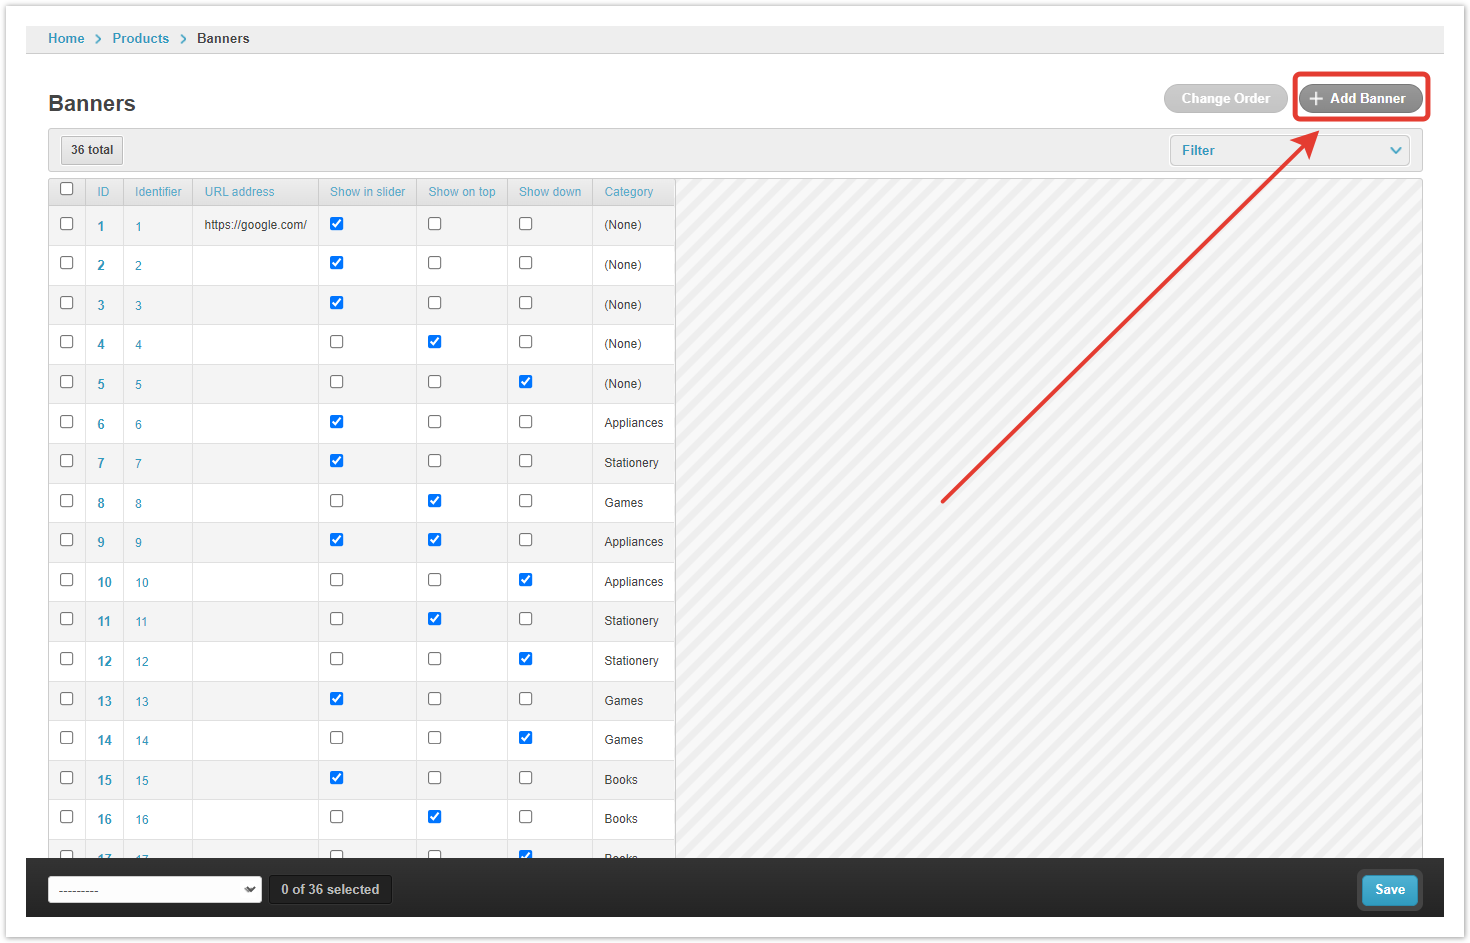
Создание баннеровОсуществляется в административной панели проекта. После авторизации в панели администратора перейдите в раздел Баннеры, затем нажмите кнопку Добавить баннер:
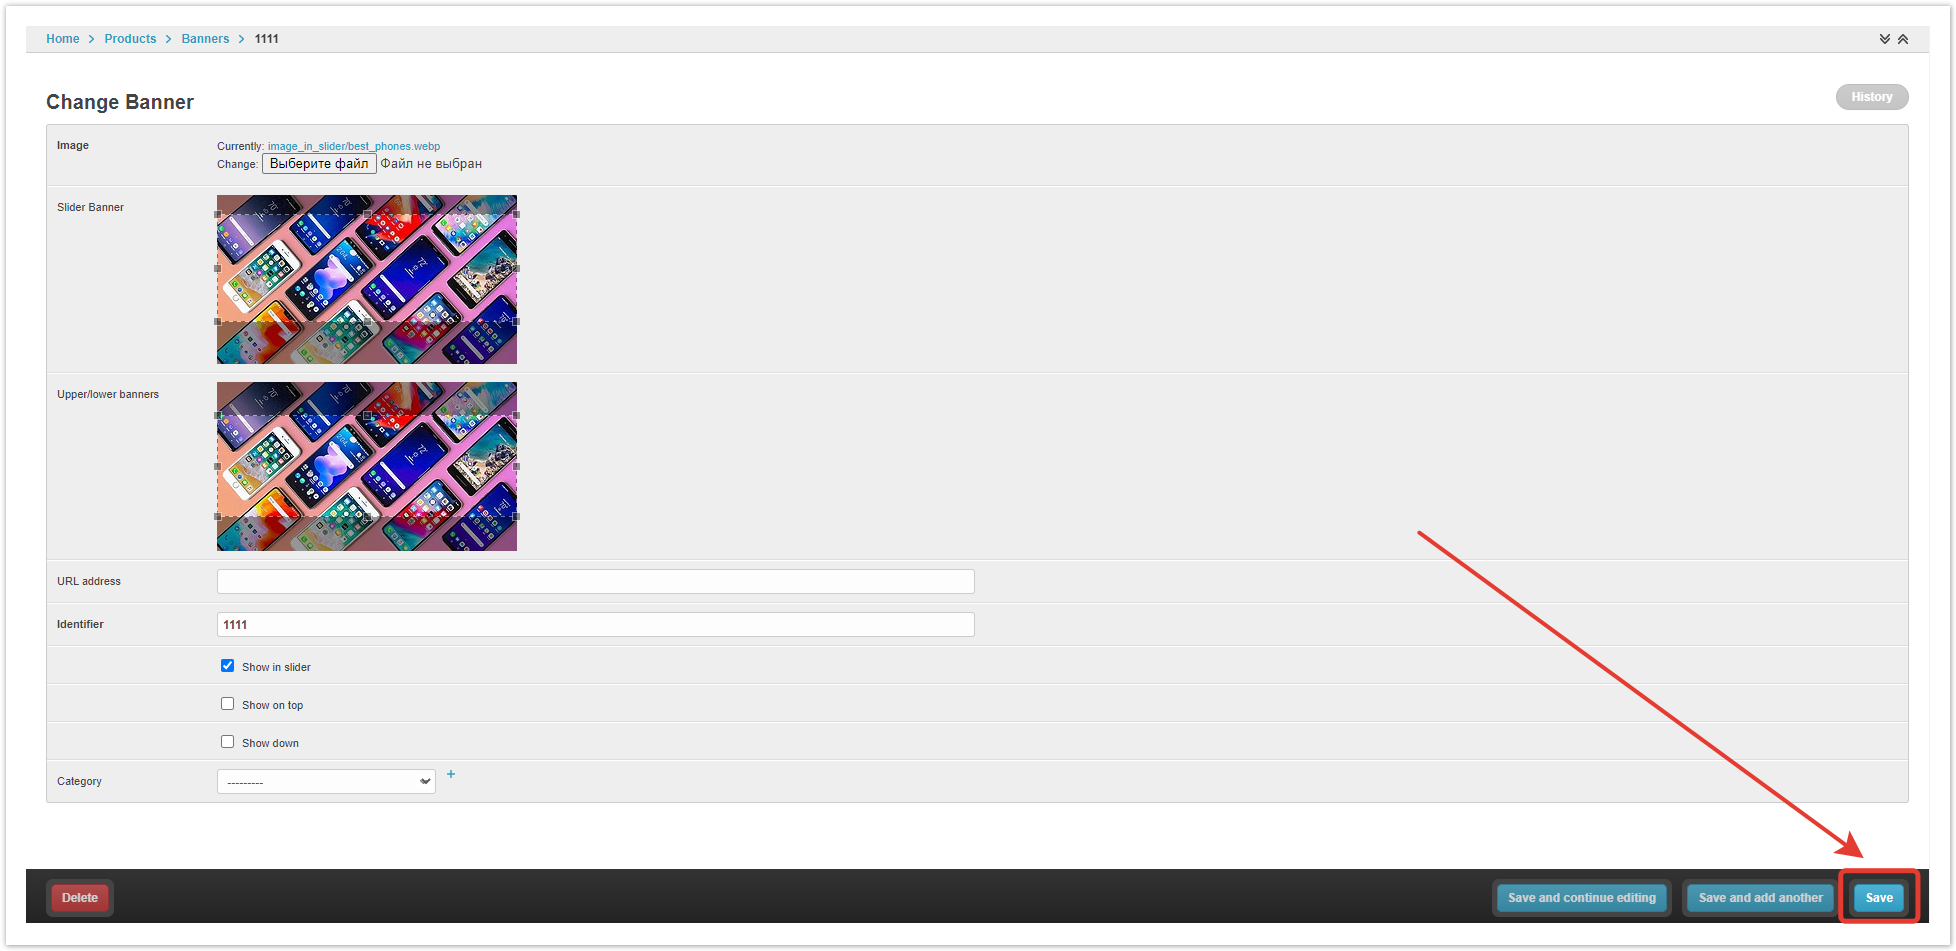
В открывшемся окне задайте условия отображения.
Изображение — путь к файлу на локальном компьютере. Баннер слайдера — размер загруженного изображения, который будет отображаться в разделе Слайды. Верхний/нижний баннер — размер загруженного изображения для раздела Баннеры (верхний/нижний). URL адрес — заполняется, если баннер необходимо сделать кликабельным, при клике будет осуществляться переход на указанный URL-адрес. Идентификатор — уникальное значение для каждого баннера. Это значение нужно для верного хранения файла баннера на проекте и удобства управления настройкой отображения баннера в каталоге. Показывать (В слайдере/Вверху/Внизу) — чекбокс, в соответствии с которым задается логика показа баннеров. Категория — категория товаров, при переходе в которую будет отображаться данный баннер. Если категория товара не указана, то баннеры будут показаны на странице Каталог и Информация. Если категория товара указана, то баннер будет показан только на странице этой категории в Каталоге. После указания всех настроек нажмите кнопку Сохранить в нижней части страницы.
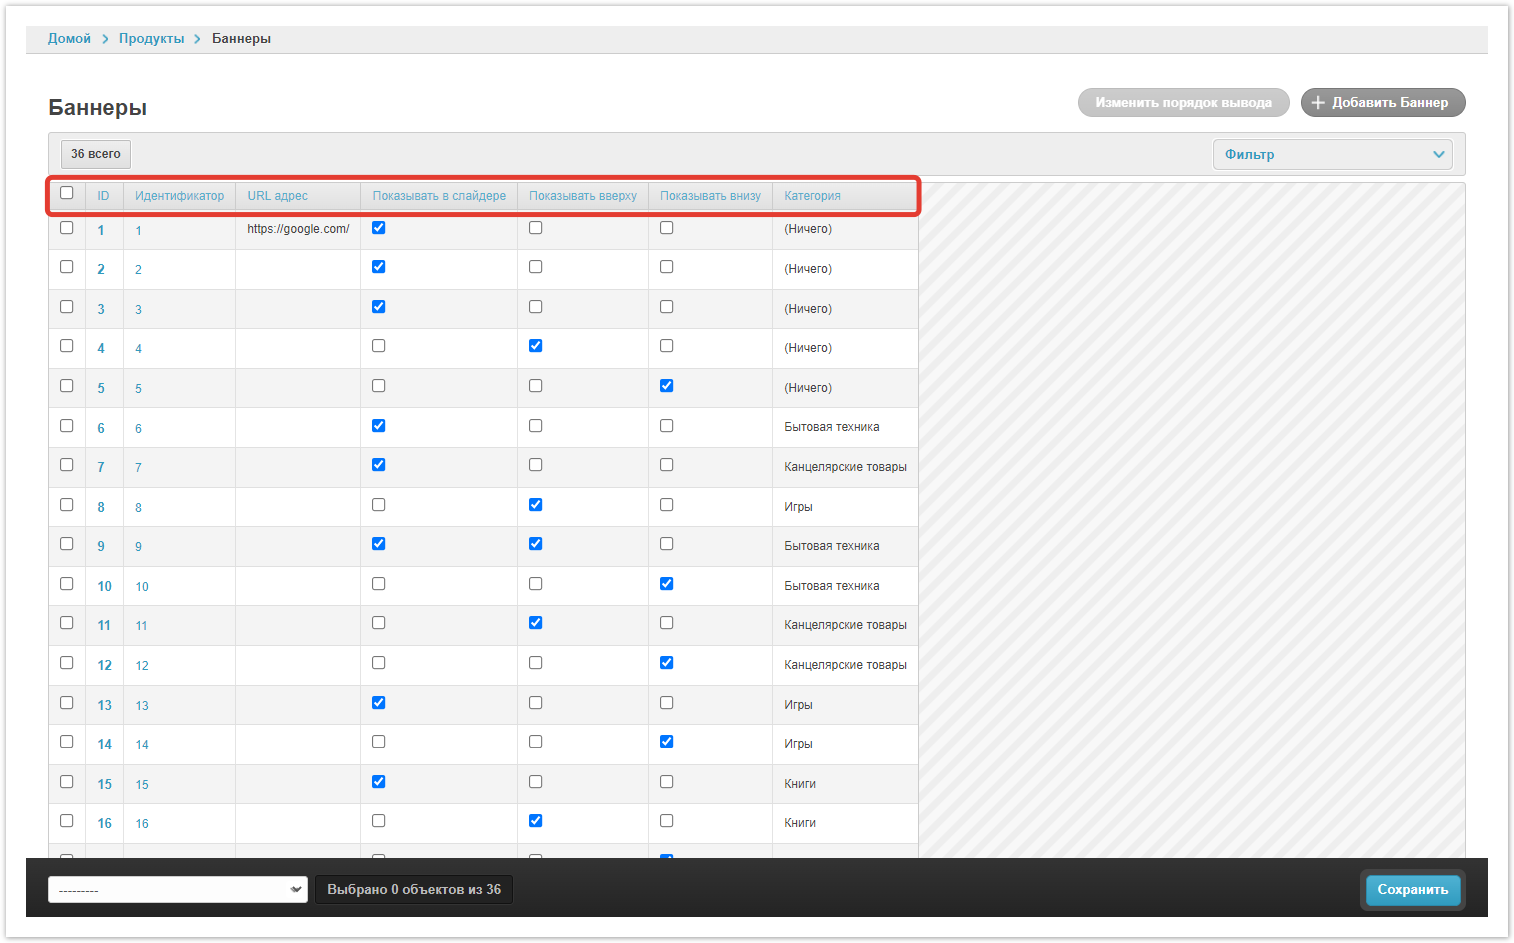
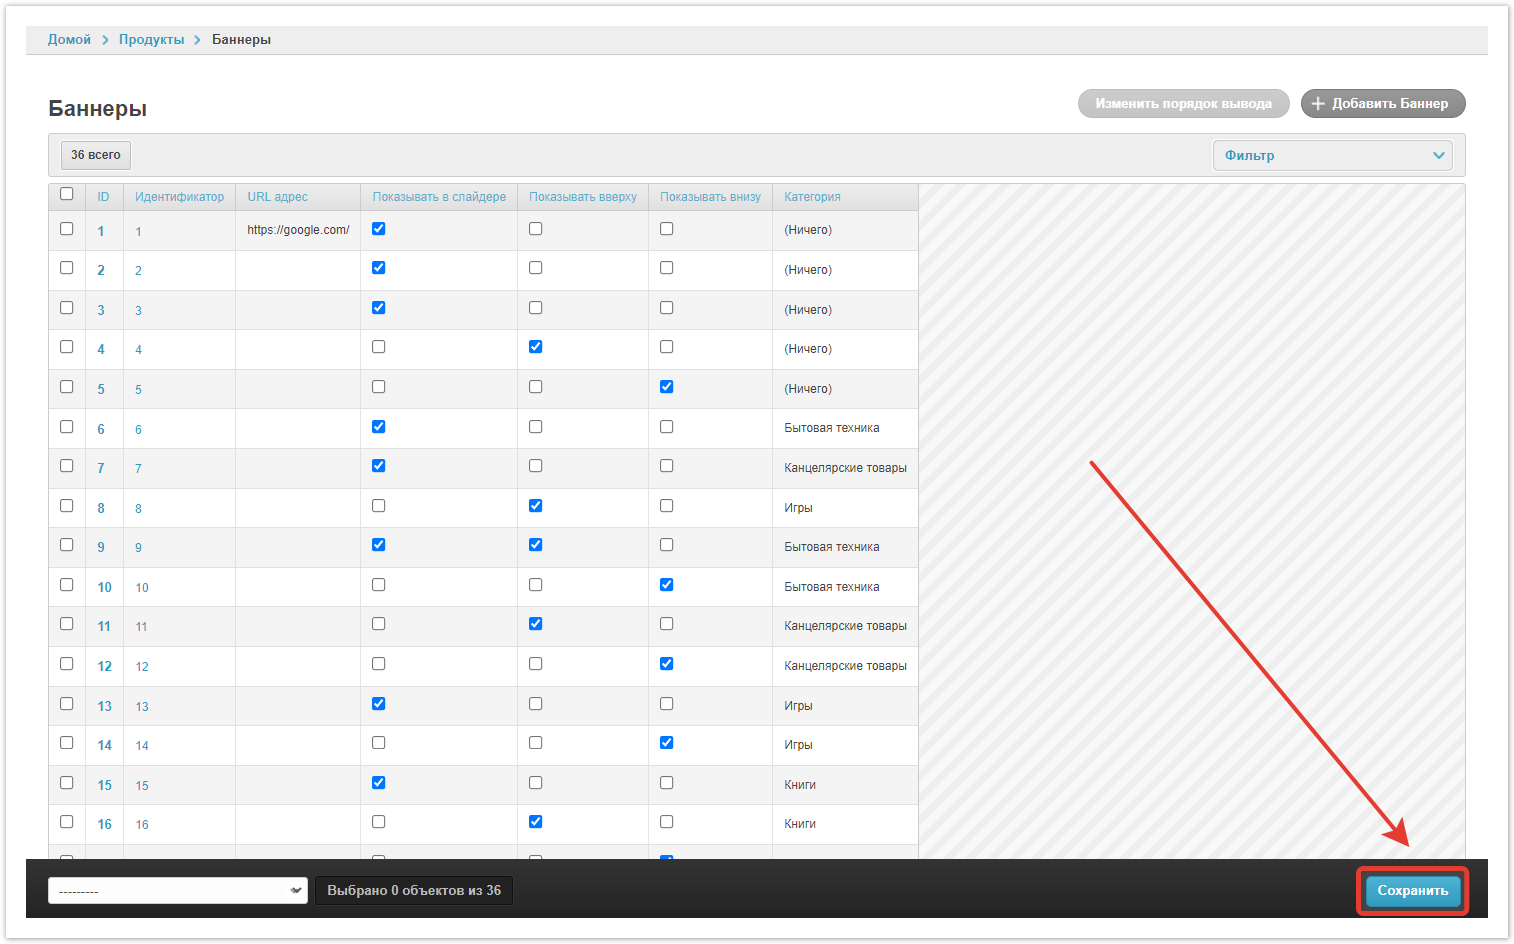
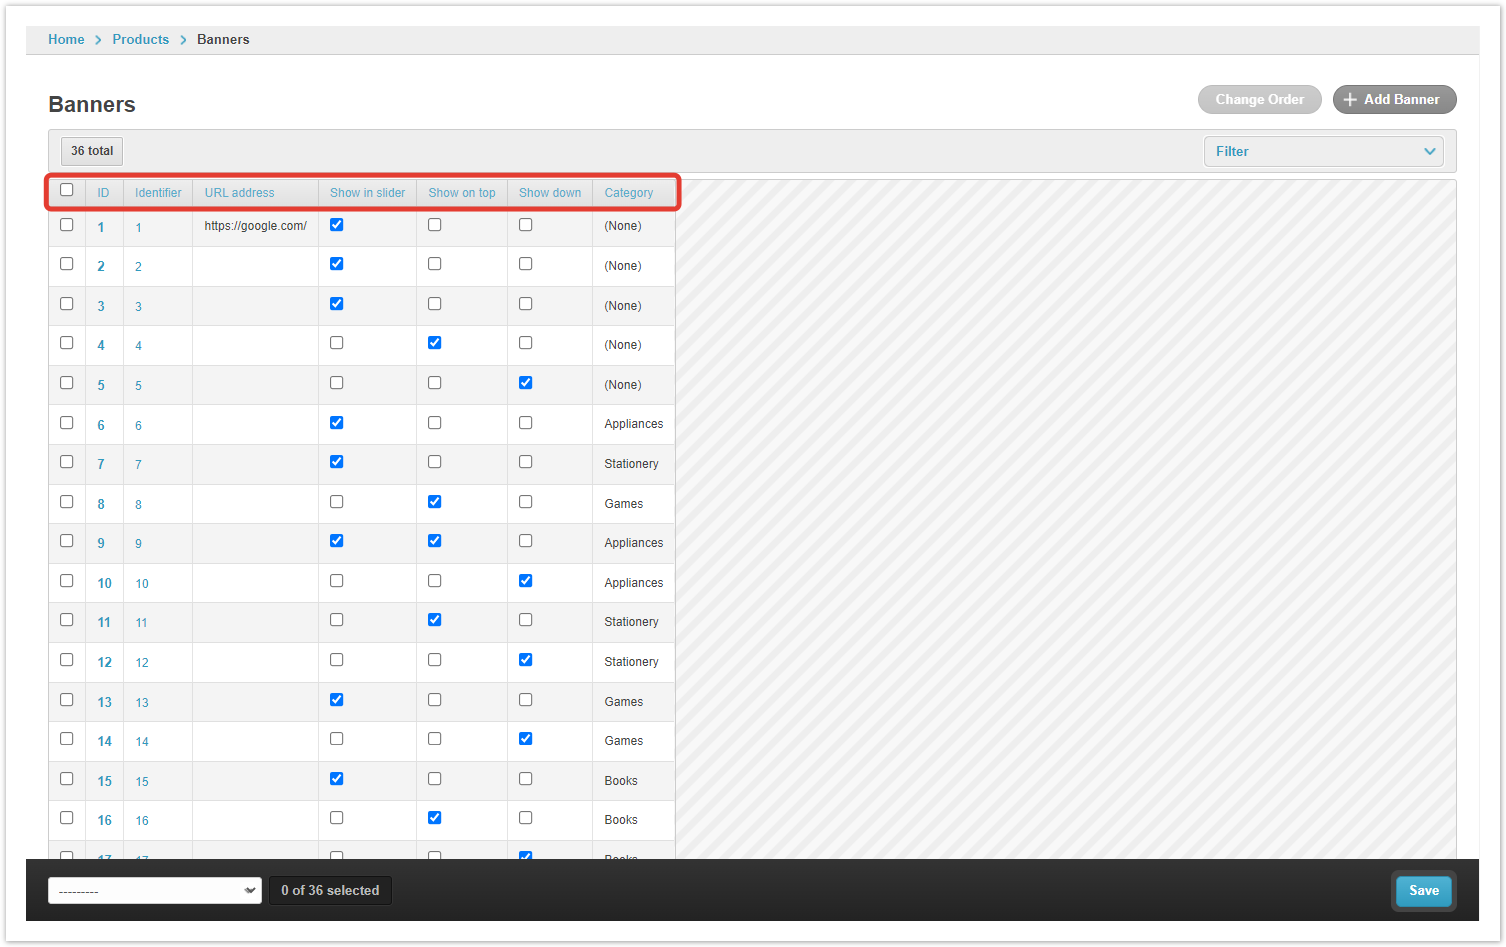
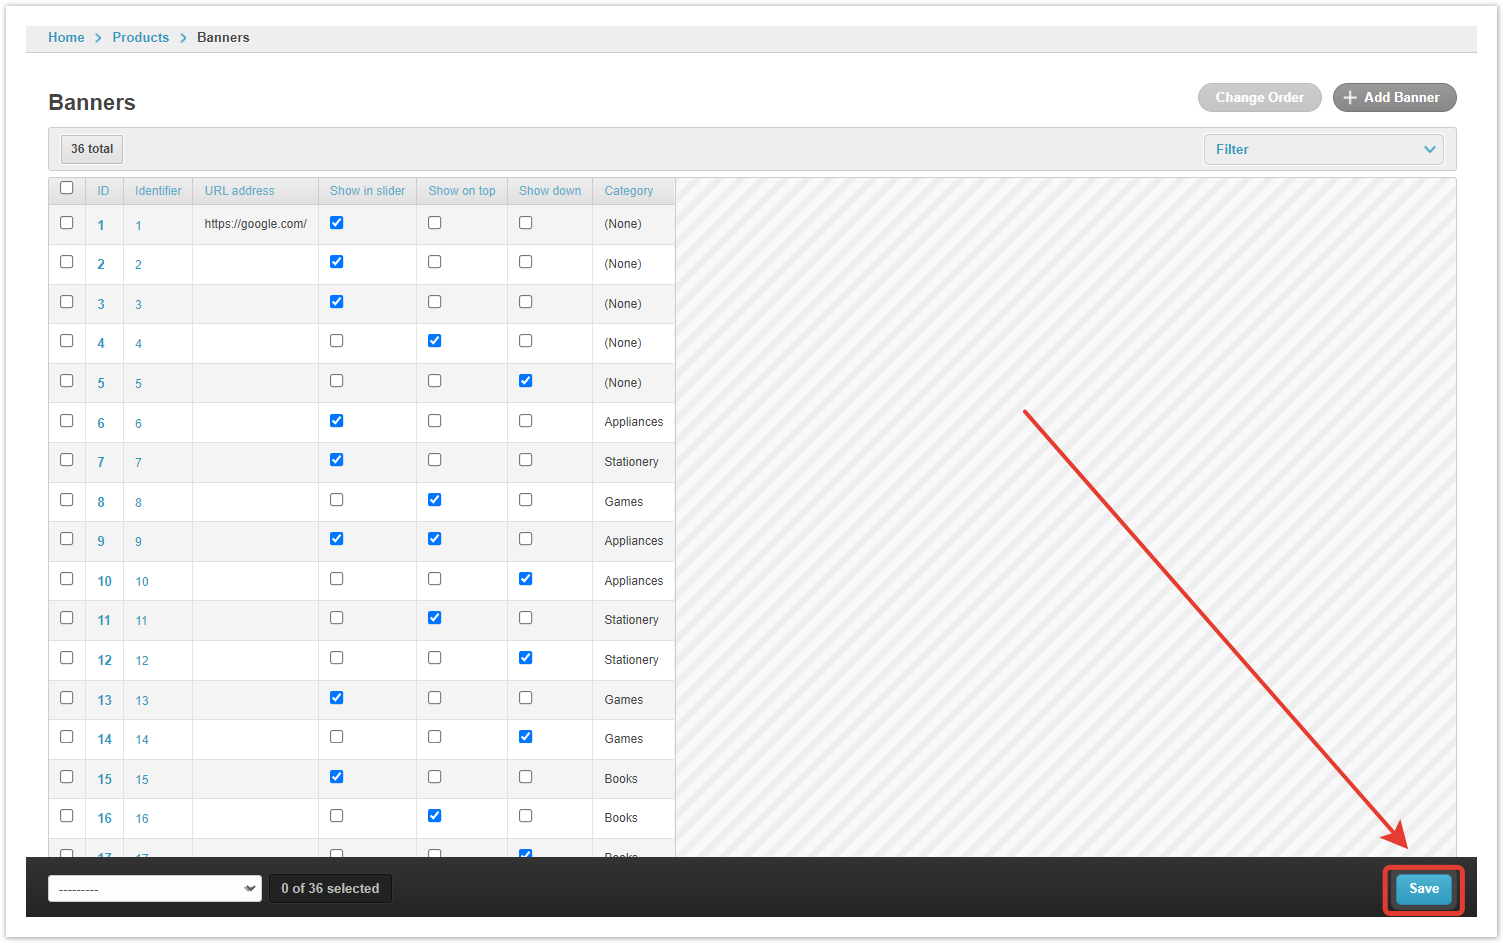
Управление баннерамиВы можете видеть все настройки в сводной таблице, а также управлять, на каких страницах проекта будут отображаться баннеры, с помощью чекбоксов раздела Баннеры административной панели.
Идентификатор — присвоенное при создании значение для каждого баннера. URL адрес — ссылка, по которой будет совершен переход при клике по баннеру. Показывать в слайдере — баннер будет отображаться в слайдере. Показывать вверху — изображение отобразится вверху, справа от слайдера. Показывать внизу — изображение отобразится внизу, справа от слайдера. Категория — показывает, в какой категории каталога Agora будет отображаться баннер. При установленном Ничего баннер будет выведен в корень каталога. Закончив настройки, нажмите кнопку Сохранить.
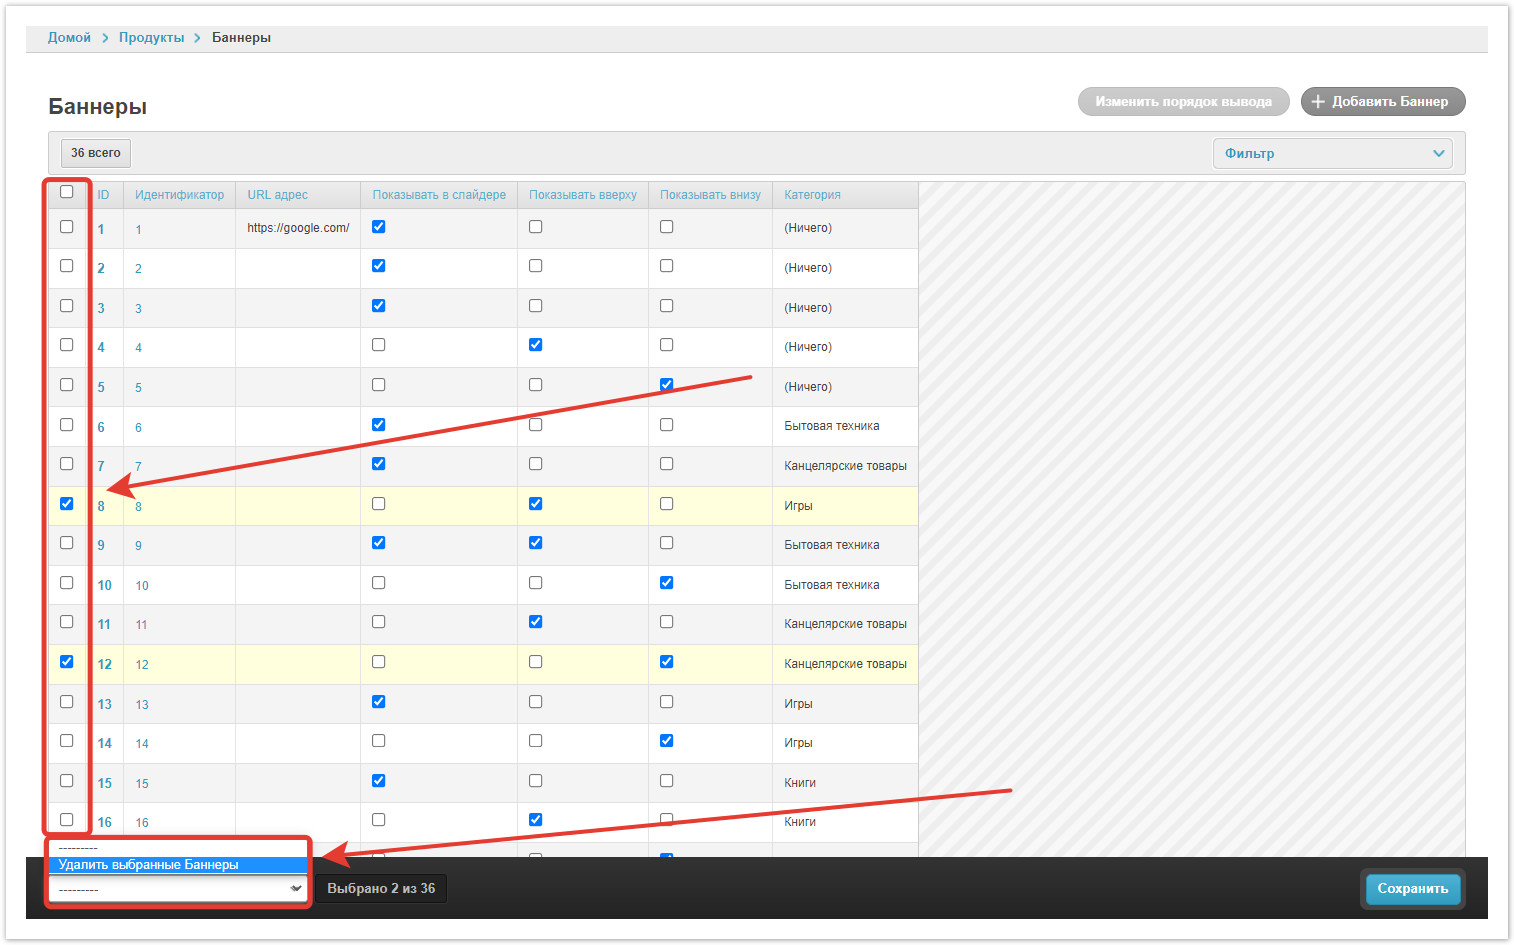
Есть возможность удалить один или несколько баннеров с помощью кнопки Удалить выбранные Баннеры.
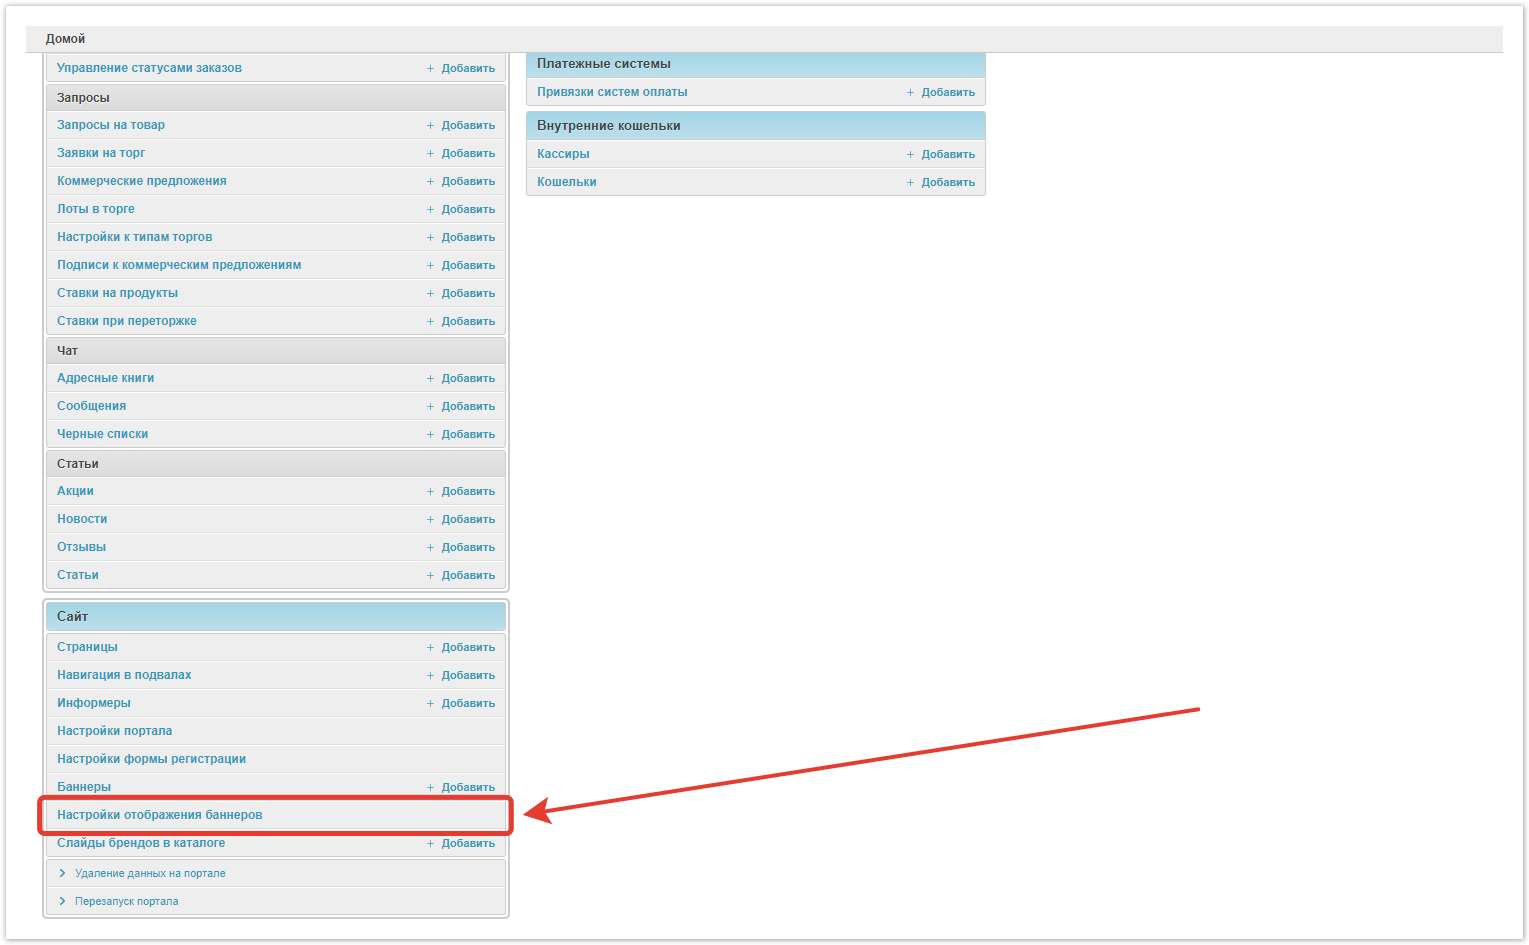
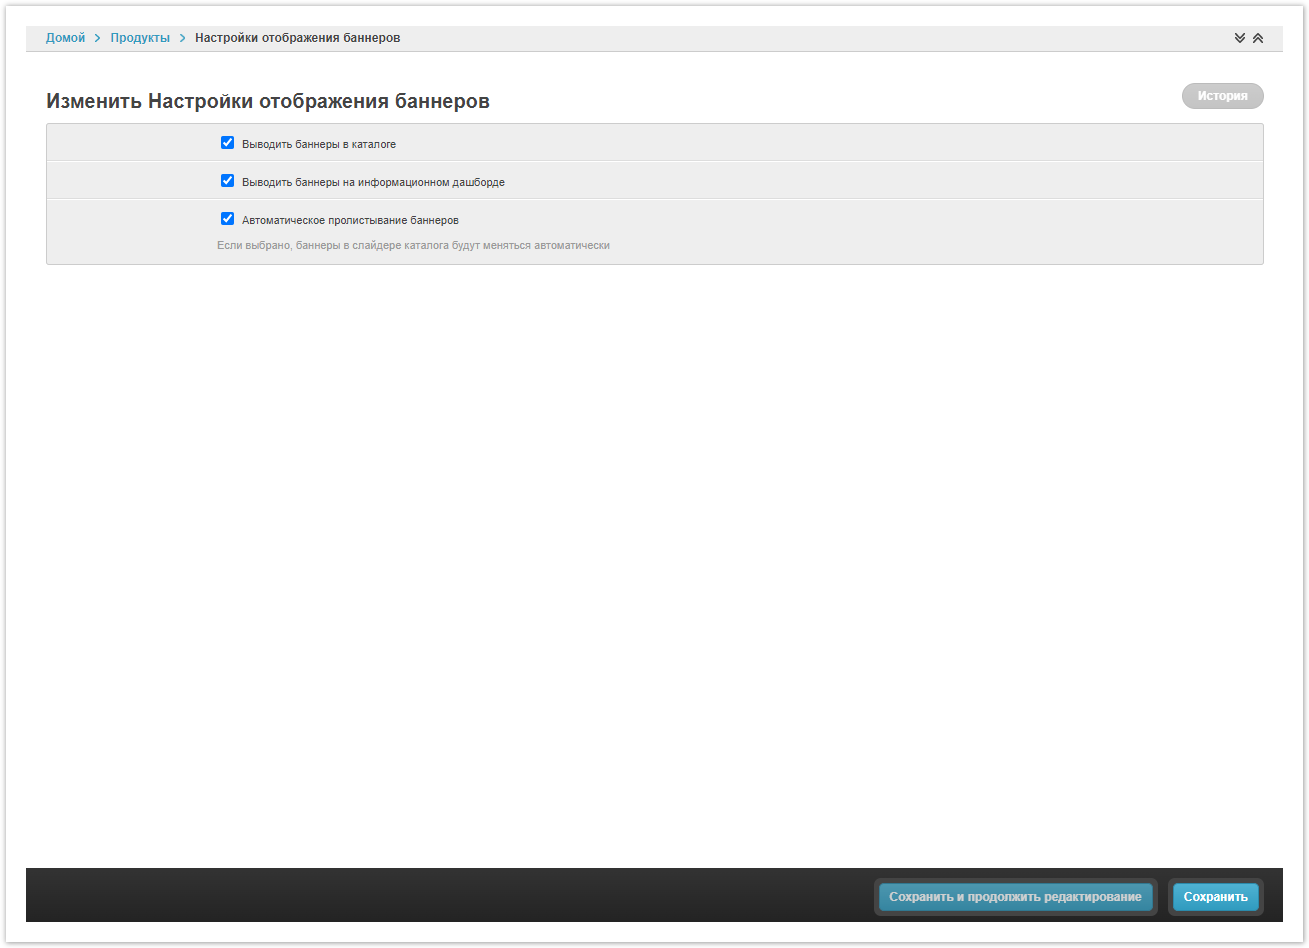
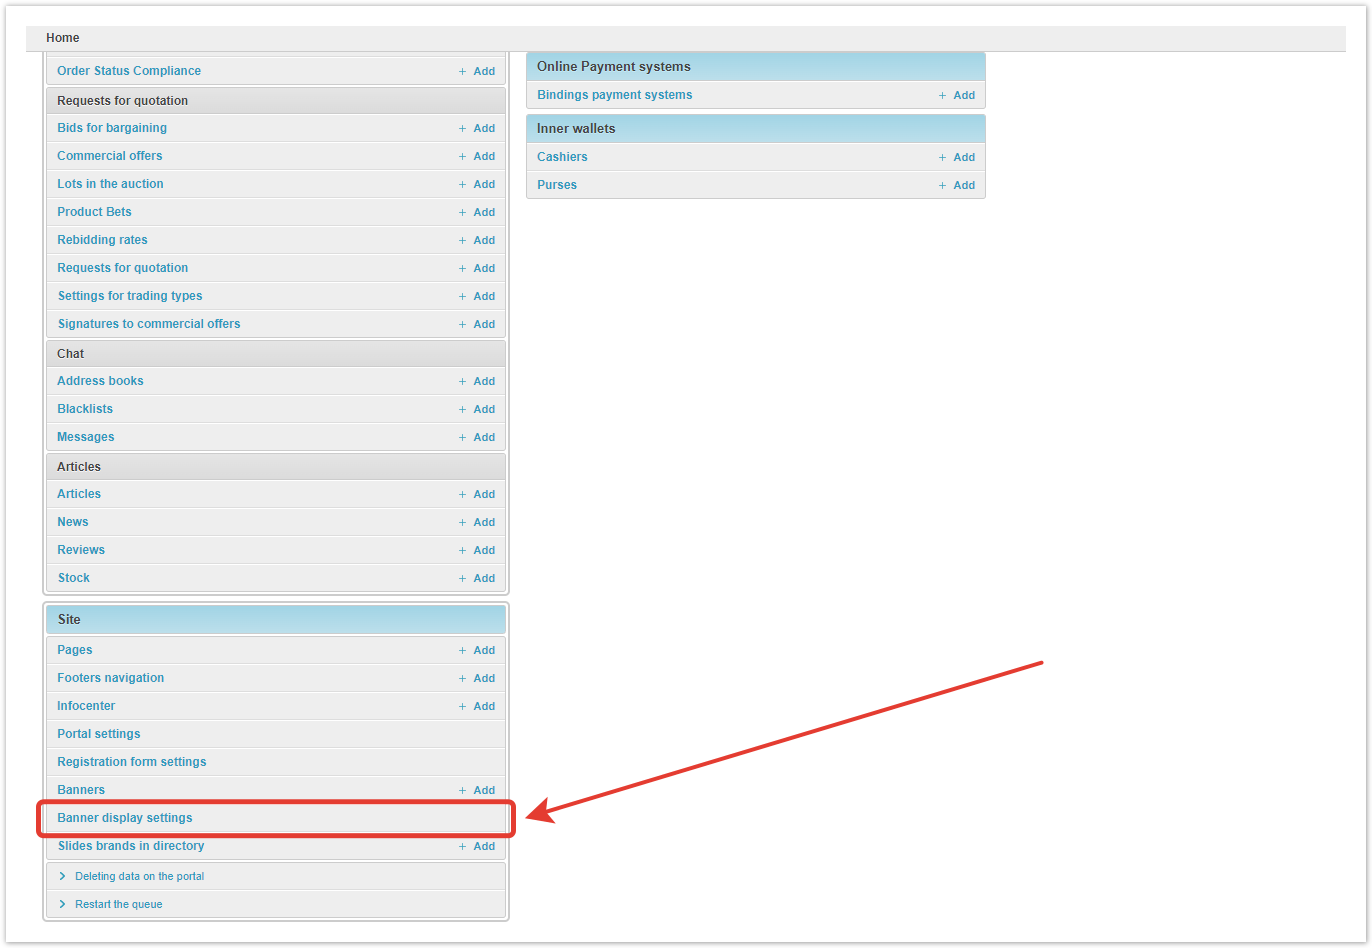
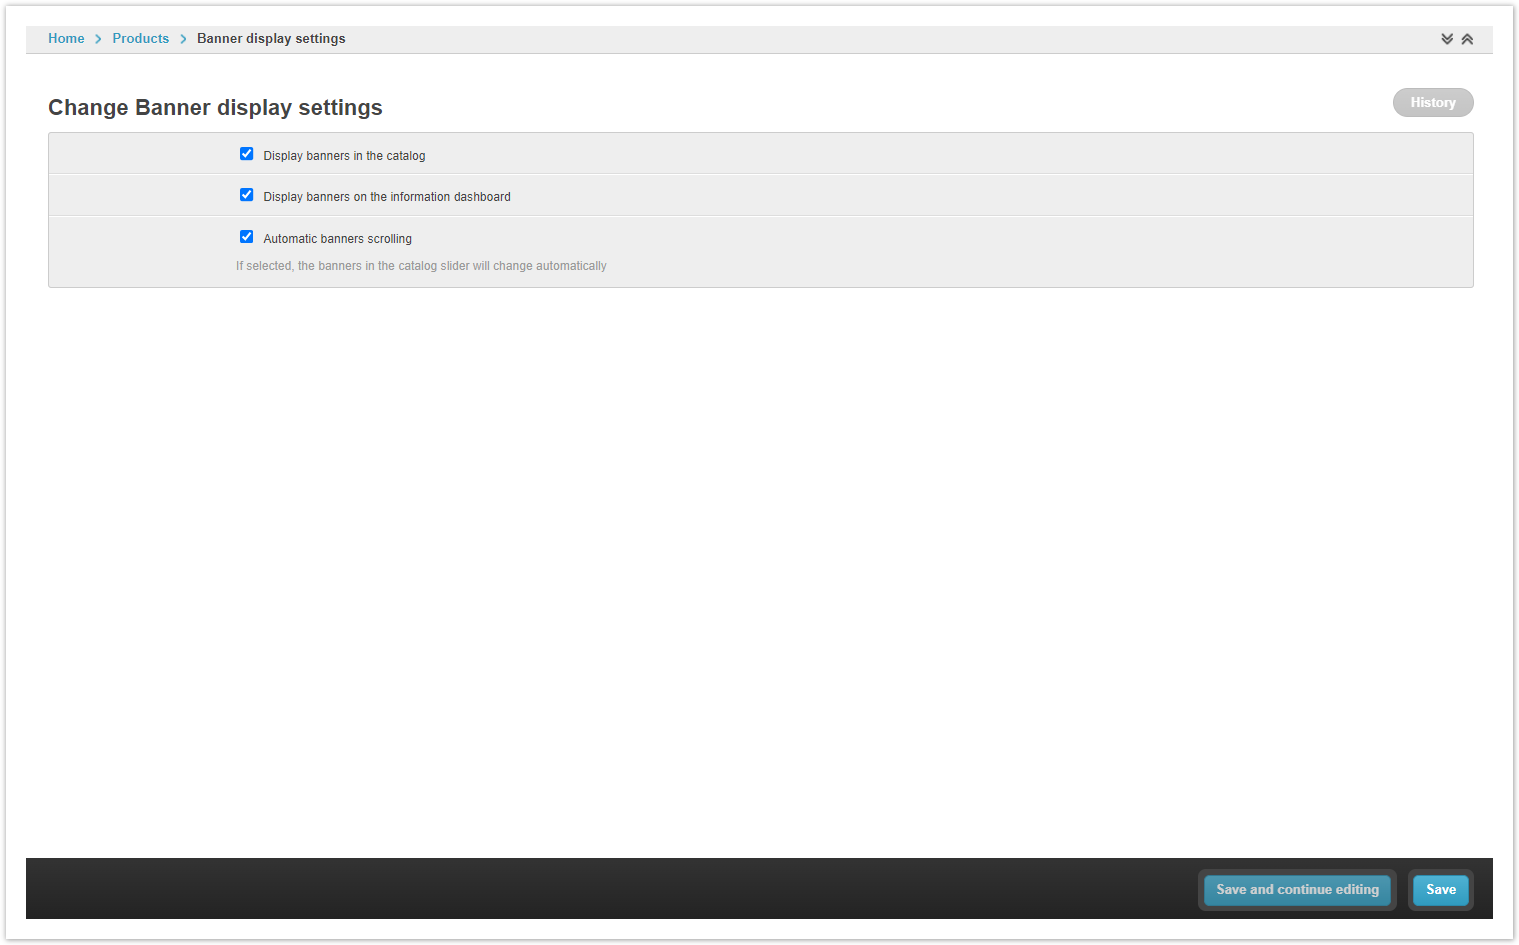
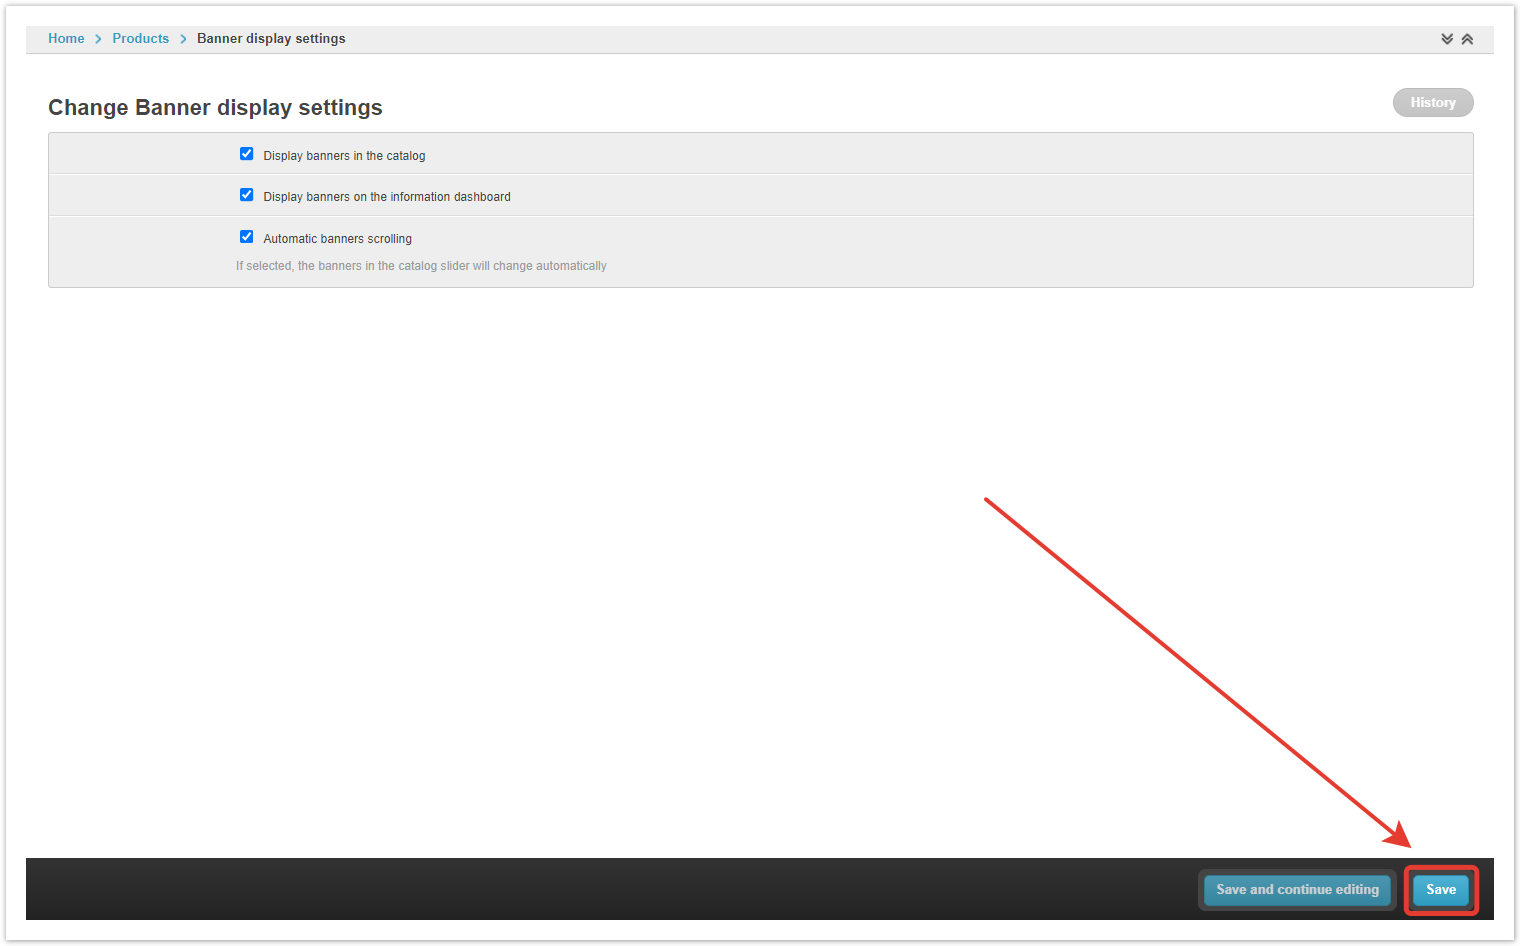
Настройки отображения баннеровВ этом разделе административной панели изменяется тип и способ вывода баннеров в каталоге.
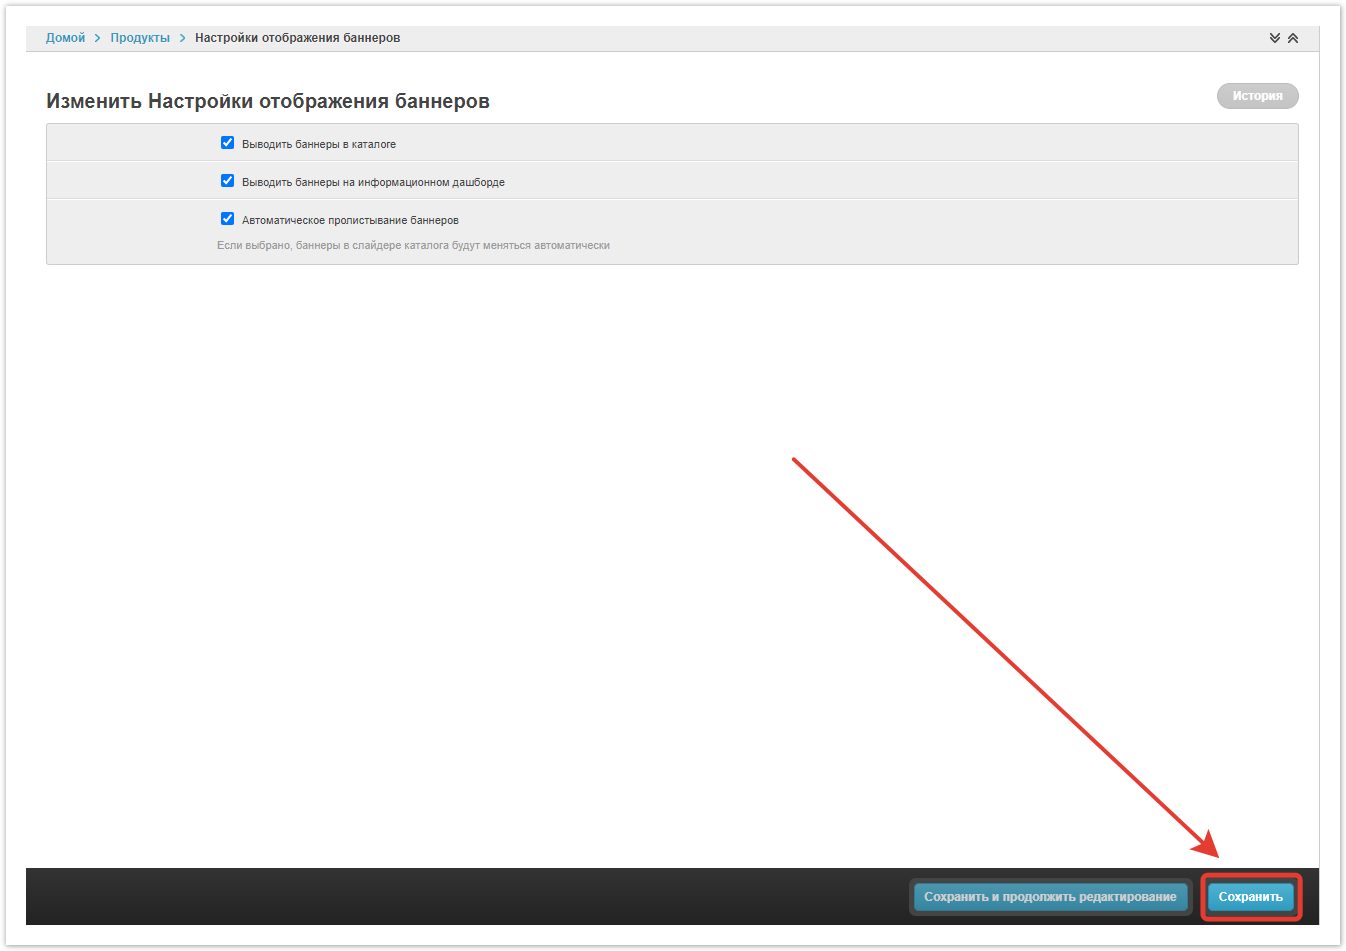
Выводить баннеры в каталогах — чекбокс включает/отключает баннеры во всех каталогах. Выводить баннеры на информационном дашборде — позволяет отображать баннеры в разделе Информация личного кабинета пользователя. Автоматическое пролистывание баннеров — при установленном чекбоксе изображения будут перелистываться автоматически. По завершении настроек Сохраните изменения.
|


| Sv translation | ||||||
|---|---|---|---|---|---|---|
| ||||||
Banners in the catalogIn the catalog, banners are displayed at the top of the page.
You can configure 2 types of banners:
Banner slider — allows you to set several images that are flipped automatically or manually:
Top/bottom banner — a static image displayed without any effects:
For the correct display, it is recommended to use banners of the following sizes:
Creating bannersBanners are configured in the admin panel of the project. After authorization in the admin panel, go to the Banners section, then click the Add banner button:
In the window that opens, specify the conditions for displaying the banner.
Image — specify the local path to the file (banner). Slider banner — the size of the loaded image, which will be displayed in the Slides section. Top/bottom banner — the size of the loaded image, which will be displayed in the Banners section (top/bottom). URL — fill in if the banner needs to be clickable, when you click on the banner, it will go to the specified URL. Identifier — a unique value for each banner. This value is necessary for the correct storage of the banner file in the project and for the convenience of managing the banner display settings in the catalog. Show (In the slider/Up/Down) — a checkbox, in accordance with which the logic for displaying banners is set. Category — a category of products, upon transition to which this banner will be displayed. If the product category is not specified, banners will be shown on the Catalog and InfoCenter page. If a product category is specified, then the banner will be shown only on the page of this category in the Catalog. After specifying all the settings, click the Save button at the bottom of the page.
Banner managementYou can see all the settings in the pivot table, as well as control which pages of the project banners will be displayed on using the checkboxes in the Banners section of the admin panel.
ID — banner number. Identifier — the value assigned at creation for each banner. URL address — the link that will be followed when clicking on the banner. Show in slider — the banner will be displayed in the slider. Show on top — the image will be displayed at the top, to the right of the slider. Show down — the image will be displayed at the bottom, to the right of the slider. Category — indicates in which category of the Agora catalog the banner will be displayed. If set to Nothing, the banner will be displayed in the directory root. When finished with the settings, click the Save button.
It is possible to remove one or several banners using the Delete selected Banners button.
Banner display settingsIn this section of the administrative panel, you can change the type and method of displaying banners in the catalog.
Display banners in the catalog — checkbox enables/disables banners in all directories. Display banners on the information dashboard — allows you to display banners in the Information section of the user's personal account. Automatic scrolling of banners — when the checkbox is checked, the images will be scrolled automatically. After completing the settings, Save the changes.
|

| Sv translation | ||||||
|---|---|---|---|---|---|---|
| ||||||
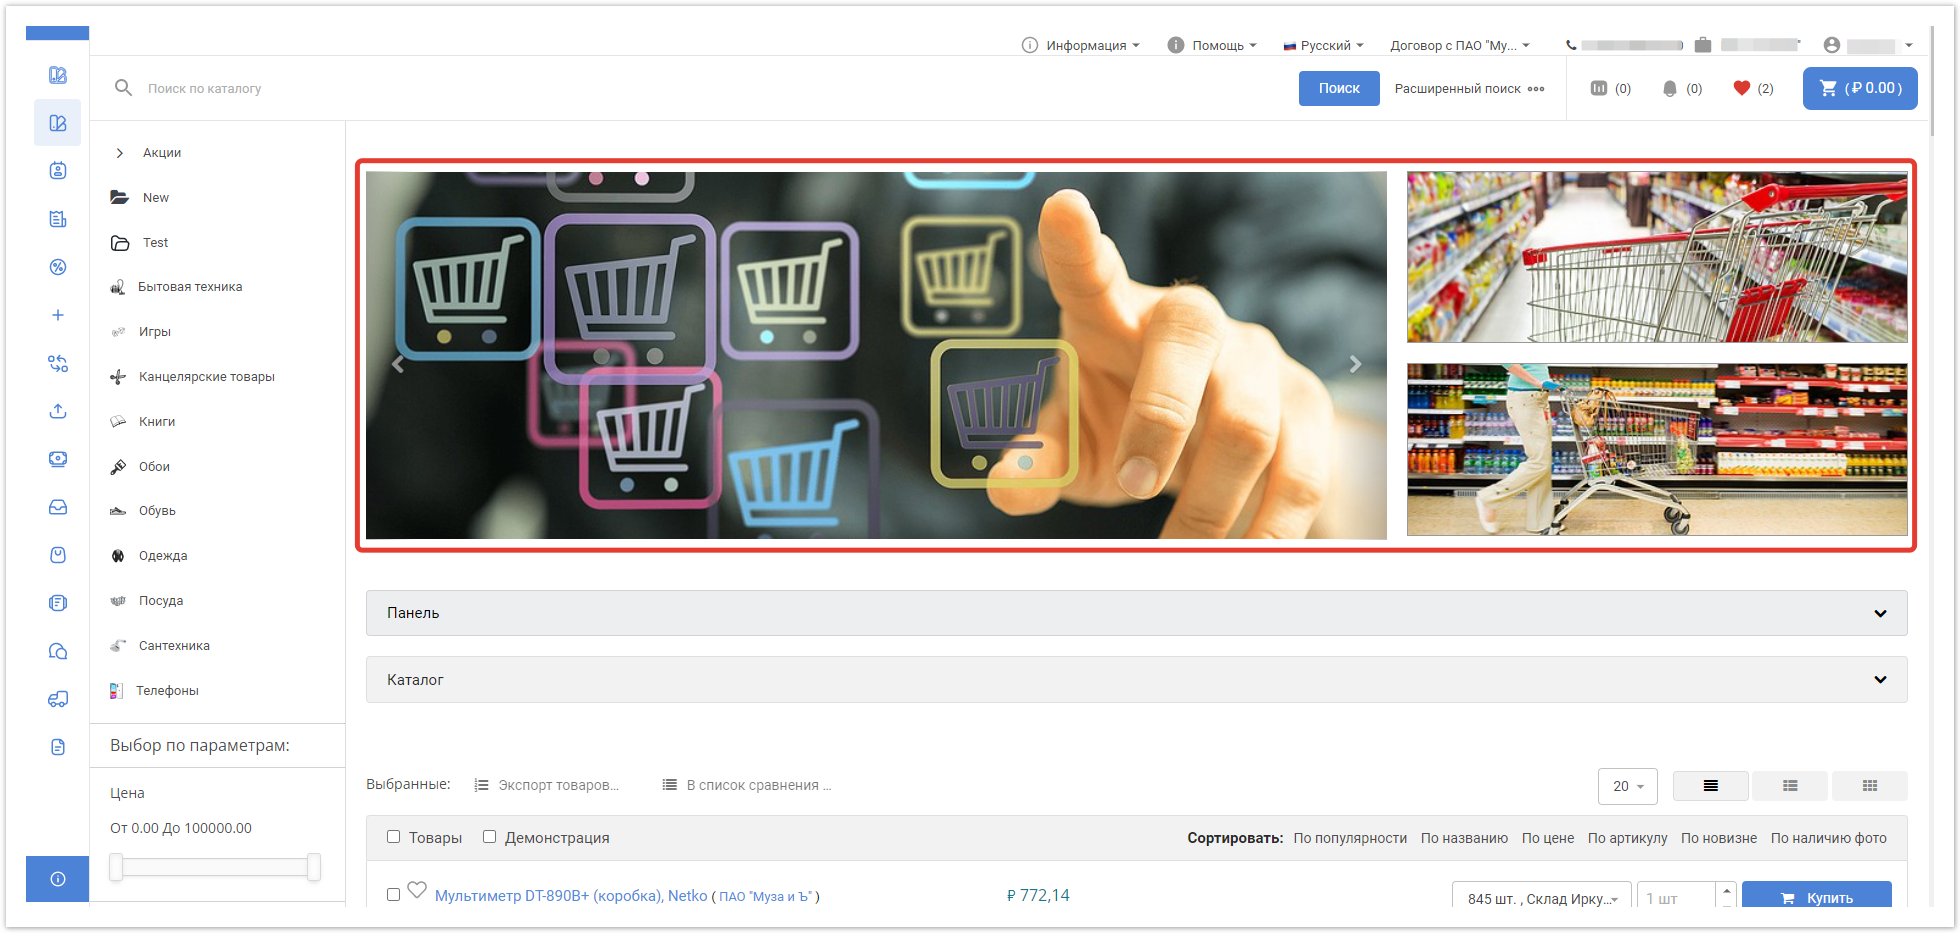
Banners no catálogoNo catálogo, os banners são exibidos na parte superior da página.
Você pode configurar 2 tipos de banners:
Slider de banner — permite especificar várias imagens que são invertidas automaticamente ou manualmente.
Banner superior/inferior — uma imagem estática exibida sem efeitos.
Para exibição correta, recomenda-se usar banners dos seguintes tamanhos:
Criando bannersOs banners estão configurados no painel administrativo do projeto. Após autorização no painel administrativo, vá para a seção Banners. Para adicionar um novo banner, clique no botão Adicionar banner:
Na janela que abre, defina as condições para exibir o banner.
Imagem — especifique o caminho local para o arquivo (banner). Banner deslizante — o tamanho da imagem carregada que será exibida na seção Slides. Banner superior/inferior — o tamanho da imagem enviada, que será exibida na seção Banners (parte superior/inferior). Endereço de URL — é preenchido, se o banner precisar ser clicável, ao clicar no banner, a transição para a URL especificada será realizada. Identificador — um valor único para cada banner. Esse valor é necessário para o armazenamento correto do arquivo banner no projeto e a conveniência de gerenciar a configuração do display do banner no diretório. Show (No controle deslizante/Superior/Inferior) — caixa de seleção, segundo a qual a lógica de exibição de banners está definida. Categoria — uma categoria de mercadorias, quando você vai para onde este banner será exibido. Se a categoria do produto não for especificada, os banners serão exibidos na página Catálogo e Informação. Se a categoria do produto for especificada, o banner será exibido apenas na página desta categoria no Catálogo. Depois de especificar todas as configurações, clique no botão Salvar na parte inferior da página.
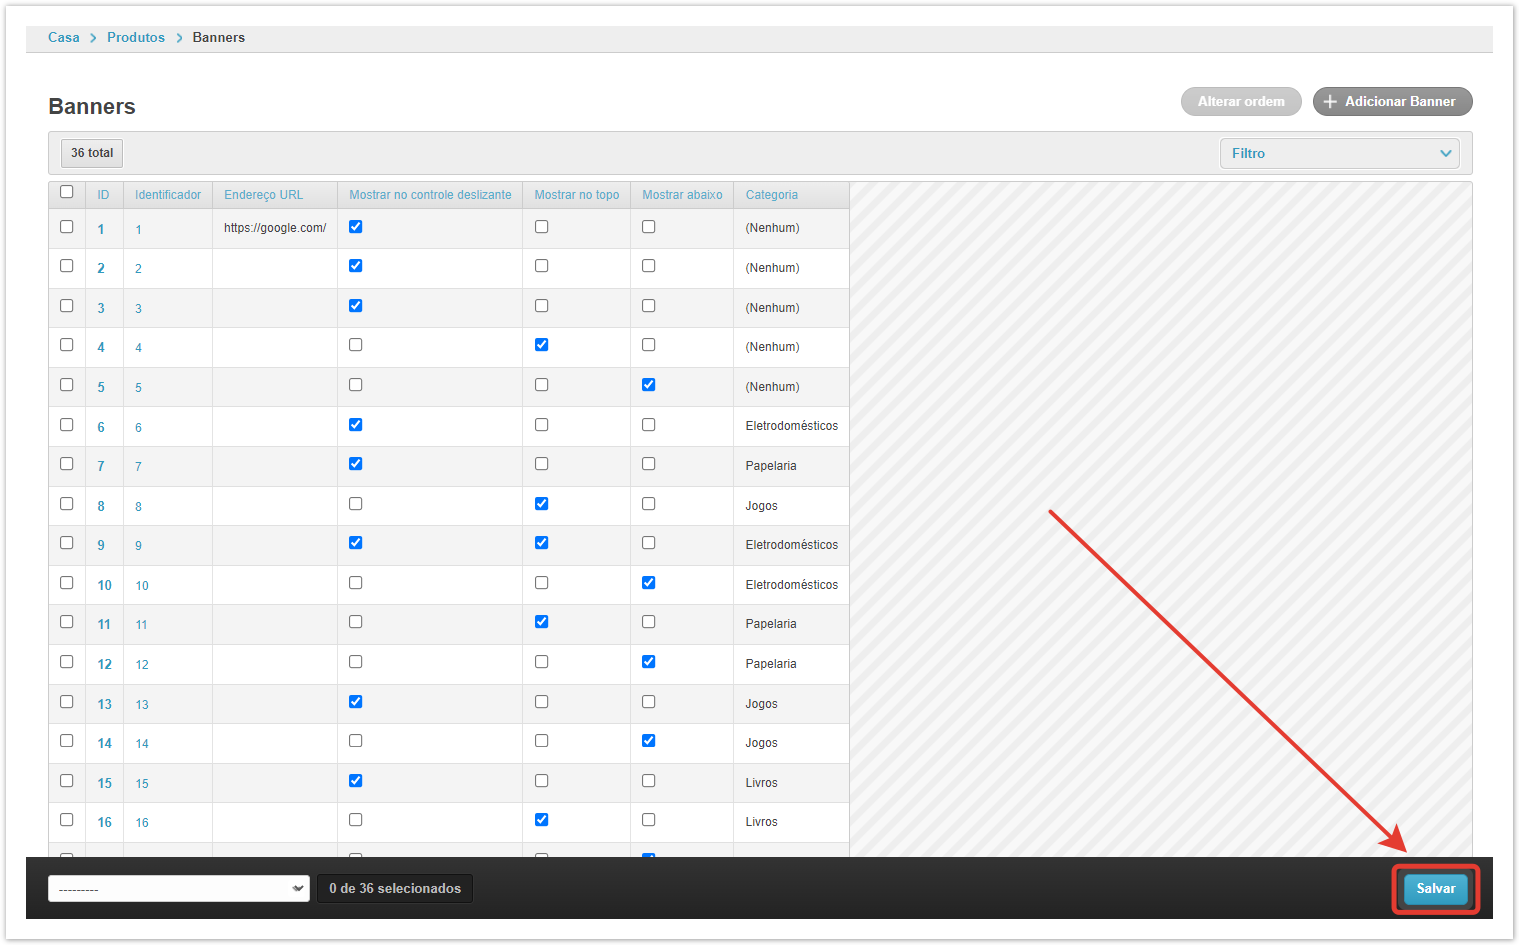
Gerenciamento de bannersVocê pode ver todas as configurações na tabela pivô, bem como gerenciar quais páginas do projeto exibirão banners, usando as caixas de seleção da seção Banners do painel administrativo.
ID — número do banner. Identificador — o valor atribuído durante a criação de cada banner. Endereço URL — o link que será clicado ao clicar no banner. Mostrar no controle deslizante — o banner será exibido no controle deslizante. Mostrar no topo — a imagem será exibida na parte superior, à direita do controle deslizante. Mostrar abaixo — a imagem será exibida na parte inferior, à direita do controle deslizante. Categoria — indica em qual categoria do catálogo do Agora o banner será exibido. Quando nada for instalado, o banner será exibido na raiz do diretório. Quando terminar, clique em Salvar.
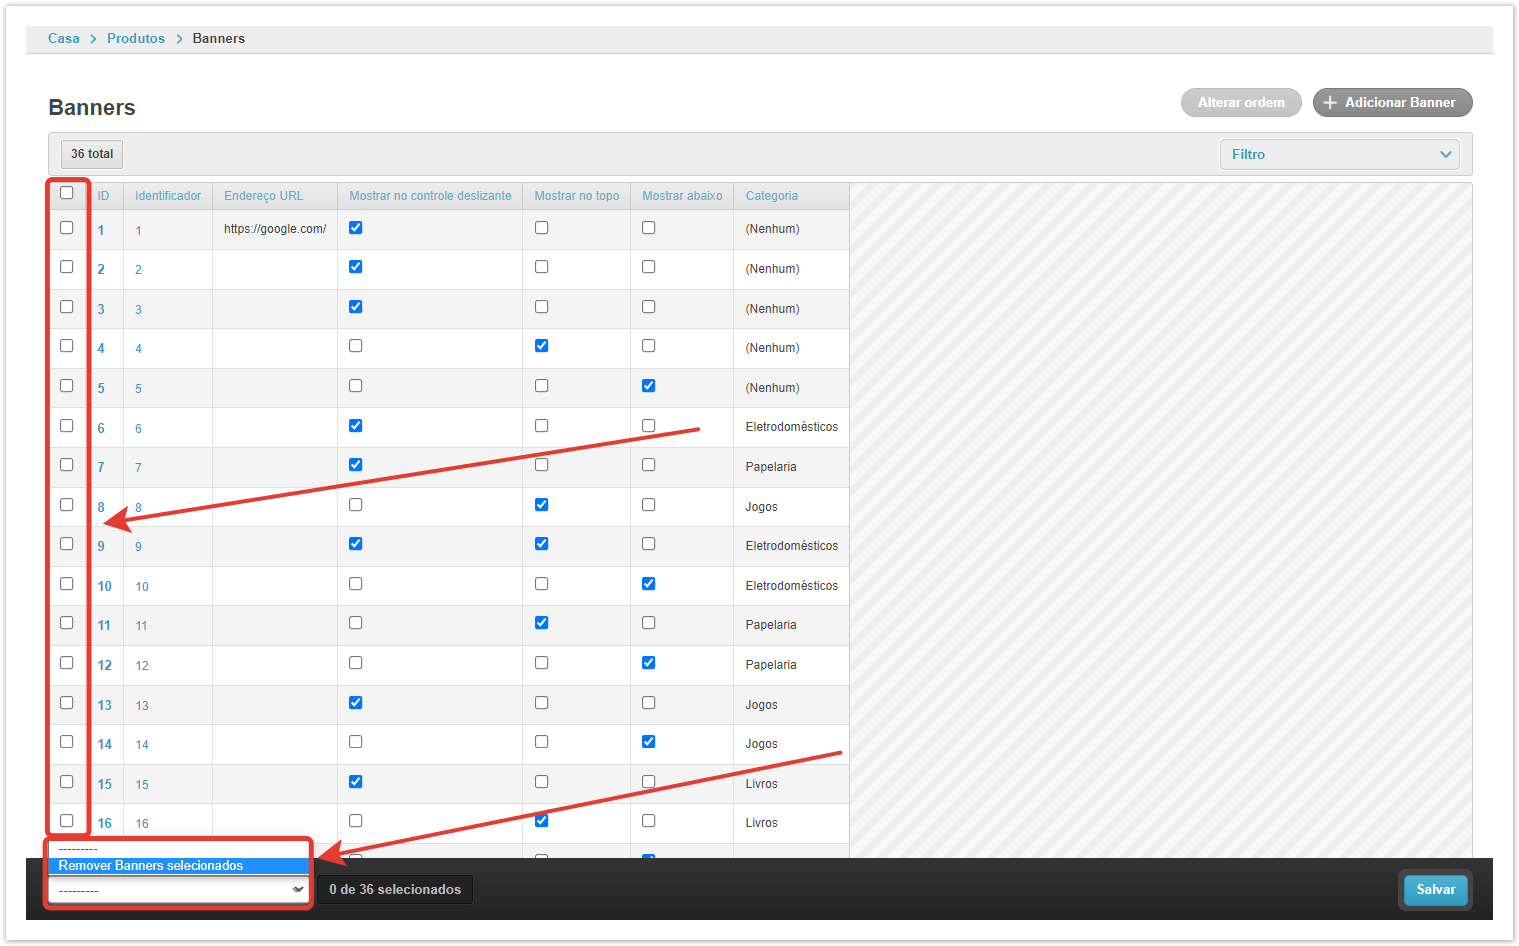
É possível excluir um ou mais banners usando o botão Remover Banners selecionados.
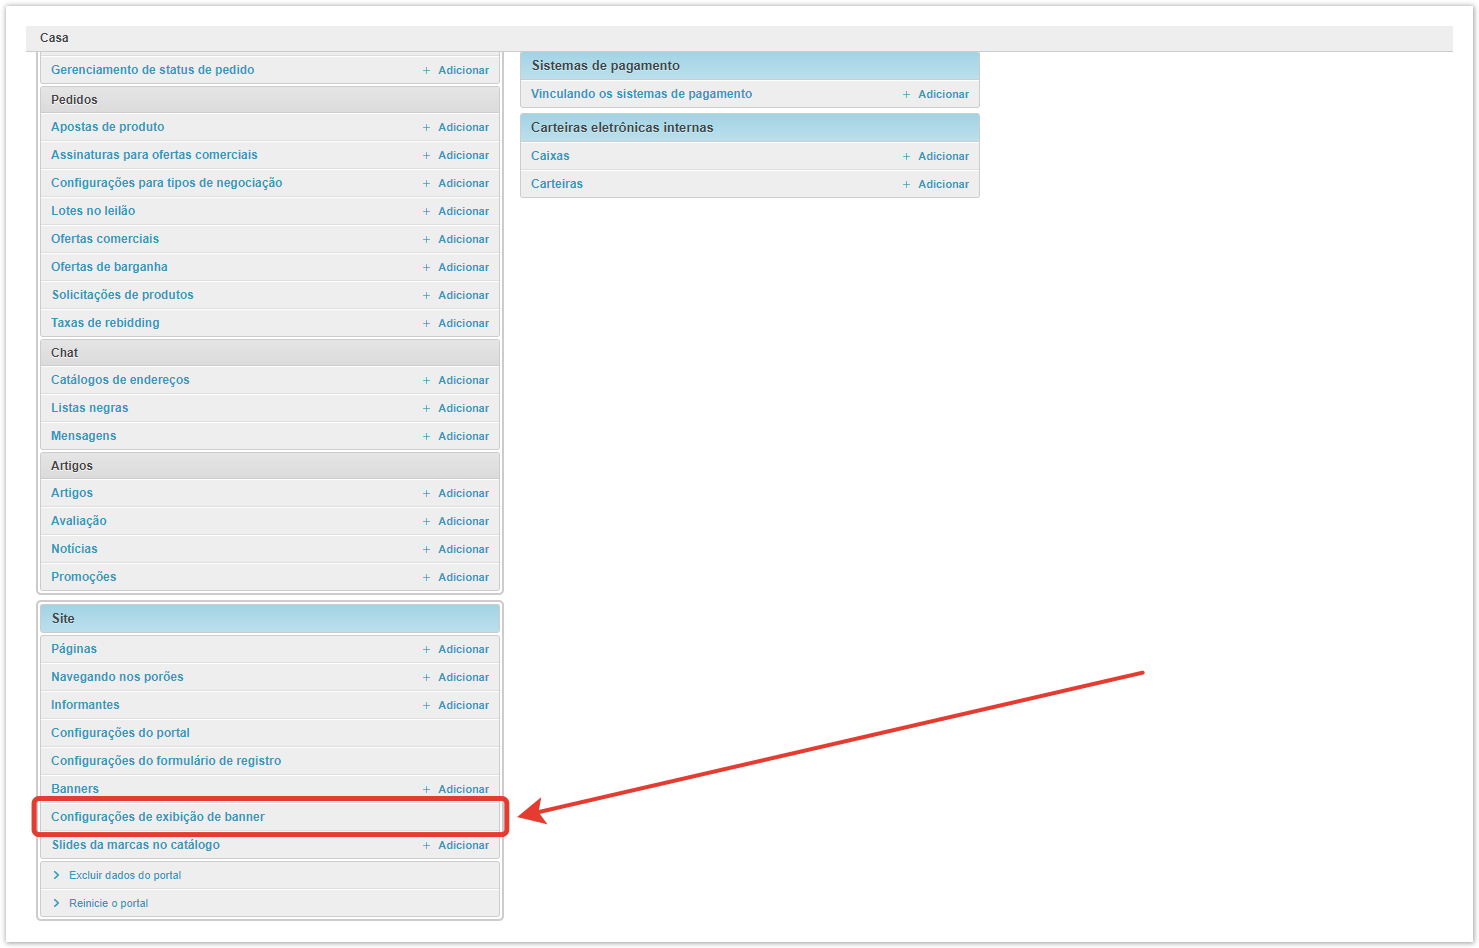
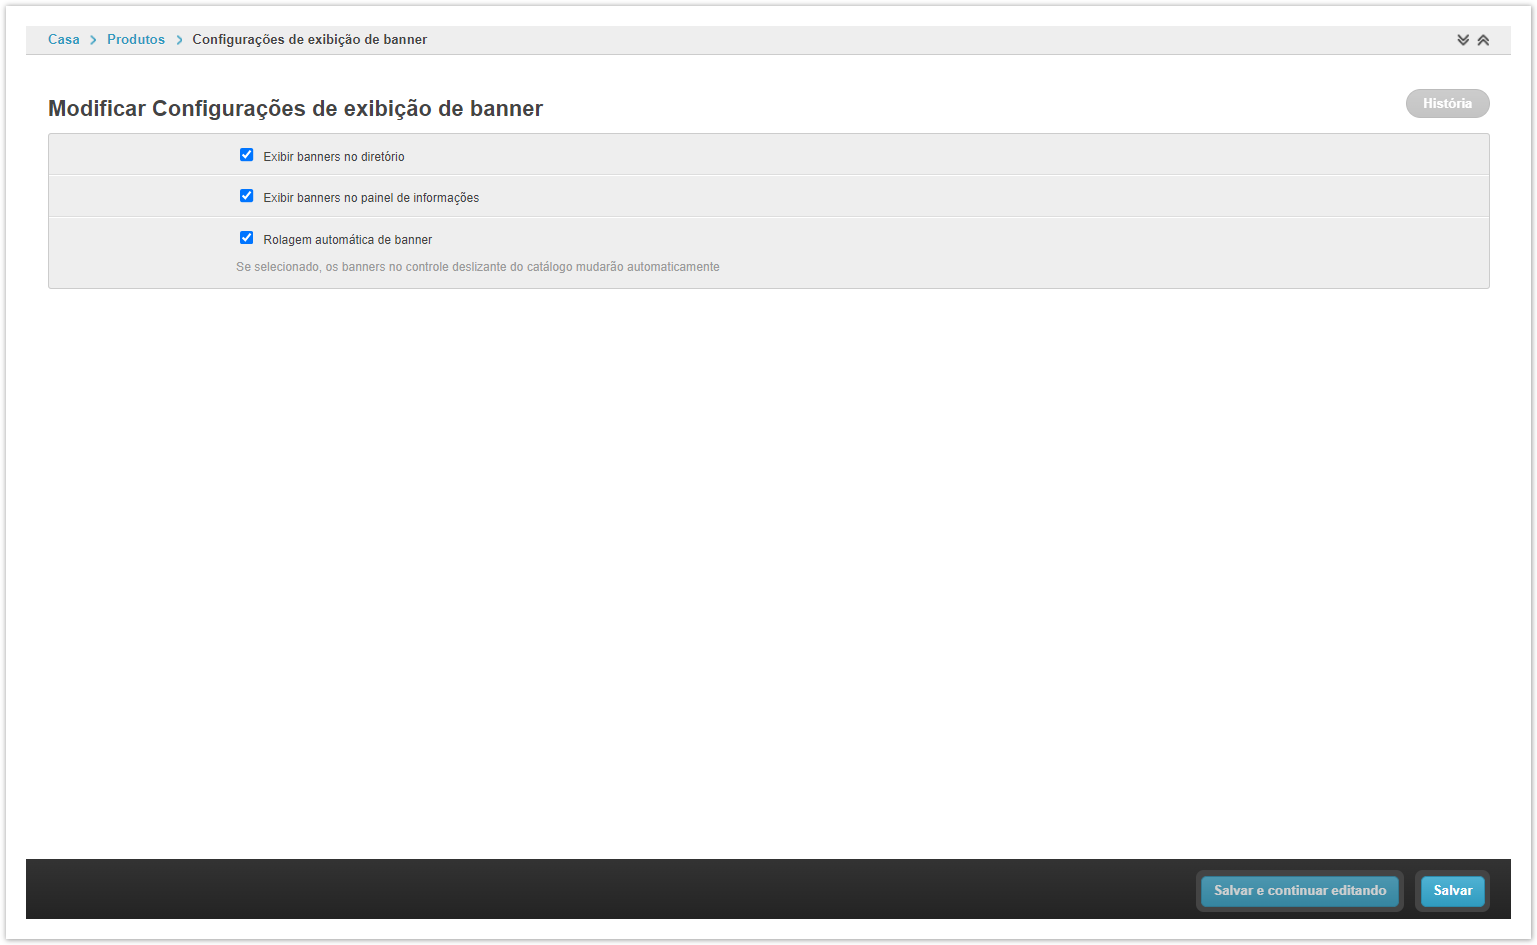
Configurações de exibição de bannerNesta seção do painel administrativo, o tipo e o método de exibição de banners no catálogo são alterados.
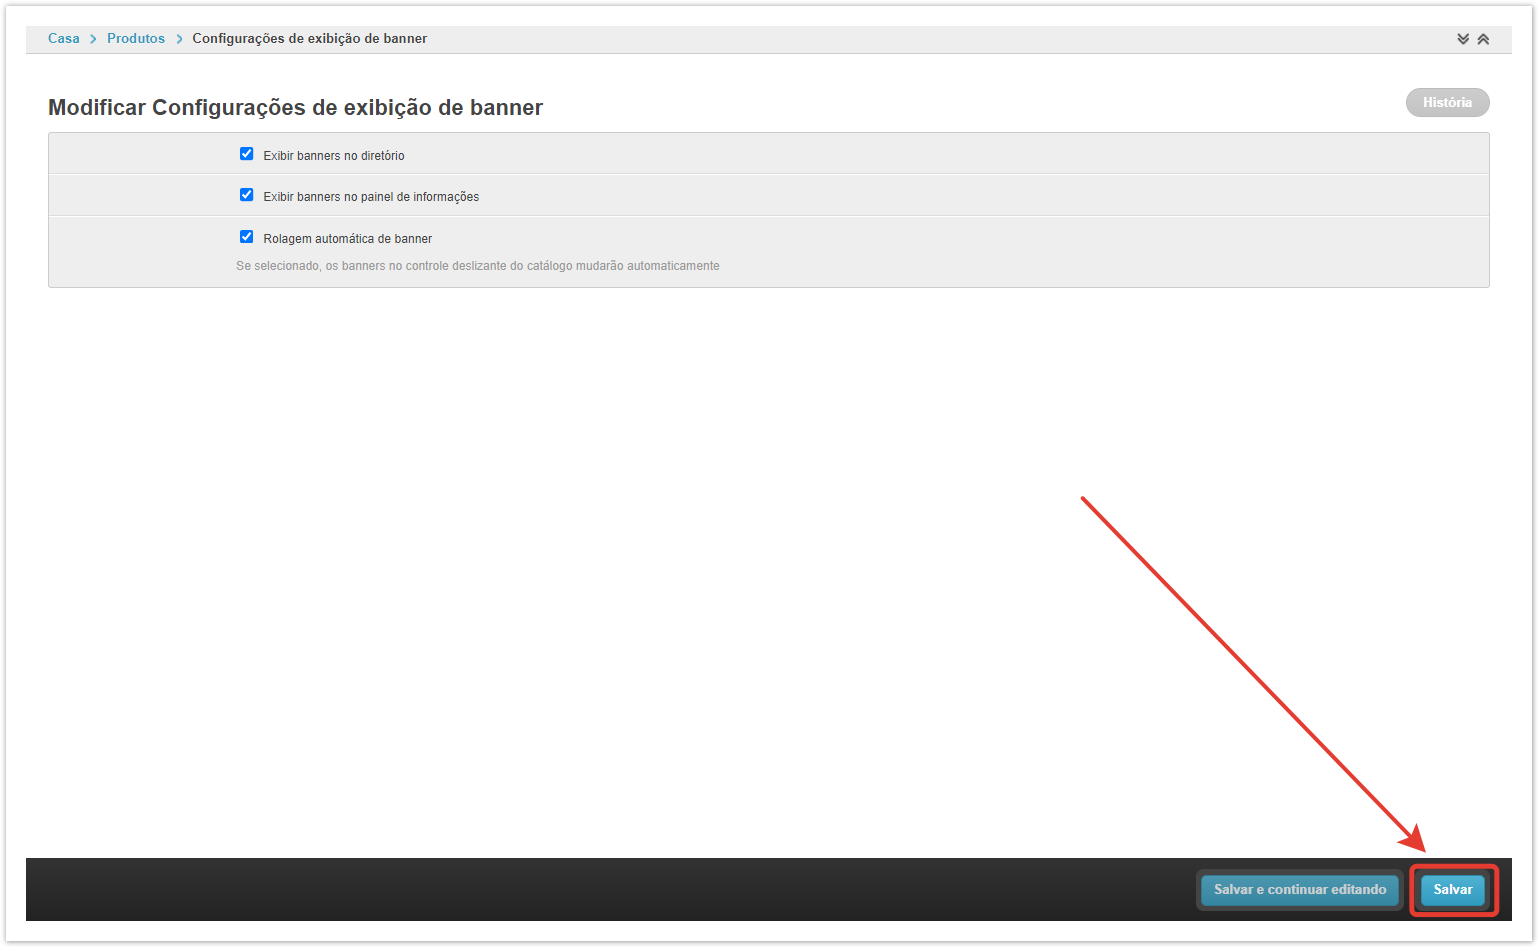
Exibir banners no diretório — a caixa de seleção permite/desativa banners em todos os diretórios. Exibir banners no painel de informações — permite exibir banners na seção Informação da conta pessoal do usuário. Rolagem automática de banners — com a caixa de seleção instalada, as imagens serão invertidas automaticamente. Quando as configurações estiverem concluídas, Salve as alterações.
|