...
| Sv translation | ||||||
|---|---|---|---|---|---|---|
| ||||||
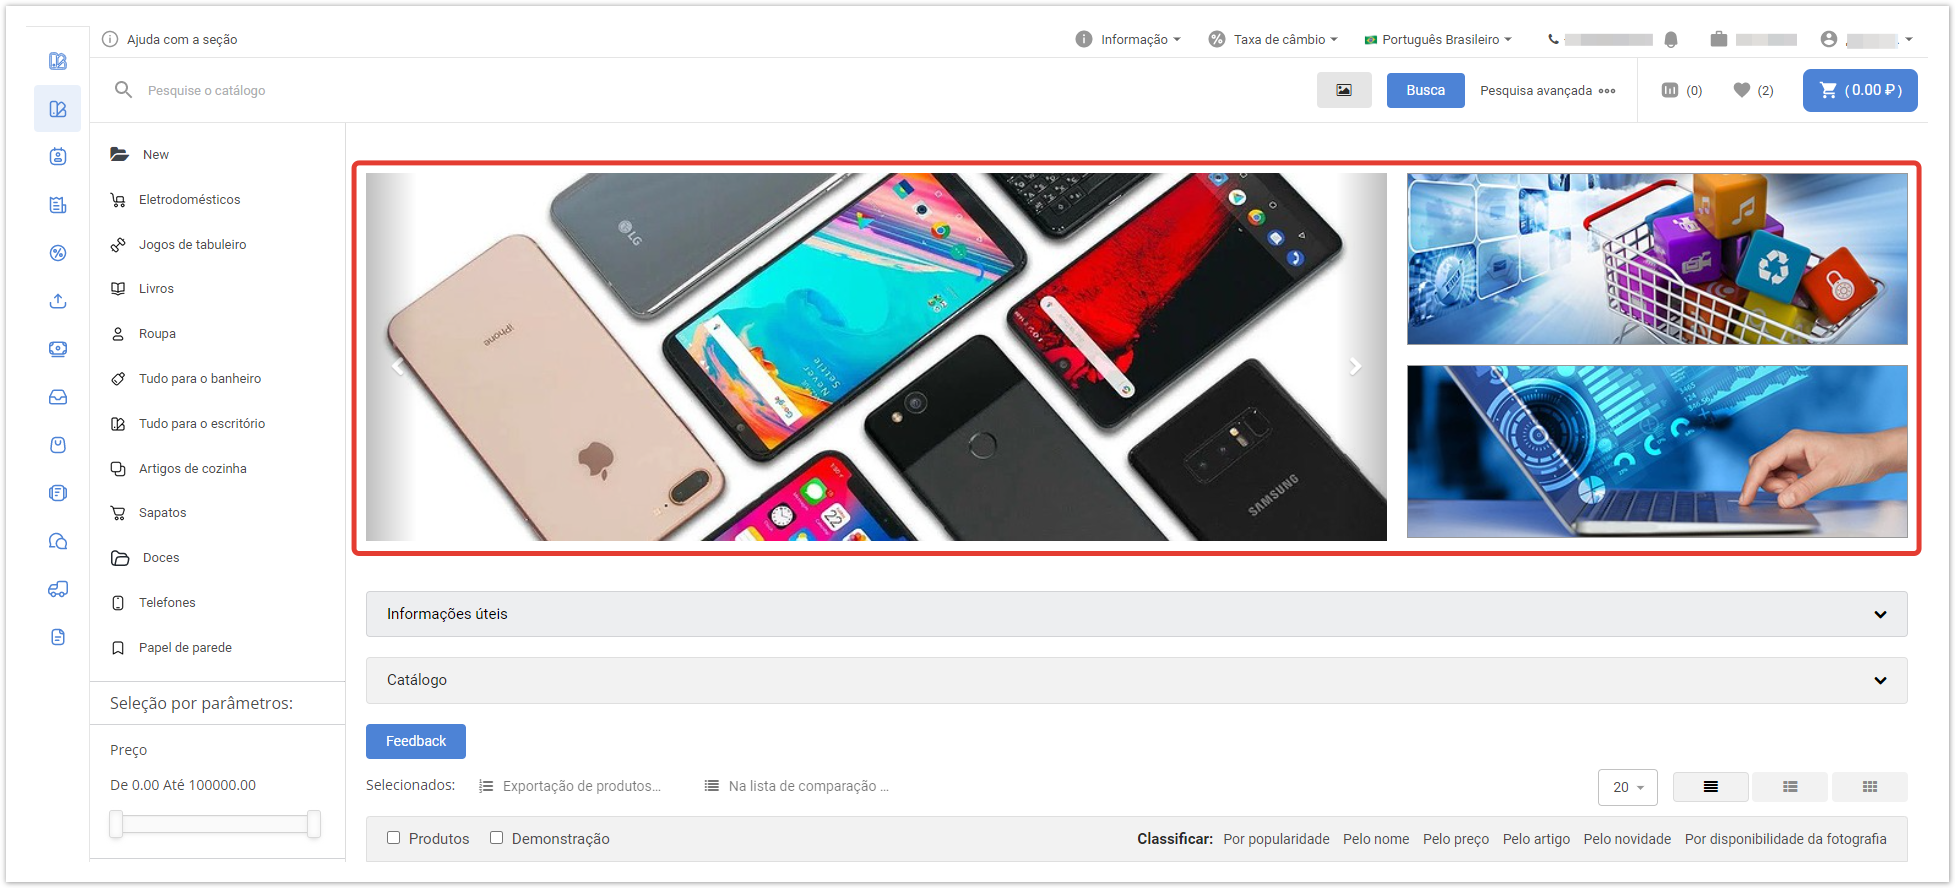
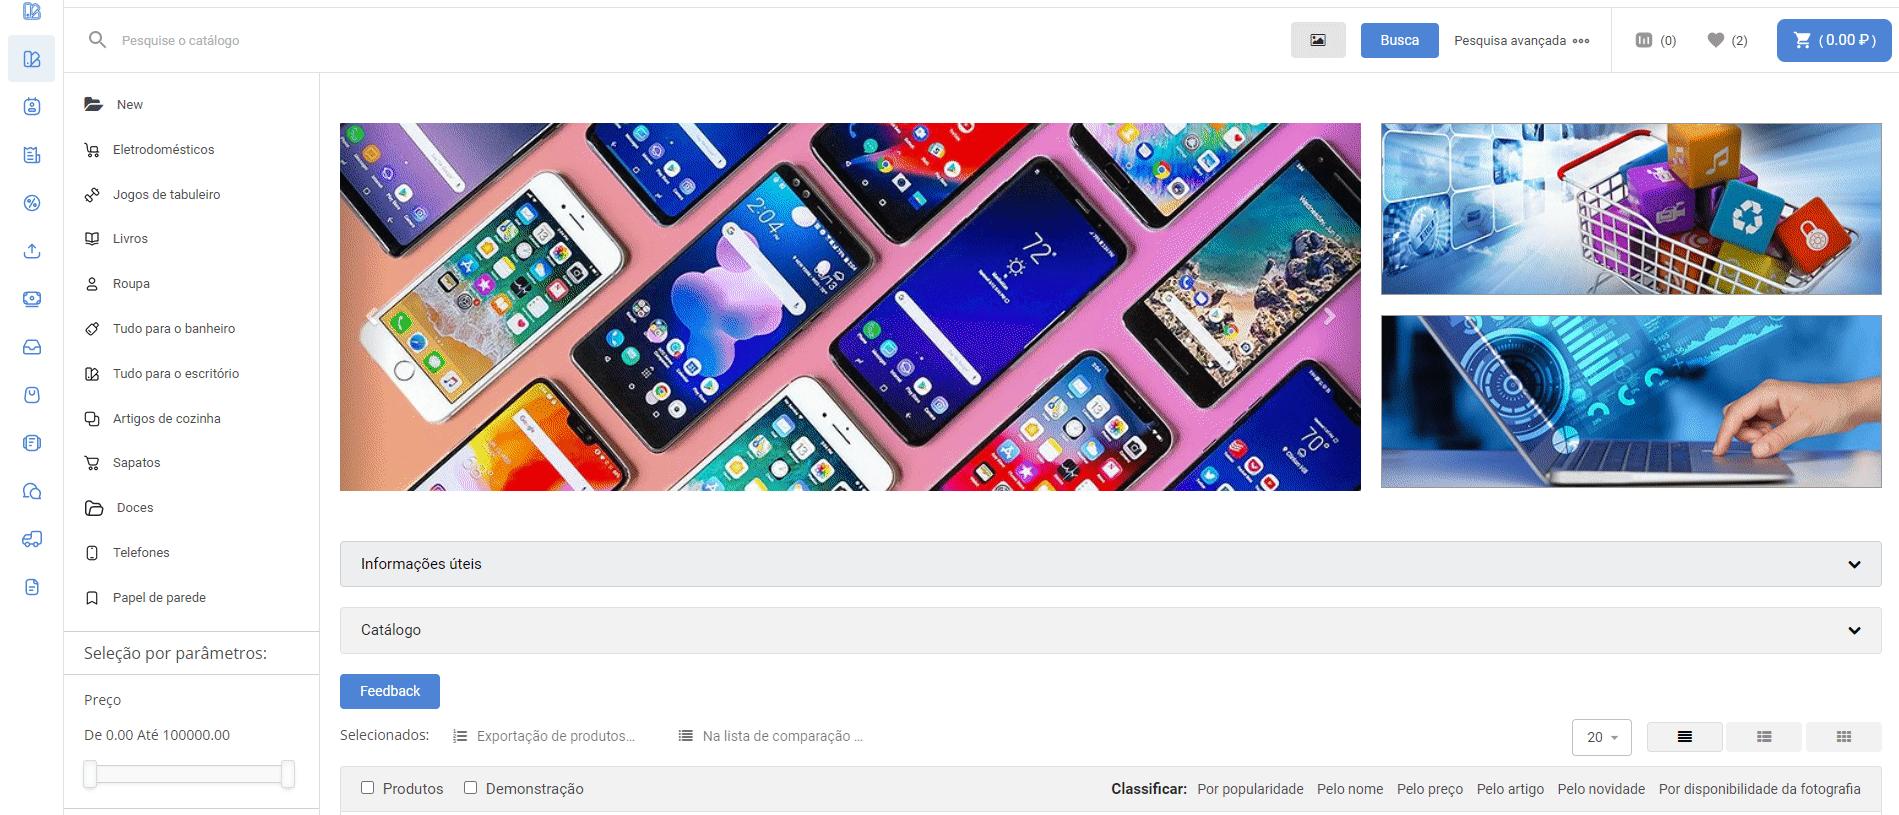
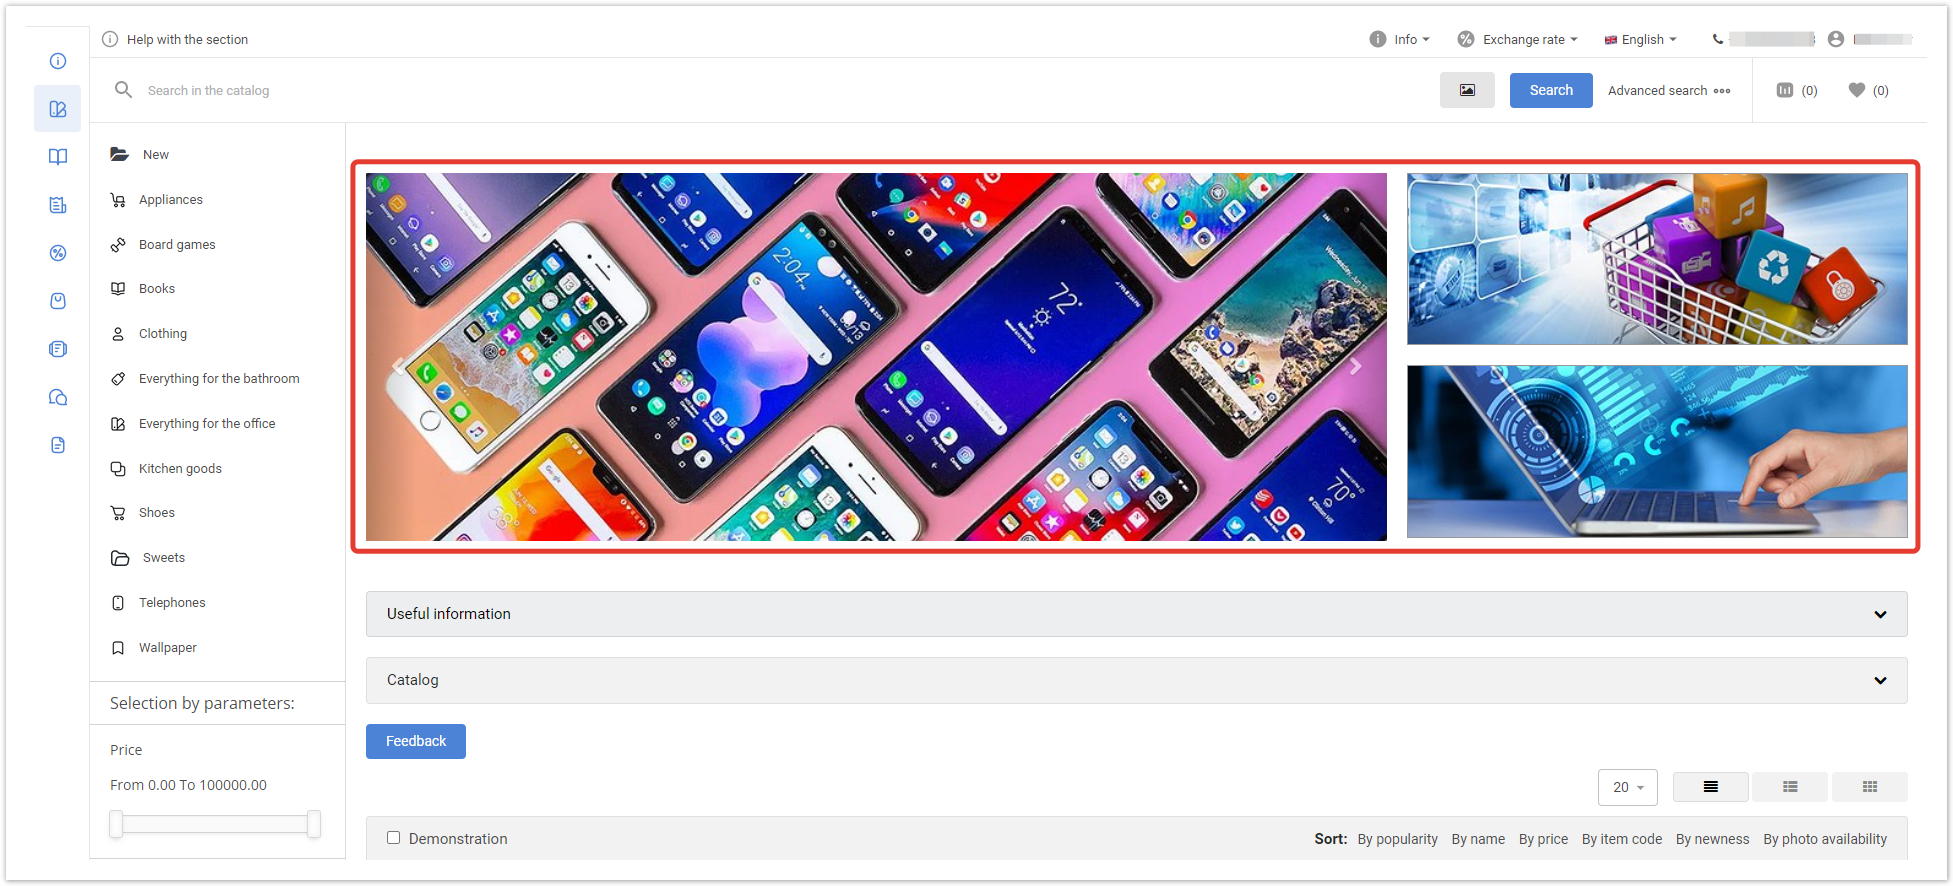
Banners in the catalogIn the catalog, banners are displayed at the top of the page.
You can configure 2 types of banners:
Banner slider — allows you to set several images that are flipped automatically or manually:
Top/bottom banner — a static image displayed without any effects:
For the correct display, it is recommended to use banners of the following sizes:
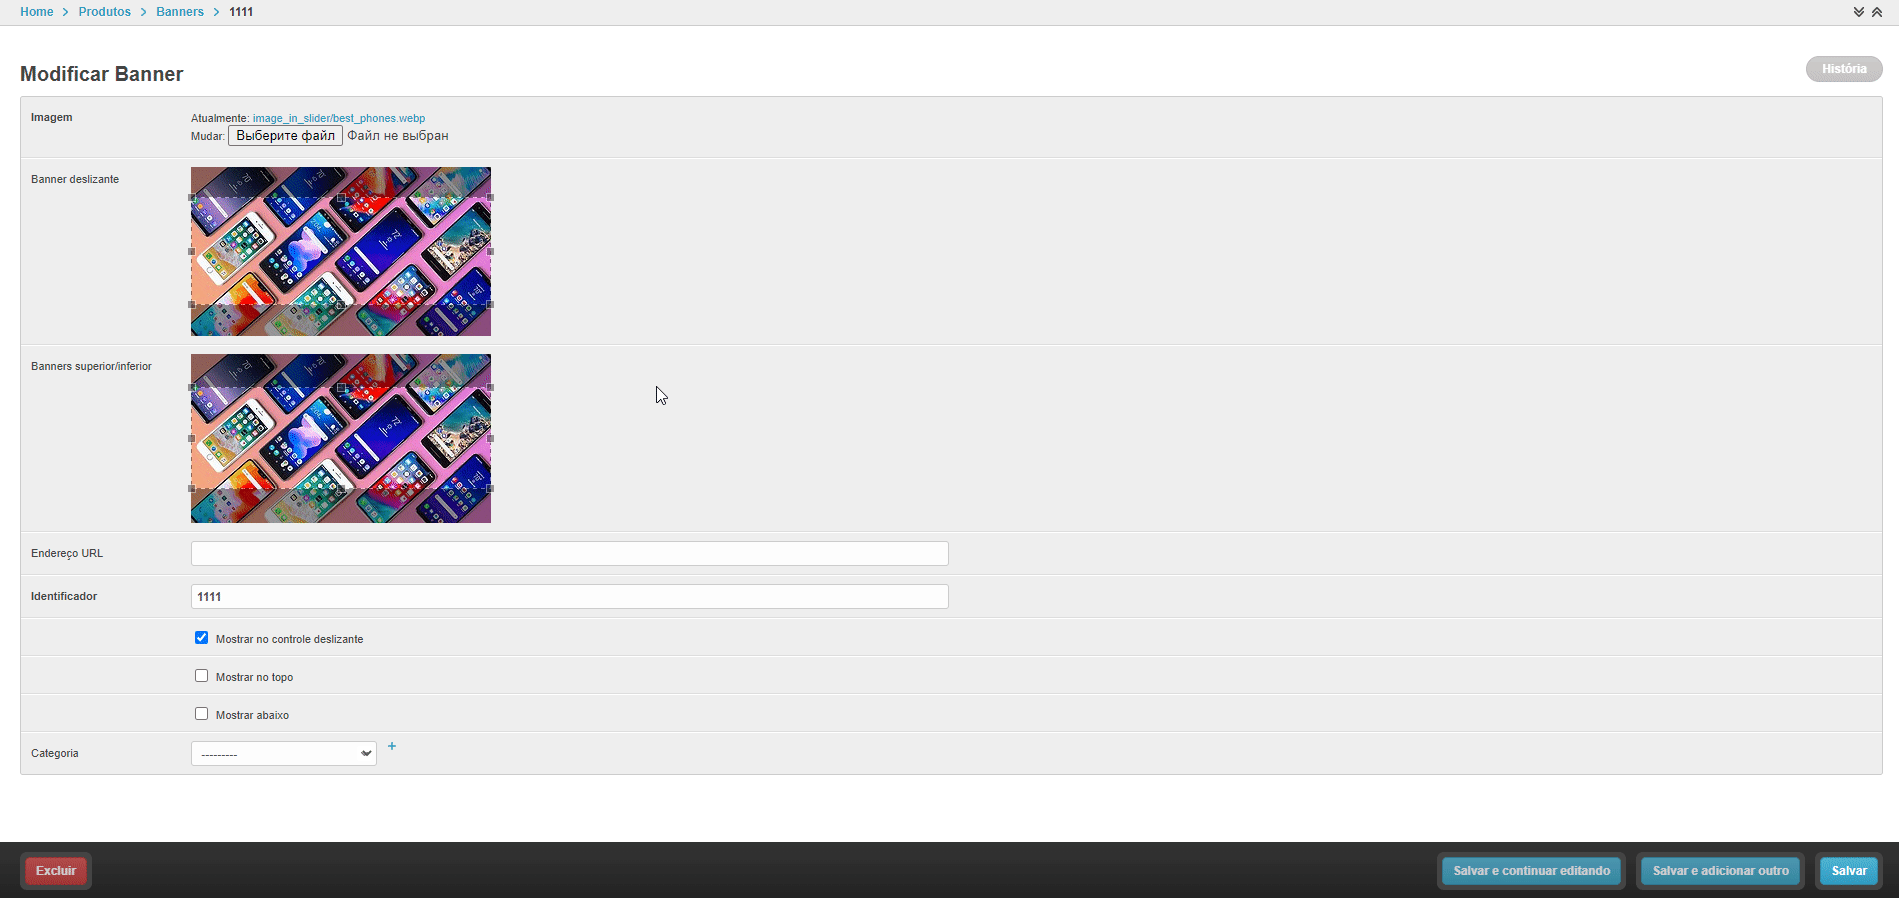
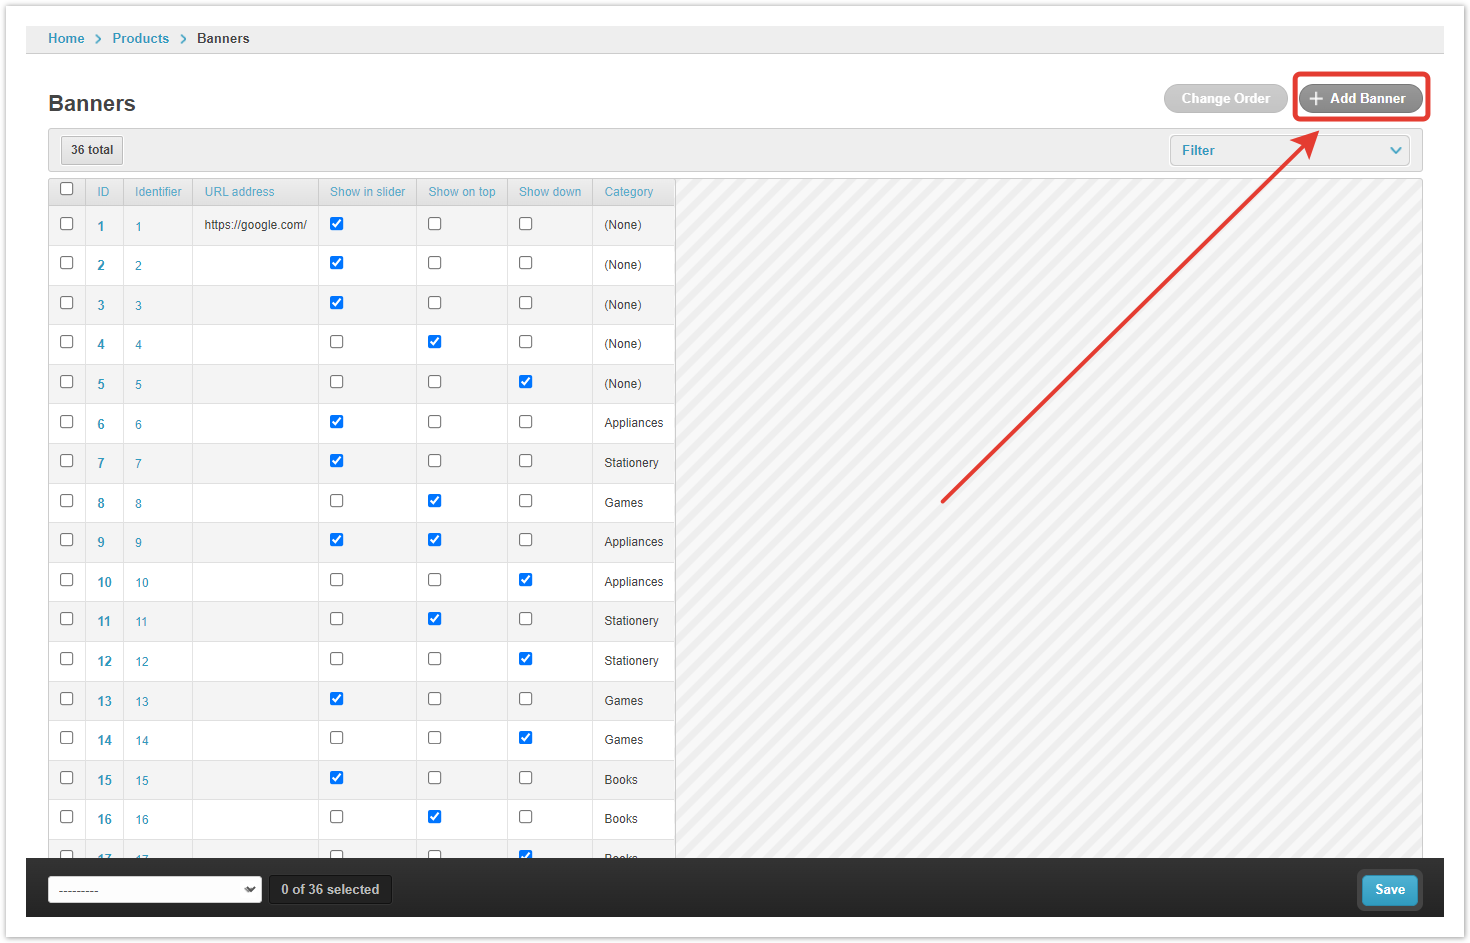
Creating bannersBanners are configured in the admin panel of the project. After authorization in the admin panel, go to the Banners section, then click the Add banner button:
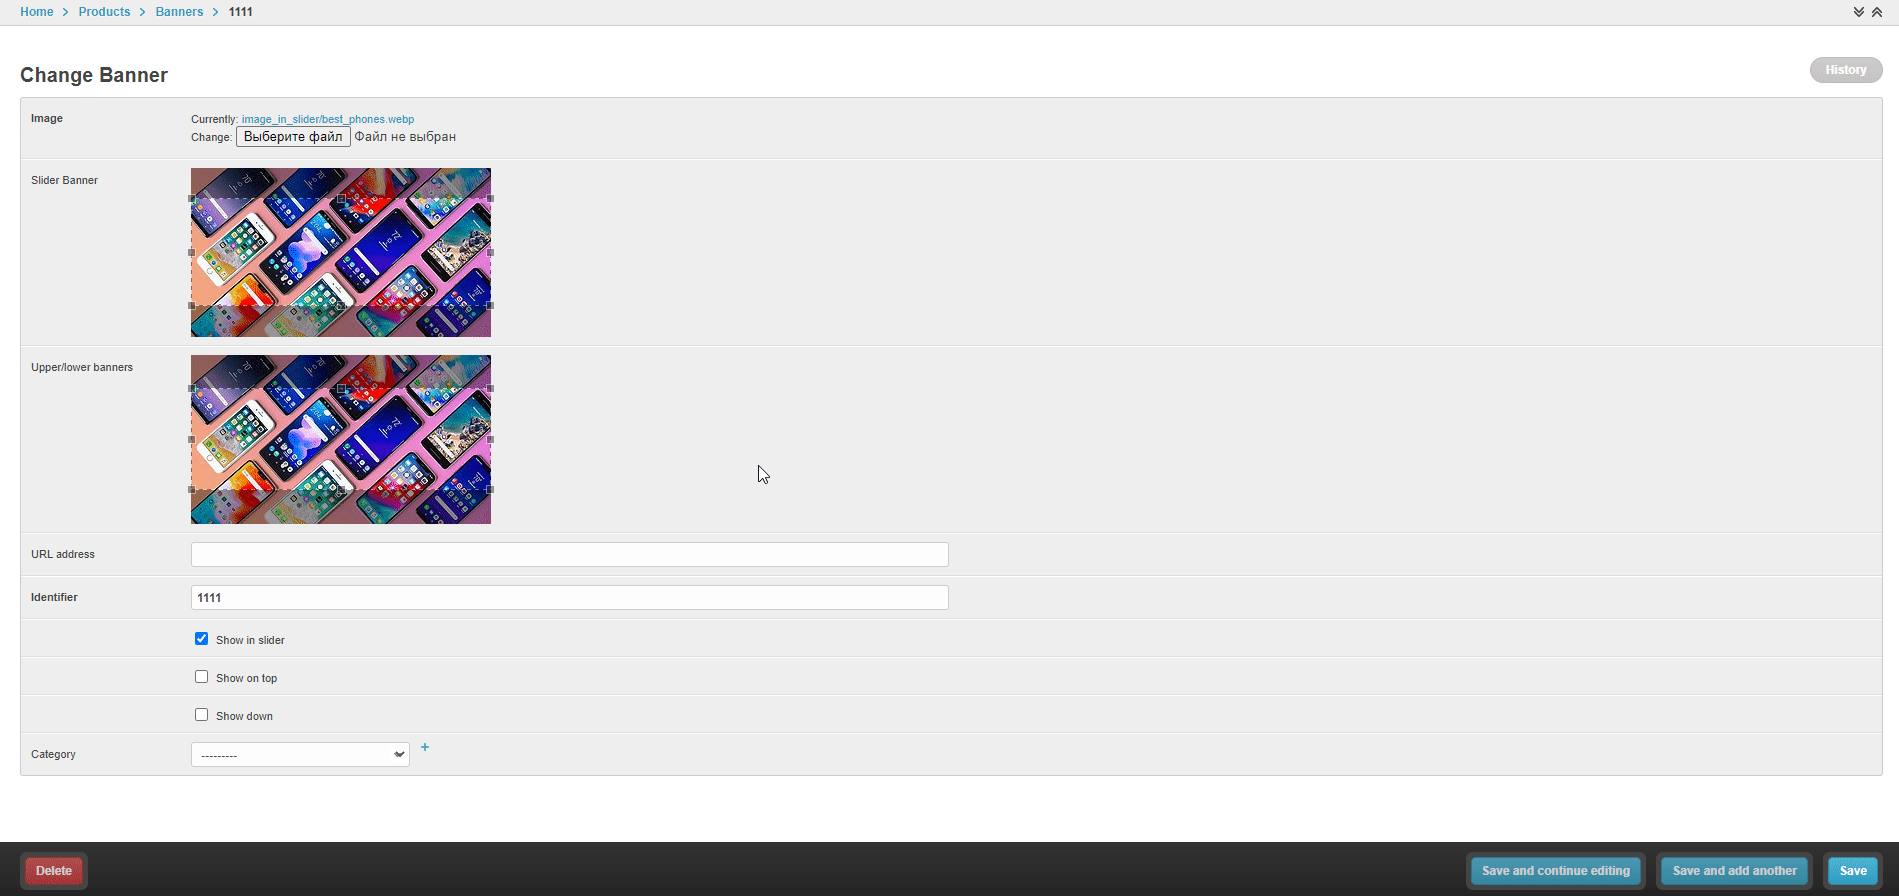
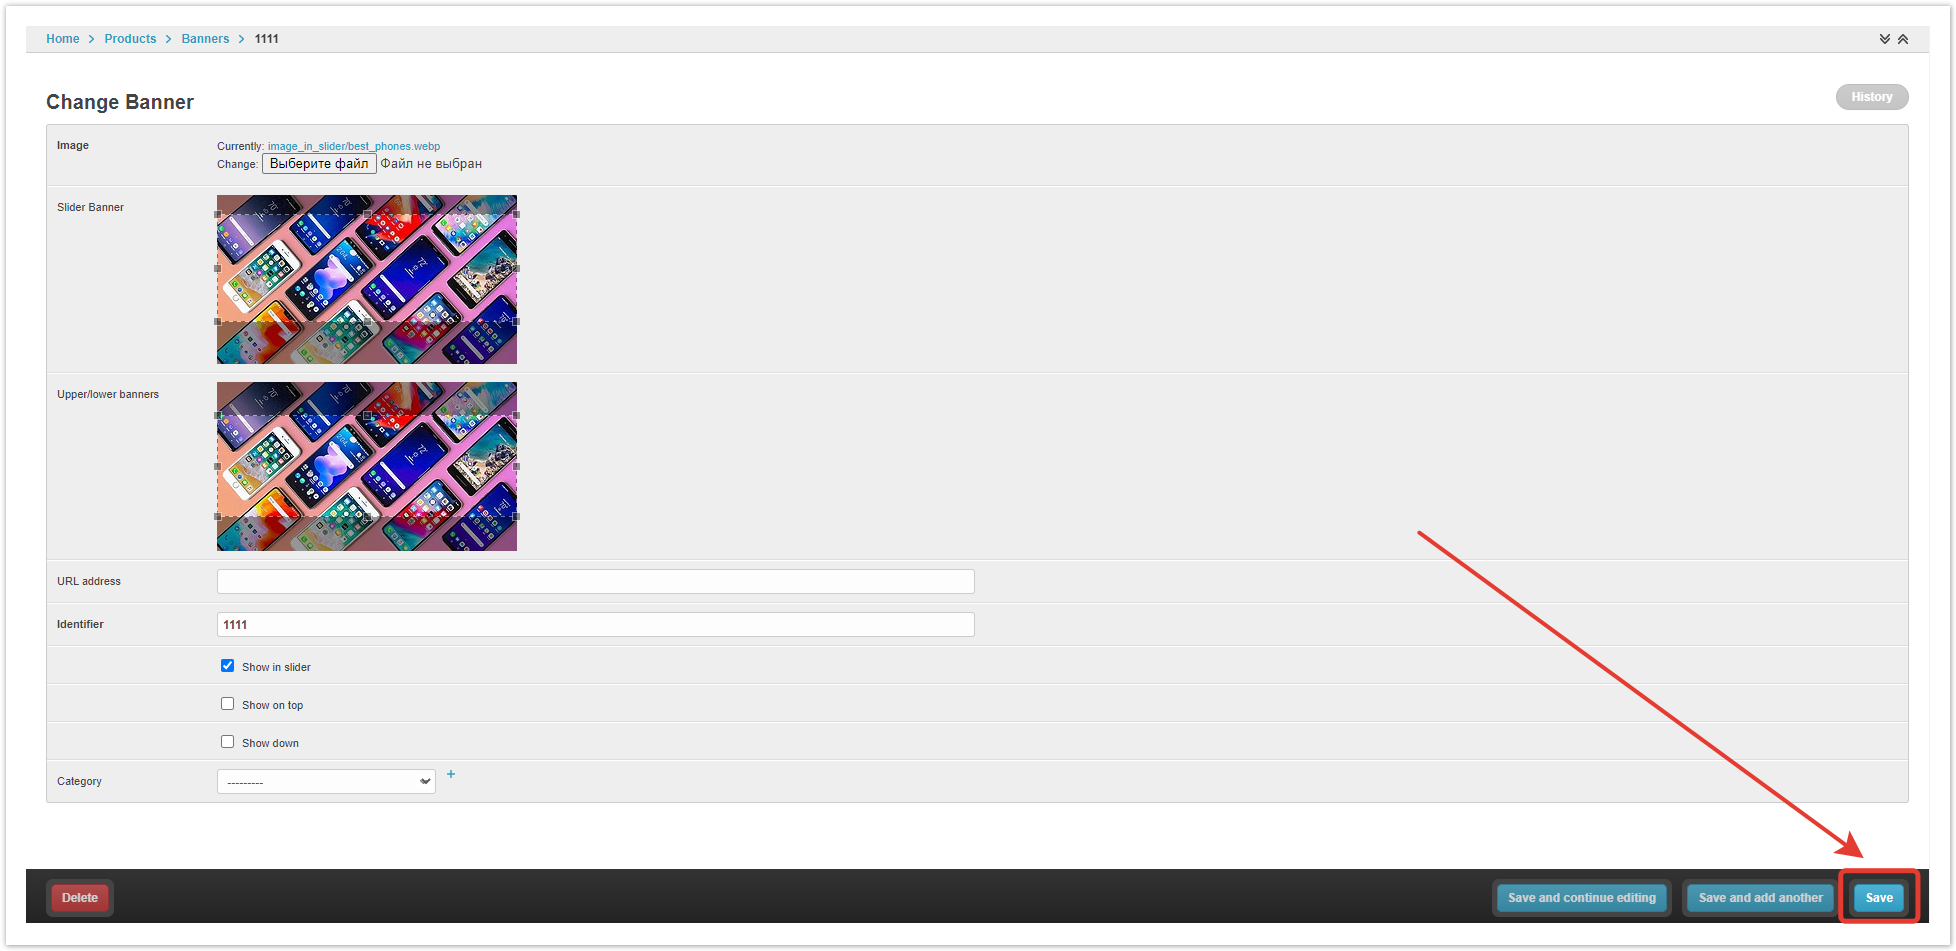
In the window that opens, specify the conditions for displaying the banner.
Image — specify the local path to the file (banner). Slider banner — the size of the loaded image, which will be displayed in the Slides section. Top/bottom banner — the size of the loaded image, which will be displayed in the Banners section (top/bottom). URL — fill in if the banner needs to be clickable, when you click on the banner, it will go to the specified URL. Identifier — a unique value for each banner. This value is necessary for the correct storage of the banner file in the project and for the convenience of managing the banner display settings in the catalog. Show (In the slider/Up/Down) — a checkbox, in accordance with which the logic for displaying banners is set. Category — a category of products, upon transition to which this banner will be displayed. If the product category is not specified, banners will be shown on the Catalog and InfoCenter page. If a product category is specified, then the banner will be shown only on the page of this category in the Catalog. After specifying all the settings, click the Save button at the bottom of the page.
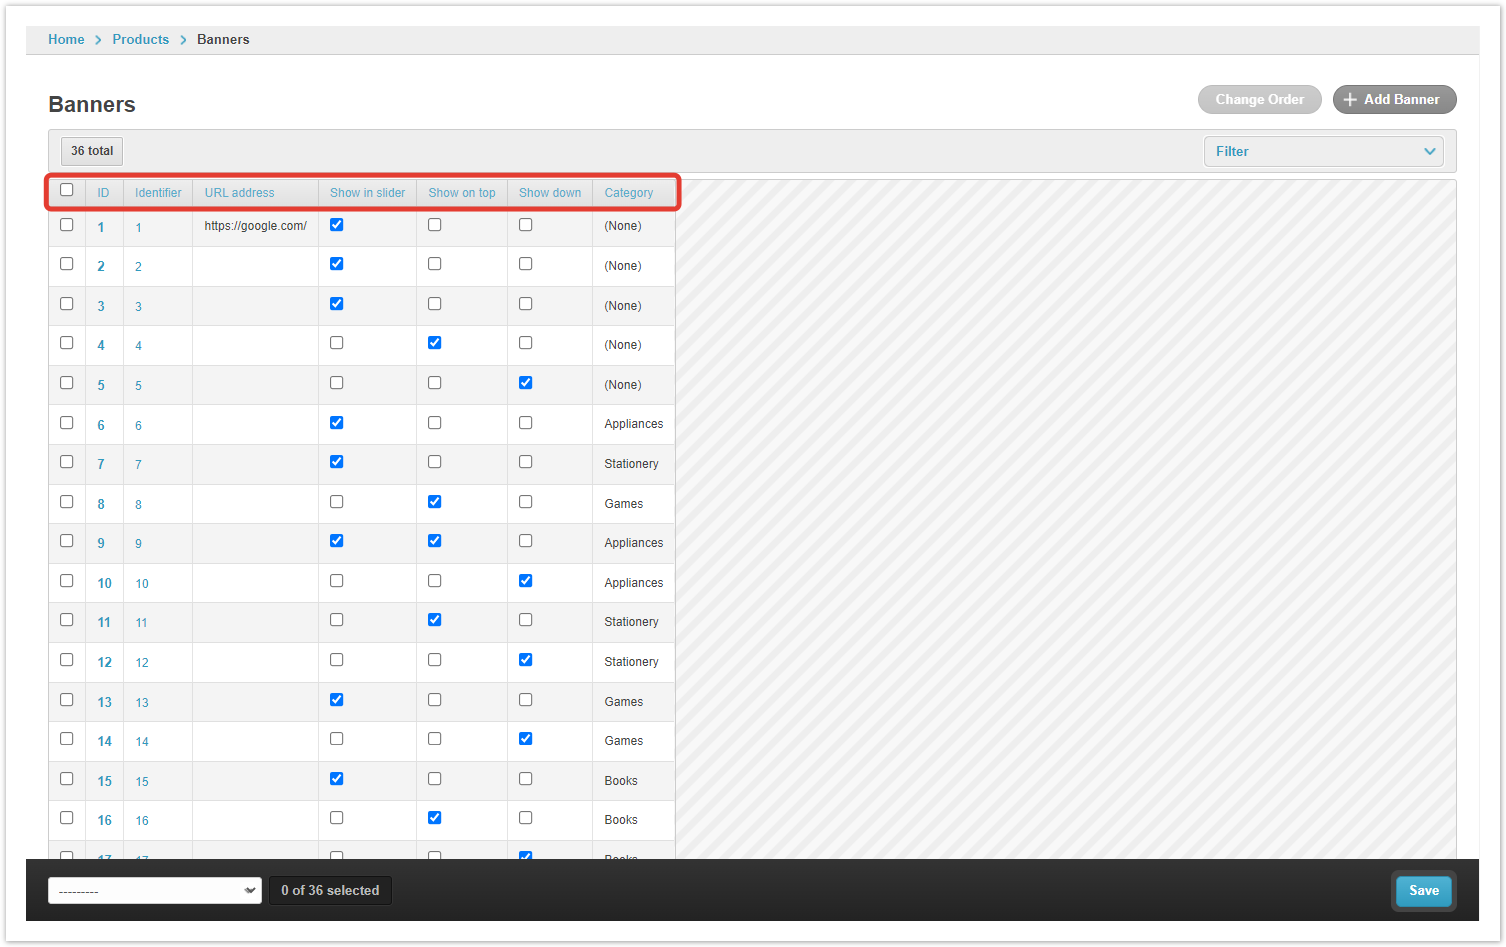
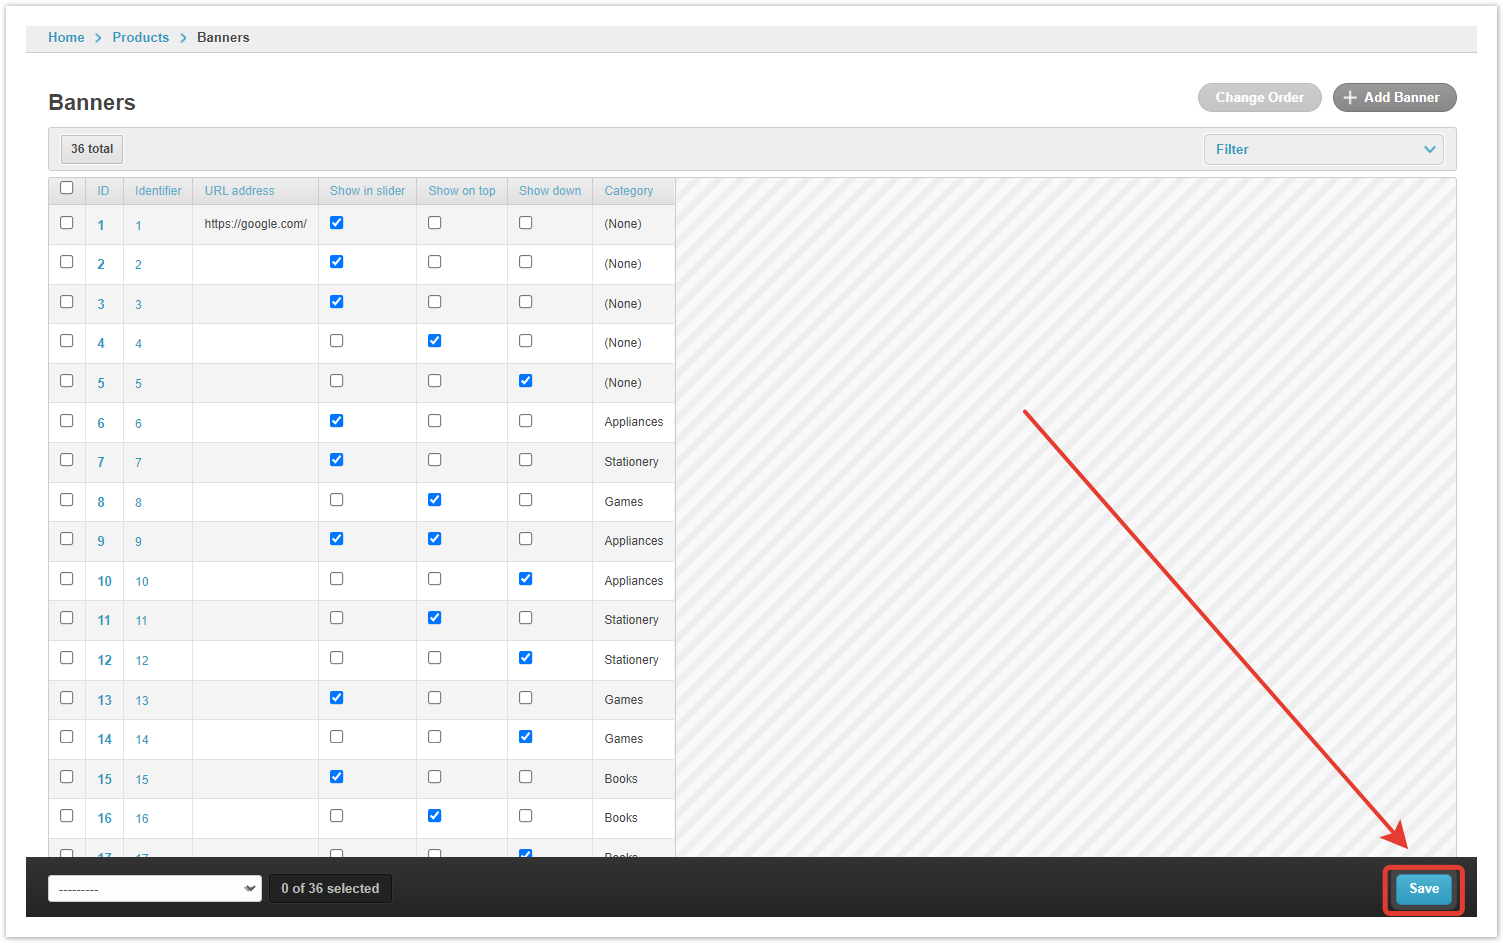
Banner managementYou can see all the settings in the pivot table, as well as control which pages of the project banners will be displayed on using the checkboxes in the Banners section of the admin panel.
ID — banner number. Identifier —a unique value for each banner. By its number, the system determines the order in which the banner is displayed in the slider. URL address — the link that will be followed when clicking on the banner. Show in slider — the banner will be displayed in the slider. Show on top — the image will be displayed at the top, to the right of the slider. Show down — the image will be displayed at the bottom, to the right of the slider. Category — indicates in which category of the Agora catalog the banner will be displayed. If set to Nothing, the banner will be displayed in the directory root. When finished with the settings, click the Save button.
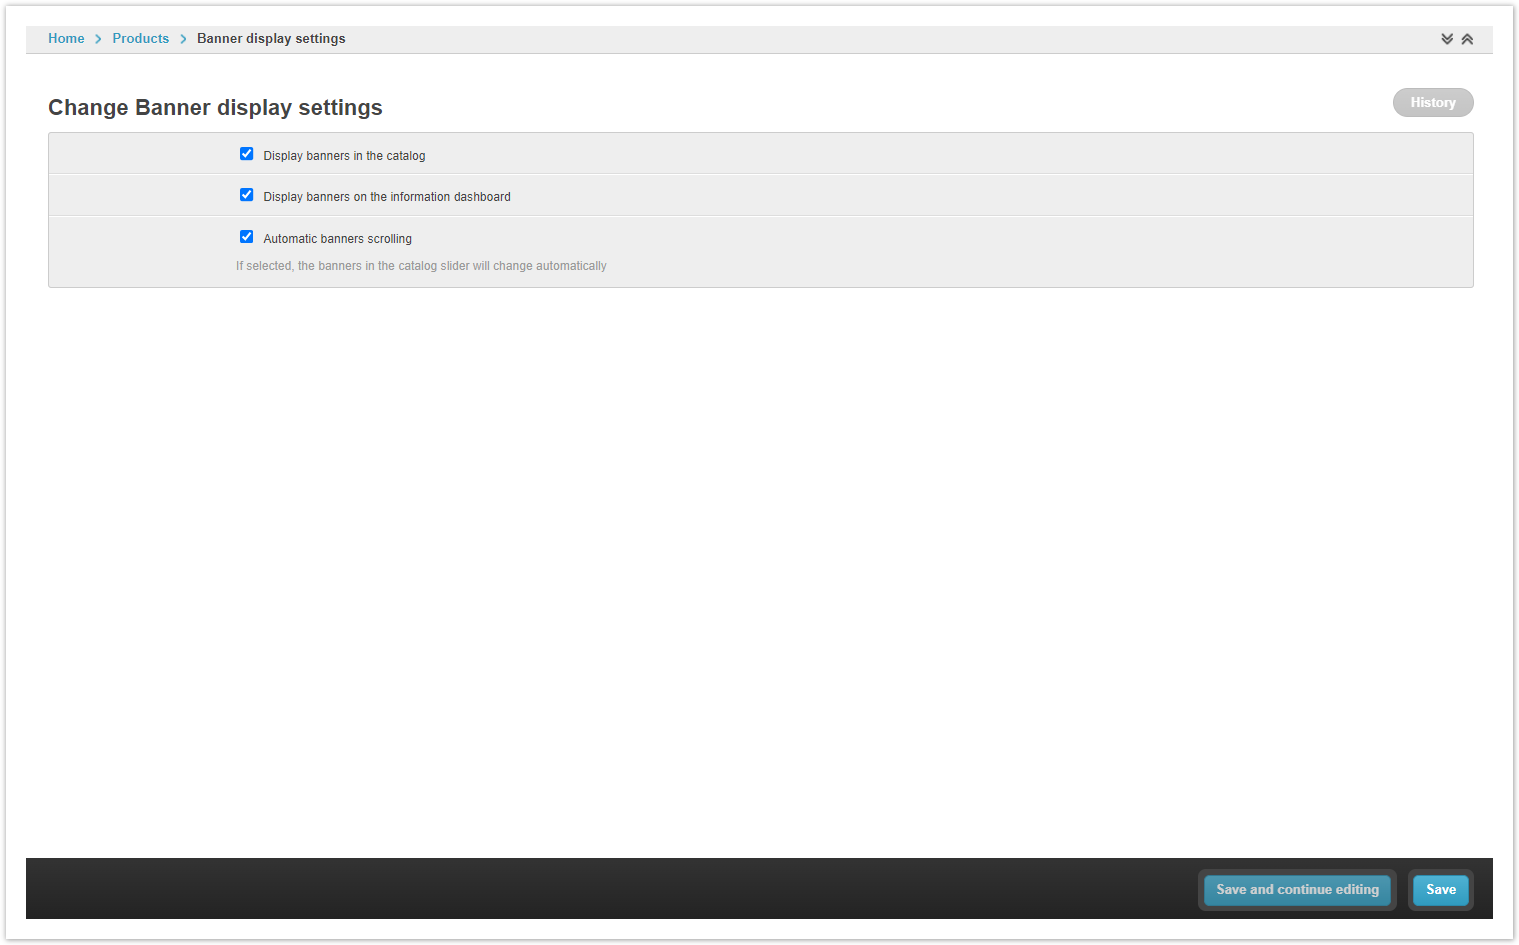
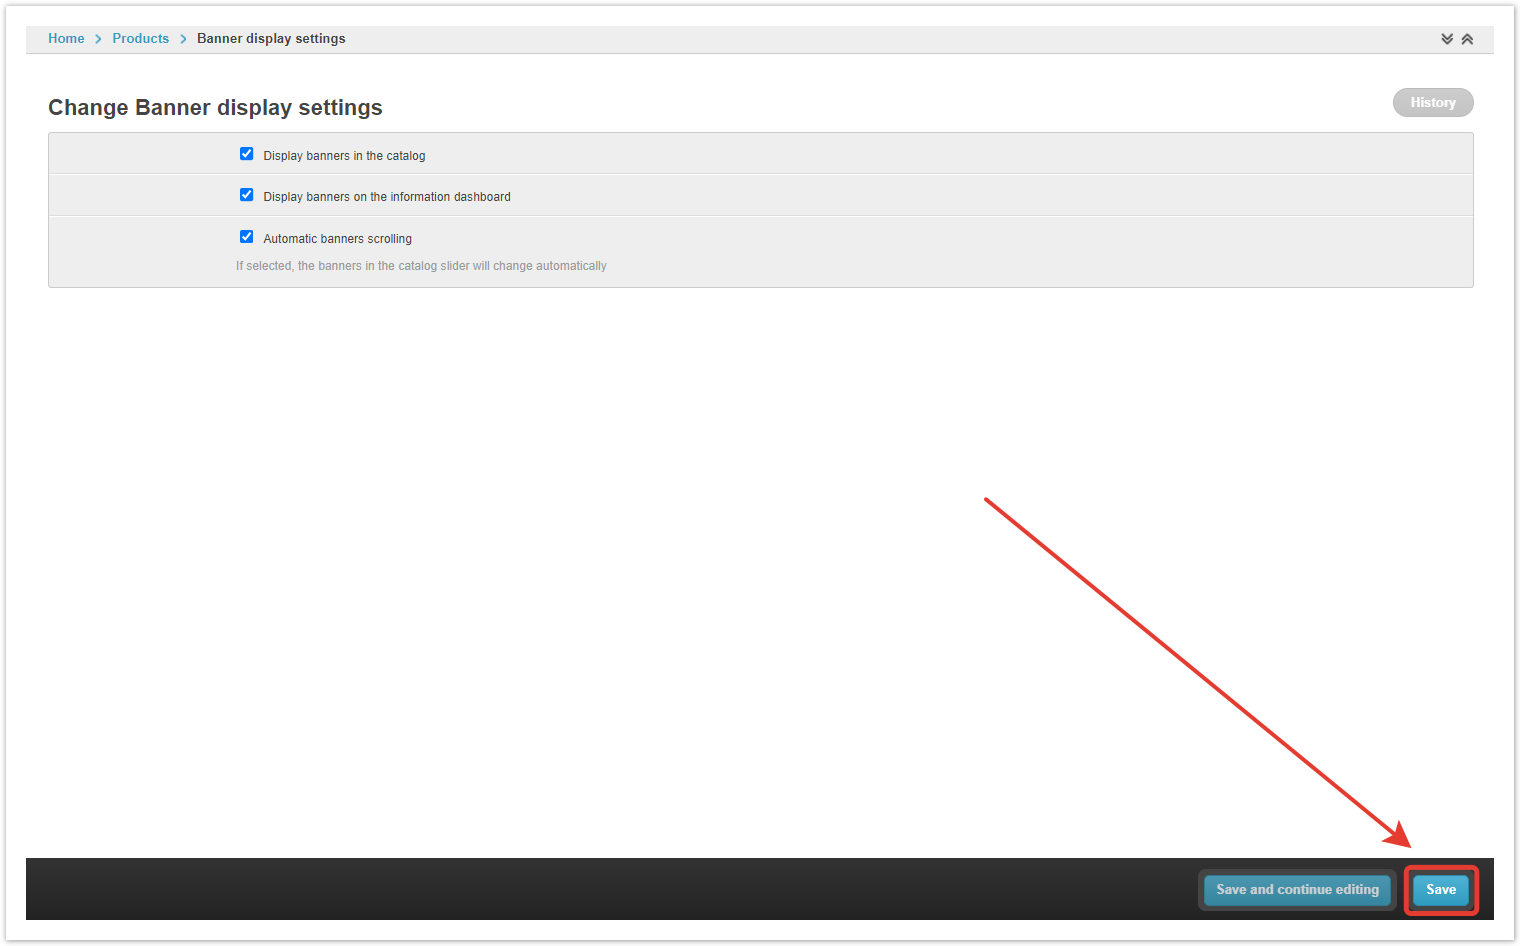
Banner display settingsIn this section of the administrative panel, you can change the type and method of displaying banners in the catalog.
Display banners in the catalog — checkbox enables/disables banners in all directories. Display banners on the information dashboard — allows you to display banners in the Information section of the user's personal account. Automatic scrolling of banners — when the checkbox is checked, the images will be scrolled automatically. After completing the settings, Save the changes.
|


| Sv translation | ||
|---|---|---|
| ||
Agora tem a opção de colocar banners de informação exibidos na parte superior da janela.
Você pode configurar 2 tipos de banners:
Slider de banner — permite especificar várias imagens que são invertidas automaticamente ou manualmente.
Banner superior/inferior — uma imagem estática exibida sem efeitos.
Para exibição correta, recomenda-se usar banners dos seguintes tamanhos:
Os banners estão configurados no painel administrativo do projeto. Após autorização no painel administrativo, vá para a seção Banners. Para adicionar um novo banner, clique no botão Adicionar banner:
Na janela que abre, defina as condições para exibir o banner.
Imagem — especifique o caminho local para o arquivo (banner). Banner deslizante — o tamanho da imagem carregada que será exibida na seção Slides. Banner superior/inferior — o tamanho da imagem enviada, que será exibida na seção Banners (parte superior/inferior). Endereço de URL — é preenchido, se o banner precisar ser clicável, ao clicar no banner, a transição para a URL especificada será realizada. Identificador — o identificador do elemento (banner) comumente usado pelos desenvolvedores. Show (No controle deslizante/Superior/Inferior) — caixa de seleção, segundo a qual a lógica de exibição de banners está definida. Categoria — uma categoria de mercadorias, quando você vai para onde este banner será exibido. Se a categoria do produto não for especificada, os banners serão exibidos na página Catálogo e Infocenter. Se a categoria do produto for especificada, o banner será exibido apenas na página desta categoria no Catálogo. Depois de especificar todas as configurações, clique no botão Salvar na parte inferior da página.
|