To configure integration with a system containing information about products and their properties, you must perform the following steps: Download a configuration file containing a predefined exchange gateway. Install the exchange gateway in 1C
Set up scheduled tasks.
 Consider setting up an exchange gateway using 1C. Trade management 10.3. Consider setting up an exchange gateway using 1C. Trade management 10.3.
| Примечание |
|---|
The difference between the used version 1C and UT 10.3 will not affect the setup sequence.
Regardless of the version used and the 1C edition, you can configure the integration, guided by this instruction. |
teeestteeest1. Download packageThe first thing to do is download the Agora delivery kit corresponding to the 1C edition used, which includes 1 file:
- A configuration file with a pre-installed gateway (.cf file).
(info)A list of turnkey integration solutions is available in this section. To download, click on the name of the required package.
| Информация |
|---|
If you did not find the version of the 1C edition you are using, write a letter to help@agora.ru or leave a request https://www.agora.ru/help/ for technical support and we will provide a delivery kit for other editions, for example, ERP 2.0 |
After downloading the package, you can proceed to the step of setting up a loaded gateway in 1C.
2. Installation of the exchange gateway(info) Before installing the Agora software product, save a backup copy of the database in order to "roll back" 1C to its original state in the event of a configuration failure.
To do this, open the 1C configurator: 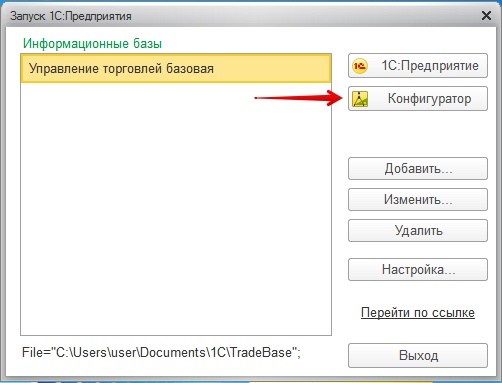 Image Added Image Added
In the window that opens, open the Administration tab and go to the Unload infobase section: 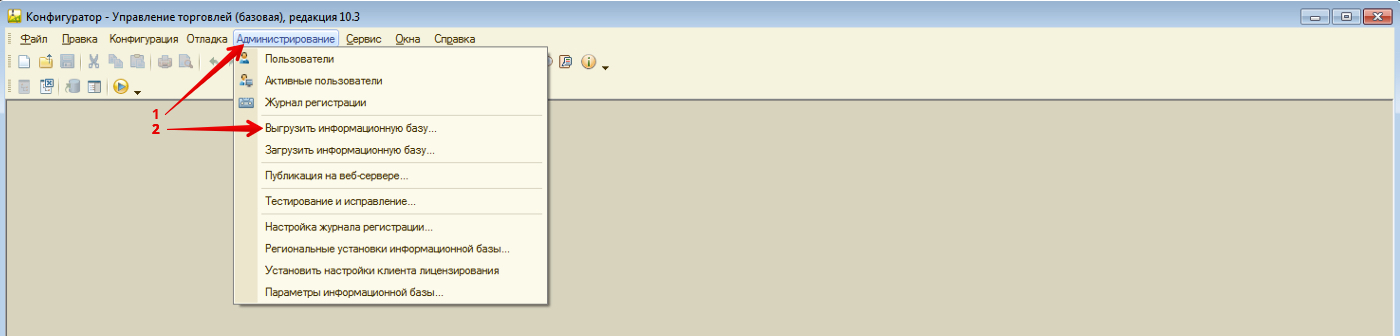 Image Added Image Added
In the window that opens, specify the path to save the infobase: 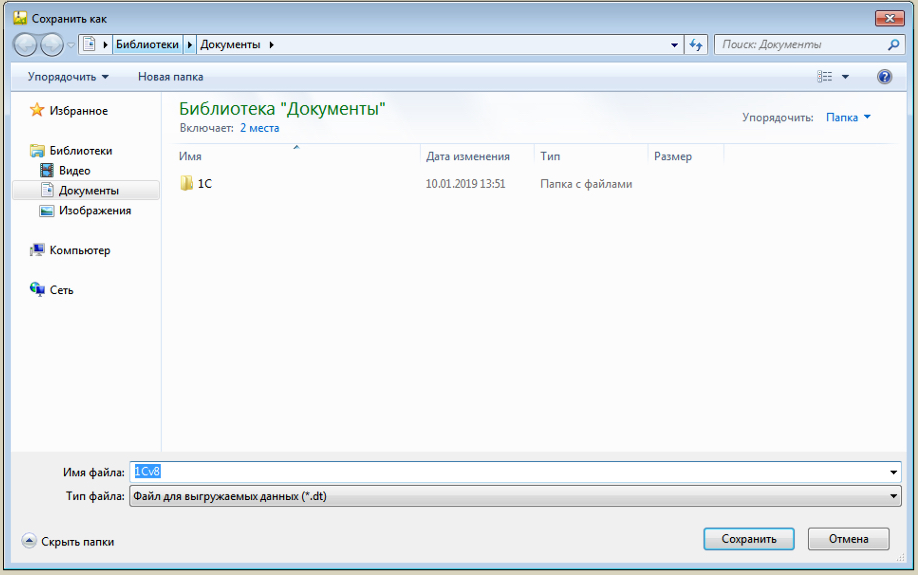 Image Added Image Added
(info) Saving a database can take a long time if the operation is performed on a “weak” computer.
If saved successfully, the following notification will be displayed:
 Image Added Image Added
The next step in the configuration is to unload a copy of the 1C database configuration.
To do this, open the Configuration tab and go to the Save configuration to file section:
 Image Added Image Added
In the window that opens, specify the path to save a copy of the 1C configuration:
Image Added
In the case of a successful save, a notification of the form: 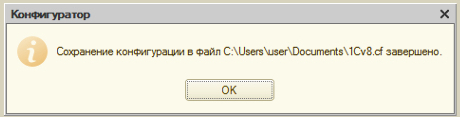 Image Added Image Added
(info) If the Save configuration to file button is not active (is displayed in gray and cannot be pressed), then the configuration to be saved is not selected. To select a configuration, open the Configuration section and select the Open configuration tab: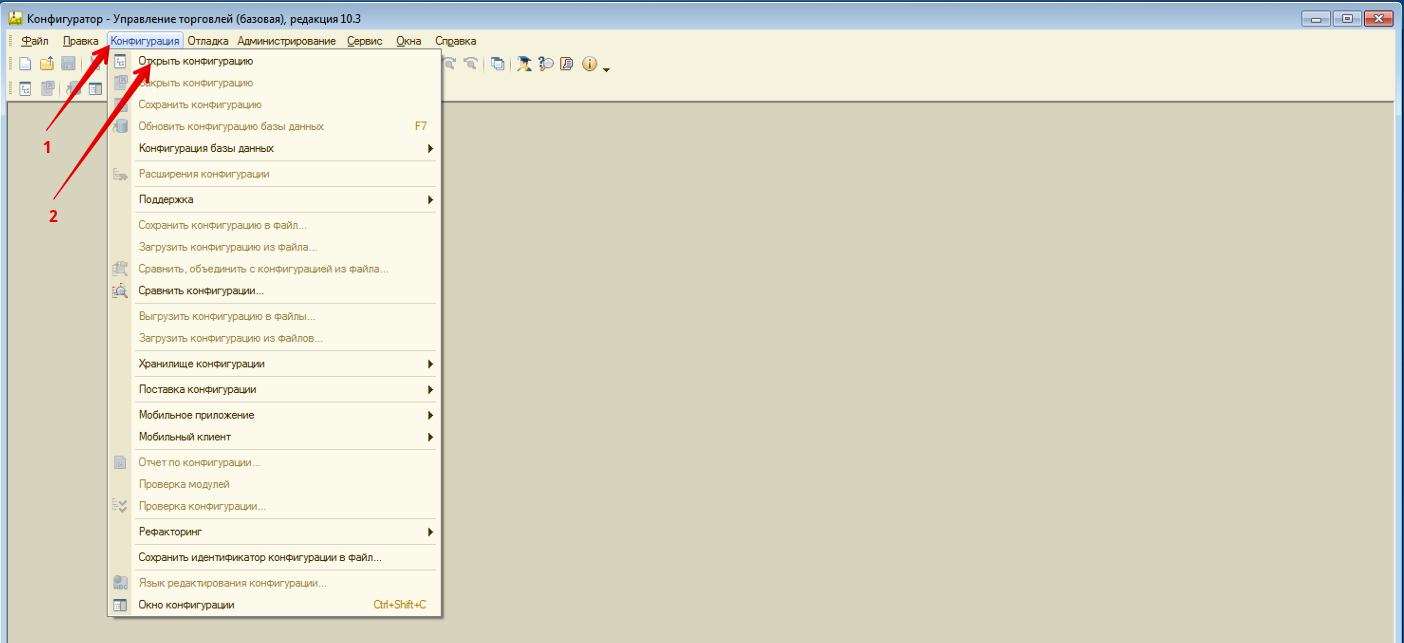 Image Added Image Added After saving the infobase, you can proceed to the stage of installing the exchange gateway. To do this, open the Configurator, go to the Configuration tab, then Open configuration. Then go to: Configuration → Support → Configure Support: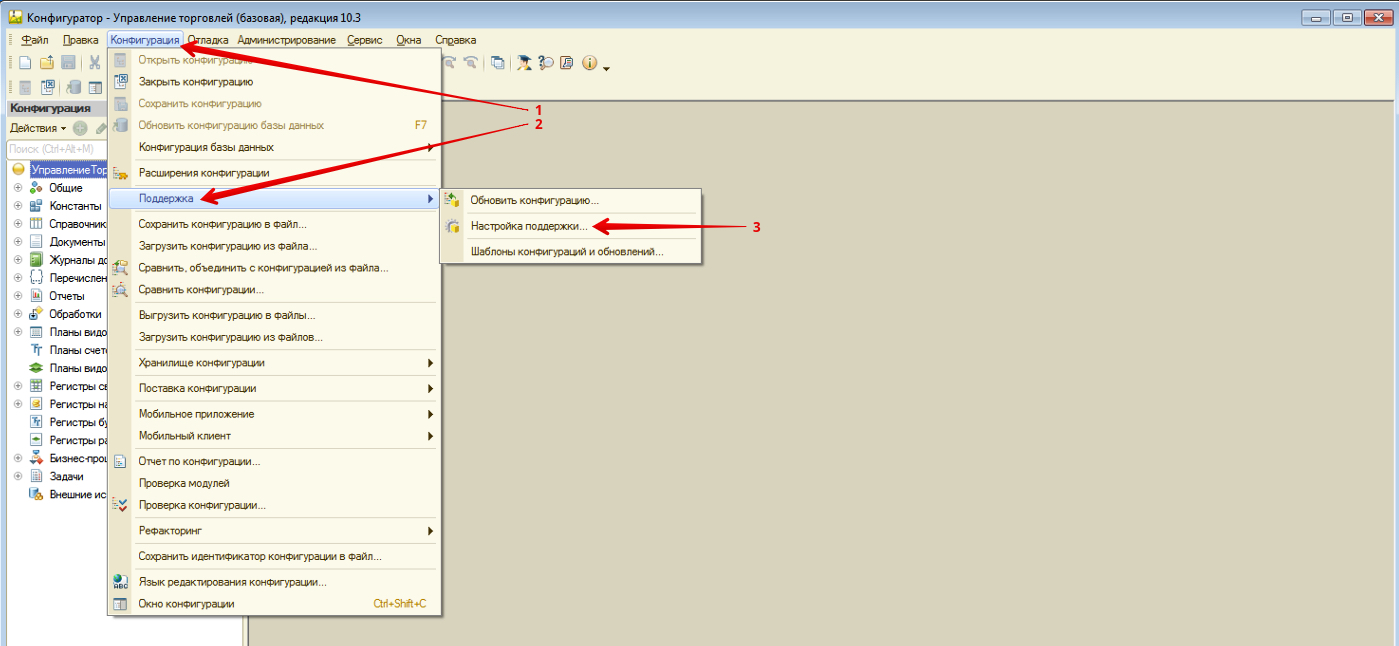 Image Added Image Added
In the window that opens, click the Enable change option button. In the request window, click Yes to agree to enable the possibility of changes: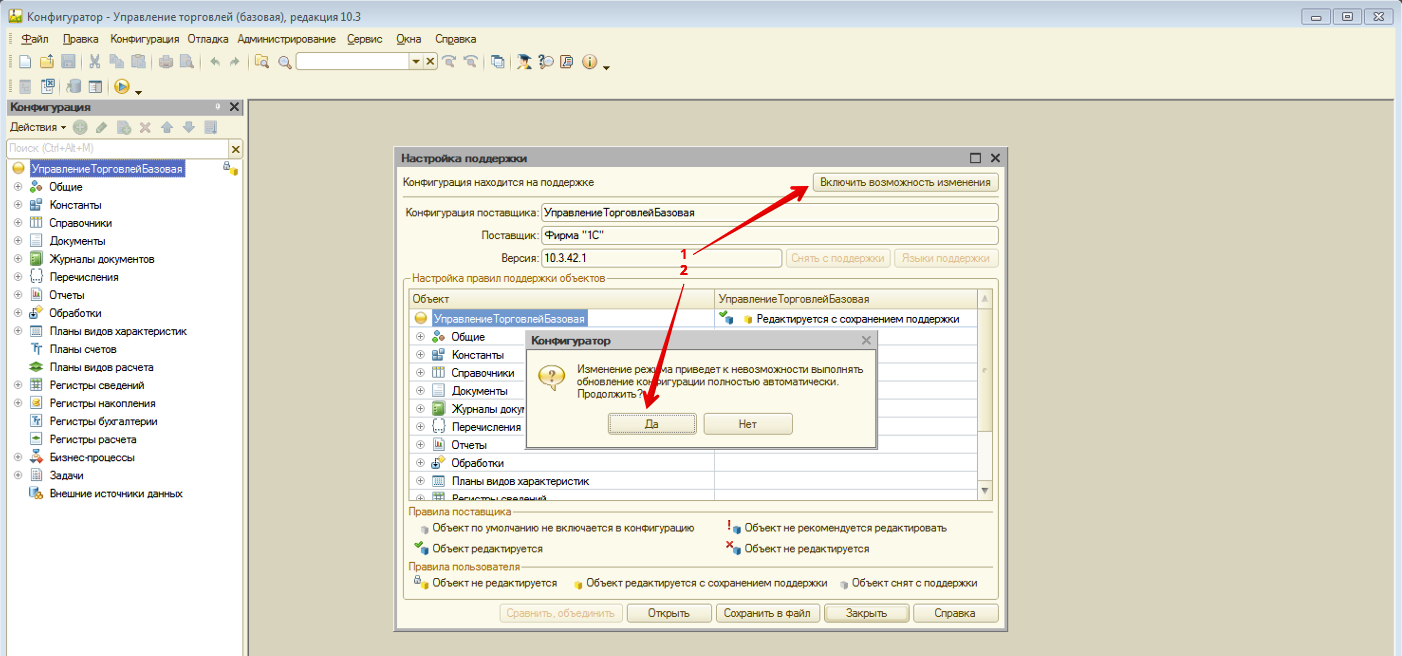 Image Added Image Added
After clicking on the Yes button, the support rule settings window opens, where specify the following parameters and click OK: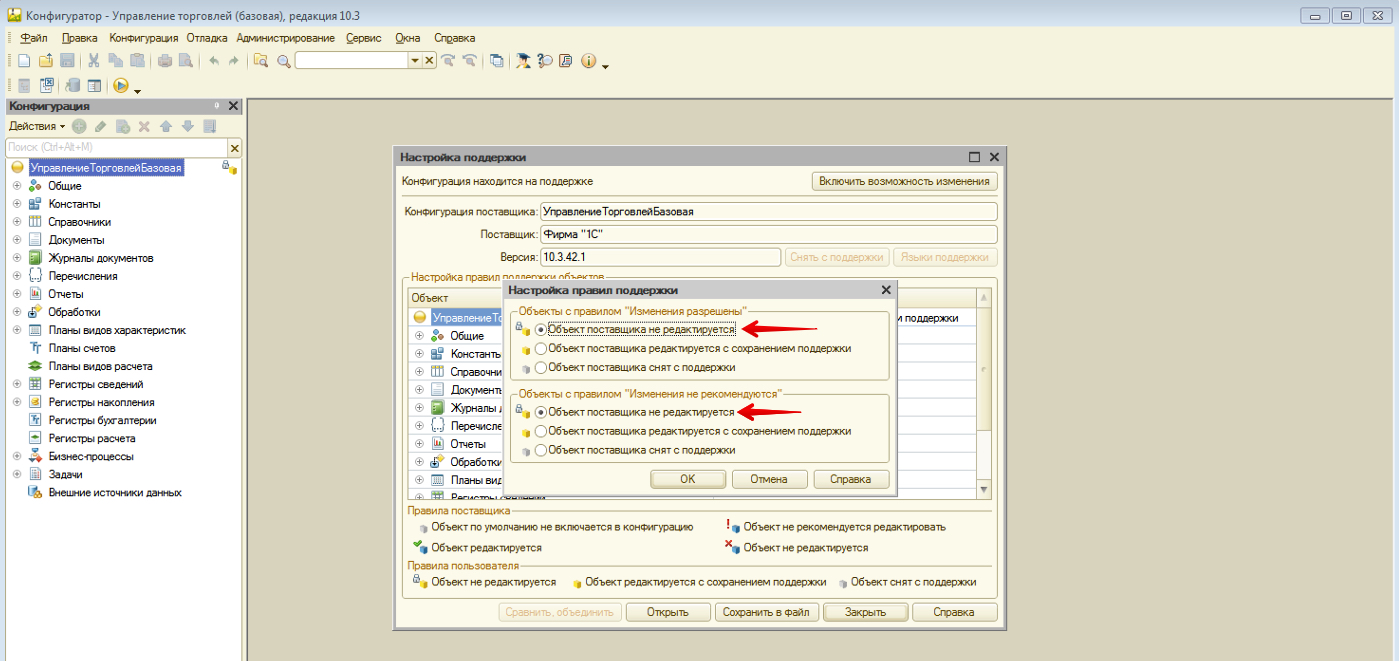 Image Added Image Added
After setting up support rules, you need to change the support rule for the configuration root. To do this, open the support mode change menu by right-clicking on the Not edited button and then clicking the Set support rule button: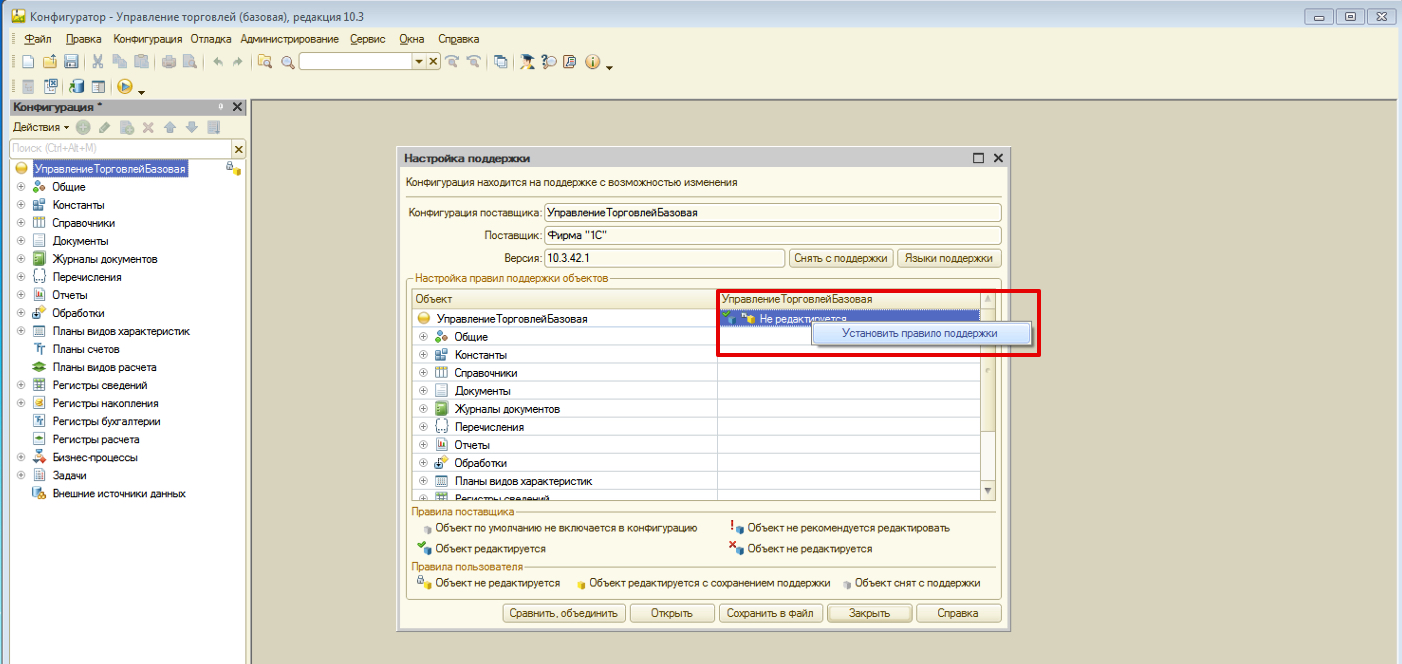 Image Added Image Added
In the window that opens, select Provider objects are edited while maintaining support. Leave unselected Set for subordinate objects and click OK:  Image Added Image Added
After that, you can close the Support Settings window by clicking the Close button.
The next configuration step will be combining the downloaded configuration file with the previously used one. To do this, open the Configuration tab and select Compare, merge with configuration from file: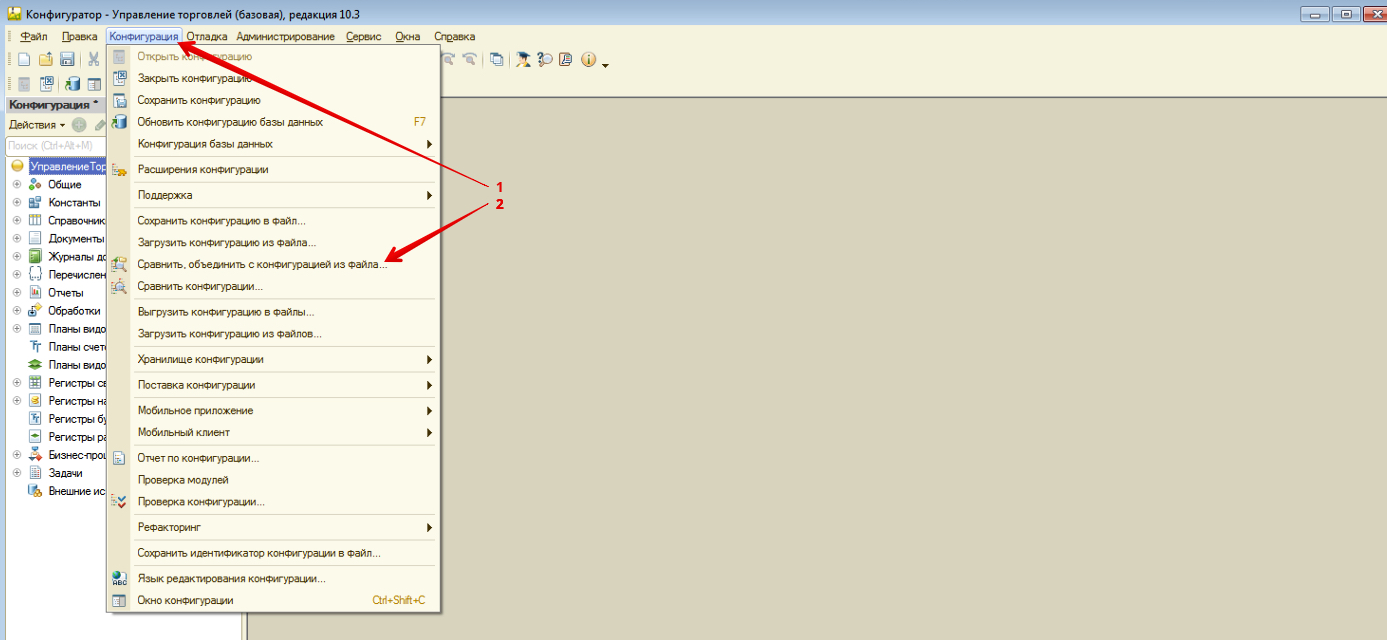 Image Added Image Added
(info)In the window that opens, specify the path to the file in the .cf format, which was downloaded at the first stage of configuration based on the delivery kit. After successfully loading the configuration file that was modified for integration, uncheck all the comparison-union checkboxes: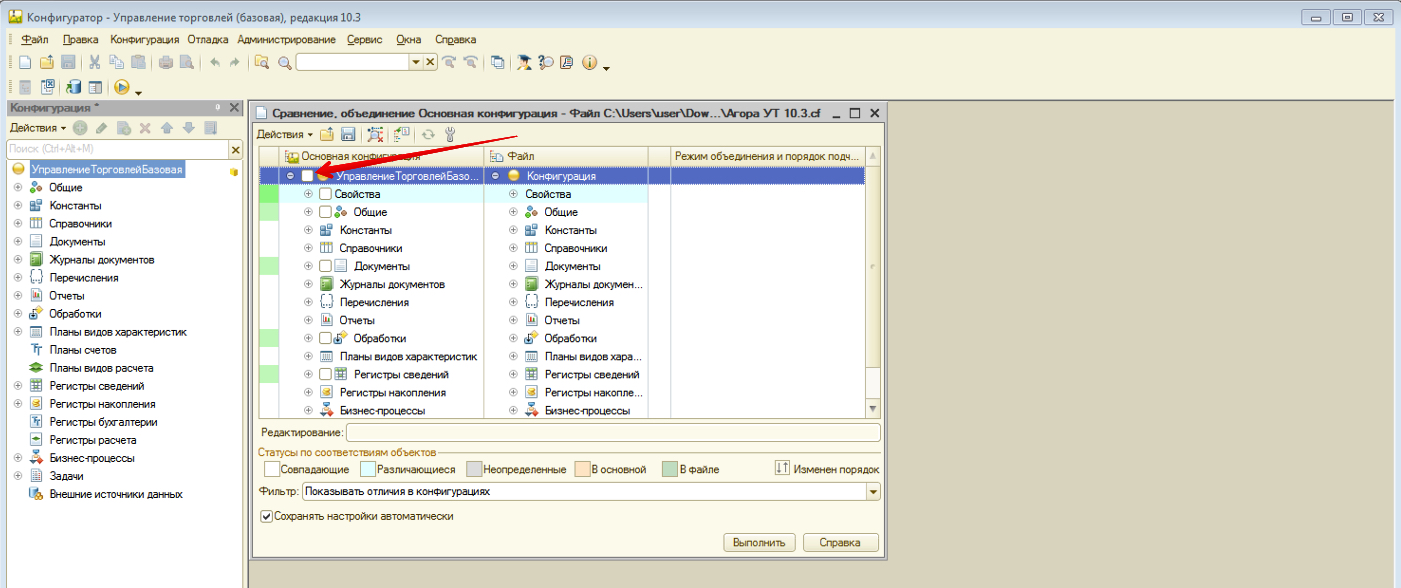 Image Added Image Added
After that, mark Agora as a subsystem. Click the Actions button and go to the Mark by file subsystems section: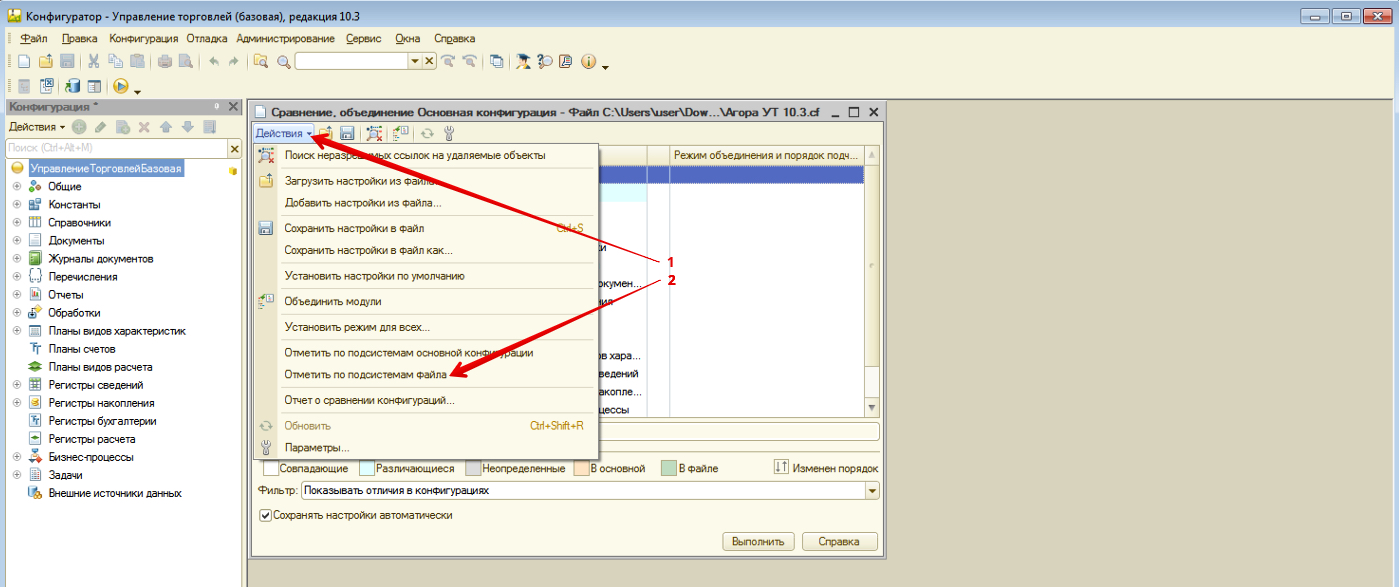 Image Added Image Added | 