
| Sv translation | ||
|---|---|---|
| ||
|
...
|
...
|
...
|
...
|
...
Подробнее про работу с Рекламациями рассказано в видео:
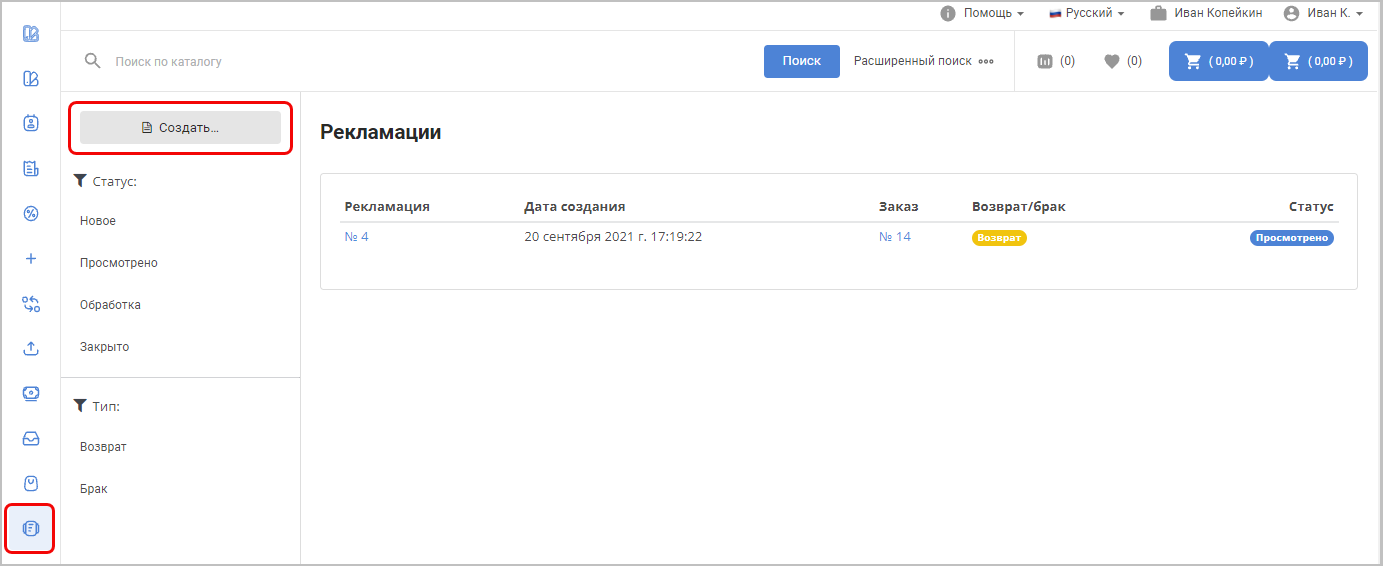
Чтобы отрыть данный раздел в личном кабинете в меню слева нажмите
Создание рекламации |

...
При нажатии кнопки Создать откроется окно, |
...
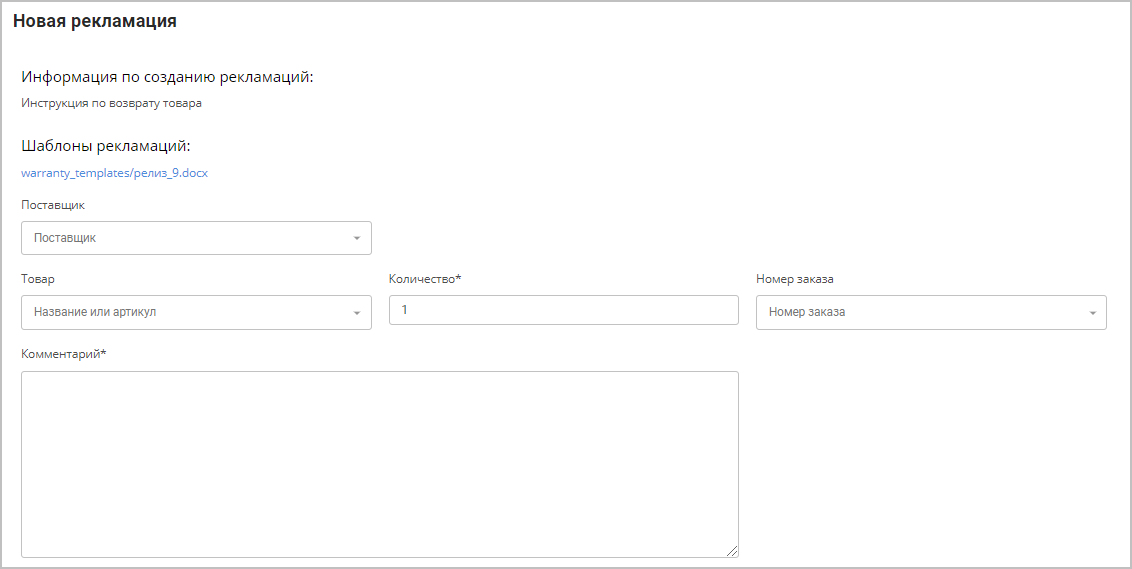
где необходимо заполнить условия возврата, описать причину и прикрепить соответствующие файлы изображений в качестве доказательств: |
...
Новая рекламацияИнформация по созданию рекламаций - отображается текст (подсказка по оформлению запросов на возврат товара, например, какие документы должны быть приложены, время рассмотрения рекламации).
Шаблоны рекламаций - прикрепленный документ с шаблоном рекламации.
Поставщик - выберите поставщика, для которого надо оформить рекламацию. Товар - выберите товар, который Вы хотите вернуть. Количество - количество возвращаемого товара. Номер заказа - номер заказа с данным товаром. Комментарий - комментарий к рекламации. Тип обращения - возврат или брак. Добавить файл - при прикреплении файла размер изображения не должен превышать 15MB, допустимые форматы изображений - .png, .jpg, .tiff, .bmp, .jpeg, .gif. Для документов размер не должен превышать 25MB, допустимые форматы - .doc, .docx, .txt, .xls, .zip, .rar, .pdf. Количество добавляемых файлов - не больше трех. |
...
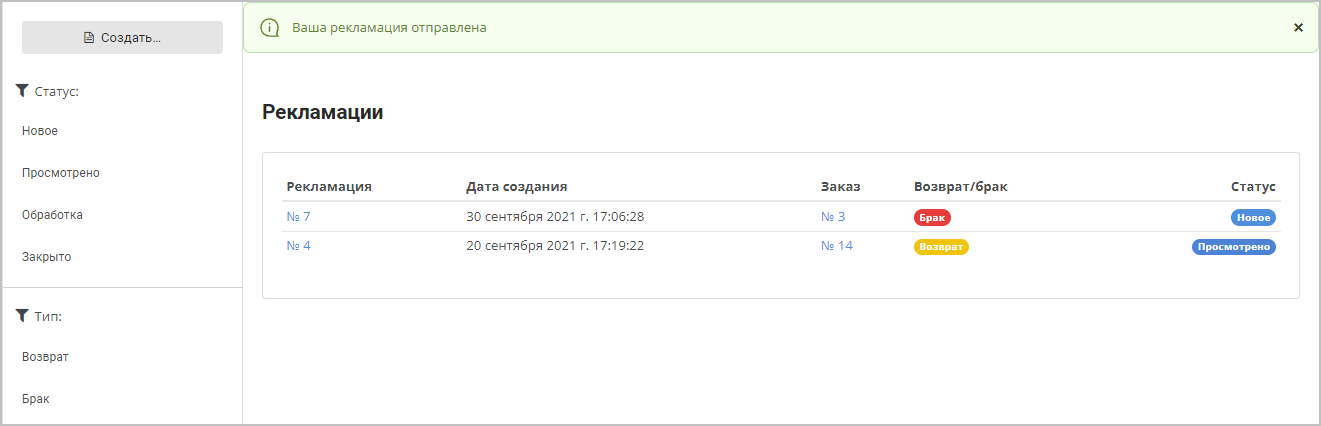
При нажатии кнопки Отправить будет осуществлен переход на страницу Рекламации, где будет отображаться созданная рекламация: |

...
Просмотр и обработка рекламации |
...
Поставщик товара или его менеджер получат уведомления об отправленной рекламации |
...
в меню слева Как правило, после получения запроса на рекламацию |

...
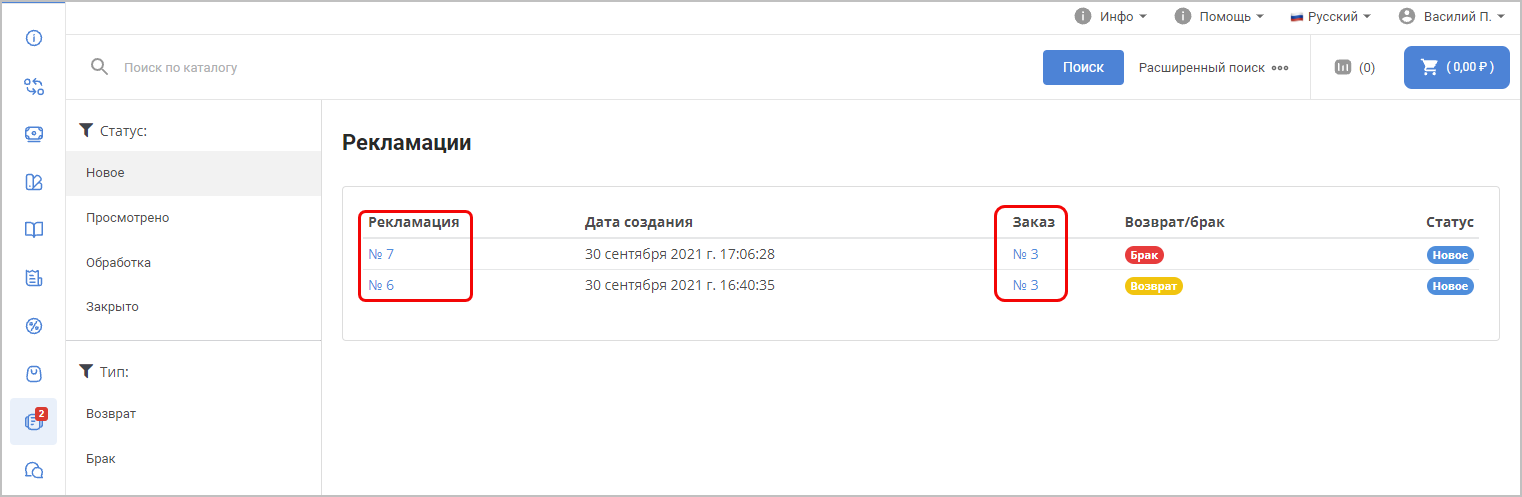
менеджеры поставщика связываются с отправившим запрос для урегулирования возникшей ситуации. Чтобы просмотреть созданную рекламацию, нажмите на ее номер. Для просмотра заказа, по которому составлена рекламация, нажмите на номер заказа: |
...
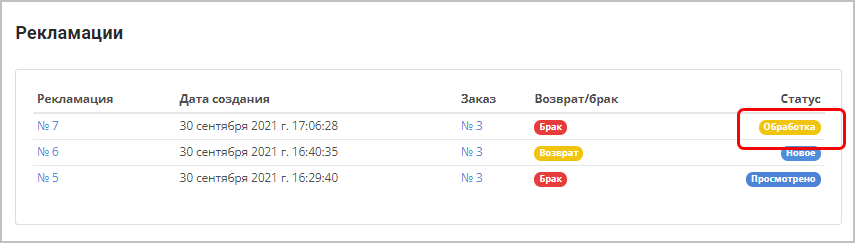
После того, как полученный запрос будет обработан поставщиком или его менеджером, статус рекламации изменится: |
...
|

Обработка рекламации поставщиком осуществляется также в интерфейсе проекта, в разделе Рекламации:
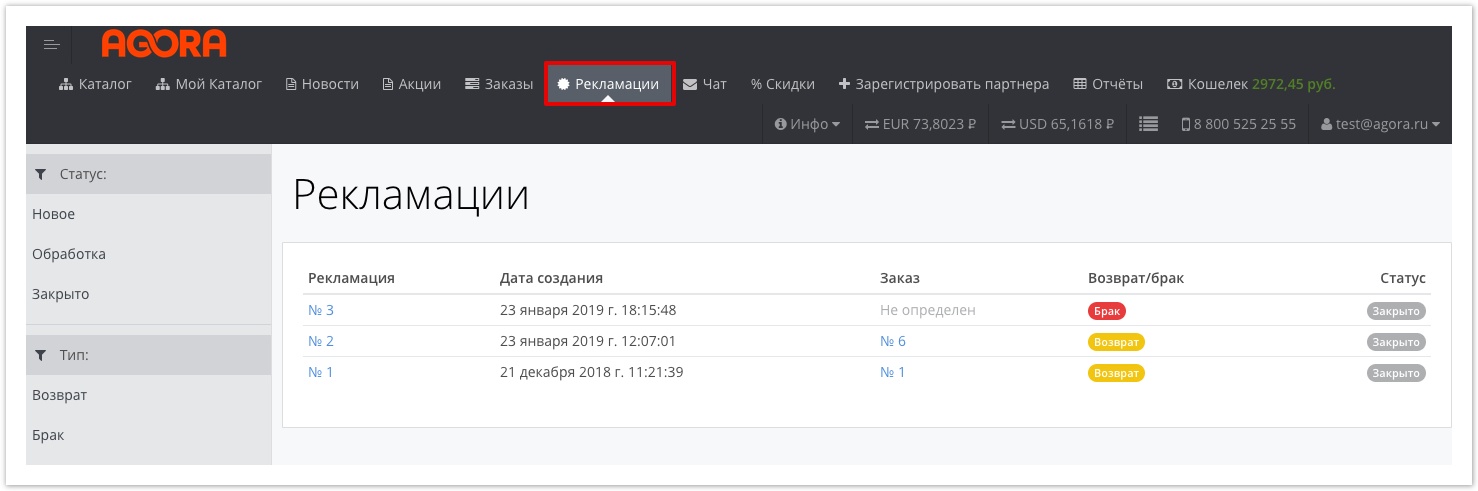
Для перехода в |
...
конкретную рекламацию достаточно кликнуть курсором мыши по номеру рекламации в |
...
колонке Рекламация. |
...
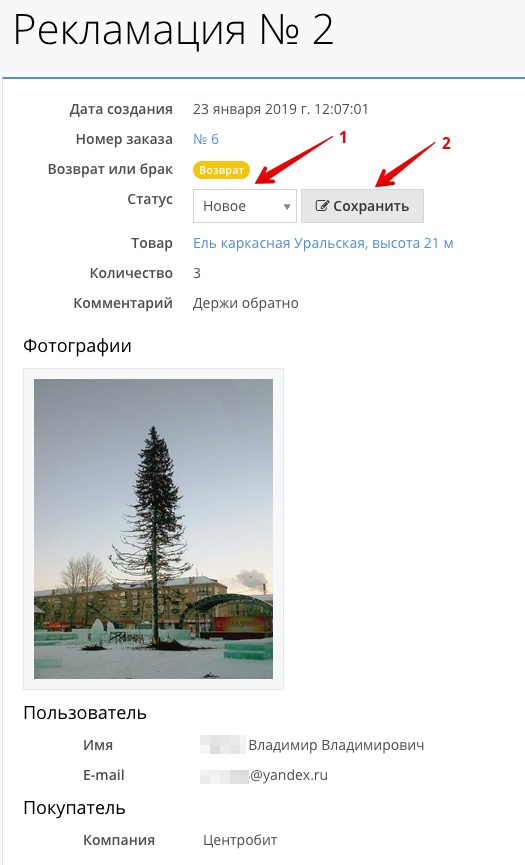
При открытии рекламации она переходит в статус Просмотрено. В процессе рассмотрения рекламации переведите ее в статус Обработка, после обработки рекламации - в статус Закрыто. Для этого достаточно изменить статус в выпадающем списке и сохранить внесенные изменения: |
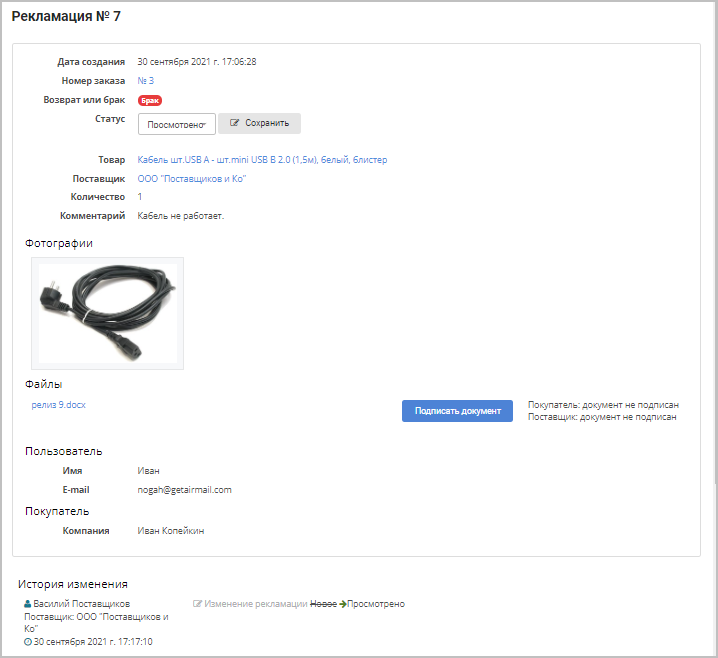
Прикрепленные документы можно подписать электронной подписью, нажав на кнопку Внизу каждой рекламации можно просмотреть историю изменений. |

| Sv translation | ||||||||
|---|---|---|---|---|---|---|---|---|
| ||||||||
To open this section in your personal account, in the menu on the left, click
Creating a claimWhen you click the Create button, a window will open where you need to fill out the return conditions, describe the reason and attach the corresponding image files as evidence: New claimInformation on creating complaints - text is displayed (hint on making requests for returning goods, for example, what documents must be attached, the time for consideration of the complaint).
Claim templates - attached document with a complaint template.
Supplier - select the supplier for whom you want to file a complaint. Product - select the product you want to return. Quantity - the quantity of the item being returned. Order number - order number with this product. Comment - a comment on the complaint. Type of appeal - return or defective. Add a file - when attaching a file, the image size should not exceed 15MB, acceptable image formats are .png, .jpg, .tiff, .bmp, .jpeg, .gif. For documents, the size should not exceed 25MB, acceptable formats are .doc, .docx, .txt, .xls, .zip, .rar, .pdf. The number of added files is no more than three.
When you click the Send button, you will be redirected to the Claims page, where the created complaint will be displayed Viewing and processing claimThe supplier of the product or its manager will receive notifications about the submitted complaint in the menu on the left As a rule, after receiving a request for a complaint, the supplier’s managers contact the person who sent the request to resolve the situation. To view the created complaint, click on its number. To view the order for which the complaint has been made, click on the order number:
After the received request is processed by the supplier or his manager, the status of the complaint will change:
To go to a specific complaint, just click with the mouse cursor on the complaint number in the Claim column. When a complaint is opened, it changes to the Viewed status. While reviewing the complaint, change it to the Processing status, and after processing the complaint, change it to the Closed status. To do this, just change the status in the drop-down list and save the changes:
Attached documents can be signed electronically by clicking on the Sign document button.. Then you need to select a certificate. After signing the document, the names whose signatures were provided are displayed to the right of the button. This functionality is enabled upon request; the user must also have an electronic signature certificate. At the bottom of each complaint you can view the history of changes. |


| Sv translation | ||||||||
|---|---|---|---|---|---|---|---|---|
| ||||||||
Para abrir esta seção em sua conta pessoal no menu à esquerda, clique
Crie uma reclamaçãoQuando você clica no botão Criar, uma janela será aberta onde você precisa preencher as condições de devolução, descrever a razão e anexar os arquivos de imagem apropriados como evidência: Nova reclamaçãoInformações sobre a criação de reclamações - o texto é exibido (uma dica sobre o desenho de pedidos de devolução de mercadorias, por exemplo, quais documentos devem ser anexados, o tempo de consideração da denúncia).
Fornecedor - selecione o fornecedor para quem deseja emitir uma reclamação. Produto - selecione o item que deseja devolver. Quantidade - a quantidade de mercadorias devolvidas. Número do pedido - número do pedido com este produto. Comentário - comentário sobre a reclamação. Tipo de tratamento - retorno ou casamento. Adicionar arquivo - ao anexar um arquivo, o tamanho da imagem não deve exceder 15MB, os formatos de imagem aceitáveis são .png, .jpg, .tiff, .bmp, .jpeg .gif. Para documentos, o tamanho não deve exceder 25MB, os formatos aceitáveis são .doc, .docx, .txt, .xls, .zip, .rar, .pdf. O número de arquivos adicionados - não mais do que três.
Quando você clicar no botão Enviar, você será levado para a página Reclamações, onde a reclamação criada será exibida:
Visualizando e processando uma reclamaçãoO fornecedor da mercadoria ou seu gerente receberá notificações sobre a reclamação enviada no menu à esquerda Via de regra, após receber um pedido de reclamação, os gerentes do fornecedor entram em contato com a pessoa que enviou o pedido para resolver a situação. Para visualizar uma reclamação criada, clique em seu número. Para visualizar a ordem para a qual a reclamação é feita, clique no número do pedido:
Após a solicitação recebida ser processada pelo fornecedor ou seu gerente, o status da reclamação mudará:
Para ir a uma reclamação específica, basta clicar no cursor do mouse no número da reclamação na coluna Reclamação. Quando você abre uma reclamação, ela vai para o status visto. No processo de consideração da denúncia, transfira-a para o status de Processamento, após o processamento da reclamação - para o status encerrado. Para fazer isso, basta alterar o status na lista de drop-down e salvar as alterações feitas: Os documentos anexados podem ser assinados com uma assinatura eletrônica clicando no botão Assinar documento. Em seguida, você precisa selecionar um certificado. Depois de assinar o documento, os nomes cujas assinaturas foram assinadas são exibidos à direita do botão. Essa funcionalidade está conectada depois da solicitação, o usuário também deve ter um certificado de assinatura eletrônica. Na parte inferior de cada reclamação, você pode visualizar o histórico de mudanças. |


...