...
| Sv translation | |||||||||||
|---|---|---|---|---|---|---|---|---|---|---|---|
| |||||||||||
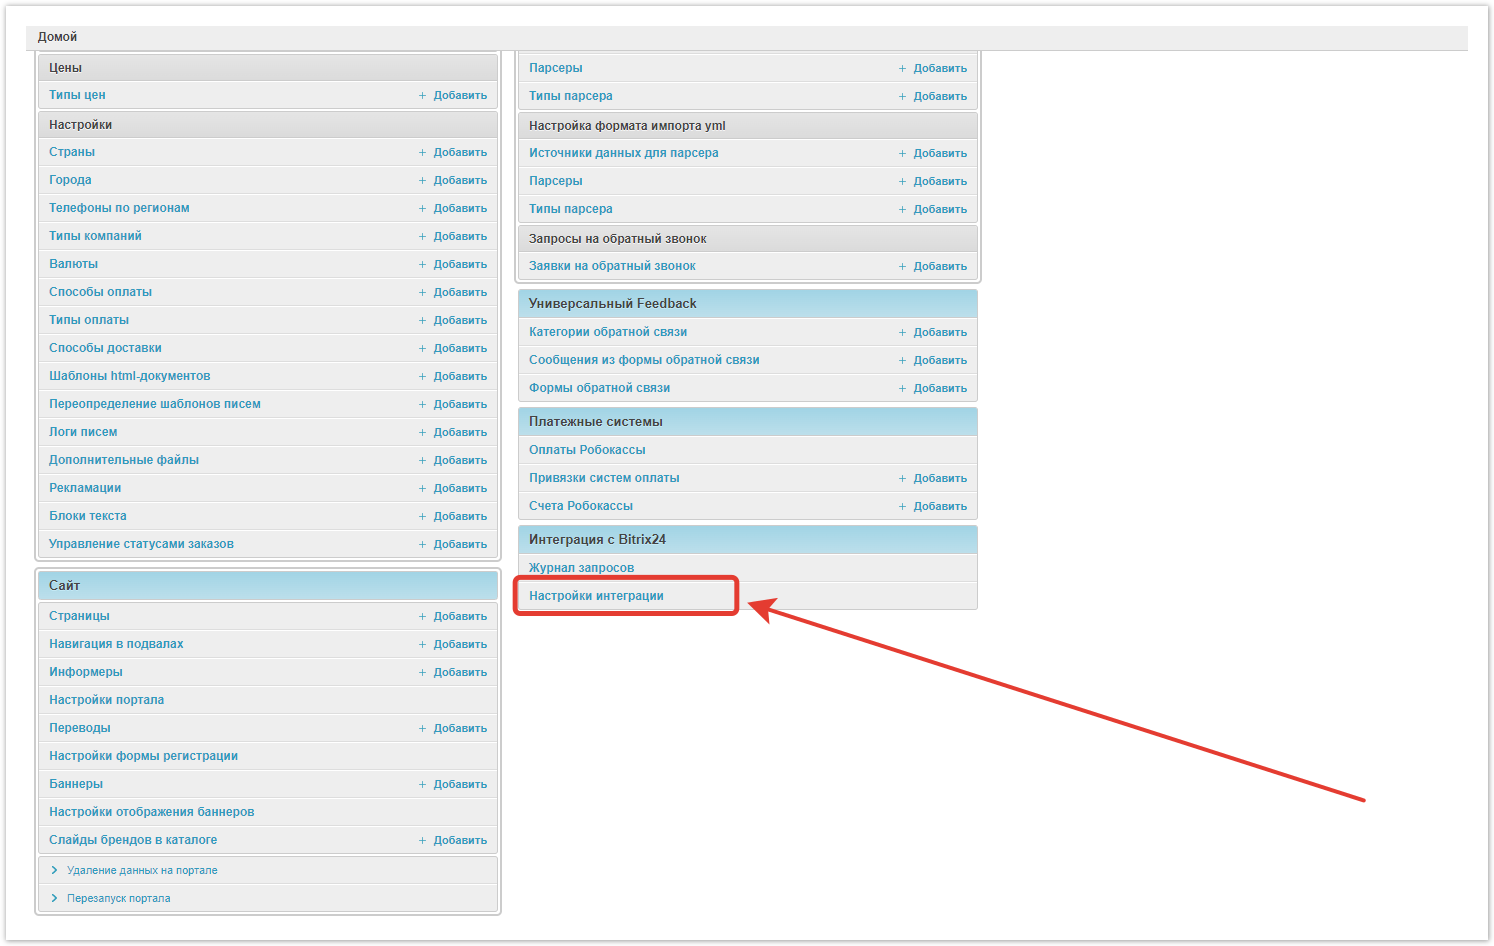
Create an integrationTo set up the integration, go to the Integration with Bitrix24 → Integration settings section of the Agora administrative panel. A settings window will open in which you need to enter data.
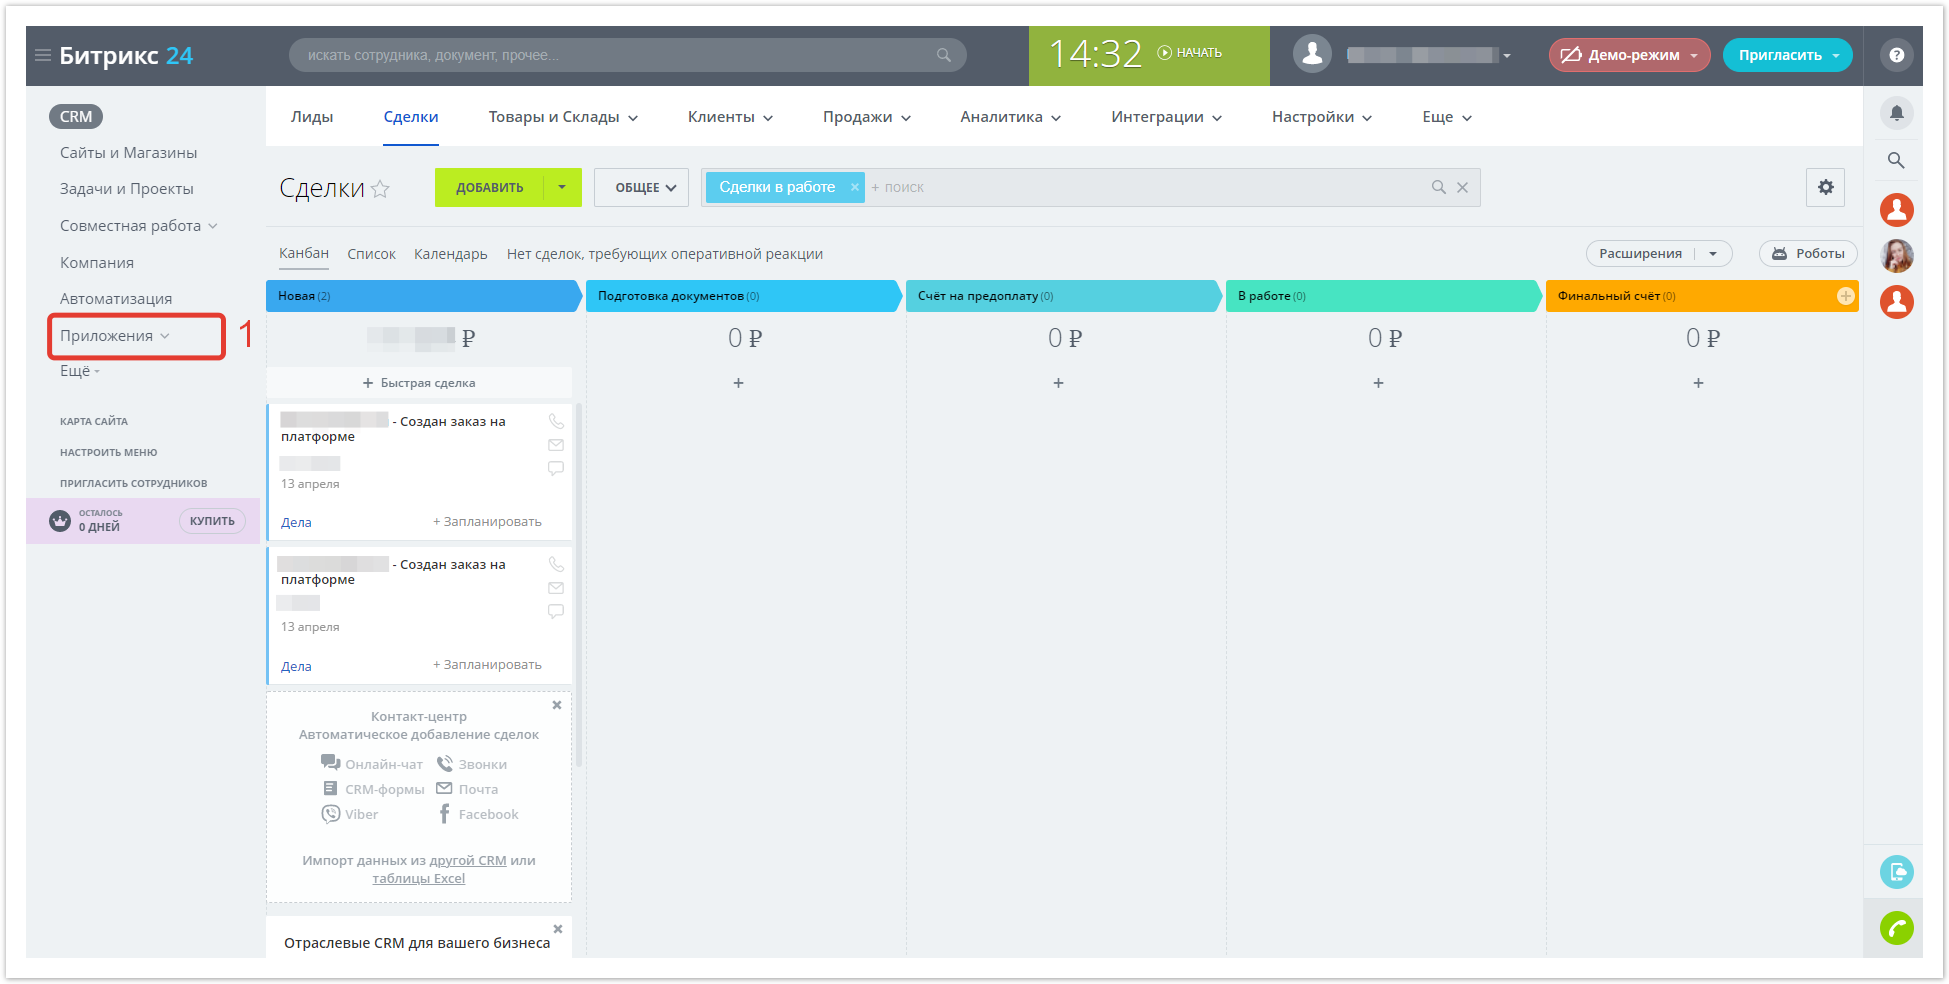
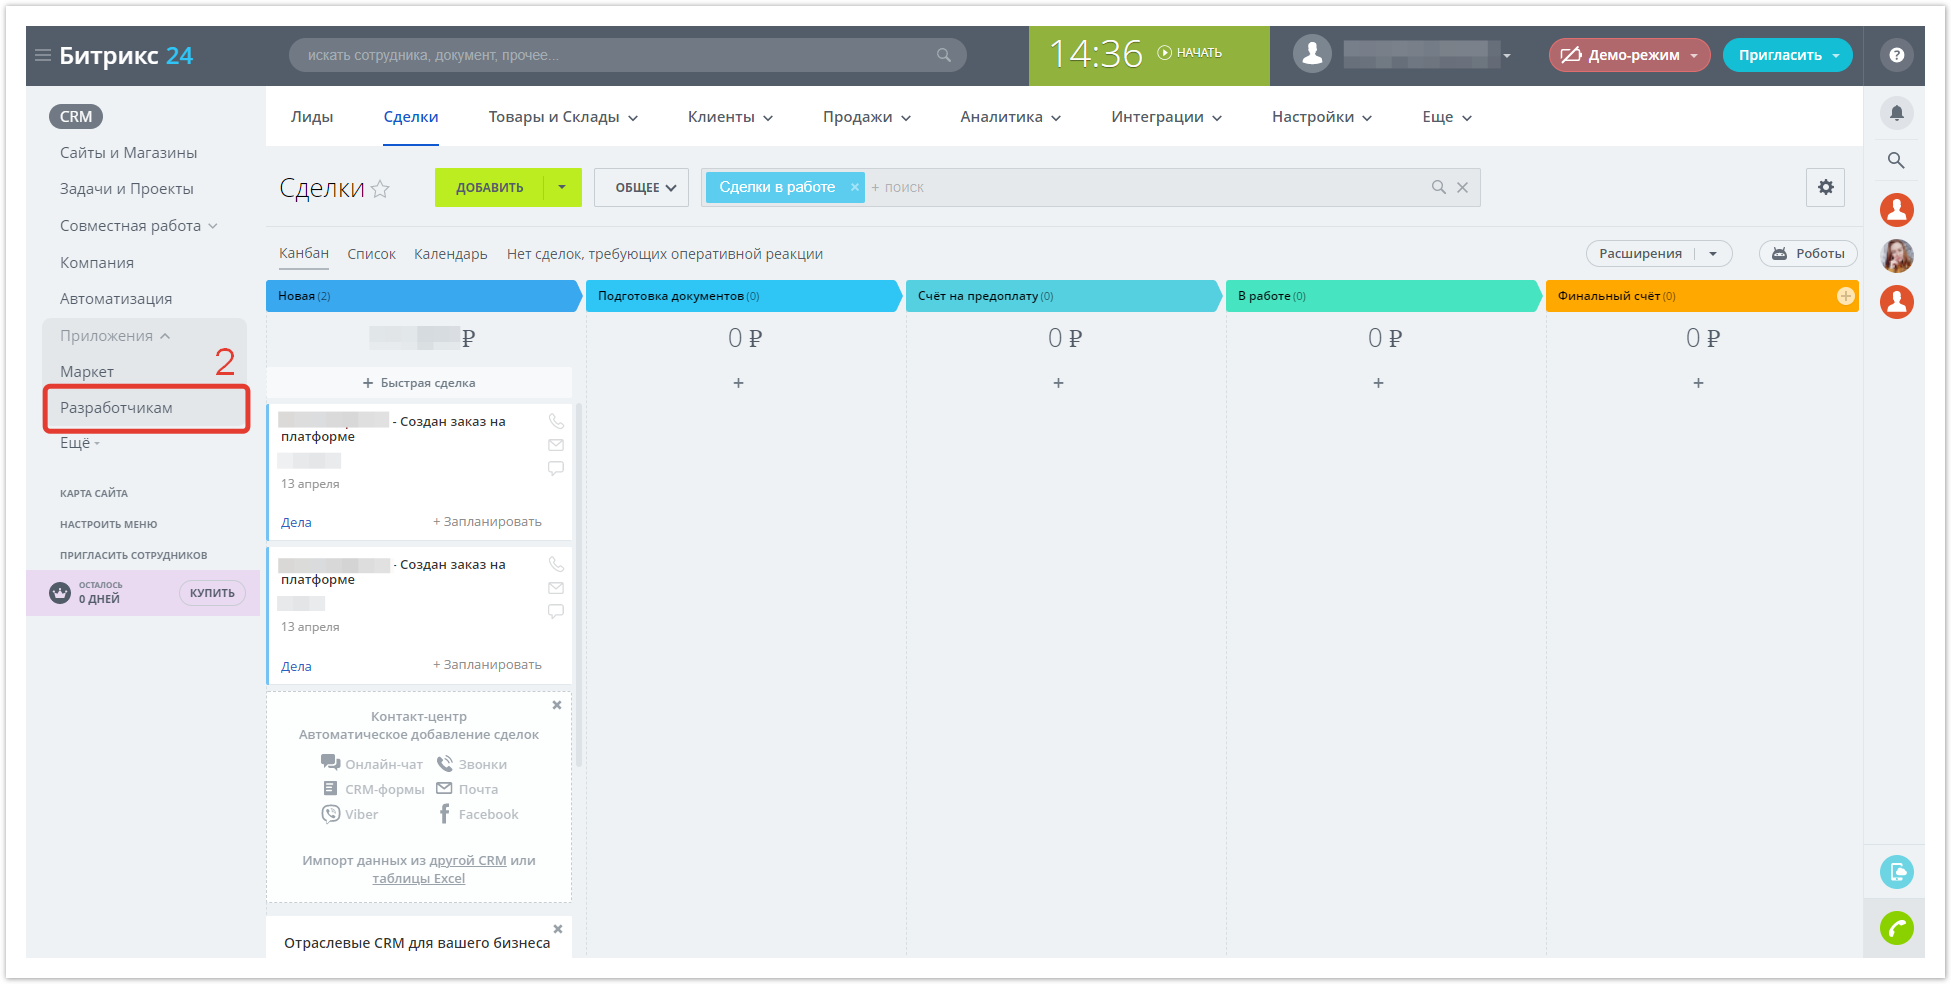
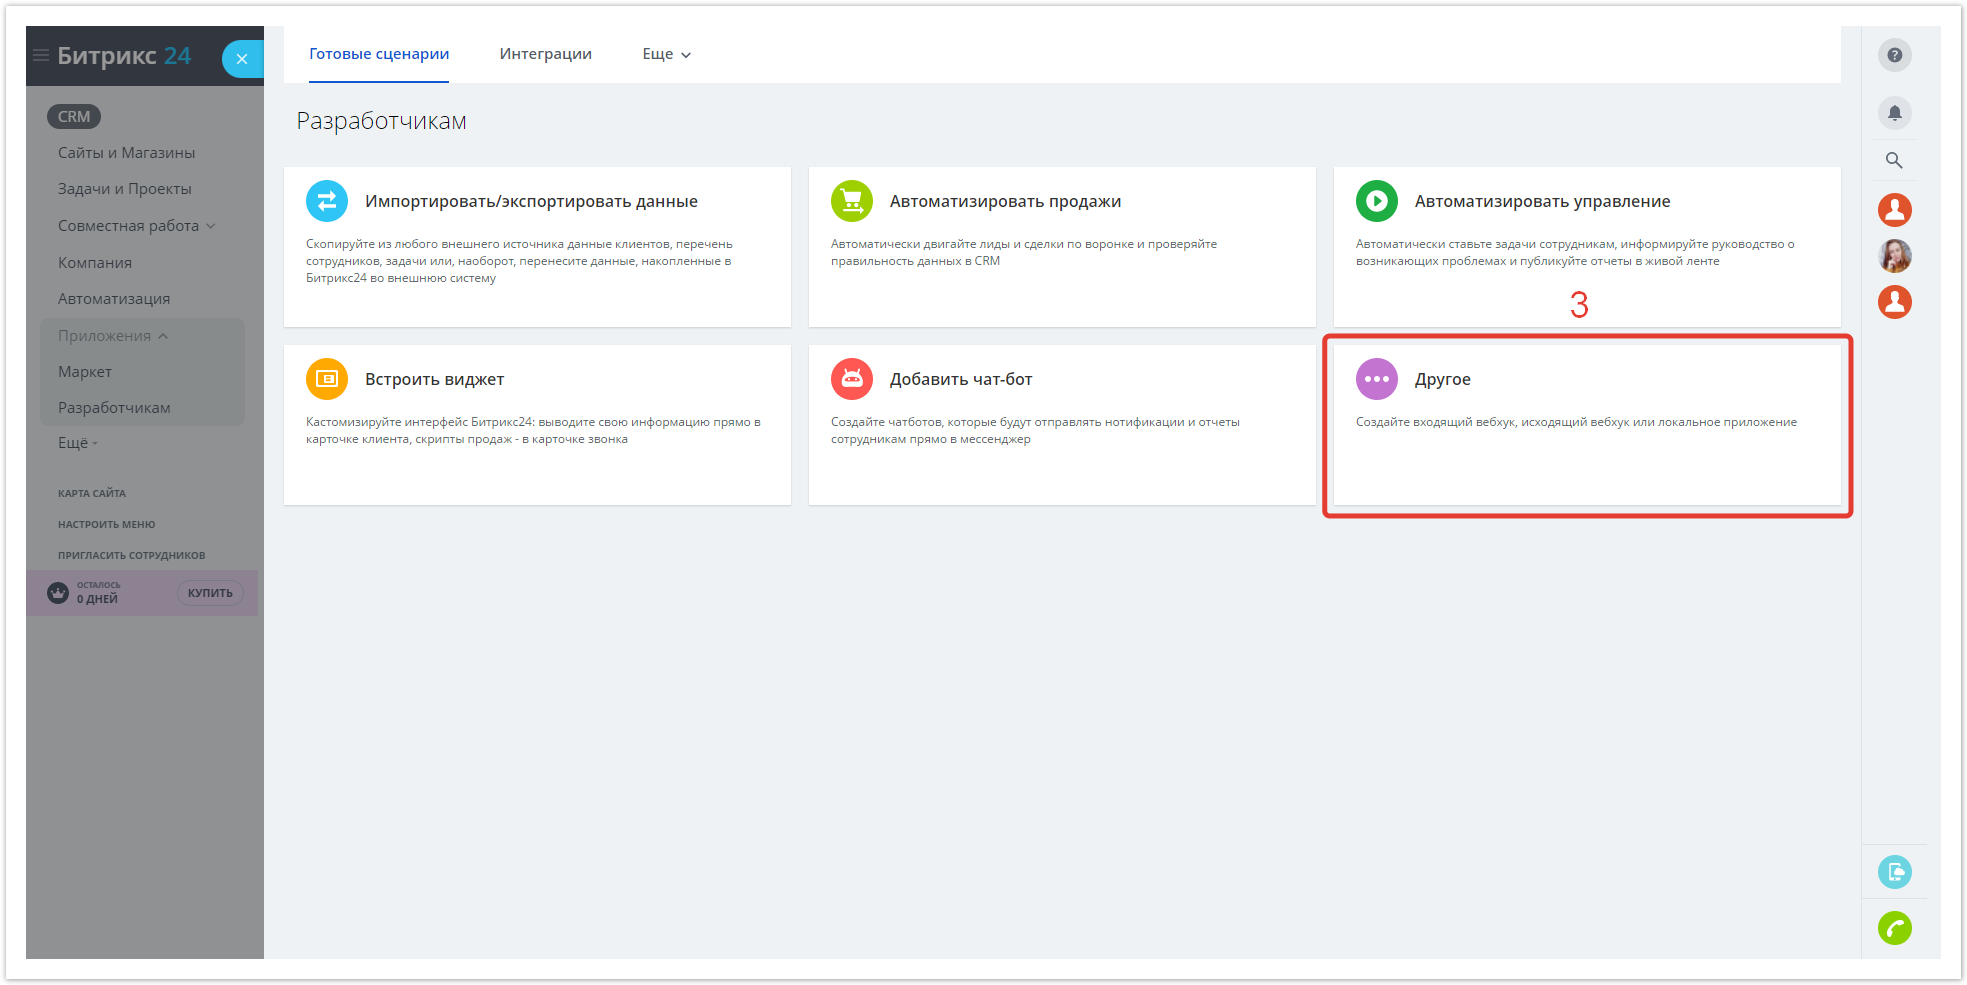
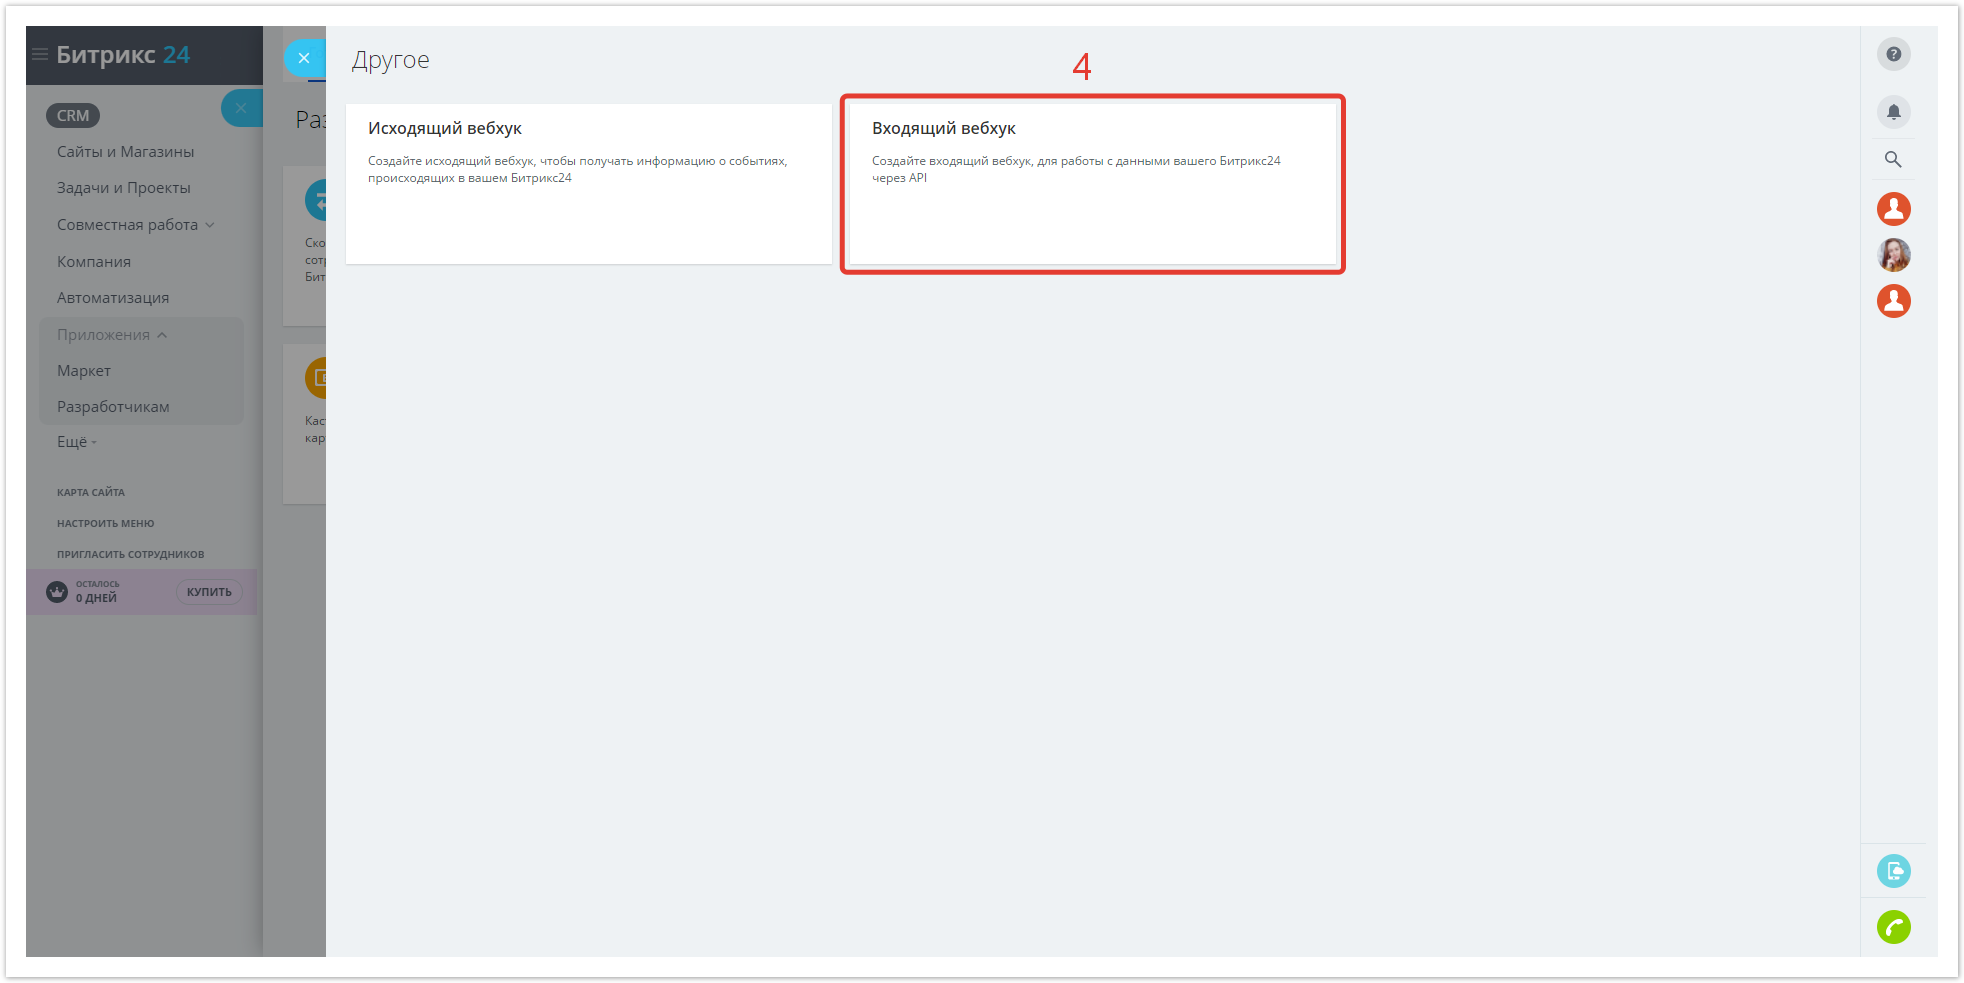
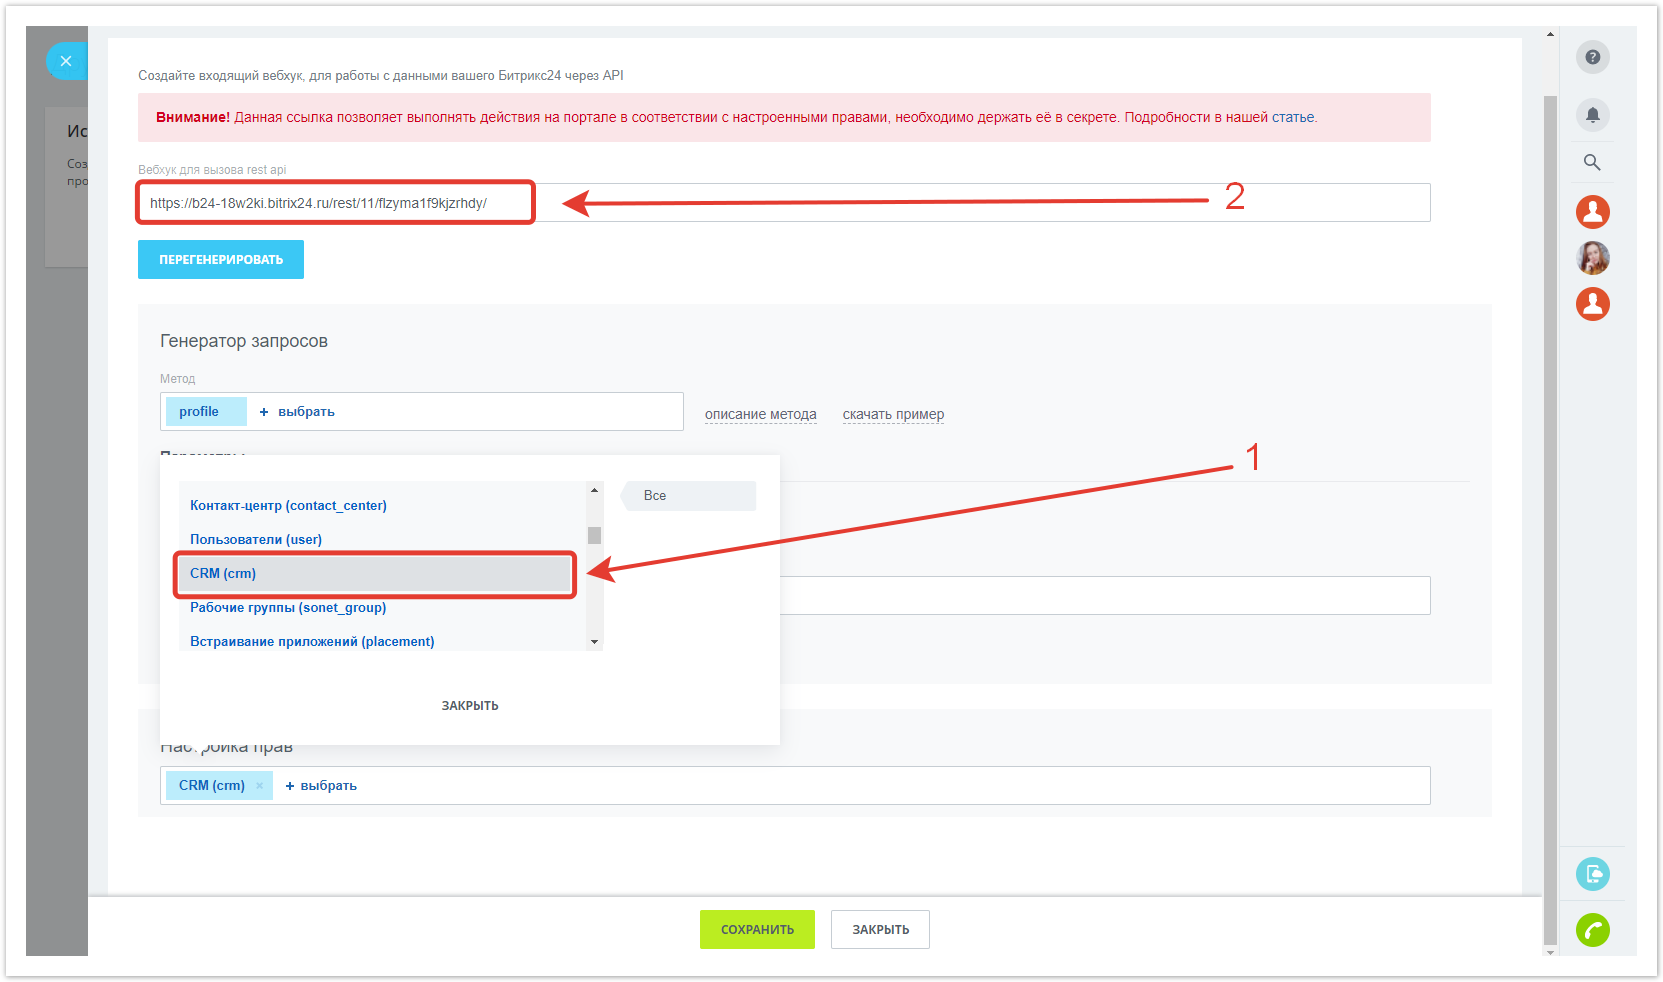
Parts of the incoming webhook URL created in Bitrix24 should be inserted into the Bitrix24 Portal, Administrator ID and Webhook Key fields. To create a new webhook in Bitrix24, go to Applications → Developer resources→ Other → Inbound webhook.
In the window that opens, copy the webhook URL from the field Webhook to call the rest api (it will be used in further integration settings) and select CRM rights.
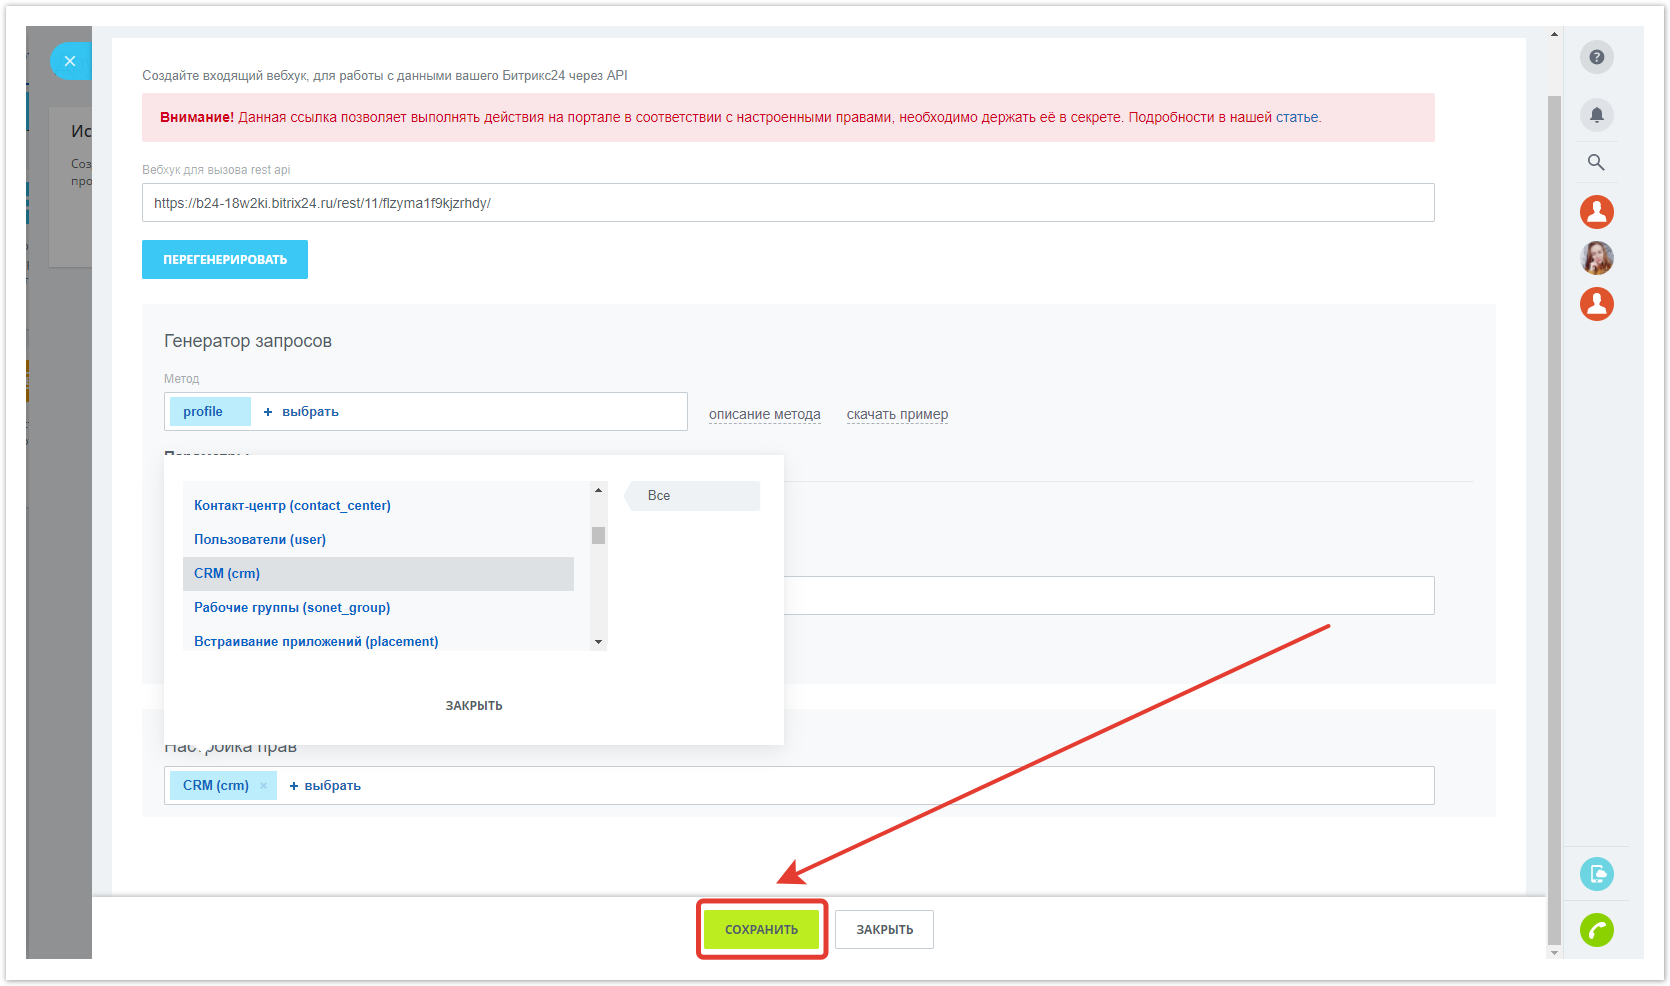
After completing the settings, Save the changes.
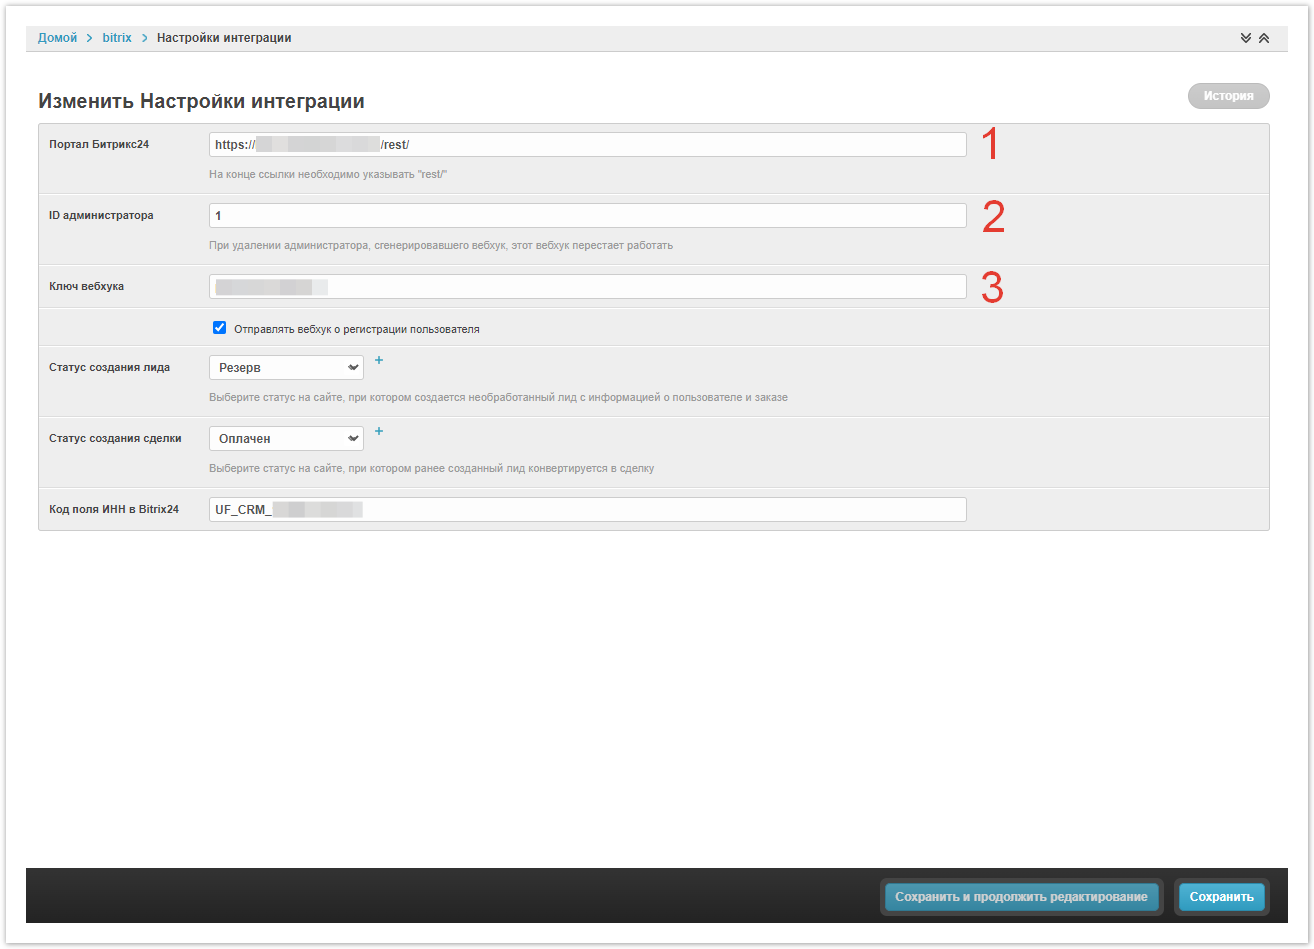
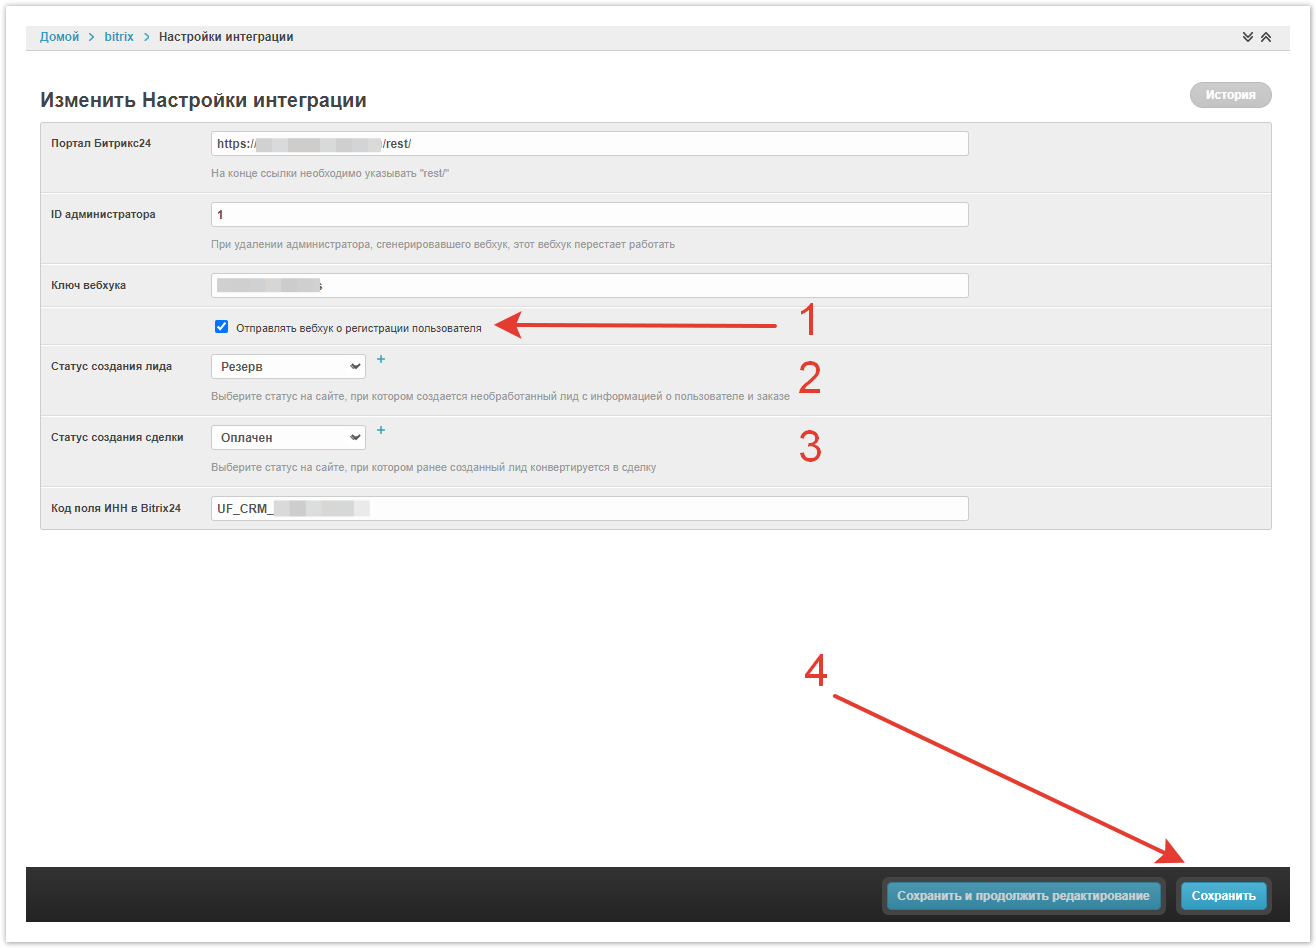
Return to the admin panel of the Agora project. The previously copied URL must be broken into 3 parts and pasted into different fields:
Then check or leave empty the Send a webhook about user registration checkbox, select Lead creation status and Transaction creation status — at what order statuses in Agora the lead and deal will be created in Bitrix24.
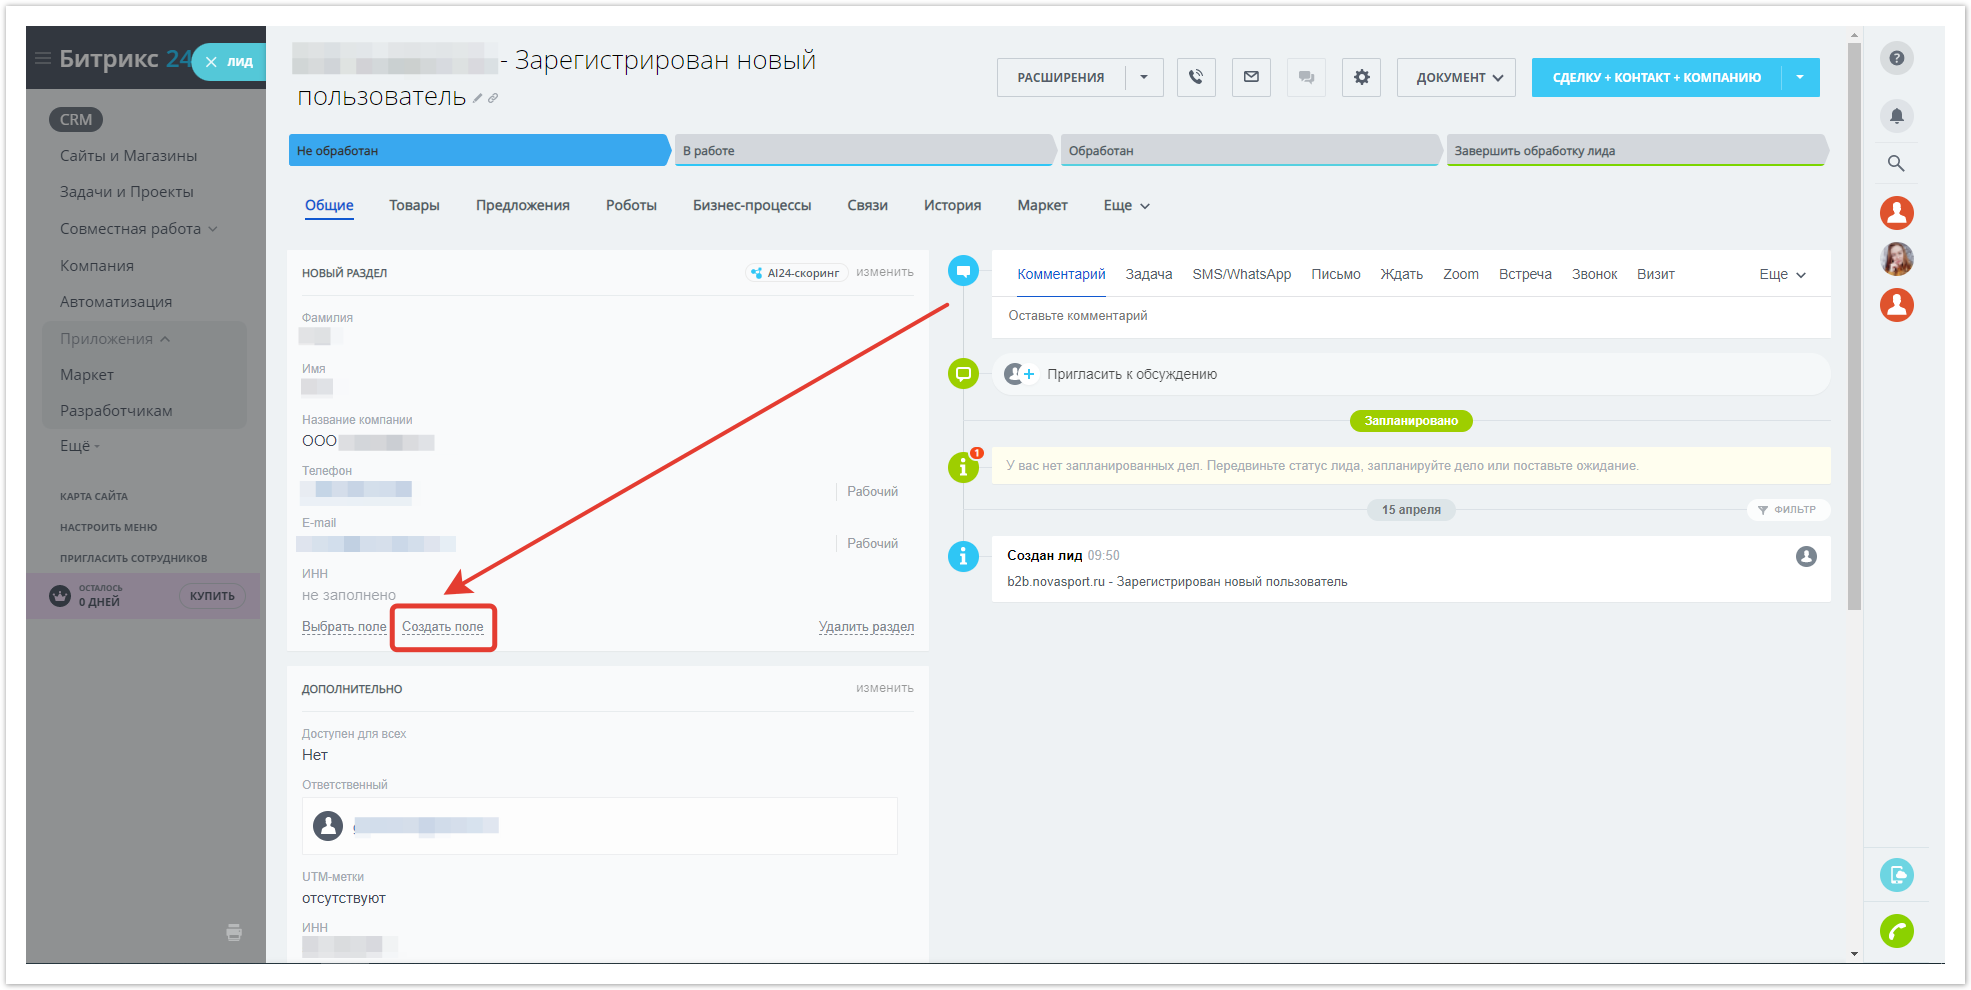
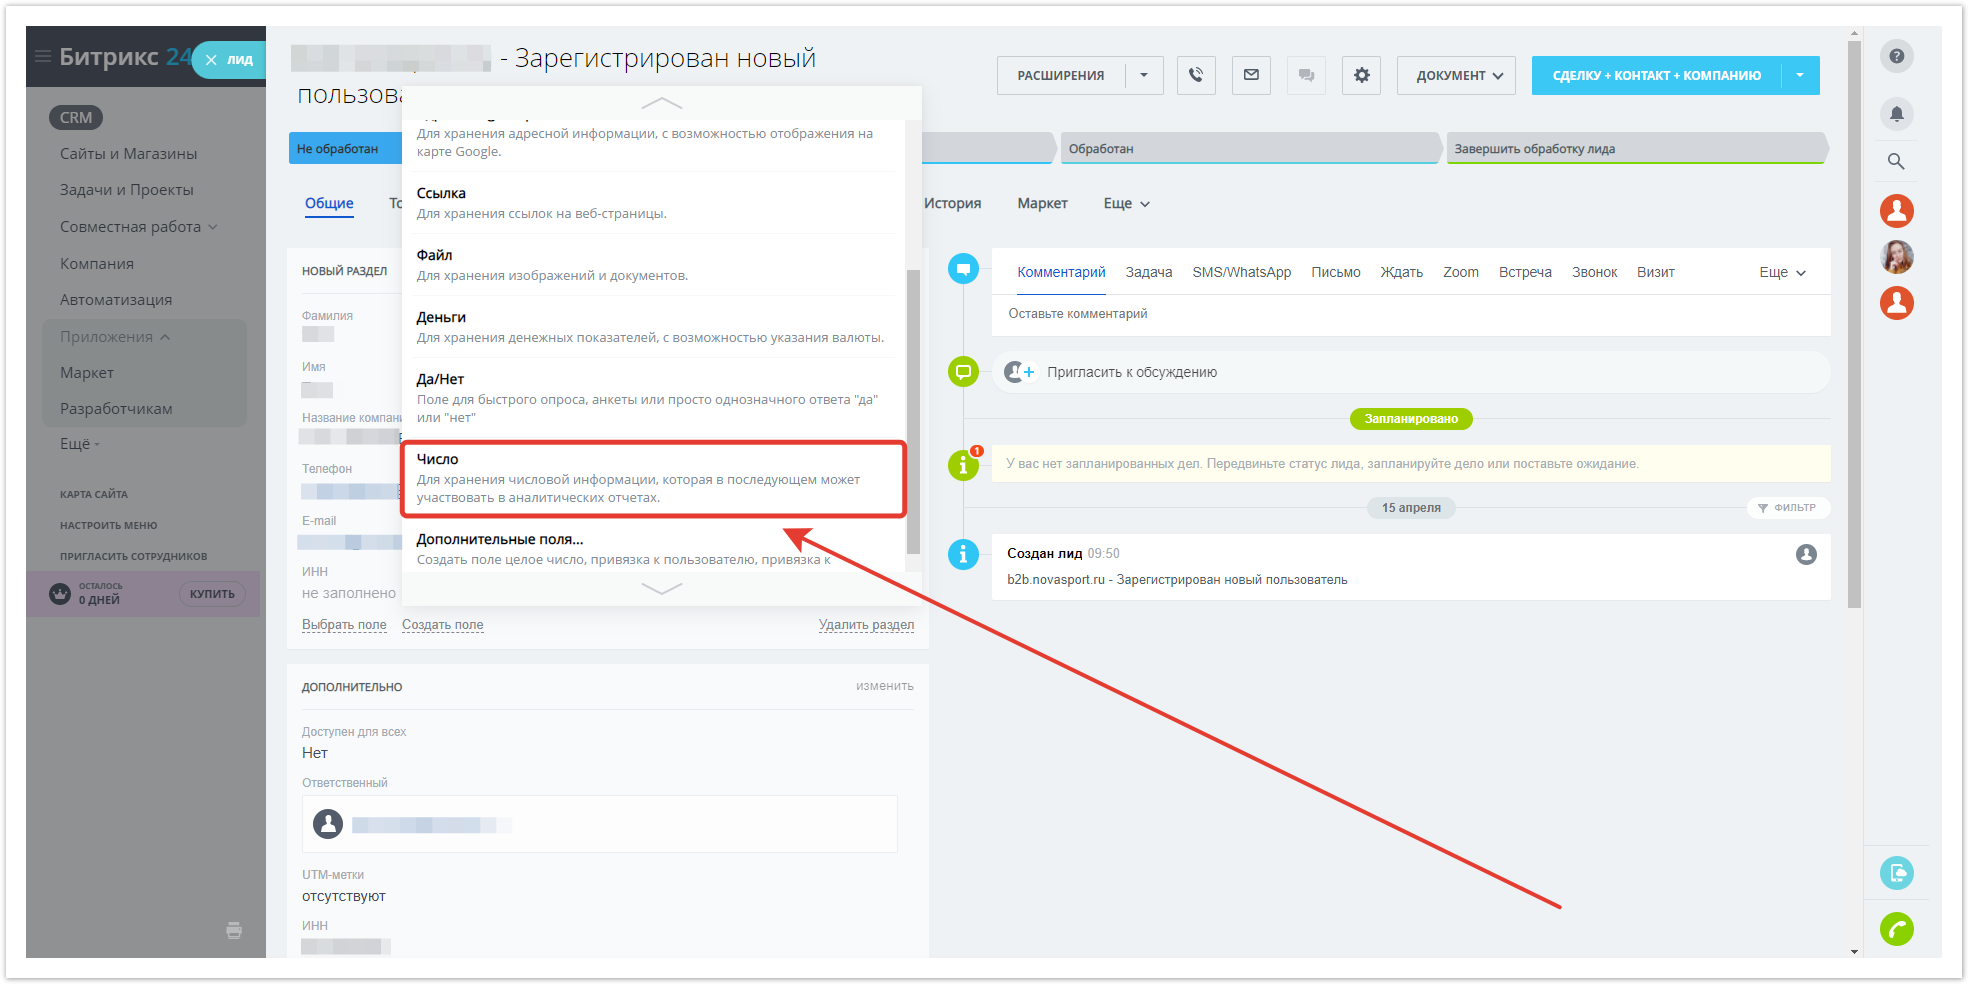
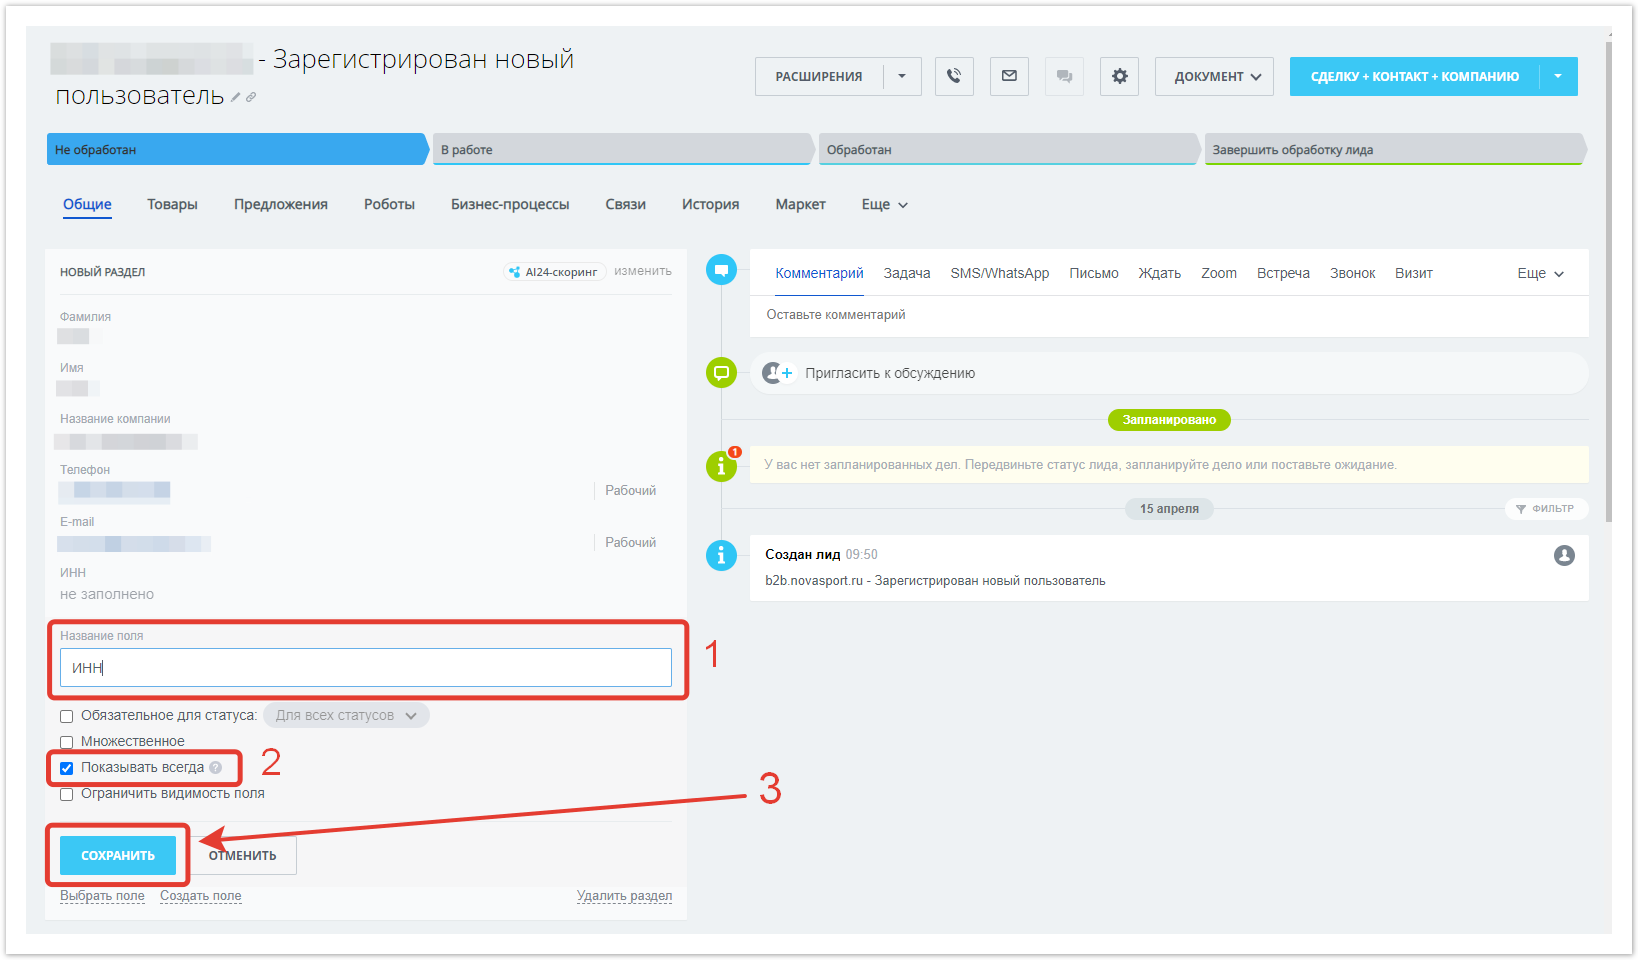
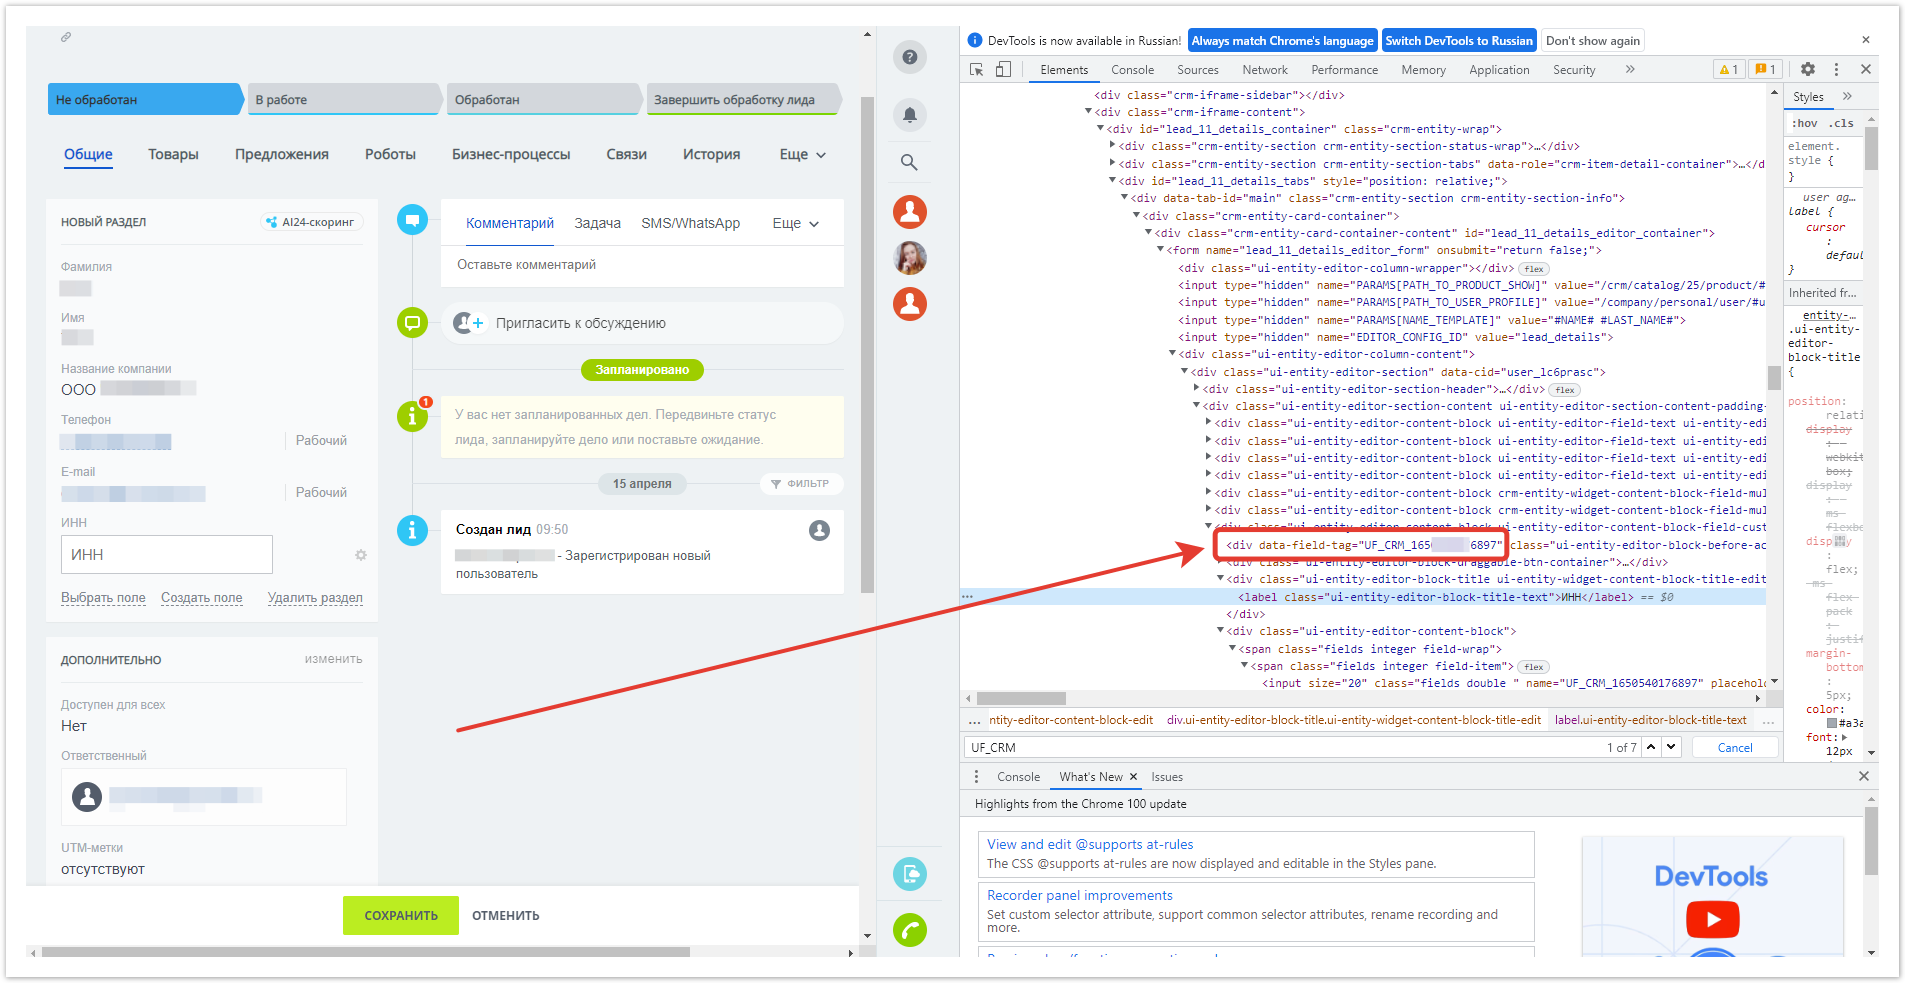
The field TIN field code in Bitrix24 is optional. To fill it out, you need to find the TIN field ID in your Bitrix. For this:
Paste the received value into the field TIN field code in Bitrix24, save the changes.
Now the integration of Agora with Bitrix24 can be considered complete. It is ready for full-fledged work: a lead will be created when registering on the site and creating an order on the site, and a deal will be formed after payment. The webhook remains available until the administrator who created it is deleted.
|


| Sv translation | |||||||||||
|---|---|---|---|---|---|---|---|---|---|---|---|
| |||||||||||
Crie um webhook de entradaPara criar um novo webhook, vá para Приложения → Разработчикам → Другое → Входящий вебхук.
Na janela que abre, selecione os direitos de CRM e copie a URL do campo Вебхук для вызова rest api, ela será usada na configuração adicional da integração.
Quando as configurações estiverem concluídas, Salve as alterações.
Em seguida, vá para o painel administrador agora, sob Настройки интеграции.
A URL copiada anteriormente deve ser dividida em 3 partes e colada em diferentes campos:
Resta apenas definir ou deixar em branco a caixa de seleção Отправлять вебхук о регистрации пользователя, selecionar Статус создания лидаe Статус создания сделки — no qual os status de pedido agora criarão um lead e um acordo no Bitrix24 e, em seguida, Salvará configurações.
Adicione um campo de IVAPara começar a adicionar um campo TIN, na seção Лиды você precisa:
Adicione um processo de negócios de liderança ao Bitrix24Em seguida, você precisa retornar a qualquer Lead Bitrix24 e ir para a guia Роботы.
Na coluna Качественный лид encontrar o botão Редактировать в дизайнере Бизнес-процессов e clique nele.
A janela de visualização do processo de negócios é aberta. A janela de visualização do processo de negócios é aberta. Para o diagrama já exibido, arraste para a seta após o bloco Начало da guia Конструкции do bloco Условие.
Em seguida, arraste para a seta após o bloco direito do bloco Условие bloquear Создание новой сделки a partir da seção CRM.
Clique no ícone
Clique em Сохранить.
Na Условии certa é necessário especificar:
Guarde as mudanças.
O bloco Создание новой сделки deve ser preenchido da seguinte forma:
As configurações do formulário devem ser Salvas. Depois disso, você precisa Salvar o próprio modelo de processo de negócios.
A integração da Agora com o Bitrix24 agora pode ser considerada completa. Ele está pronto para o trabalho completo: o lead será criado ao se cadastrar no site e criar um pedido no site, e a transação será formada após o pagamento. O webhook permanece disponível até que o administrador que o criou seja excluído.
|