
...
| Sv translation | |||||||||||
|---|---|---|---|---|---|---|---|---|---|---|---|
| |||||||||||
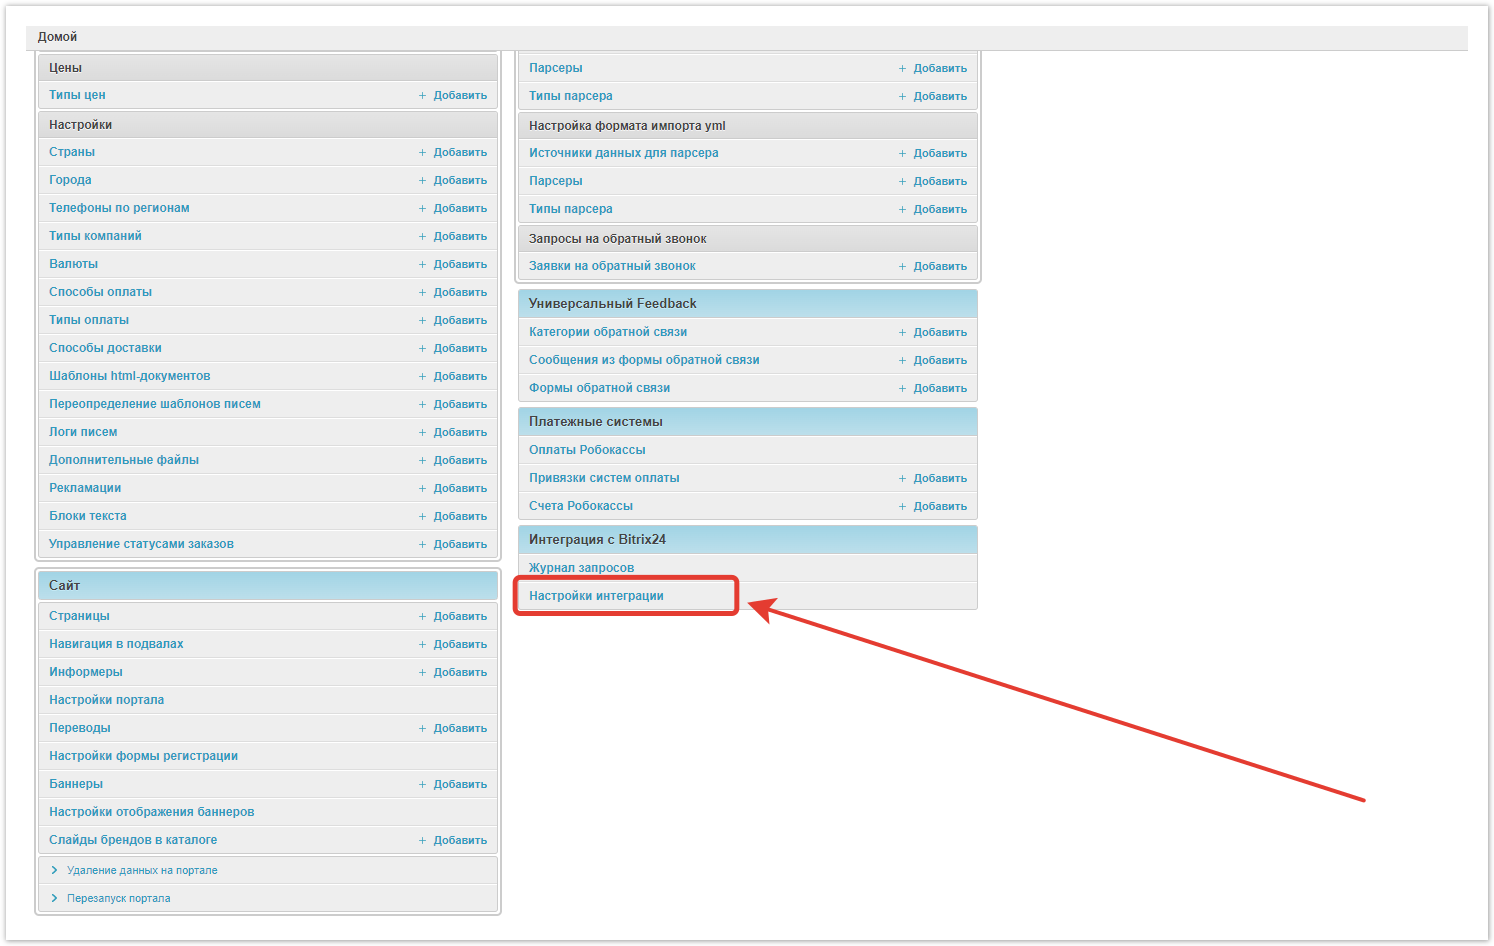
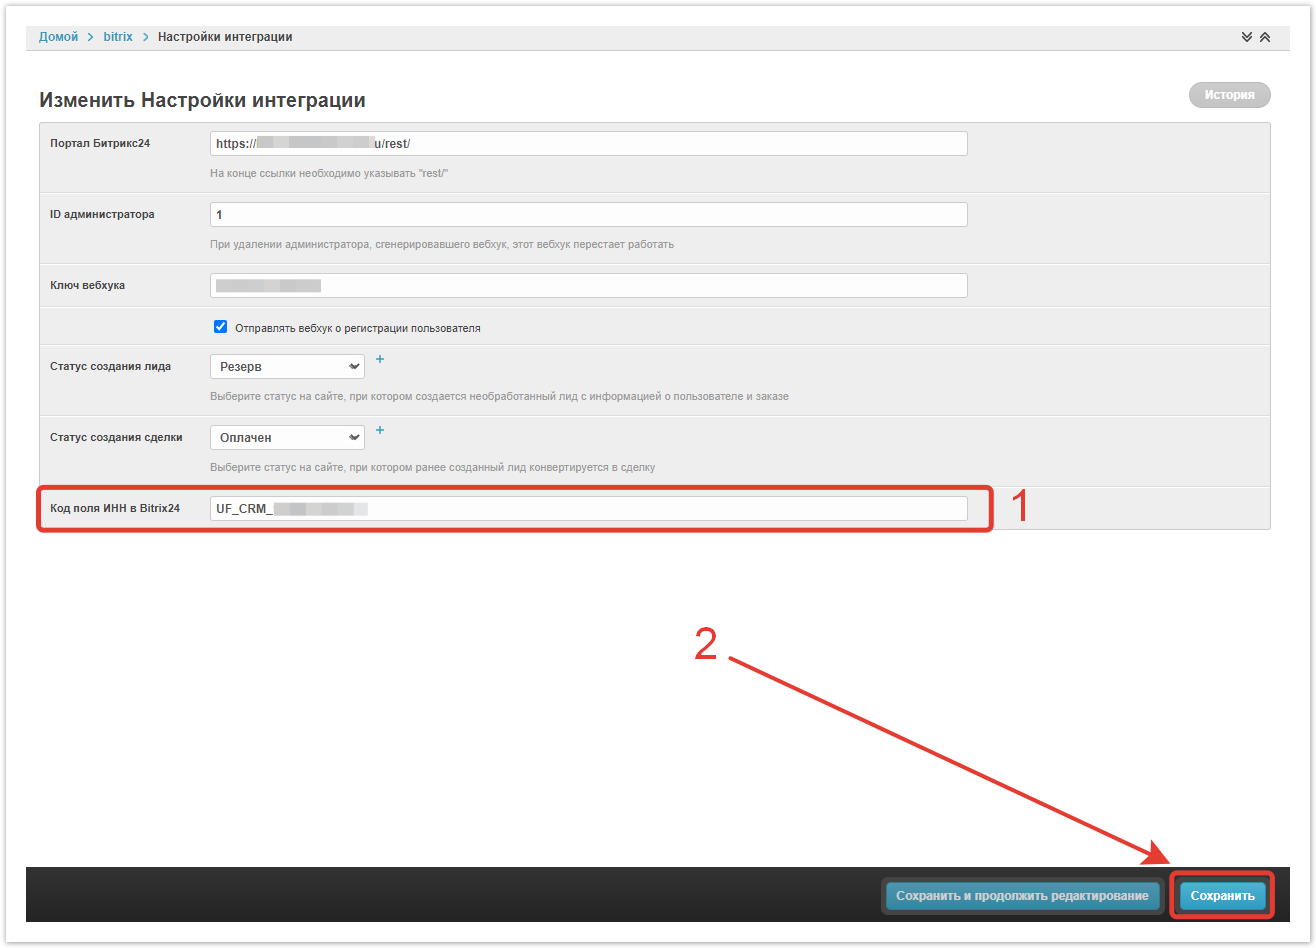
Create an integrationTo set up the integration, go to the Integration with Bitrix24 → Integration settings section of the Agora administrative panel. A settings window will open in which you need to enter data.
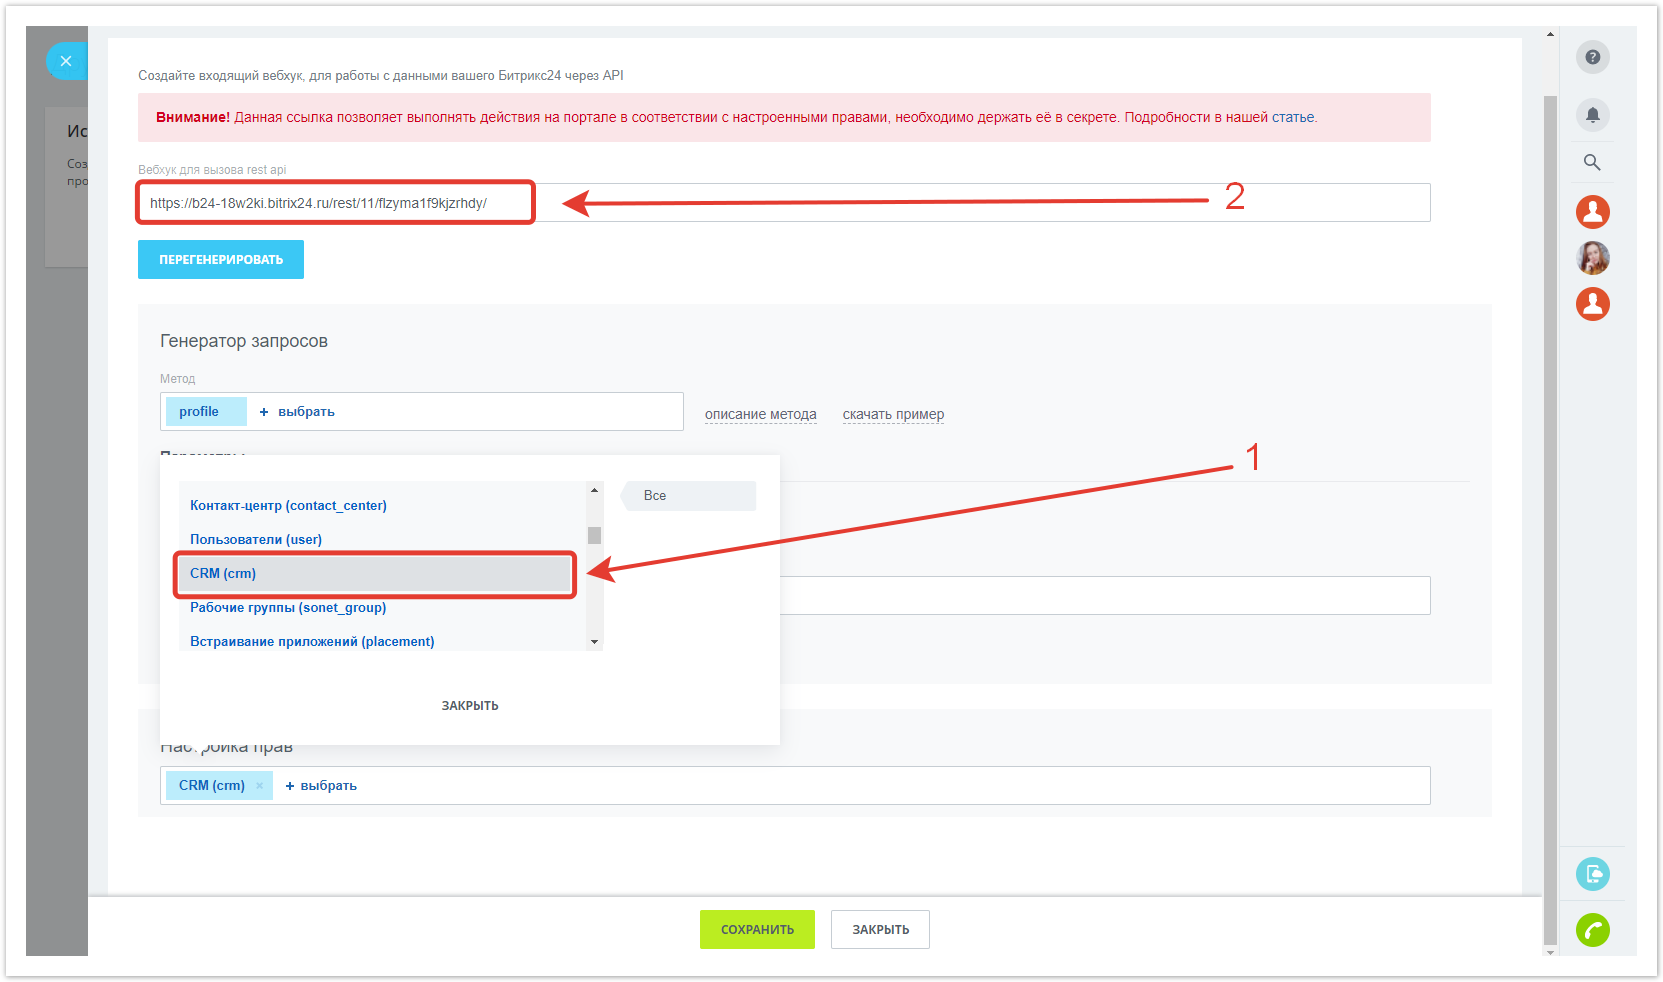
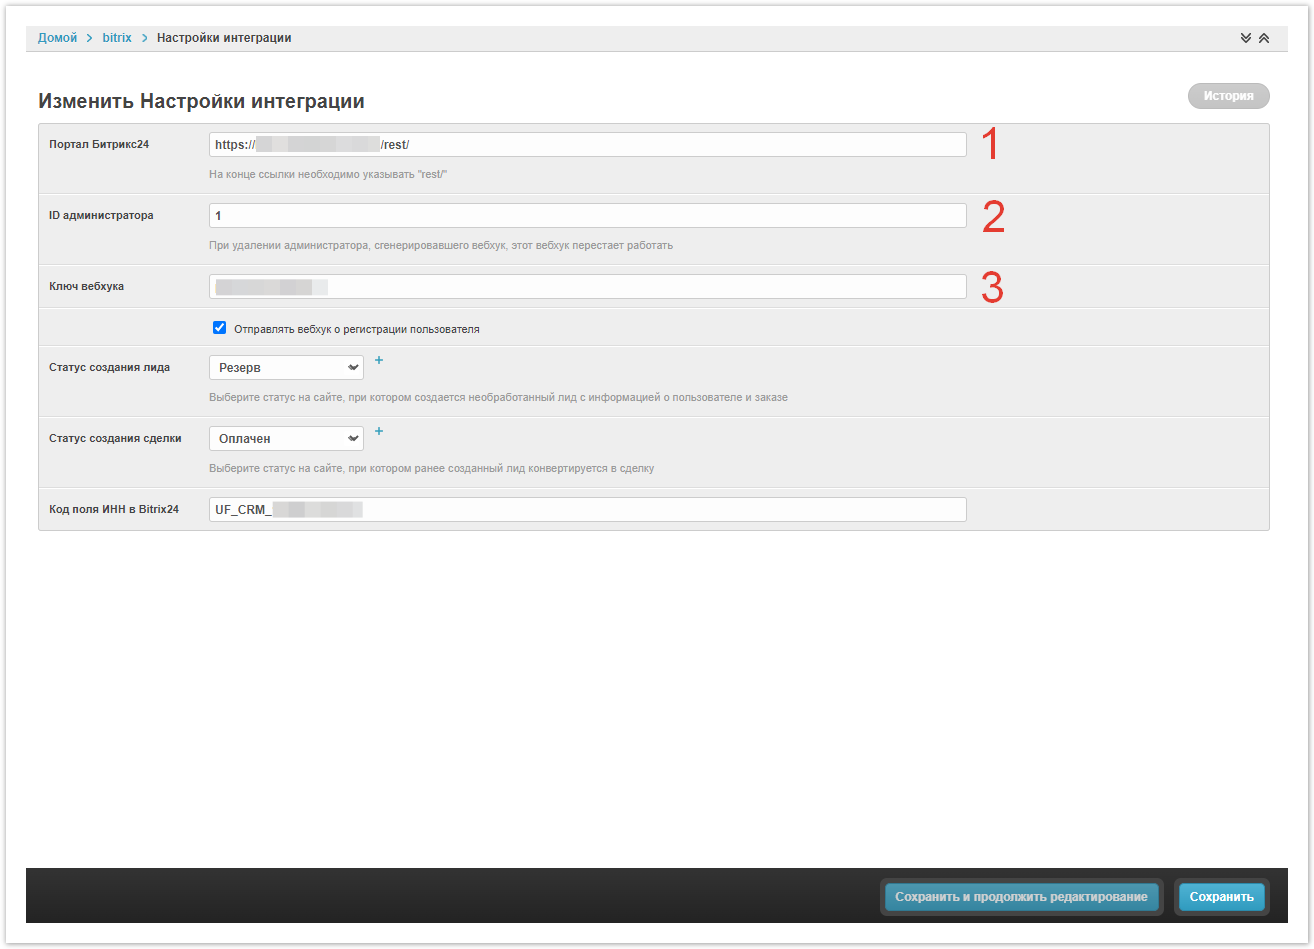
Parts of the incoming webhook URL created in Bitrix24 should be inserted into the Bitrix24 Portal, Administrator ID and Webhook Key fields. To create a new webhook in Bitrix24, go to Applications → Developer resources→ Other → Inbound webhook.
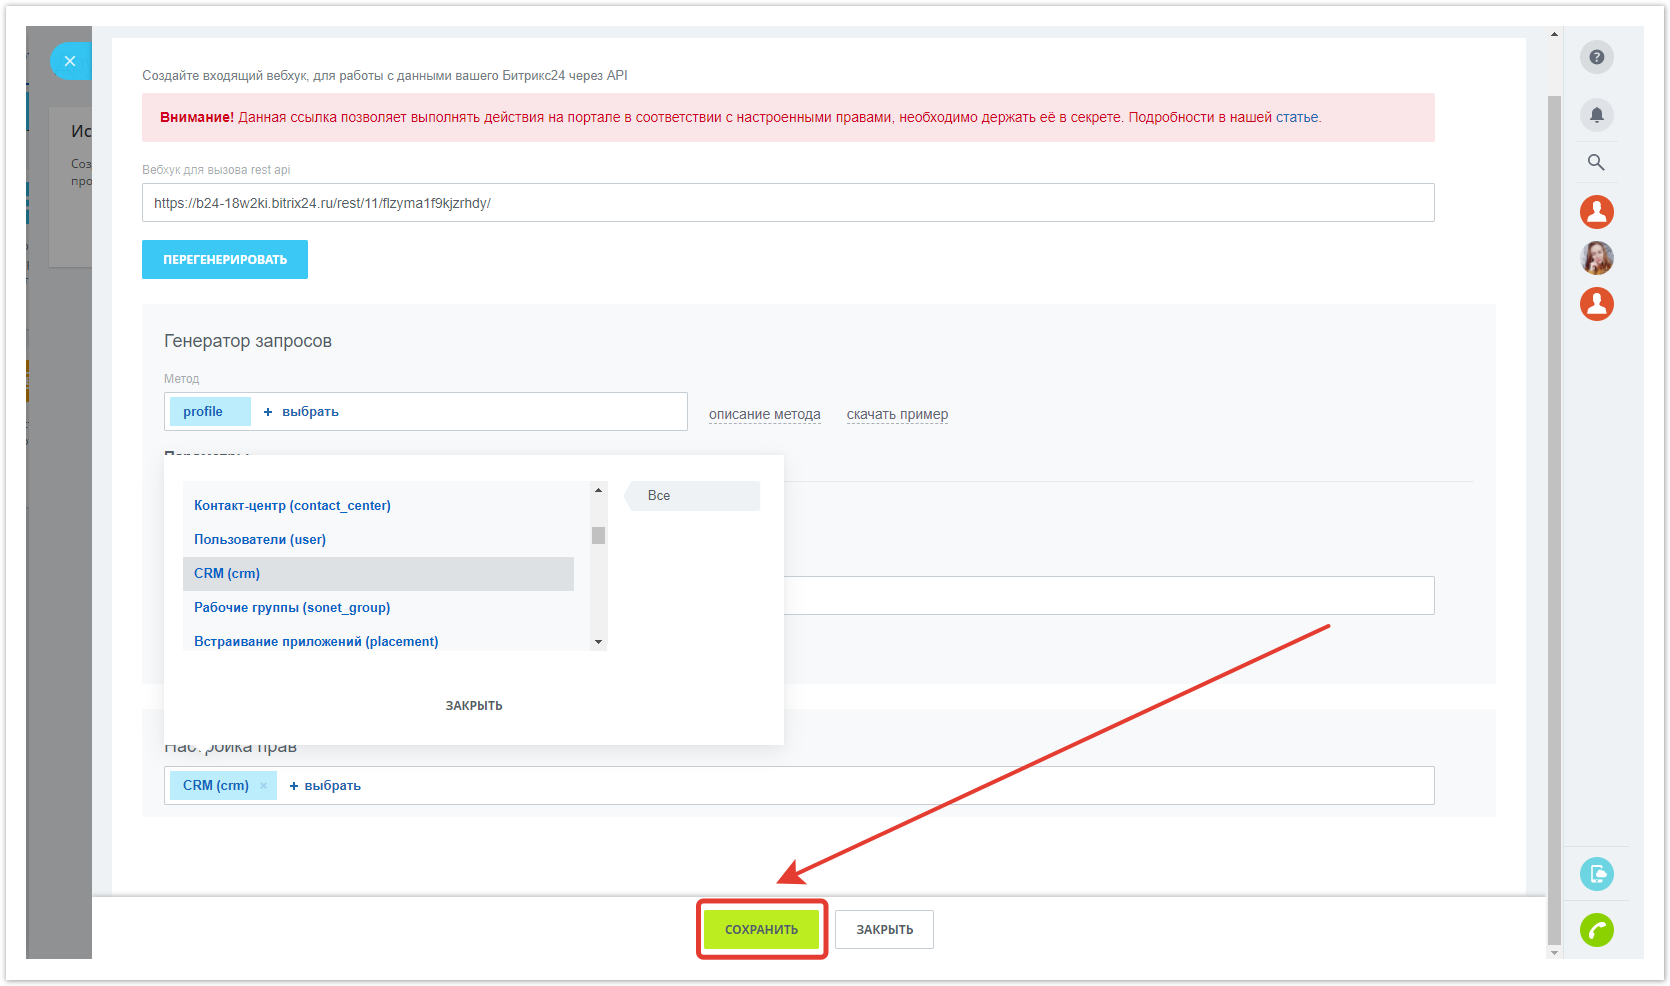
In the window that opens, select CRM rights and copy the webhook URL from the field Вебхук для вызова the field Webhook to call the rest api, (it will be used in further integration settings) and select CRM rights.
After completing the settings, Save the changes.
Then go Return to your Agora the admin panel , to the Настройки интеграцииsection. The previously copied URL must be broken into 3 parts and pasted into different fields:
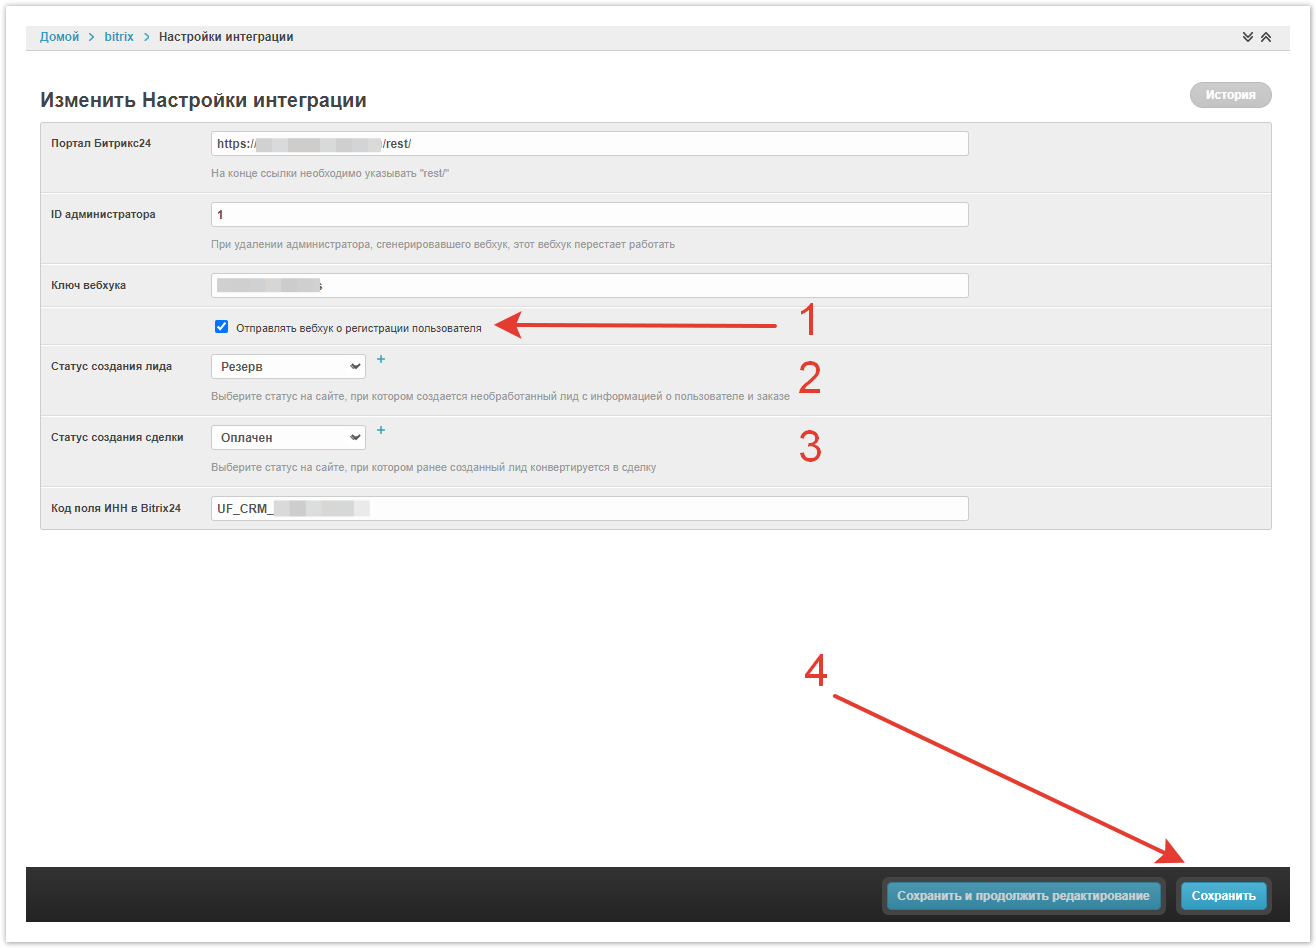
Then check It remains only to set or leave empty the checkbox empty Отправлять вебхук о регистрации пользователя, choose Статус создания лида and Статус создания сделки — under which Send a webhook about user registration checkbox, select Lead creation status and Transaction creation status — at what order statuses in Agora will a the lead and deal will be created in Bitrix24, and then Сохранить.
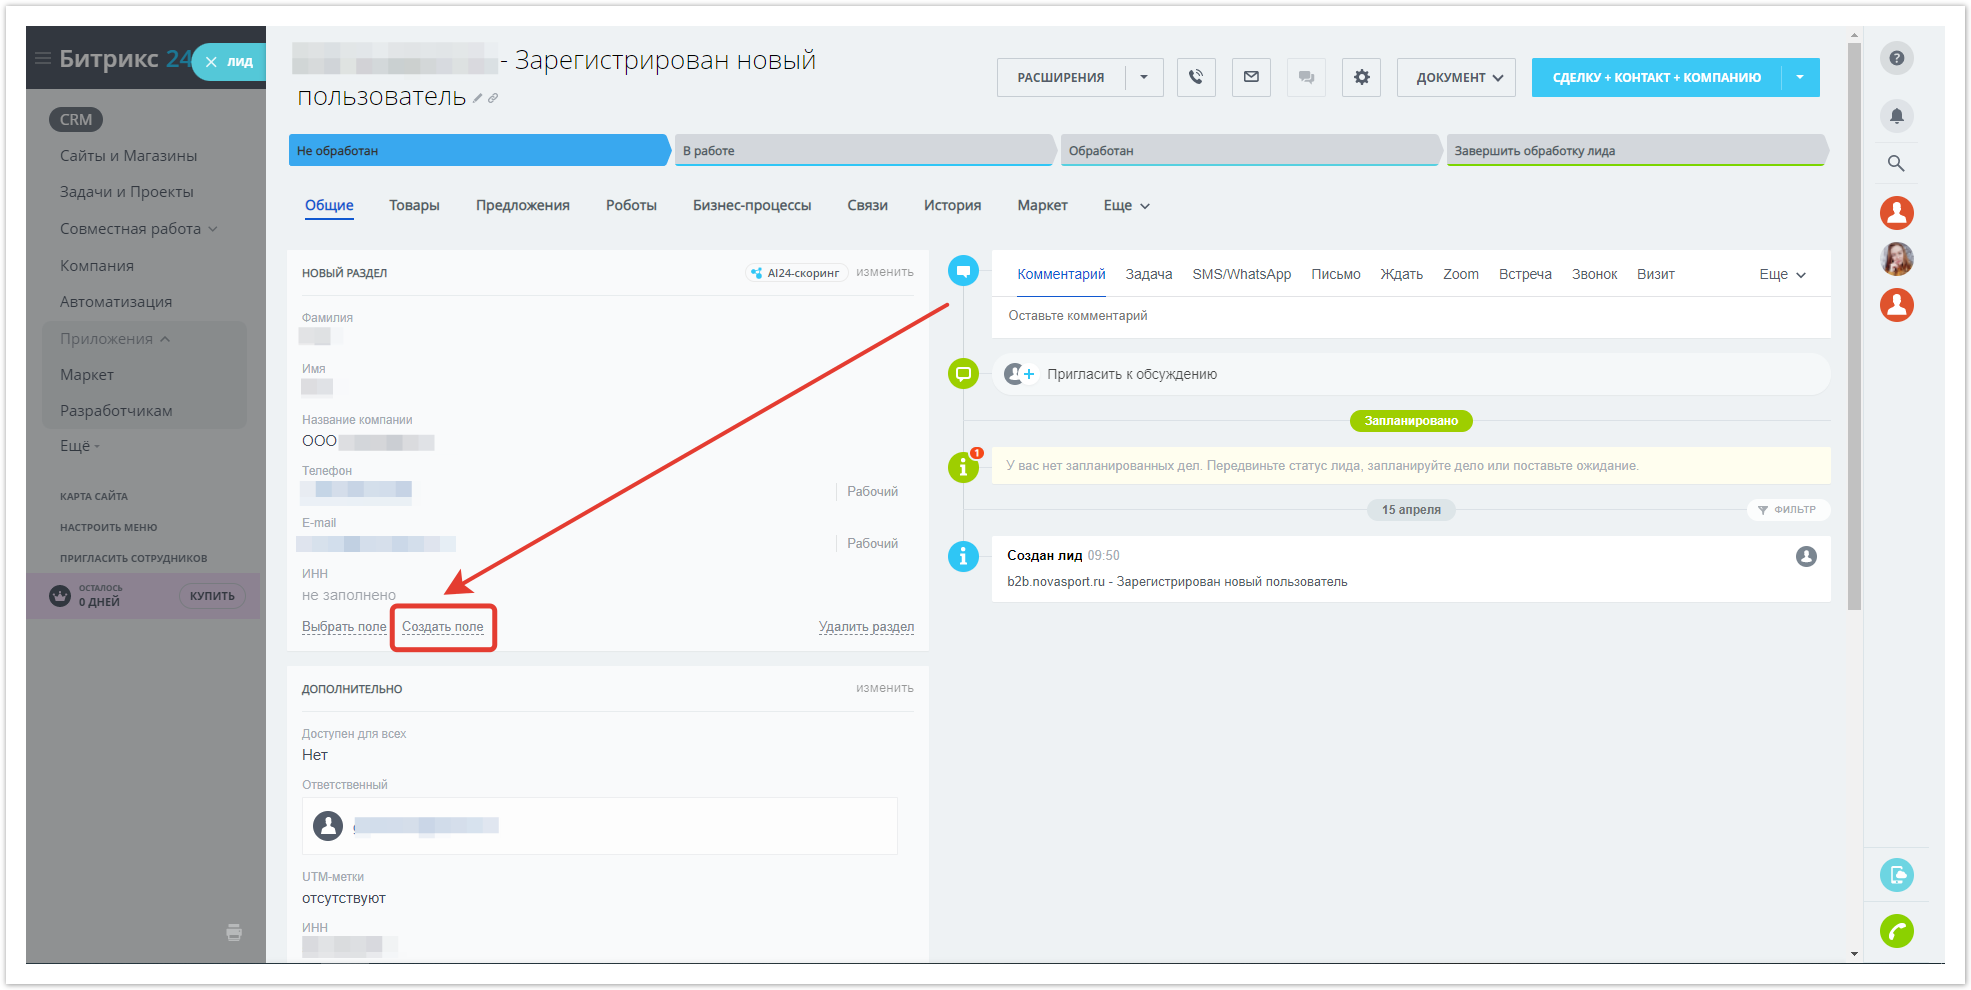
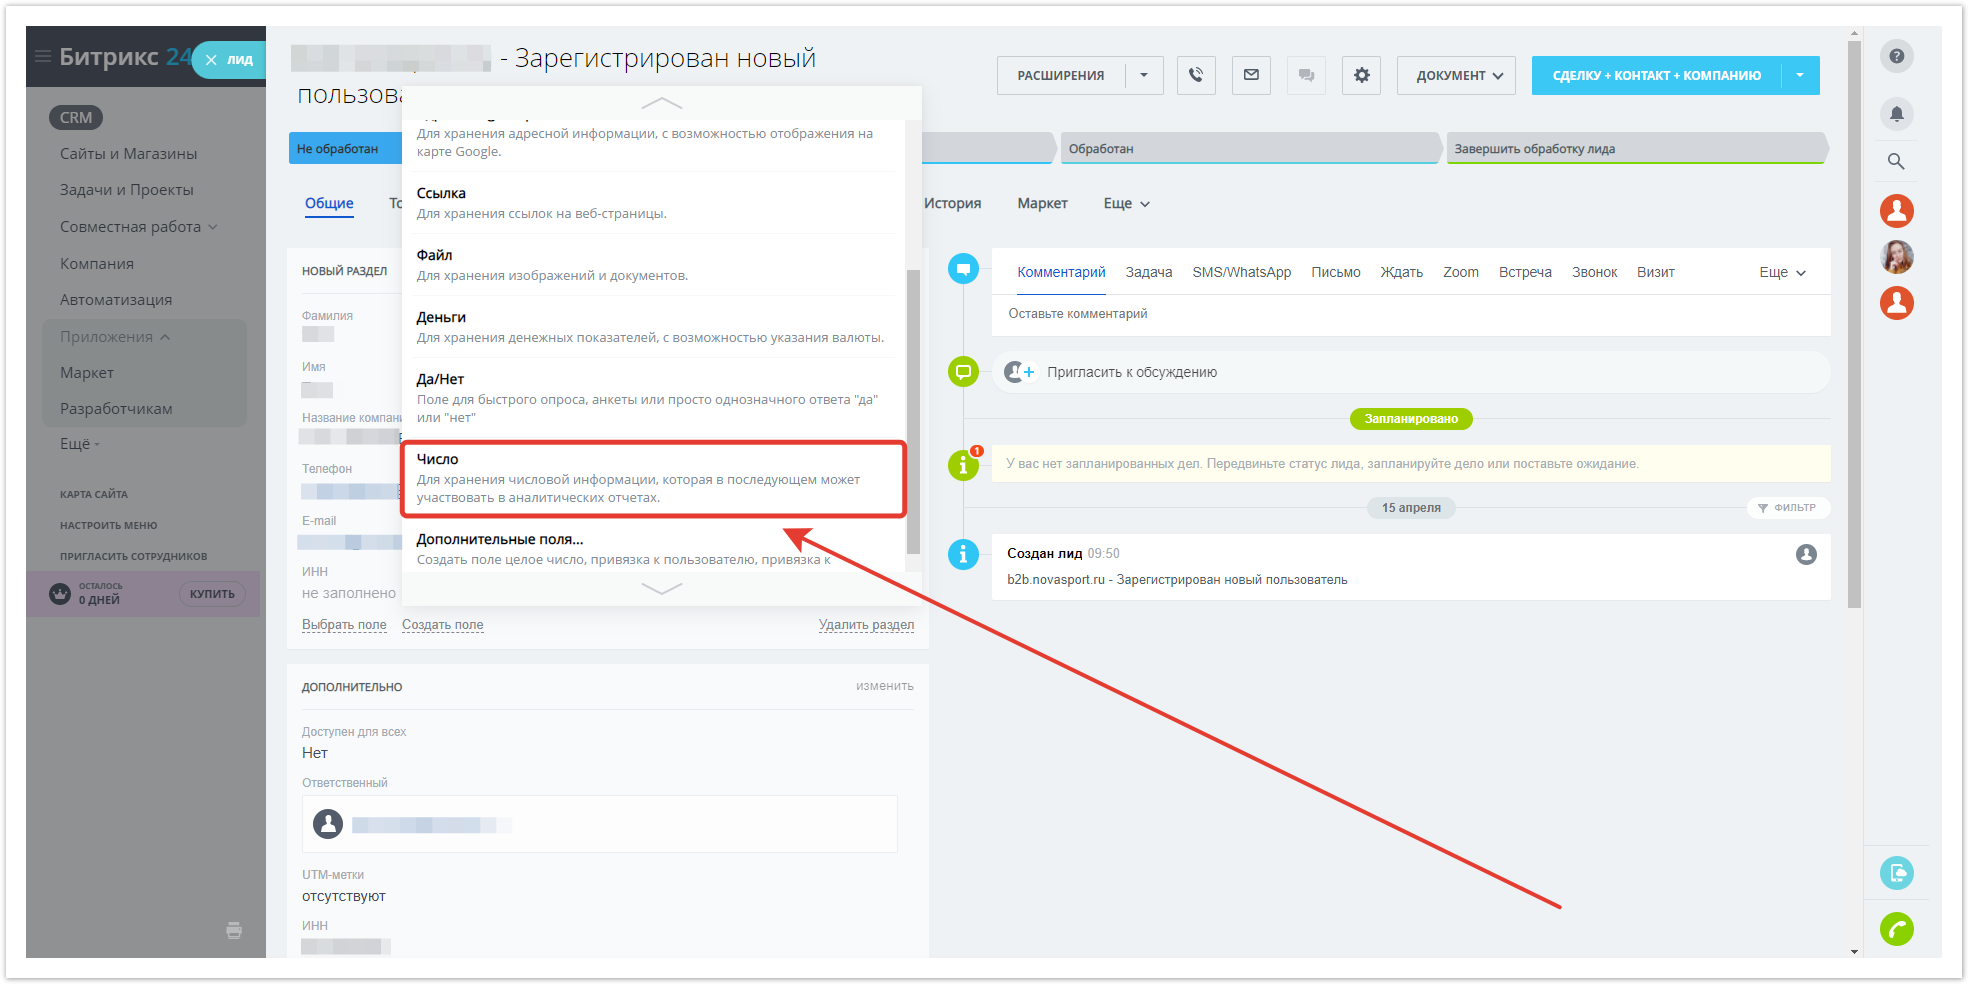
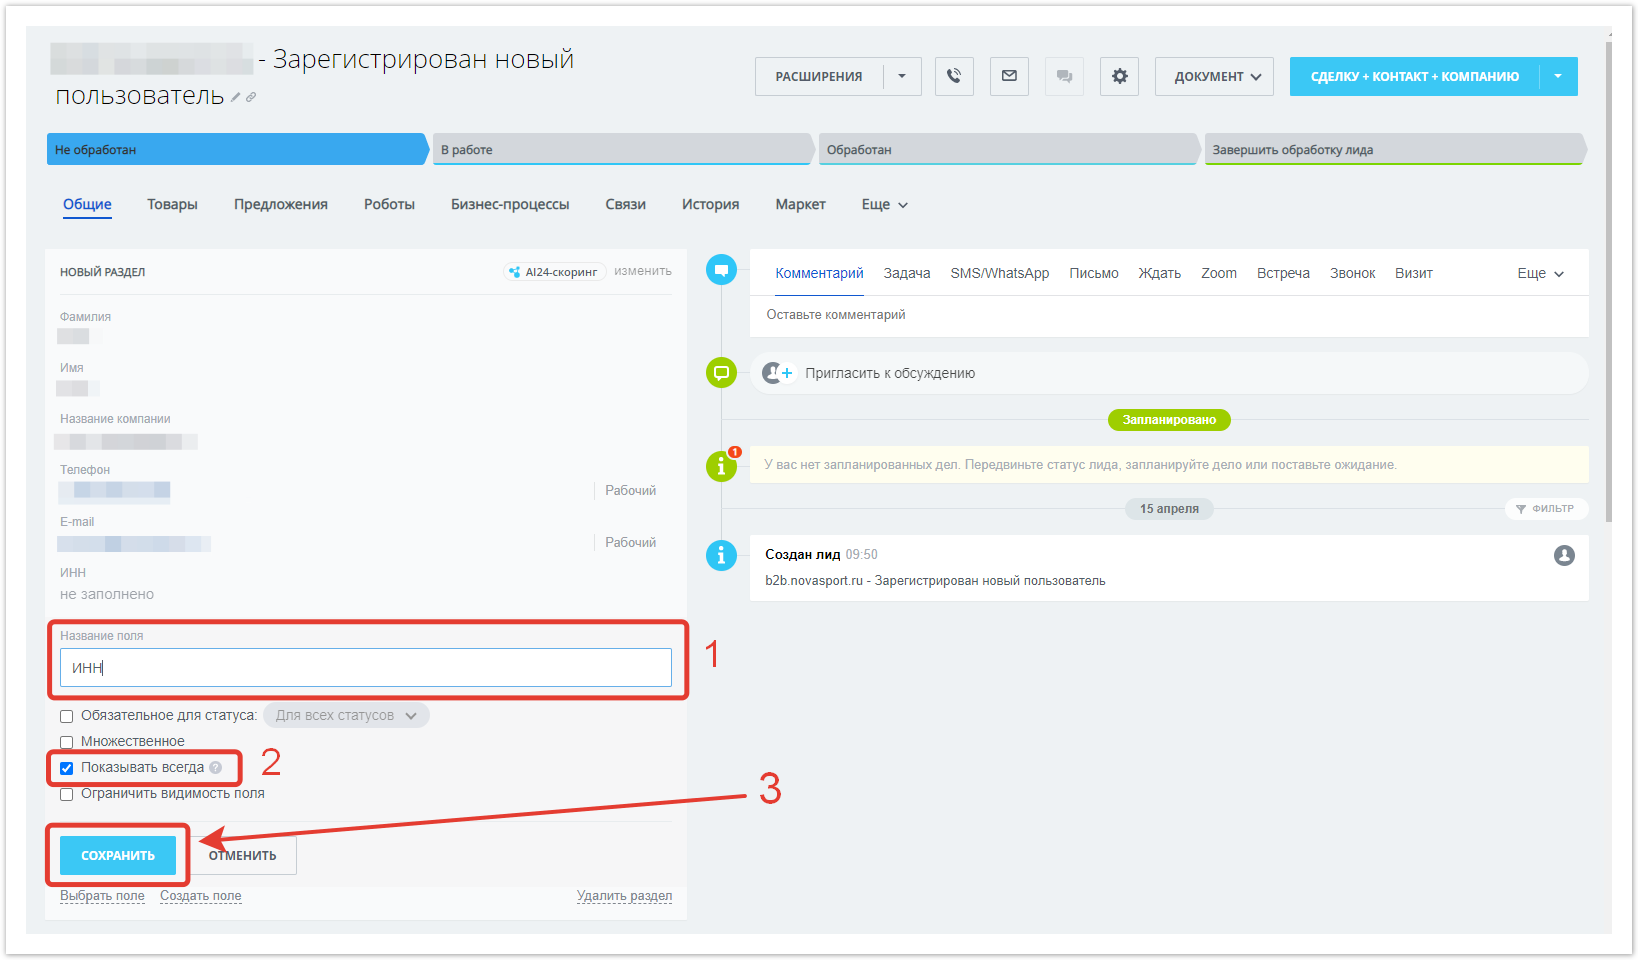
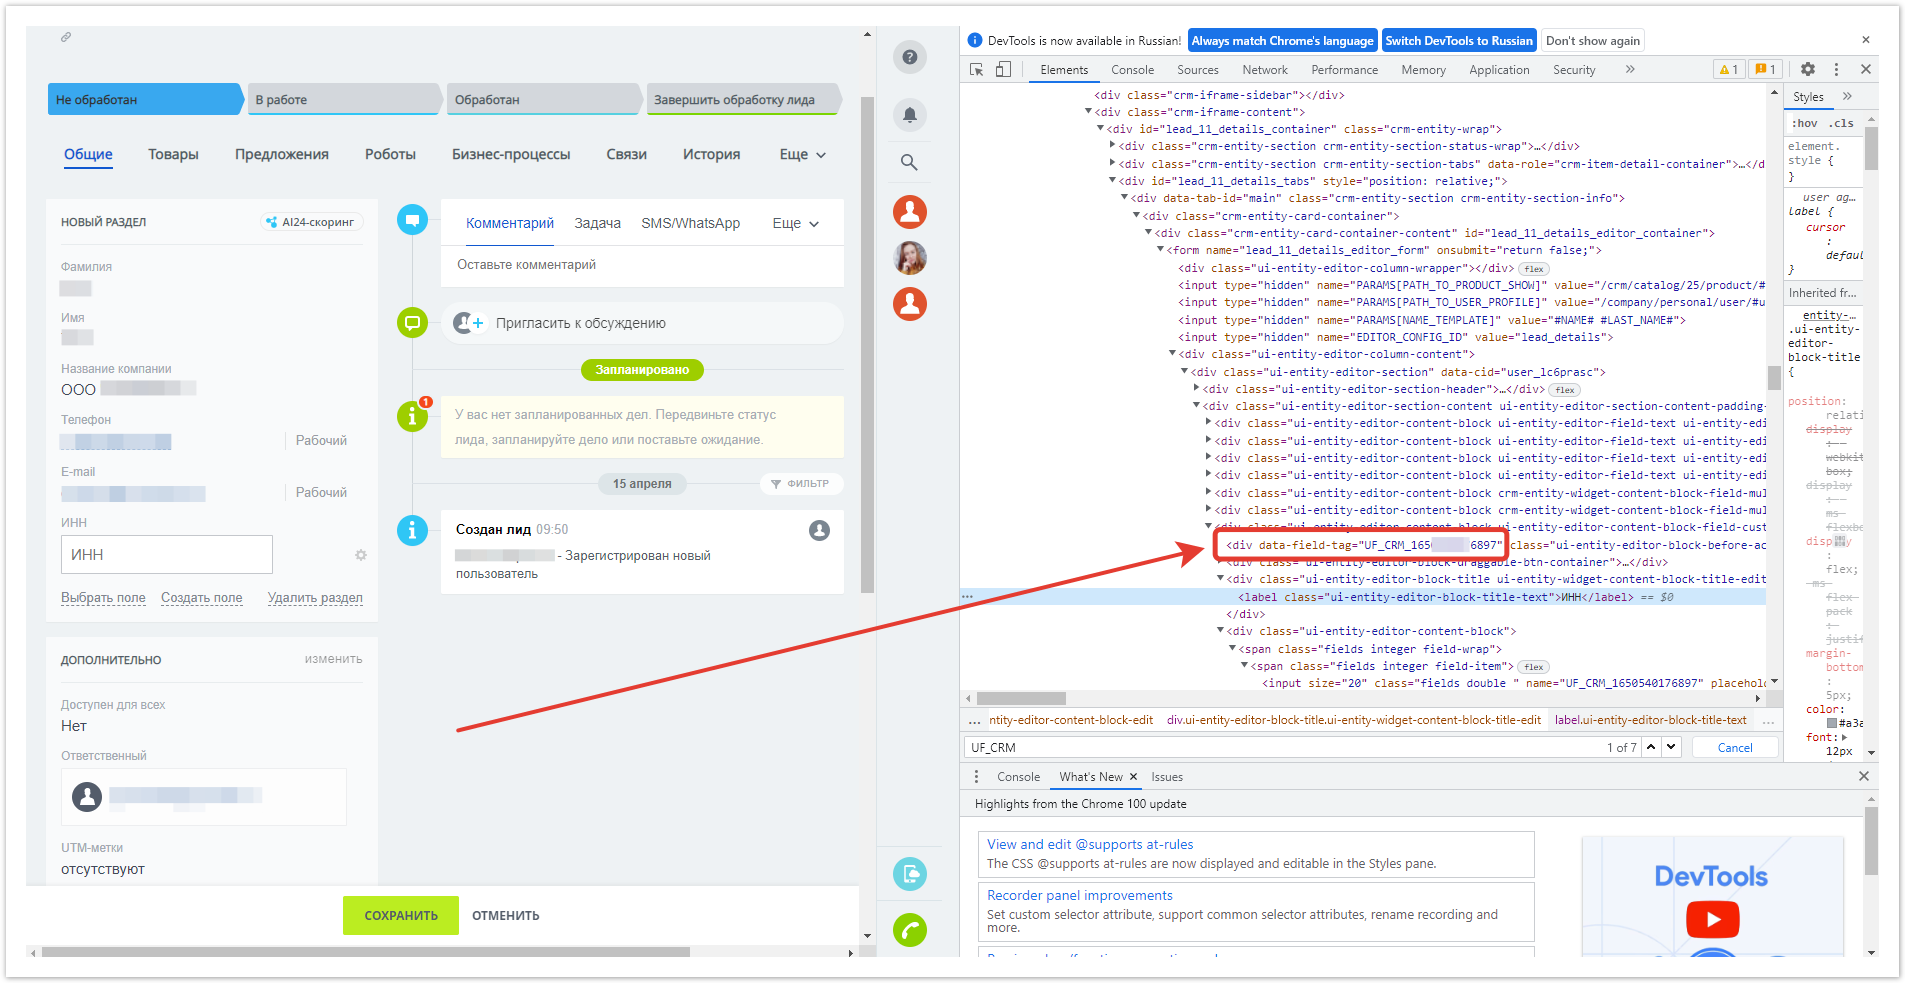
Adding a TIN fieldTo start adding the The field TIN field , in the Лиды sectioncode in Bitrix24 is optional. To fill it out, you need to :
Adding a business process for leads in Bitrix24Next, you need to return to any Bitrix24 lead and go to the Роботы tab.
In the Качественный лид column, find the button in the Редактировать в дизайнере Бизнес-процессов and click on it.
The business process visualization window will open. To the already displayed scheme, drag to the arrow after the Начало block from the Конструкции tab the Условие block.
Then drag to the arrow after the right block Условие block Создание новой сделки from the CRM section.
Click on the icon
Click Сохранить.
In the right block Условие you need to specify:
Save changes.
The Создание новой сделки block should be filled in as follows:
Form settings must be Saved. After that, you need to Save the business process template itself. find the TIN field ID in your Bitrix. For this:
Paste the received value into the field TIN field code in Bitrix24, save the changes.
Now the integration of Agora with Bitrix24 can be considered complete. It is ready for full-fledged work: a lead will be created when registering on the site and creating an order on the site, and a deal will be formed after payment. The webhook remains available until the administrator who created it is deleted.
|


...