| Sv translation | ||||||||||
|---|---|---|---|---|---|---|---|---|---|---|
| ||||||||||
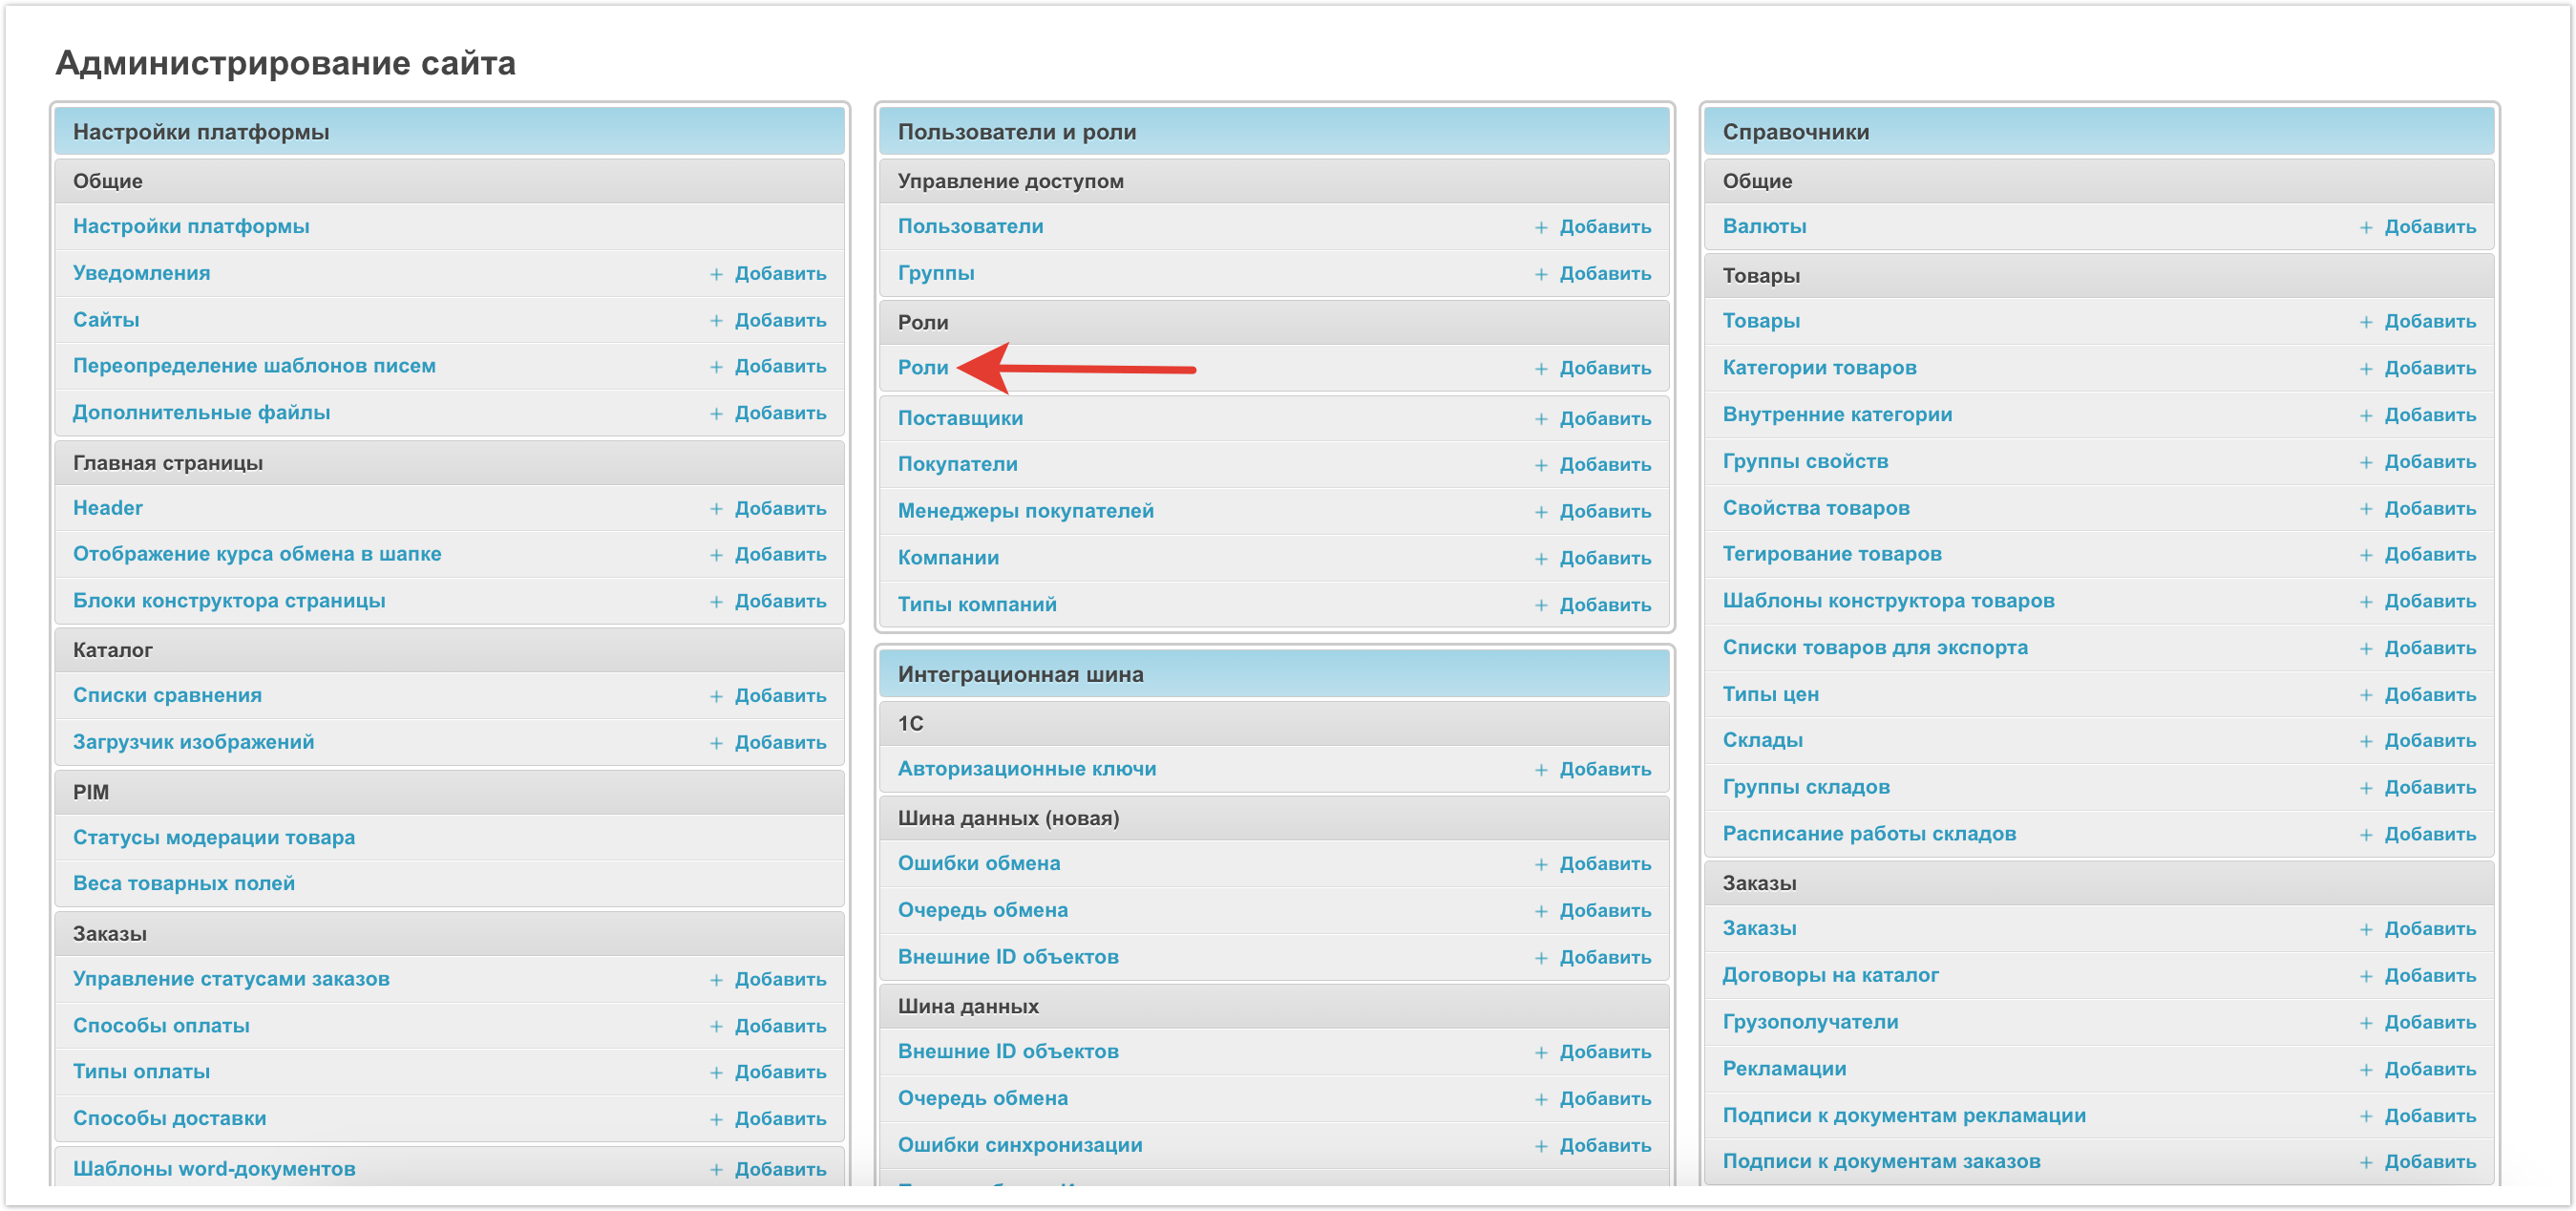
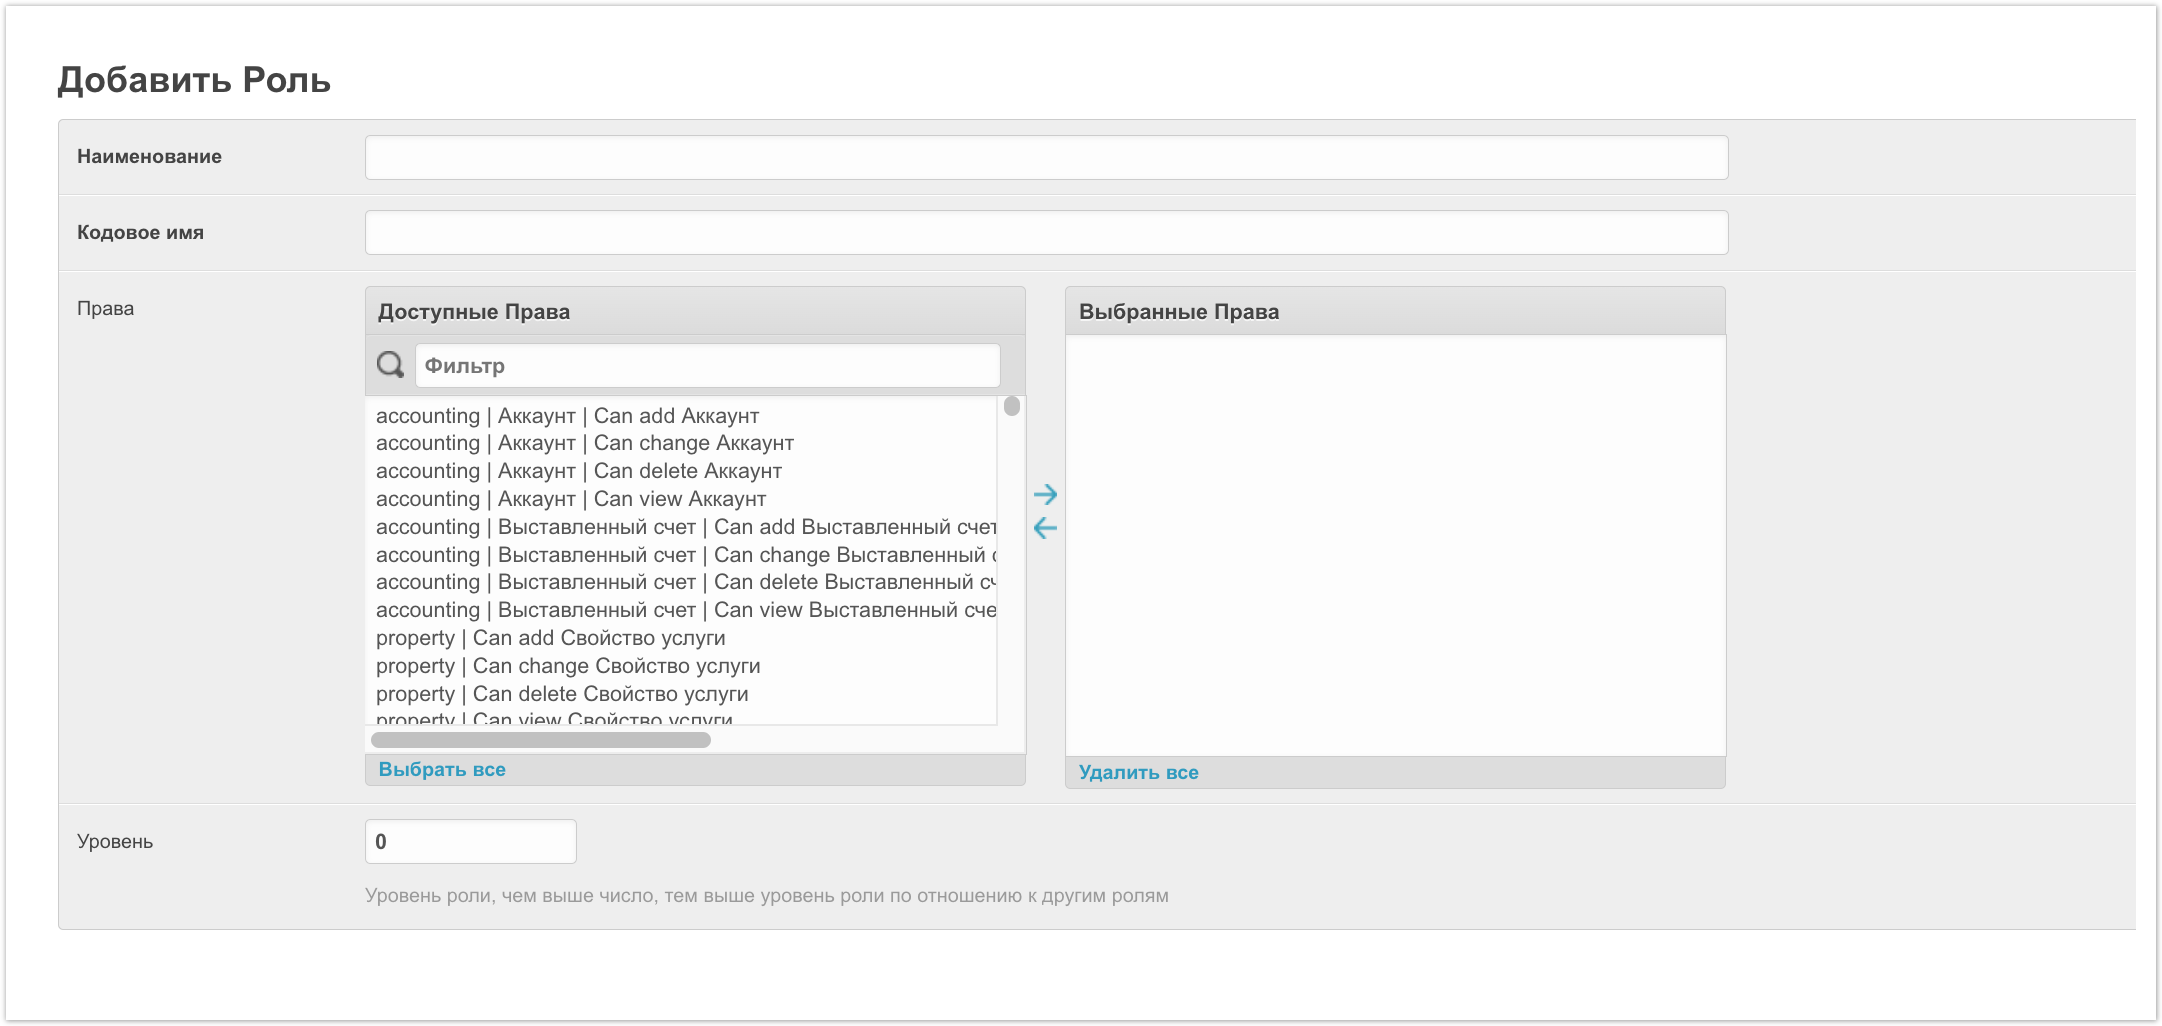
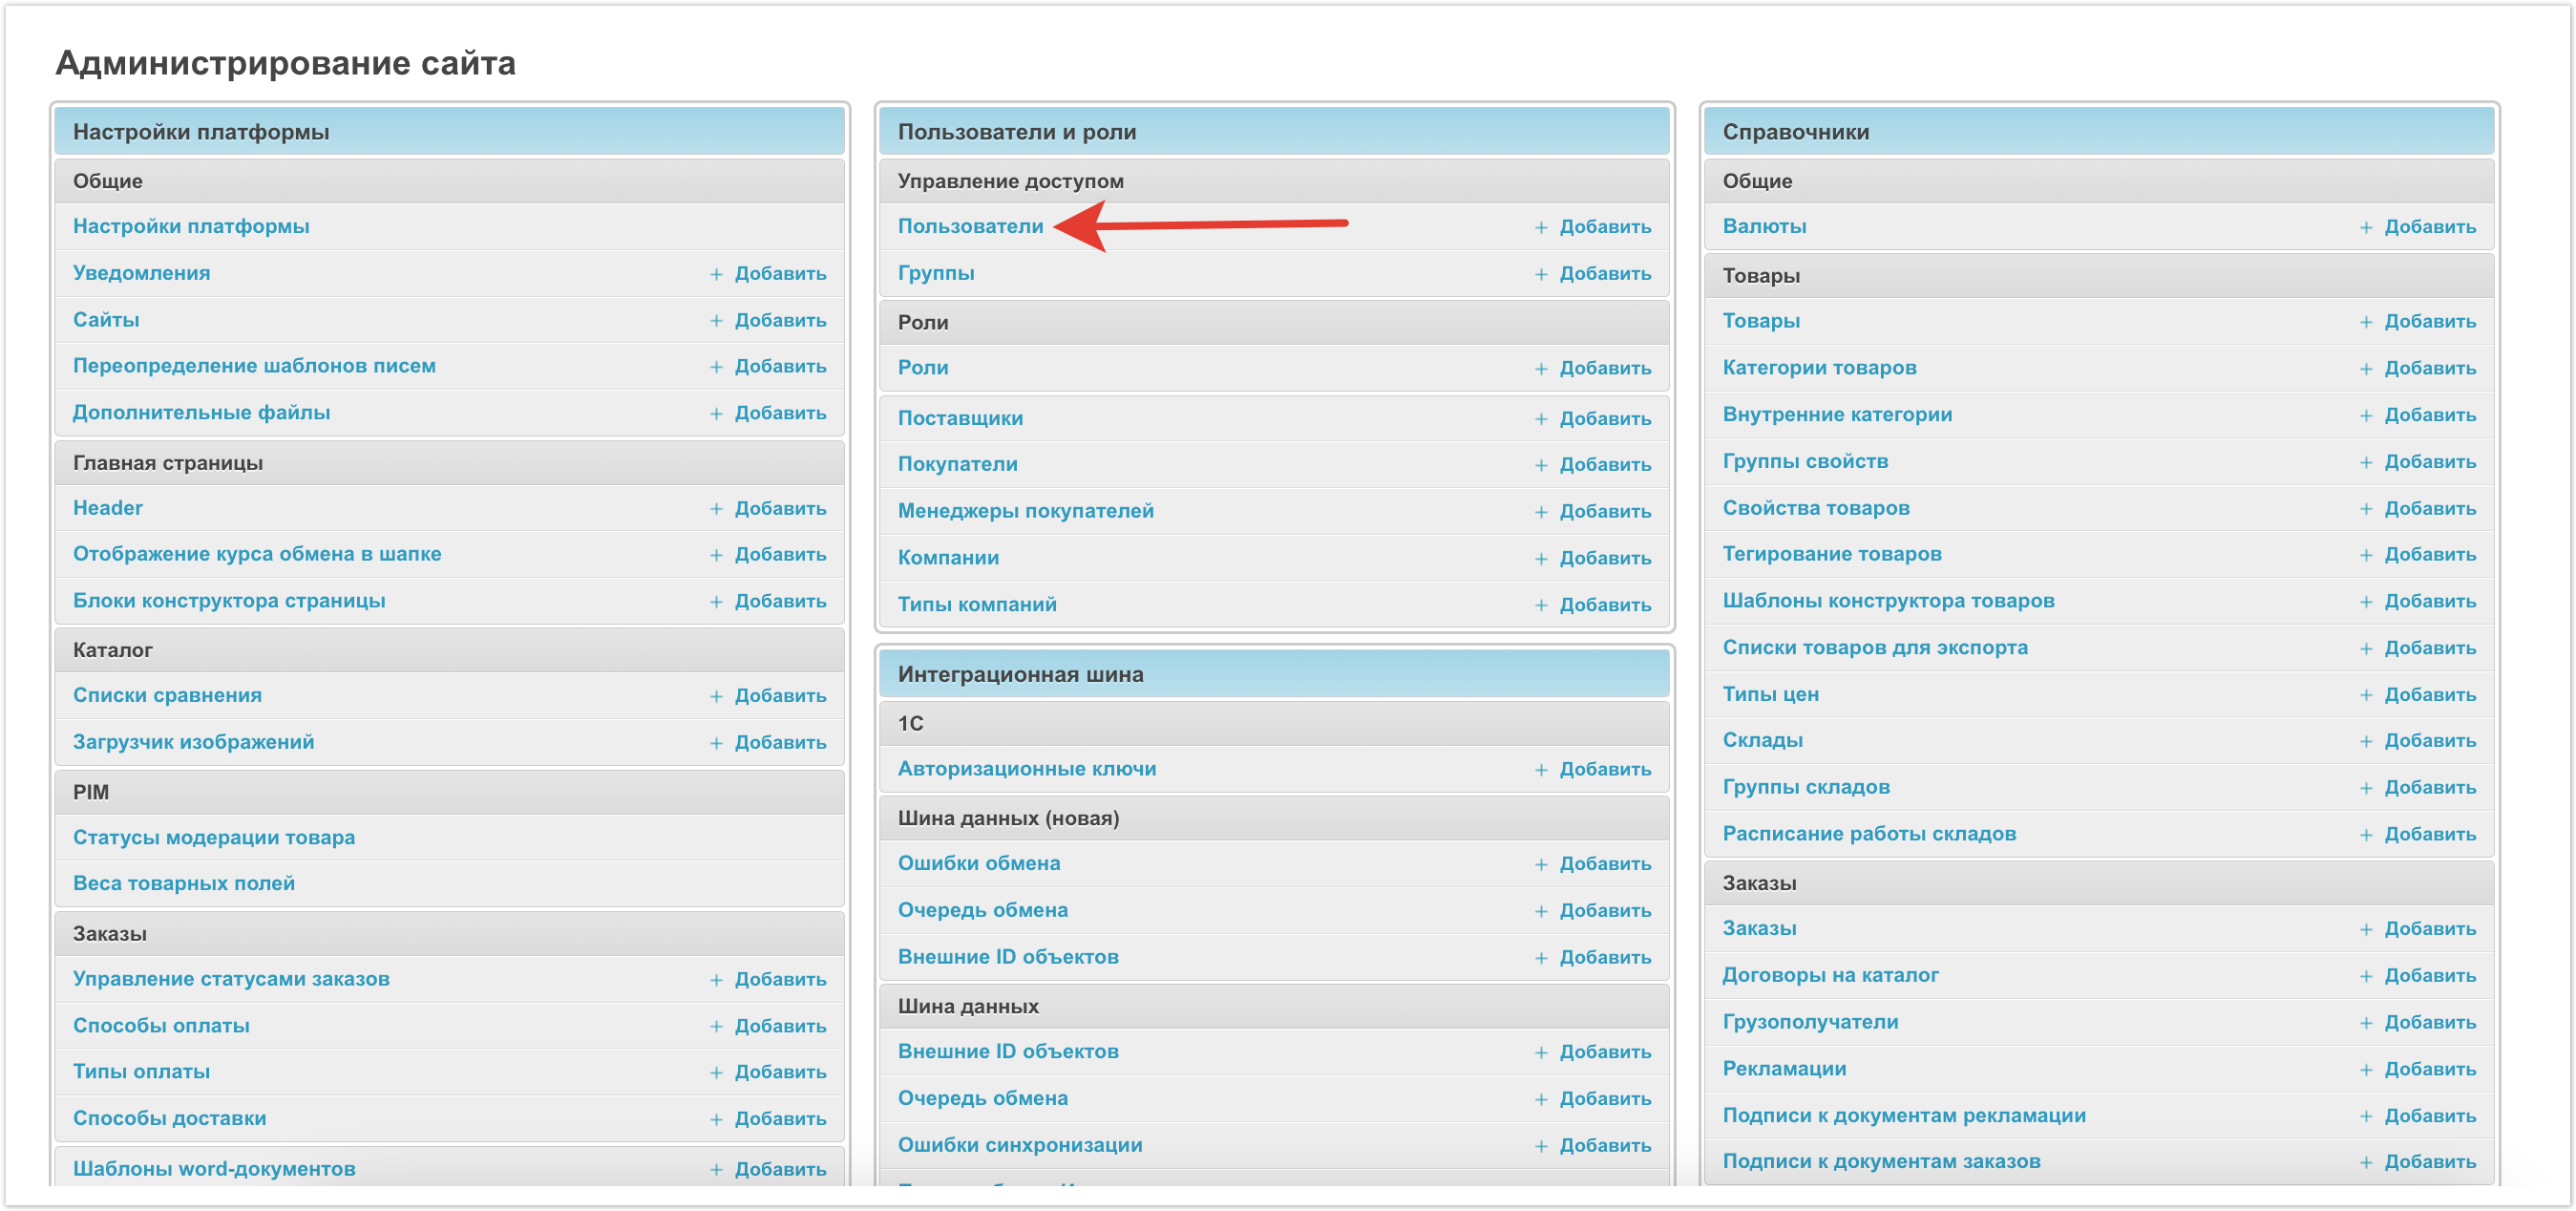
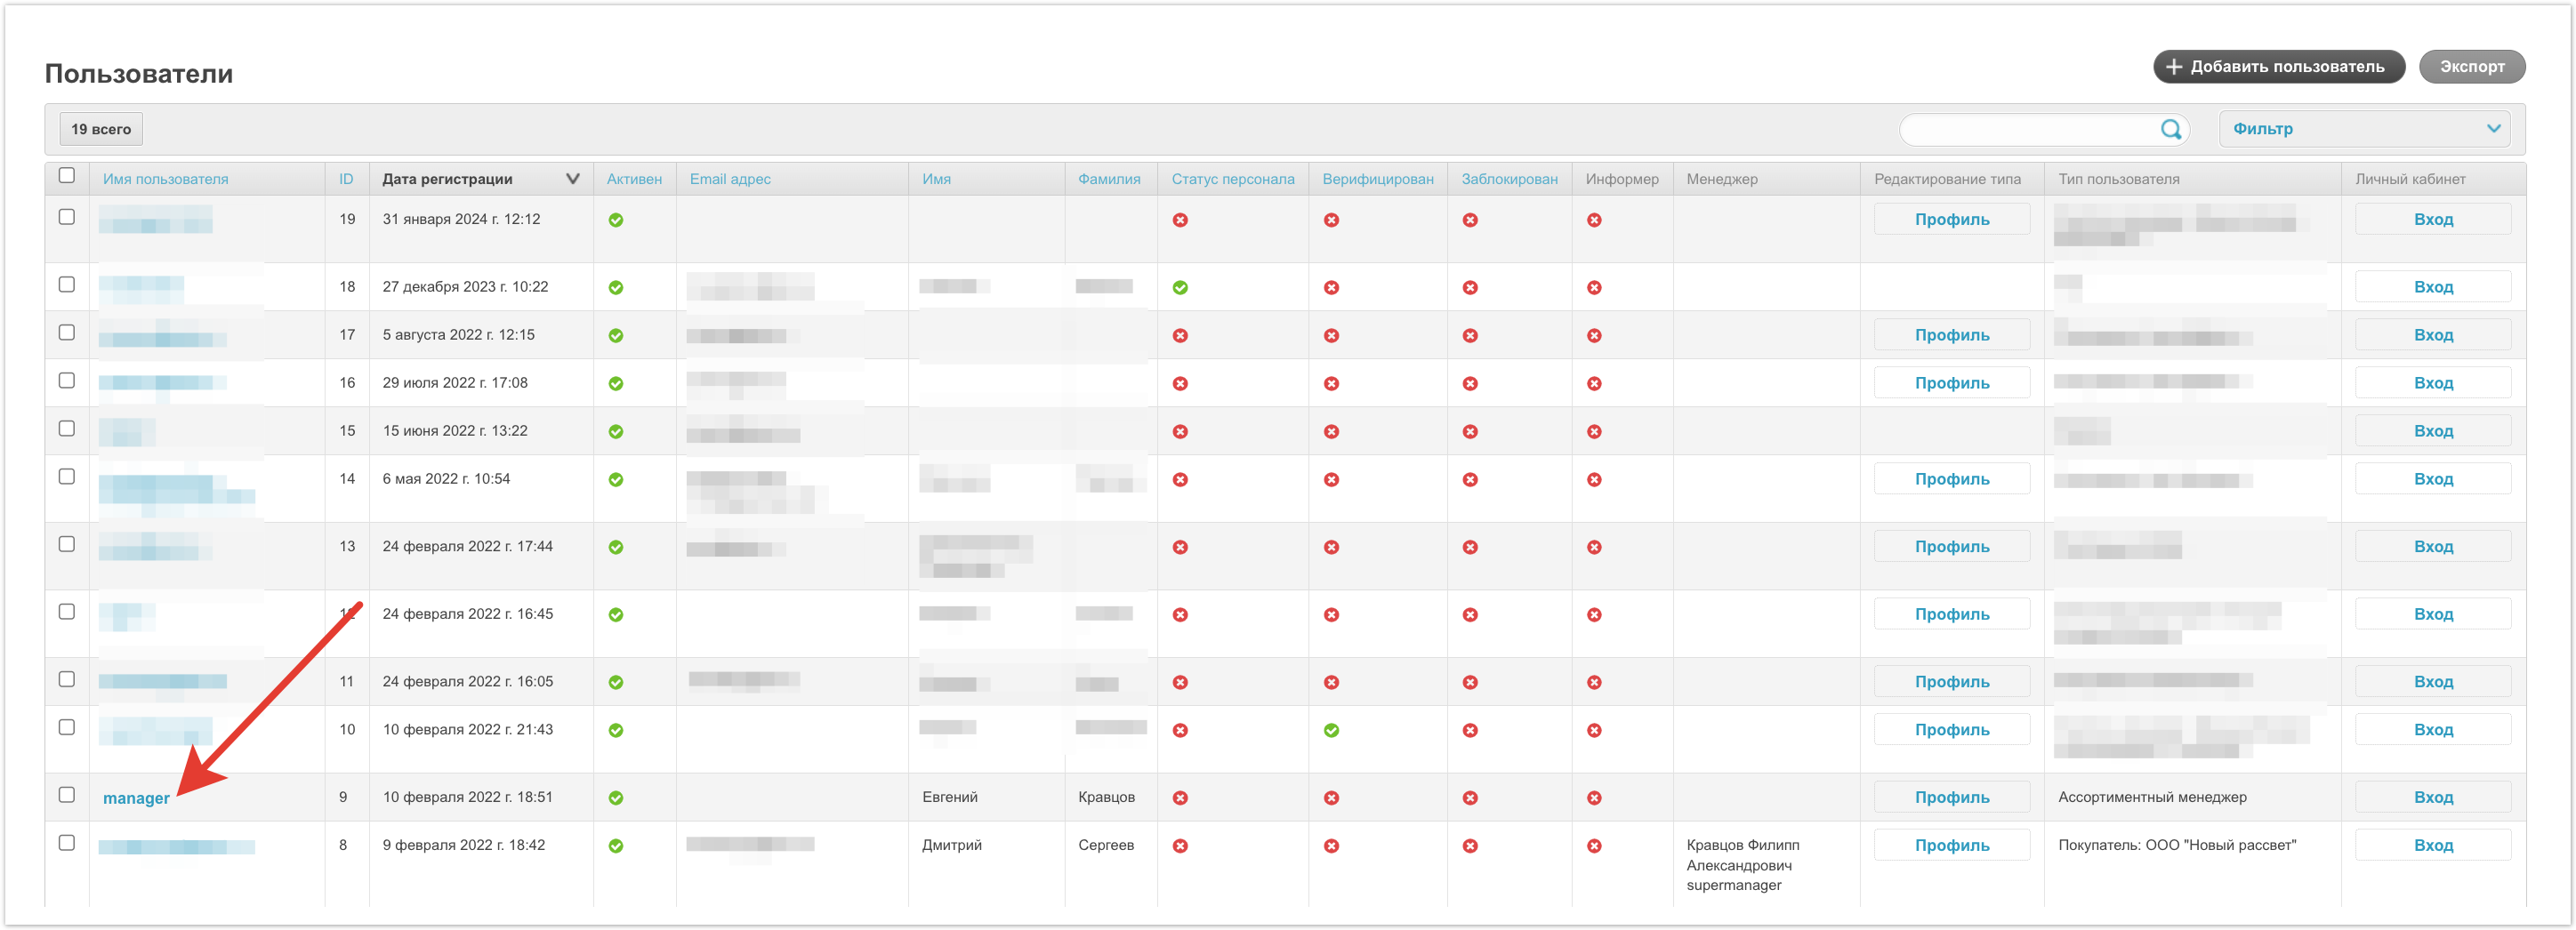
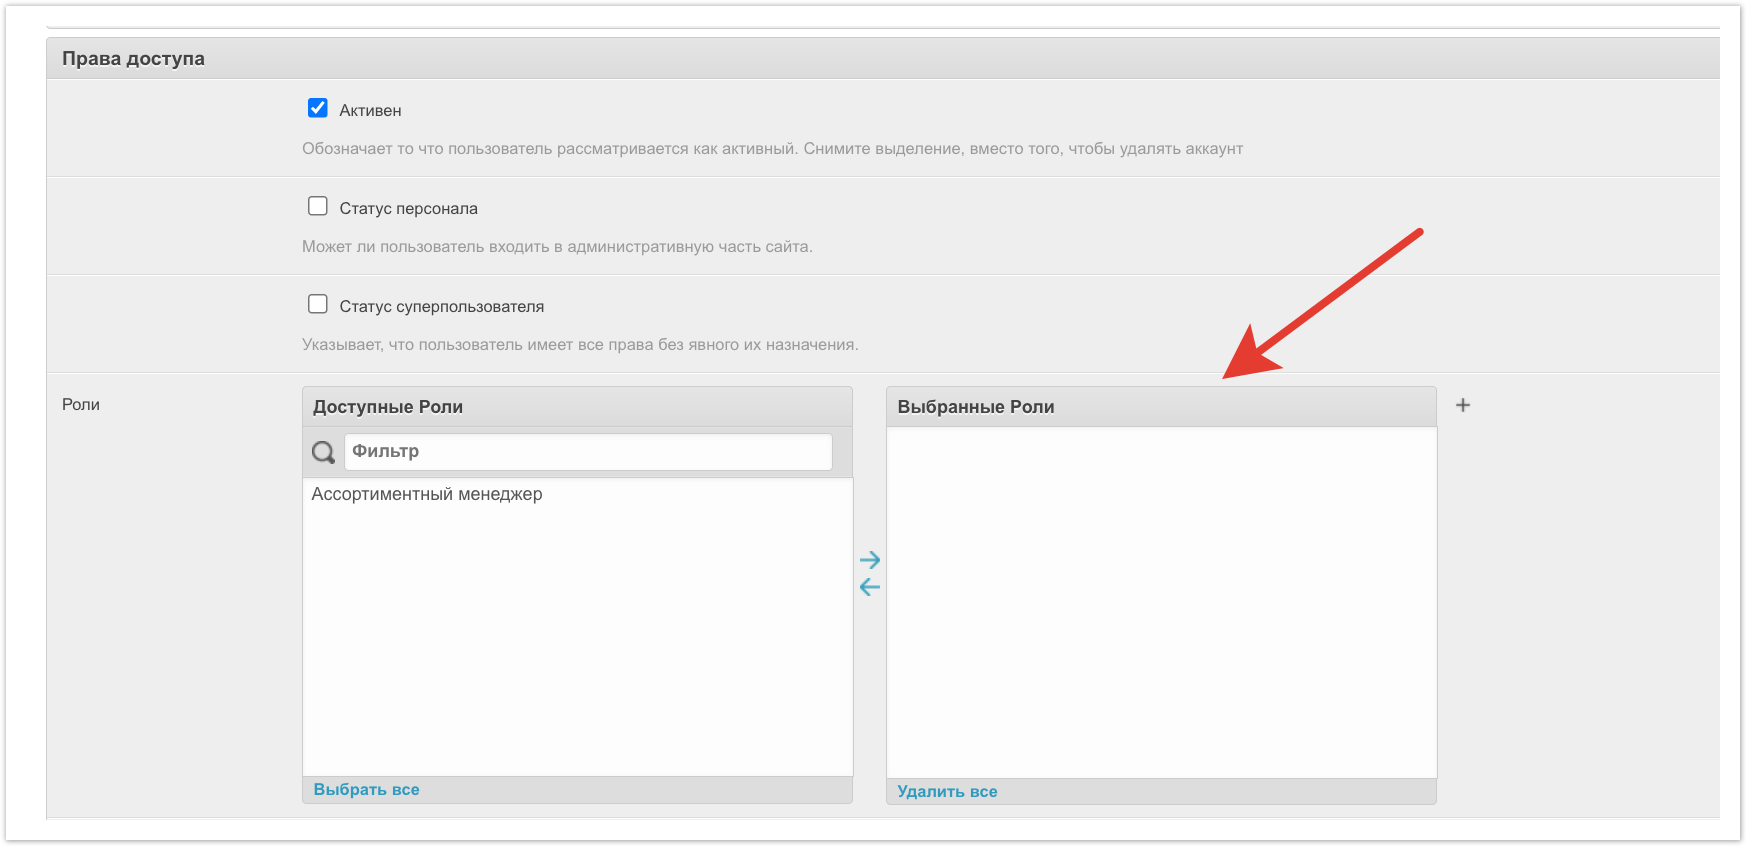
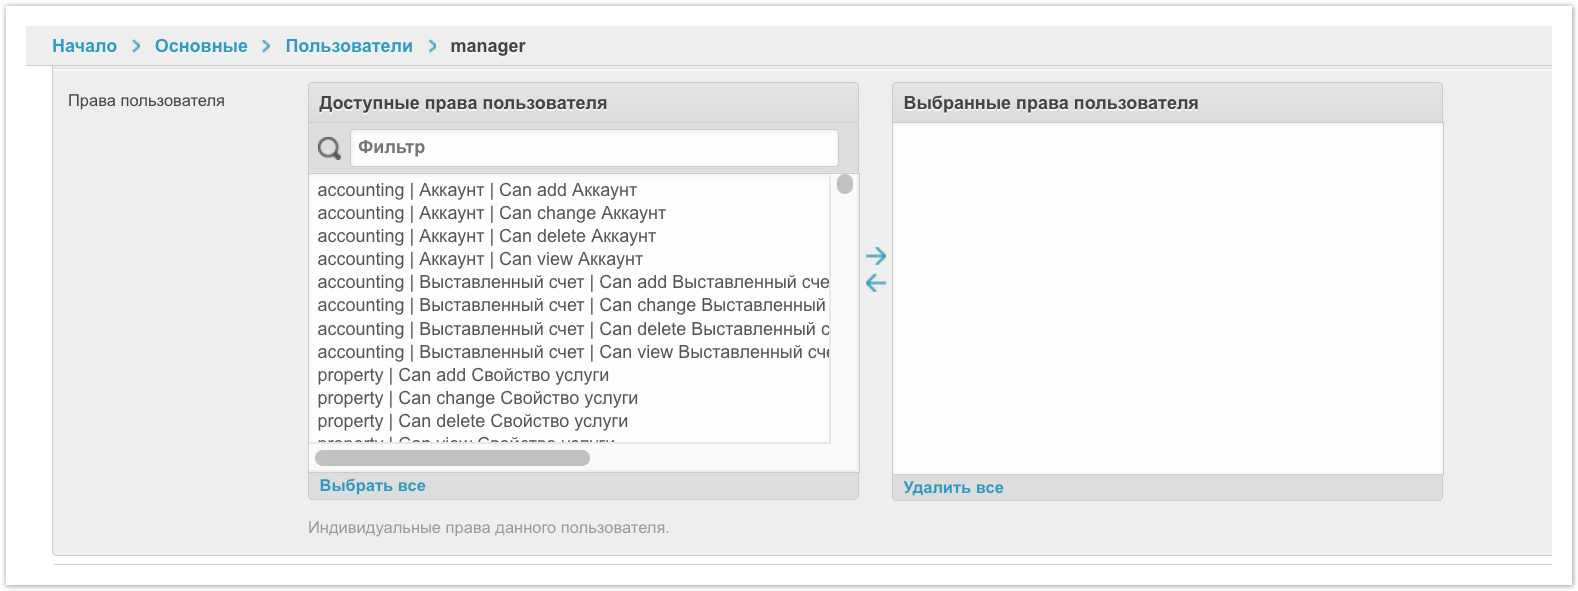
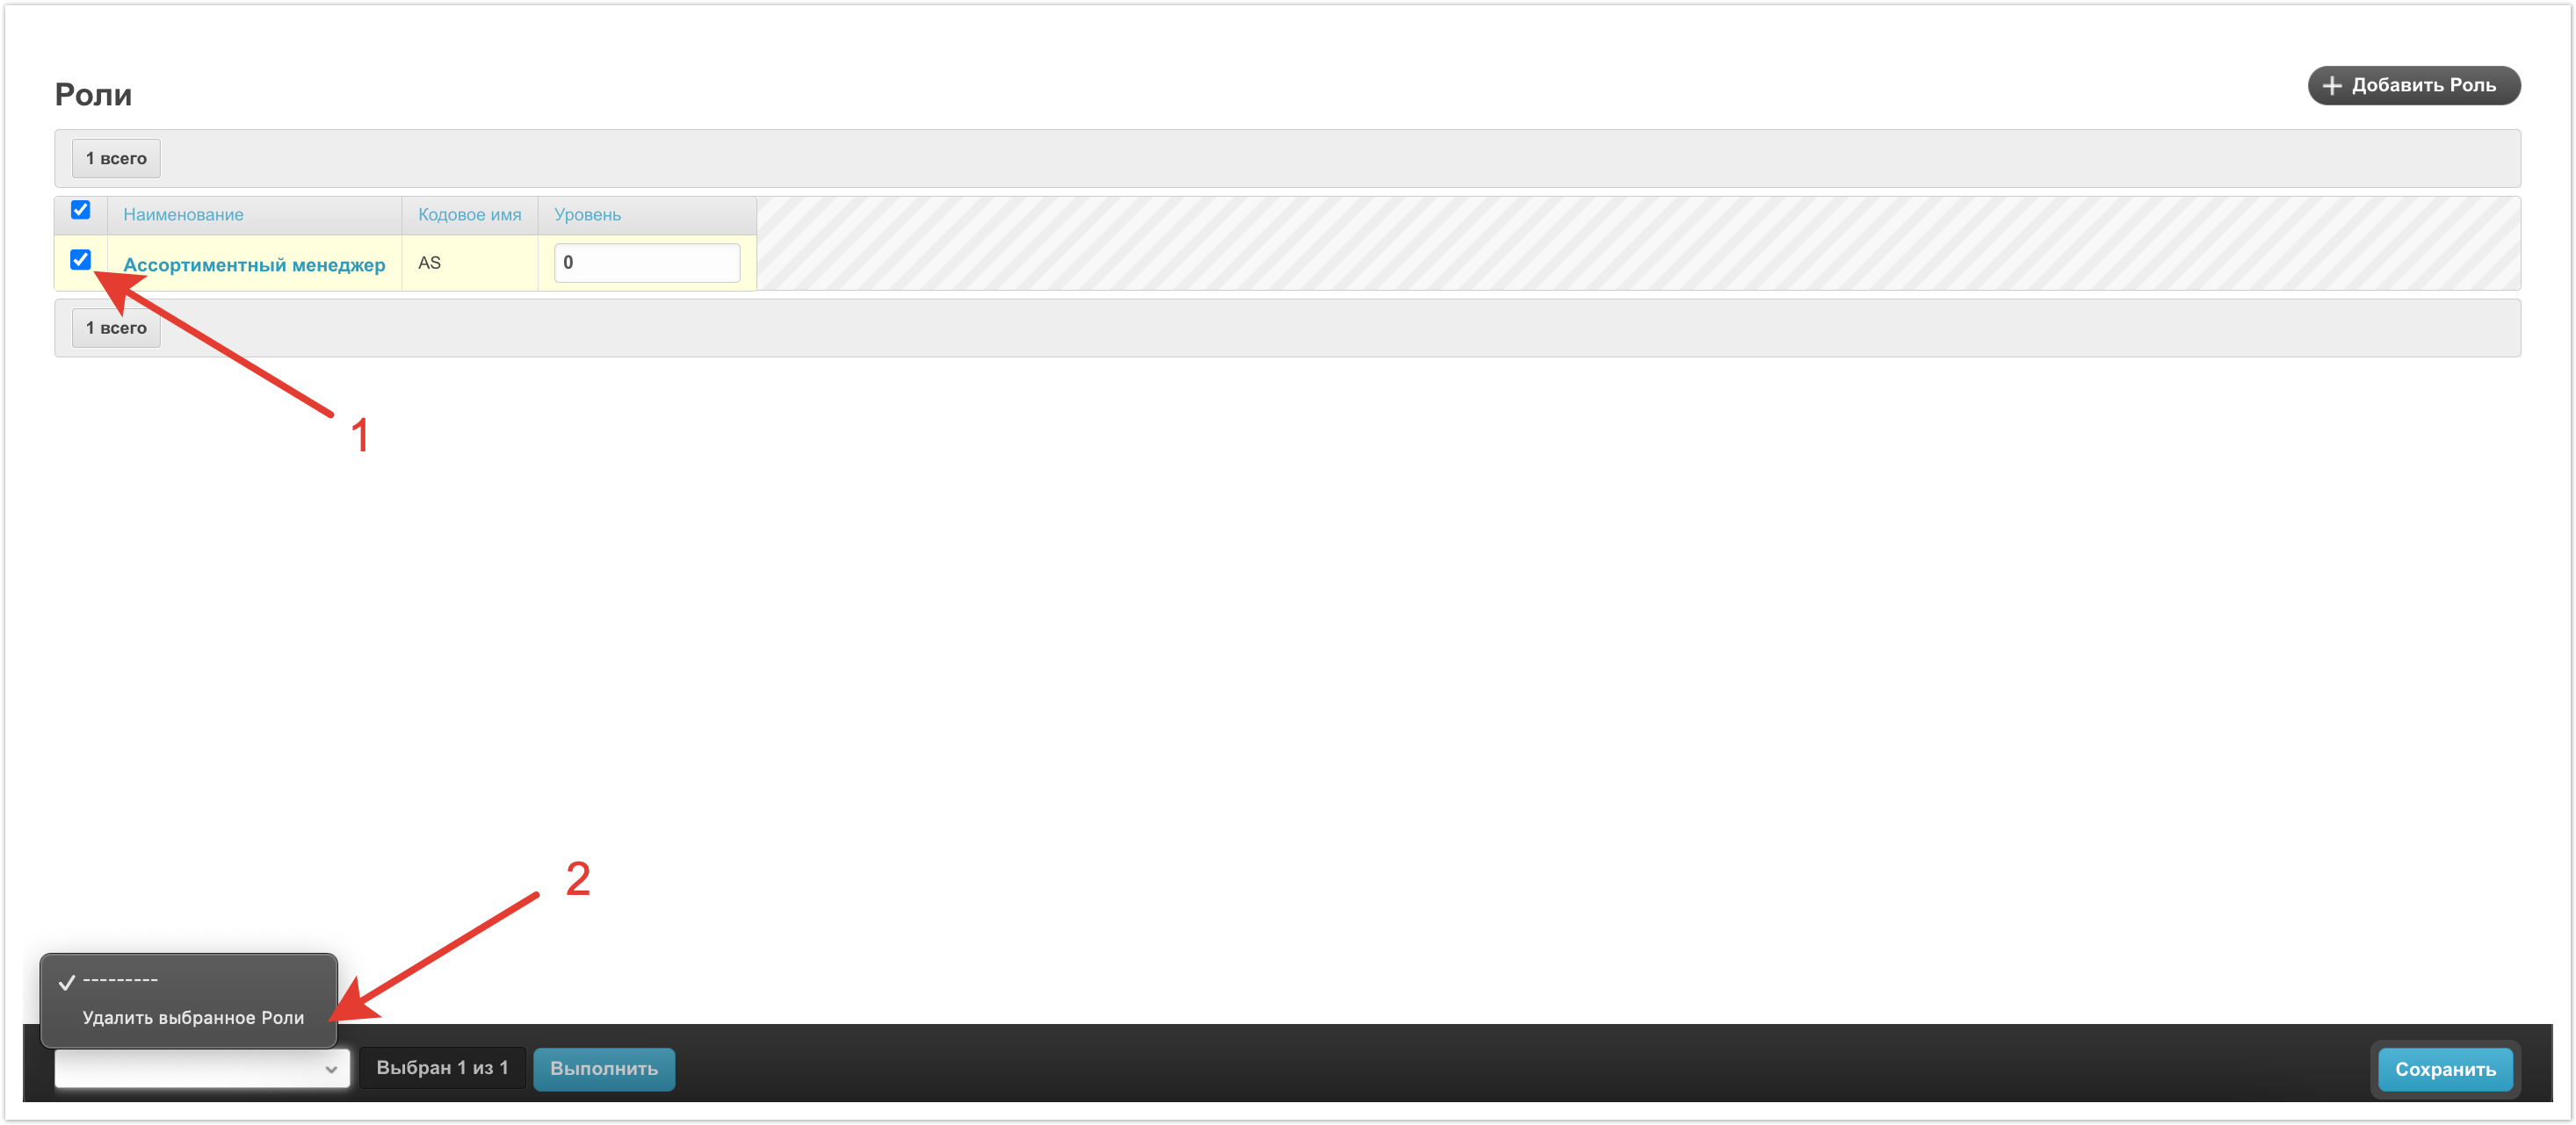
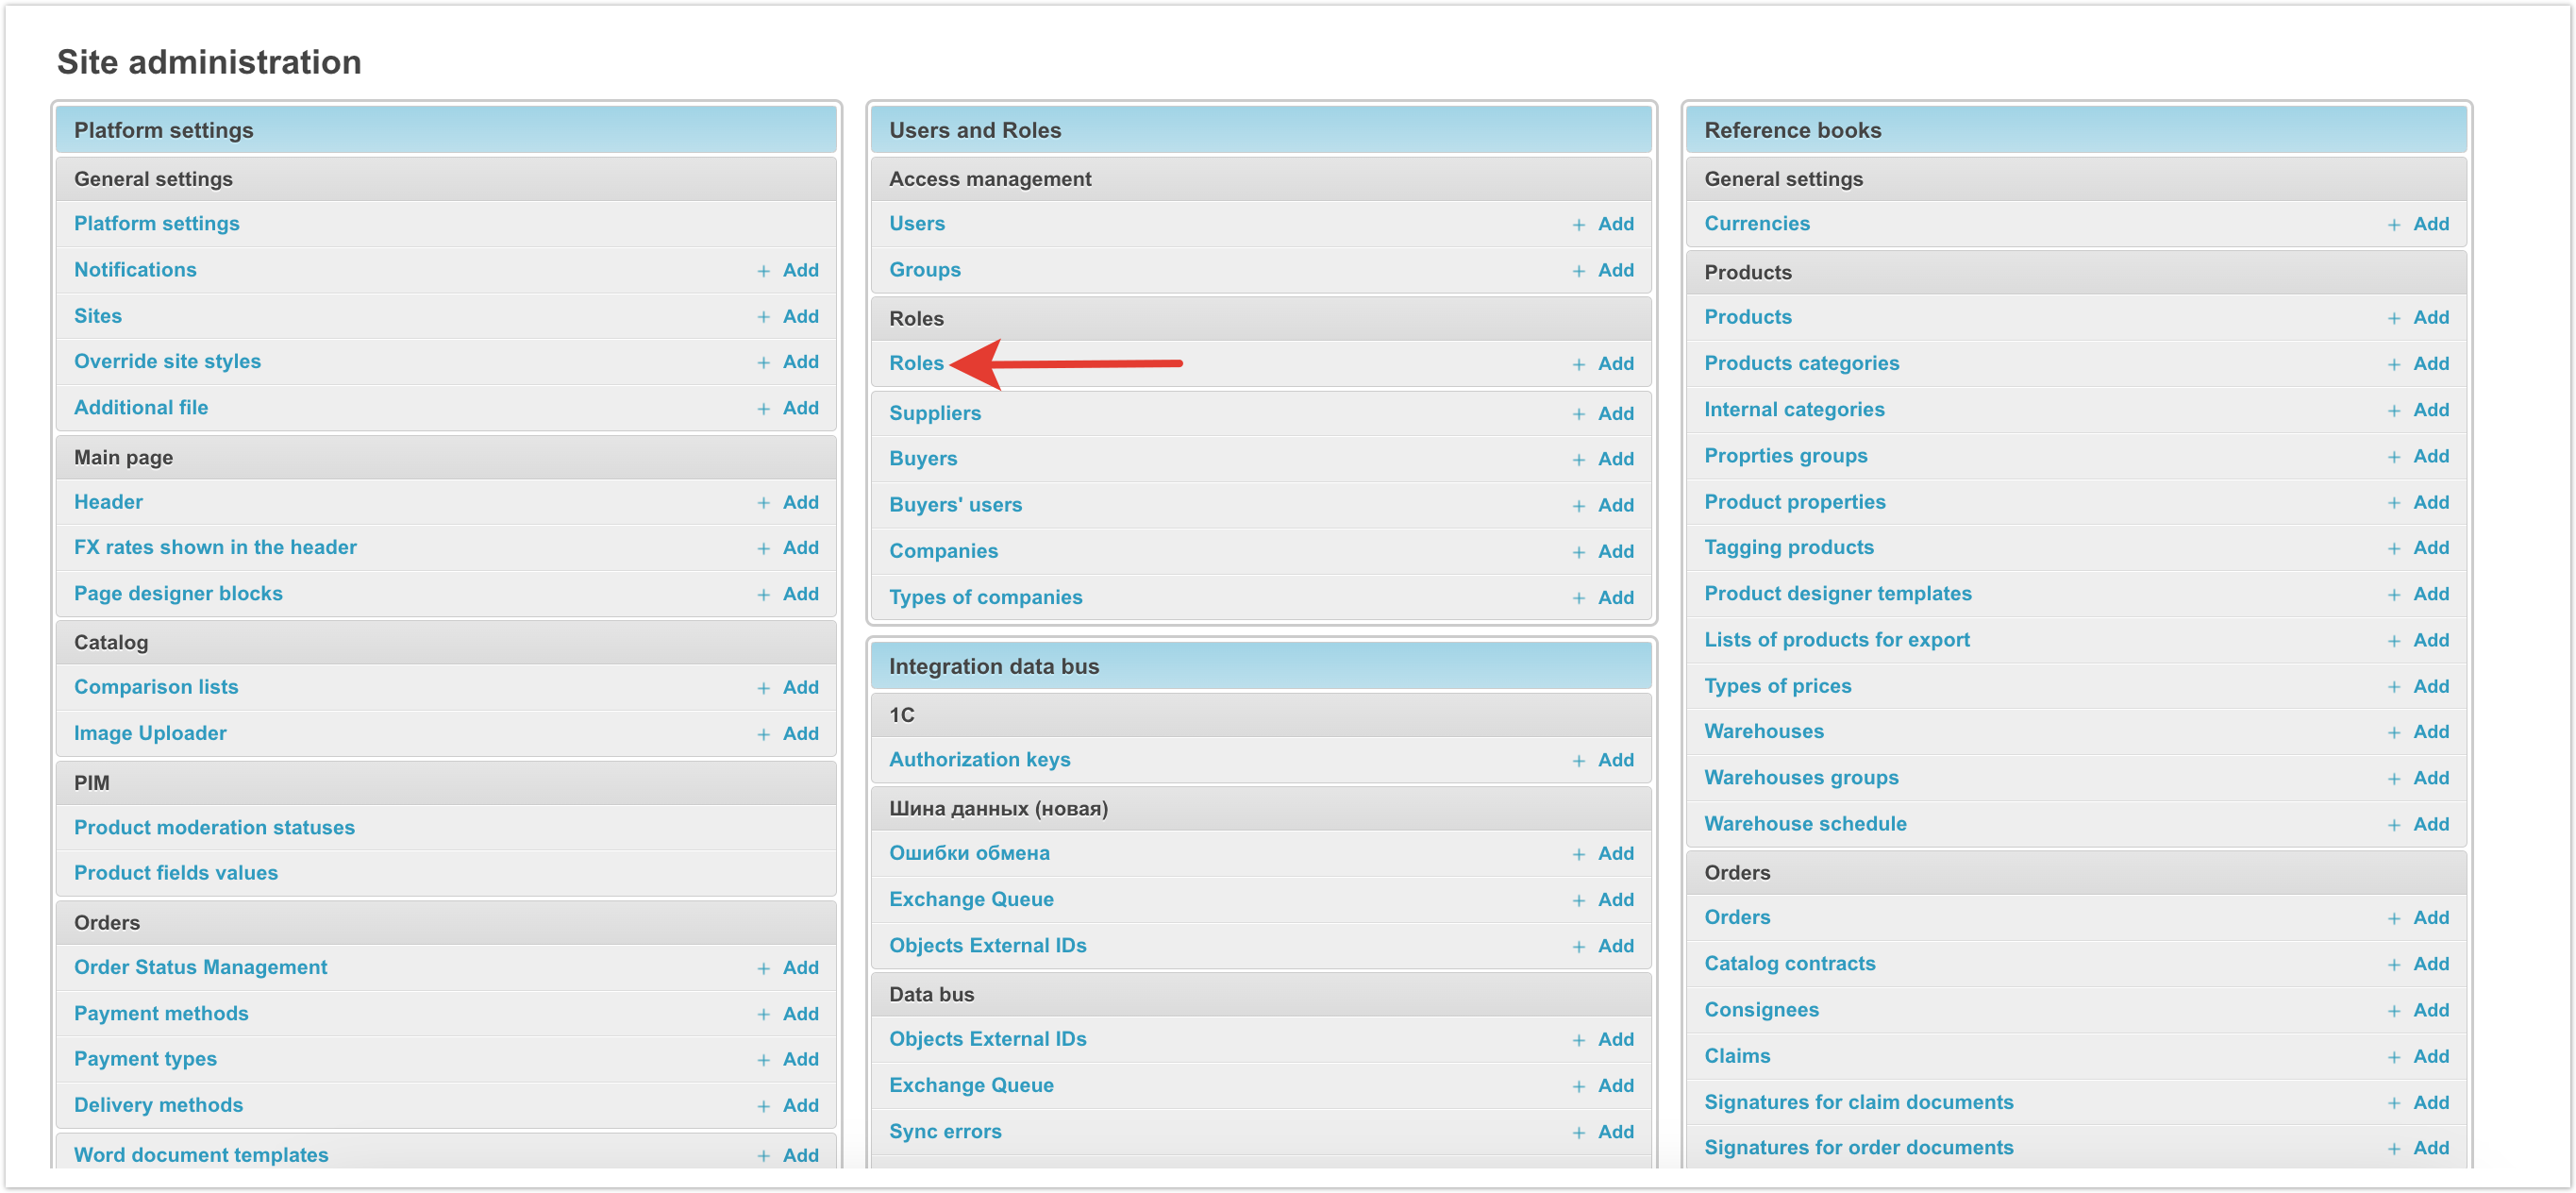
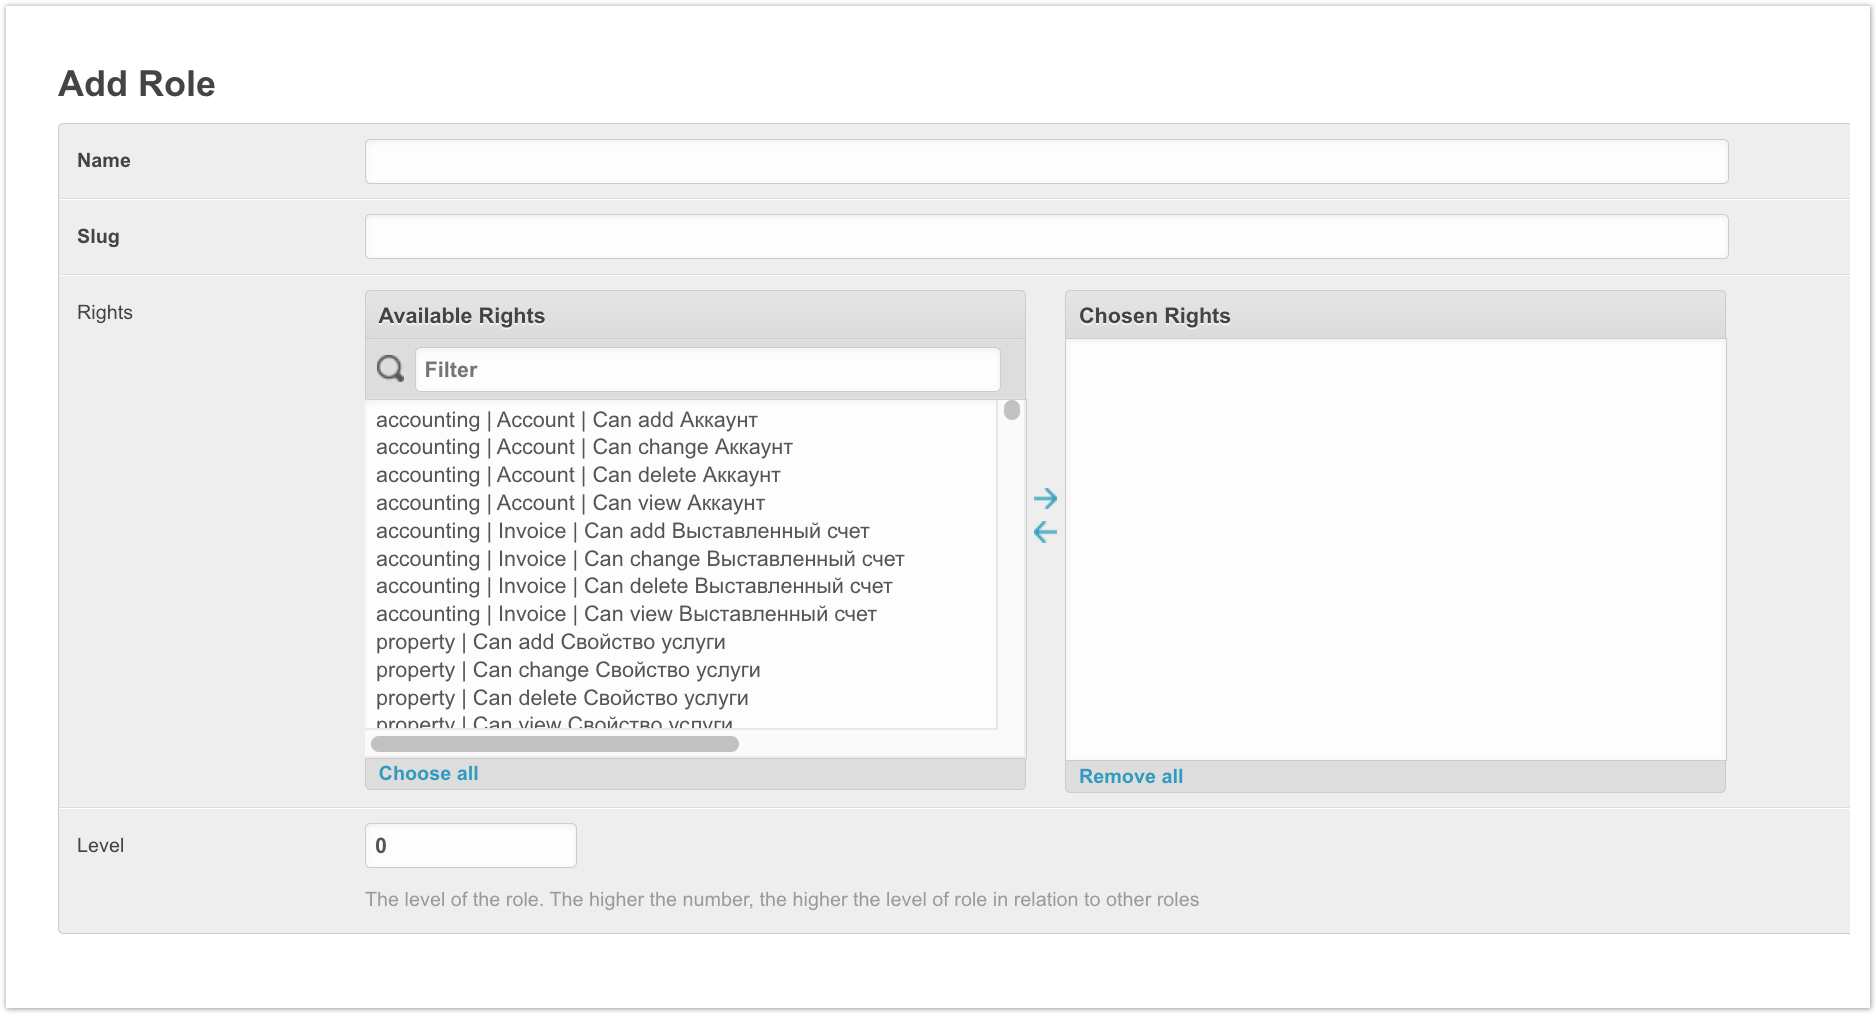
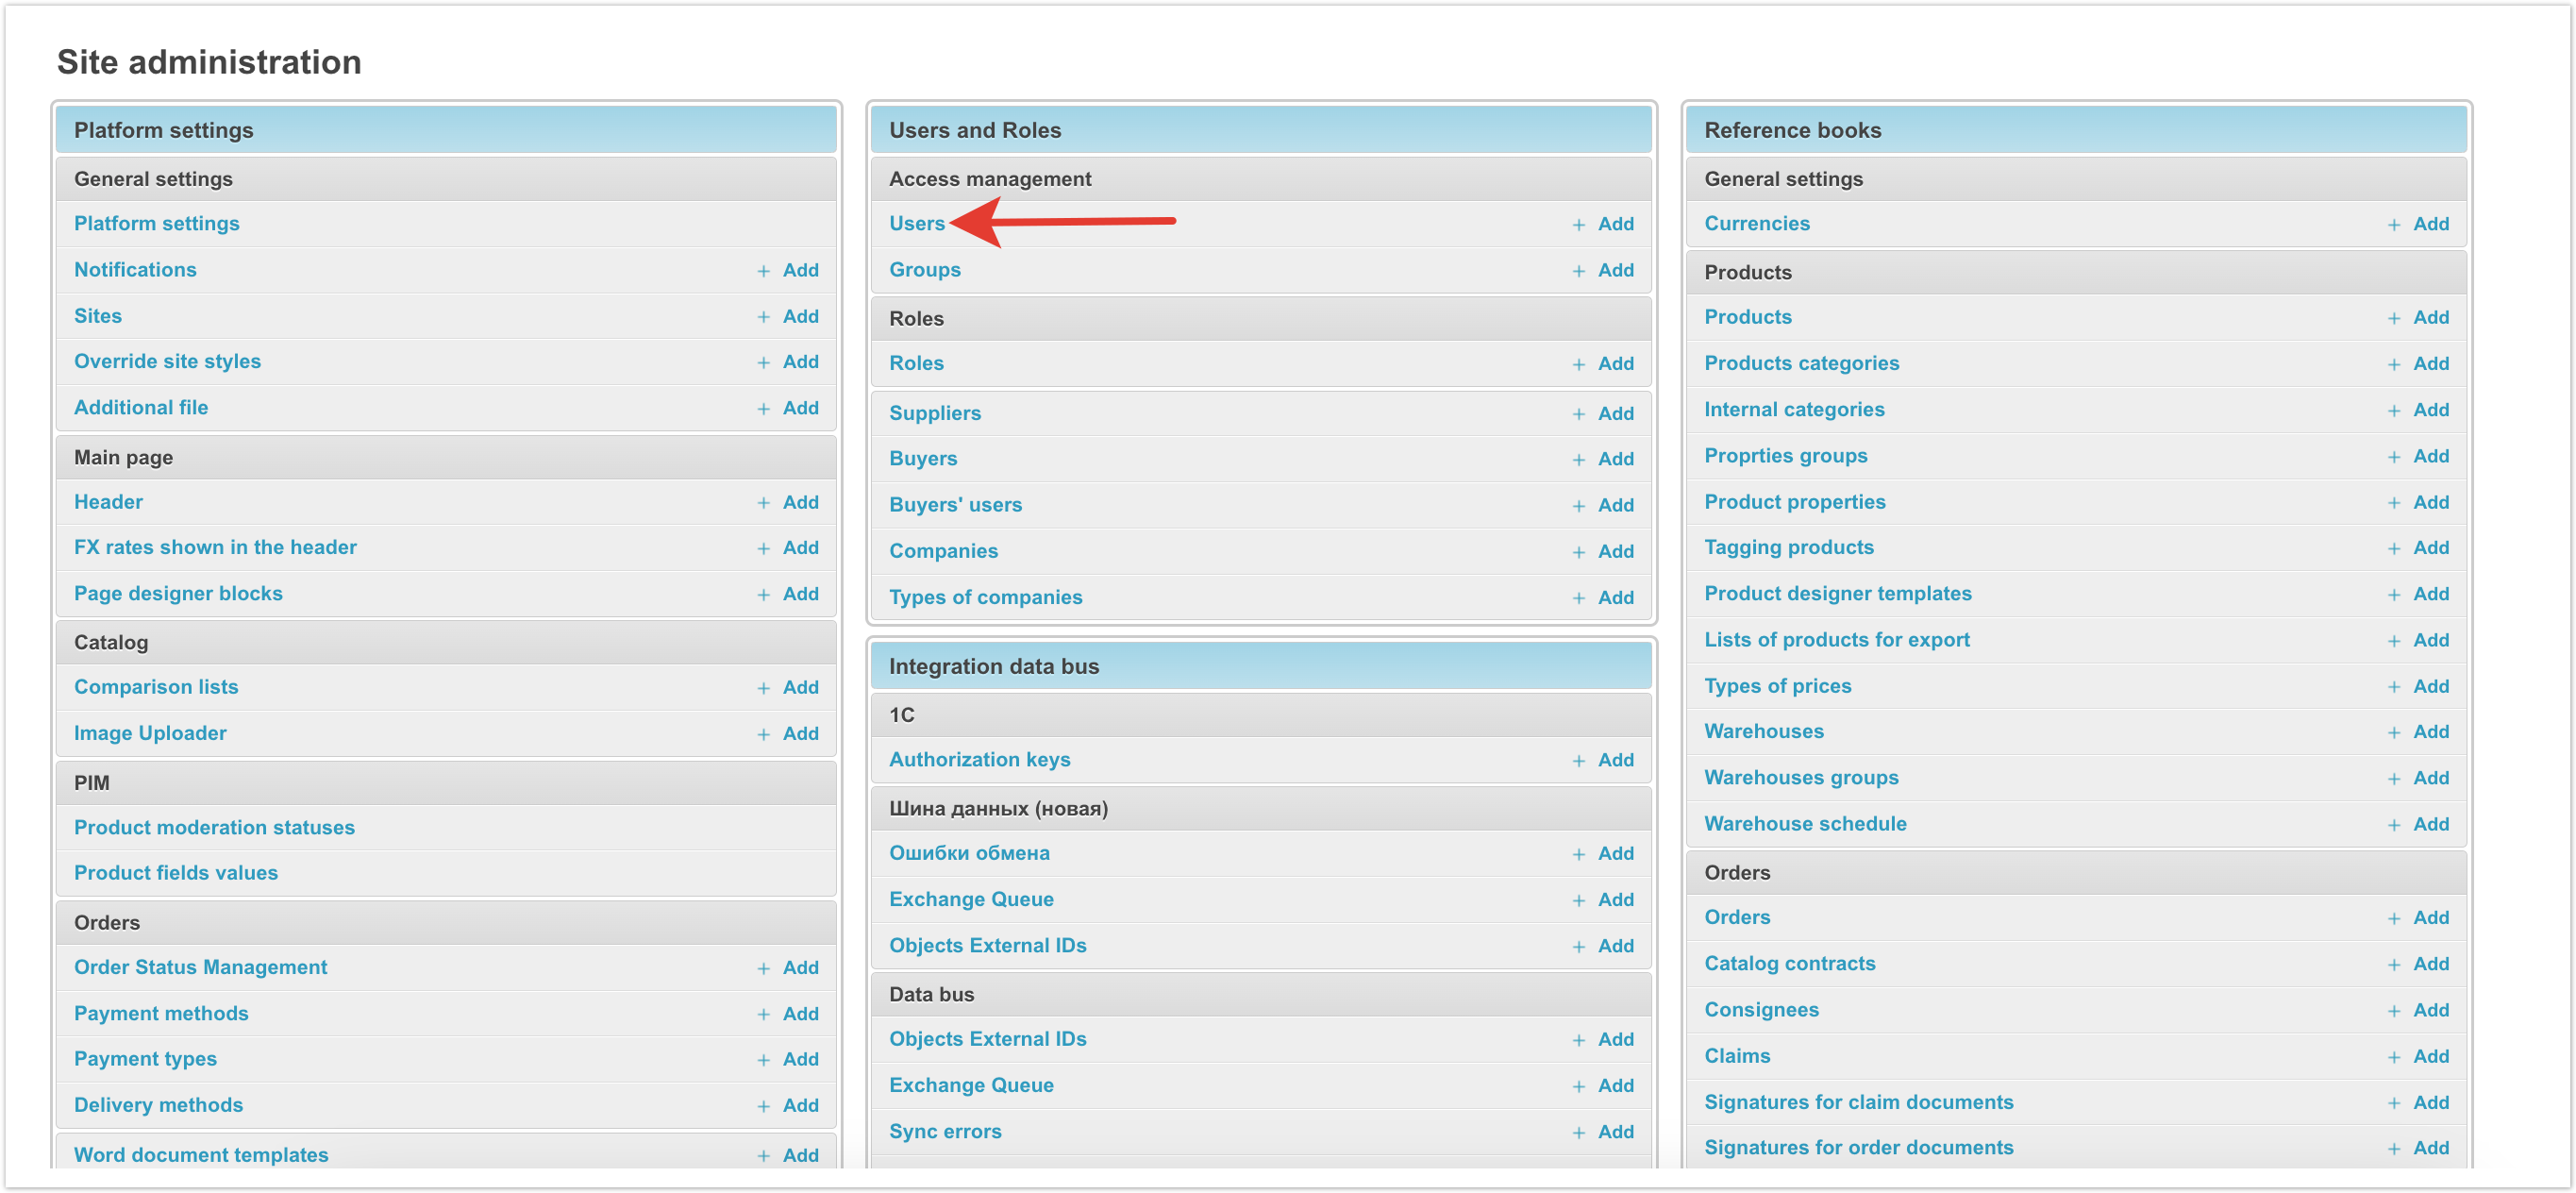
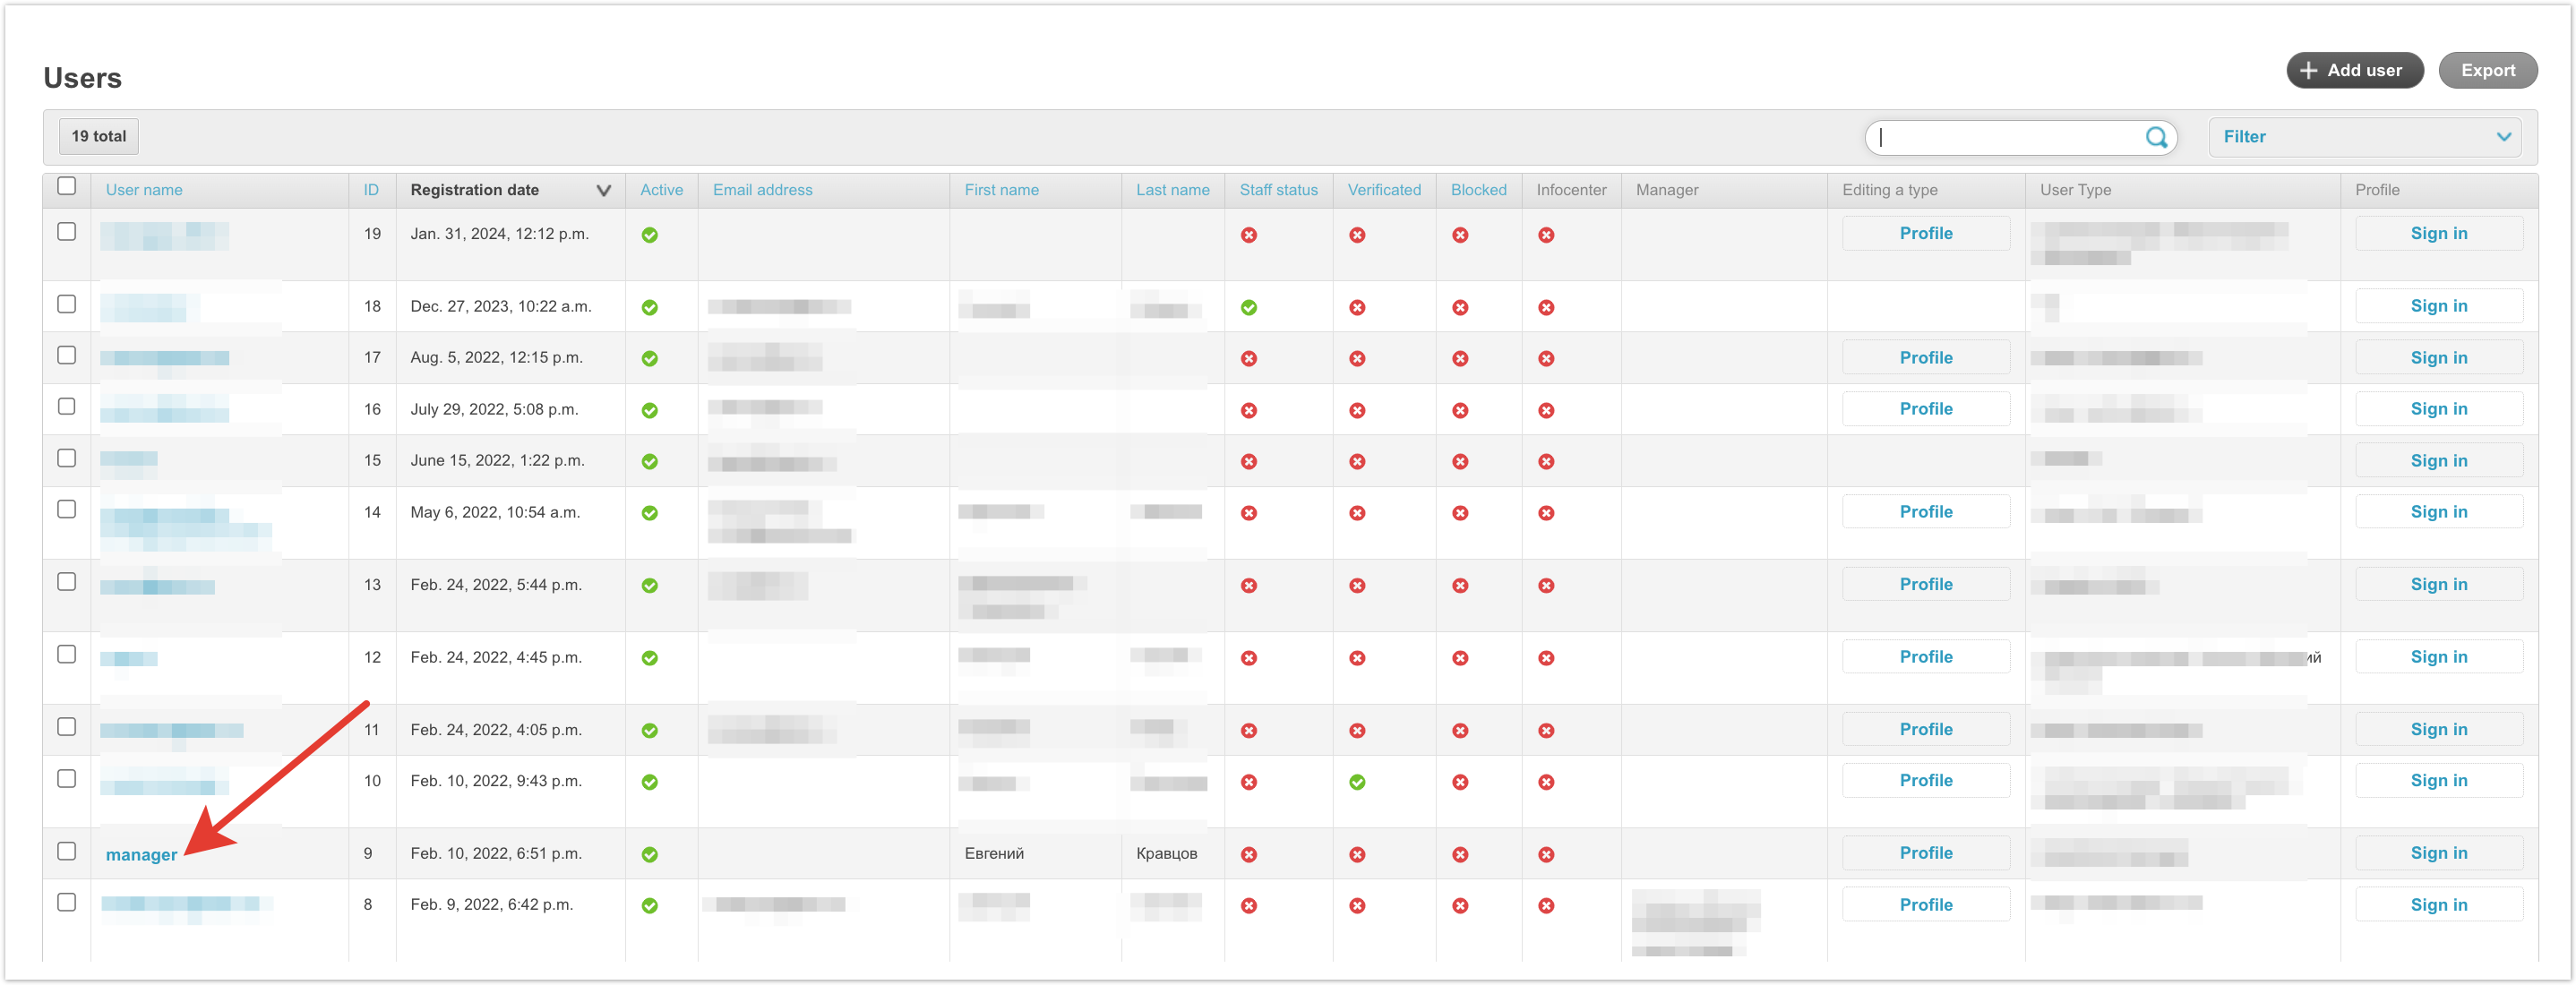
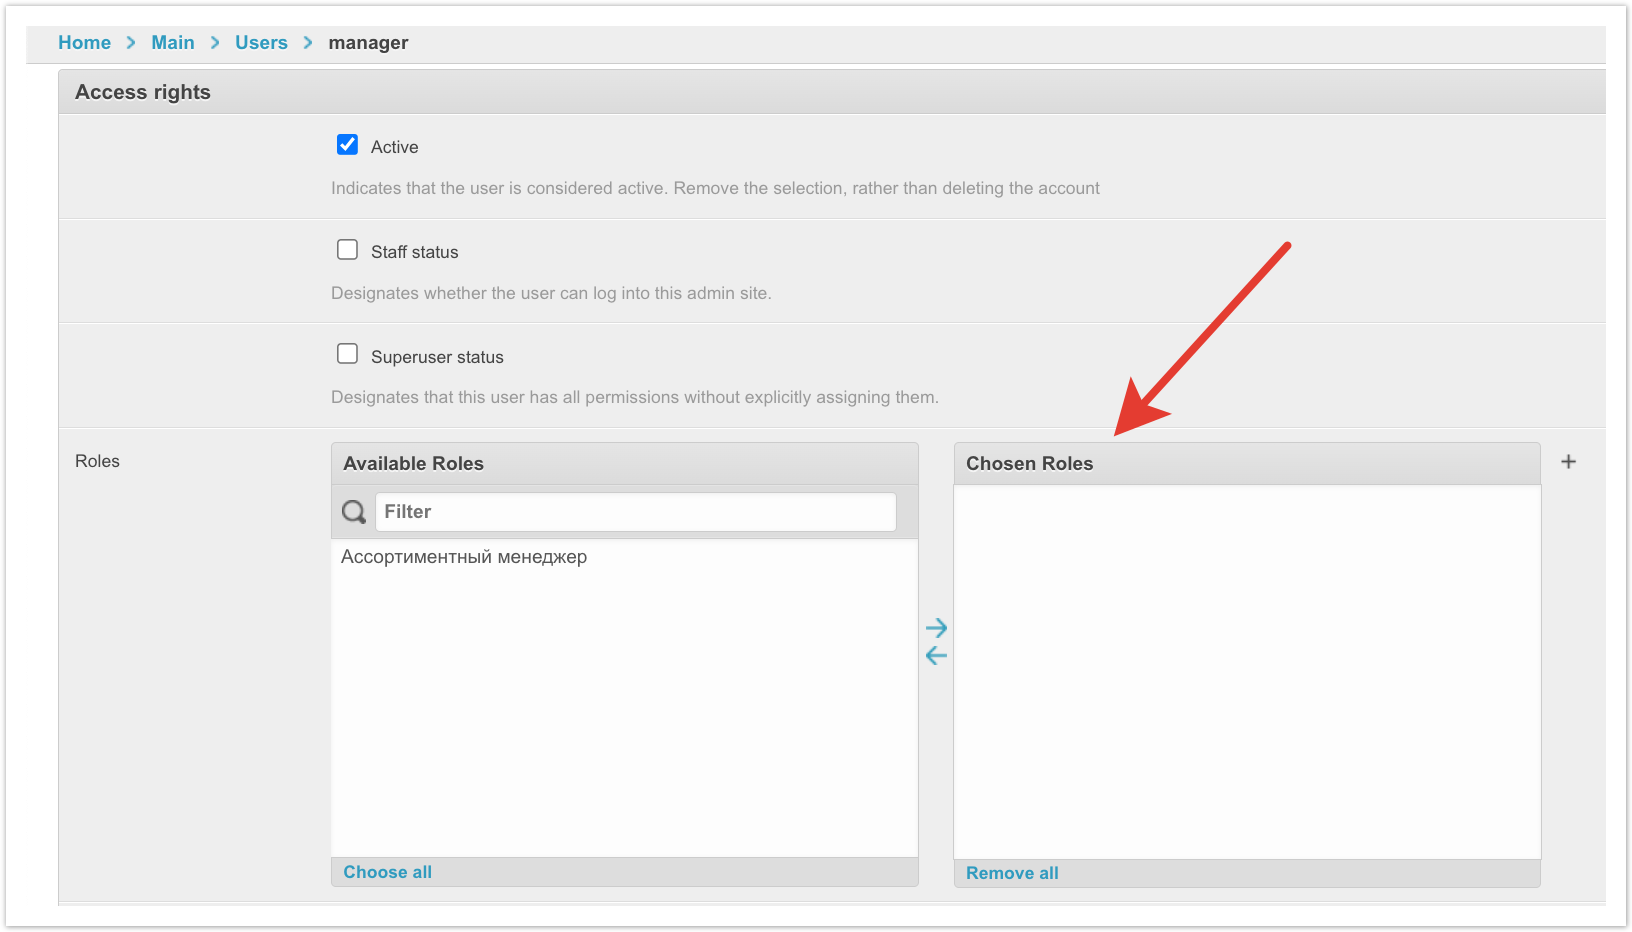
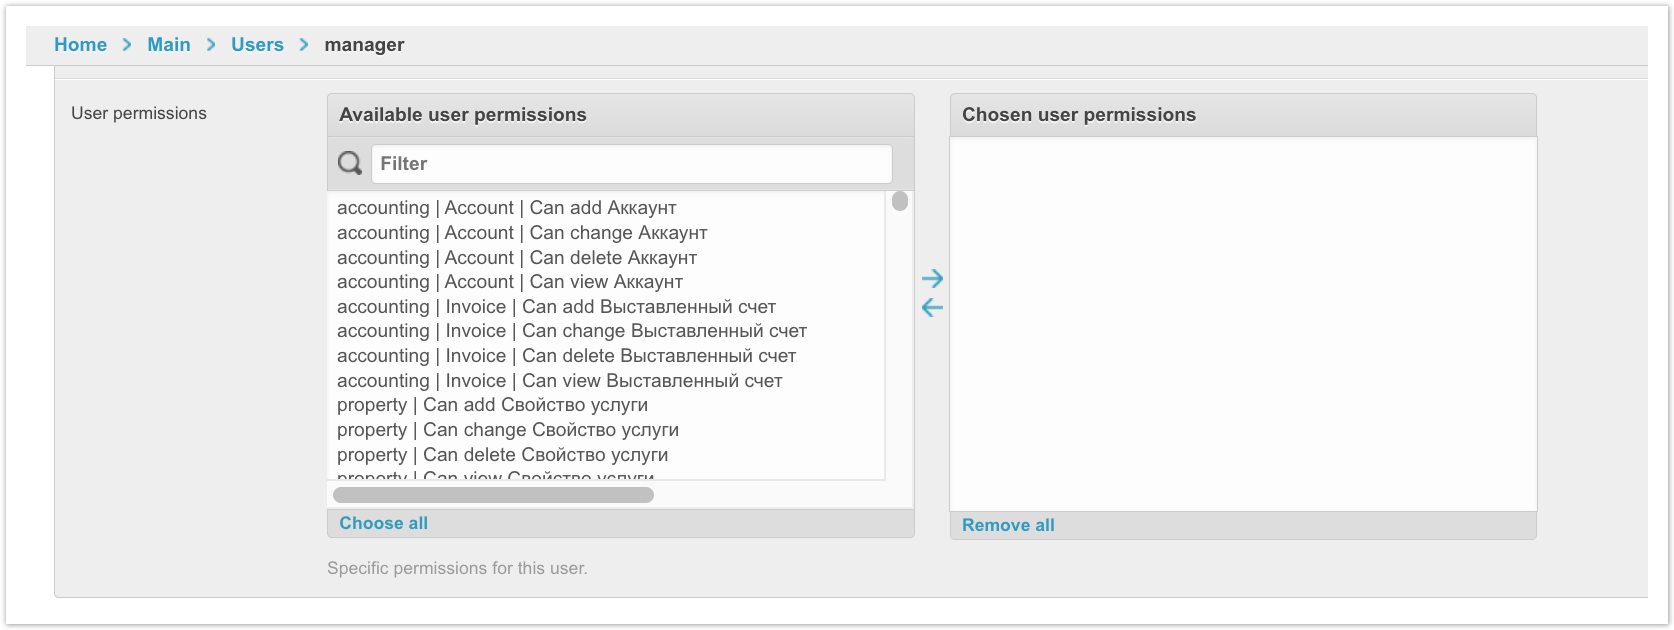
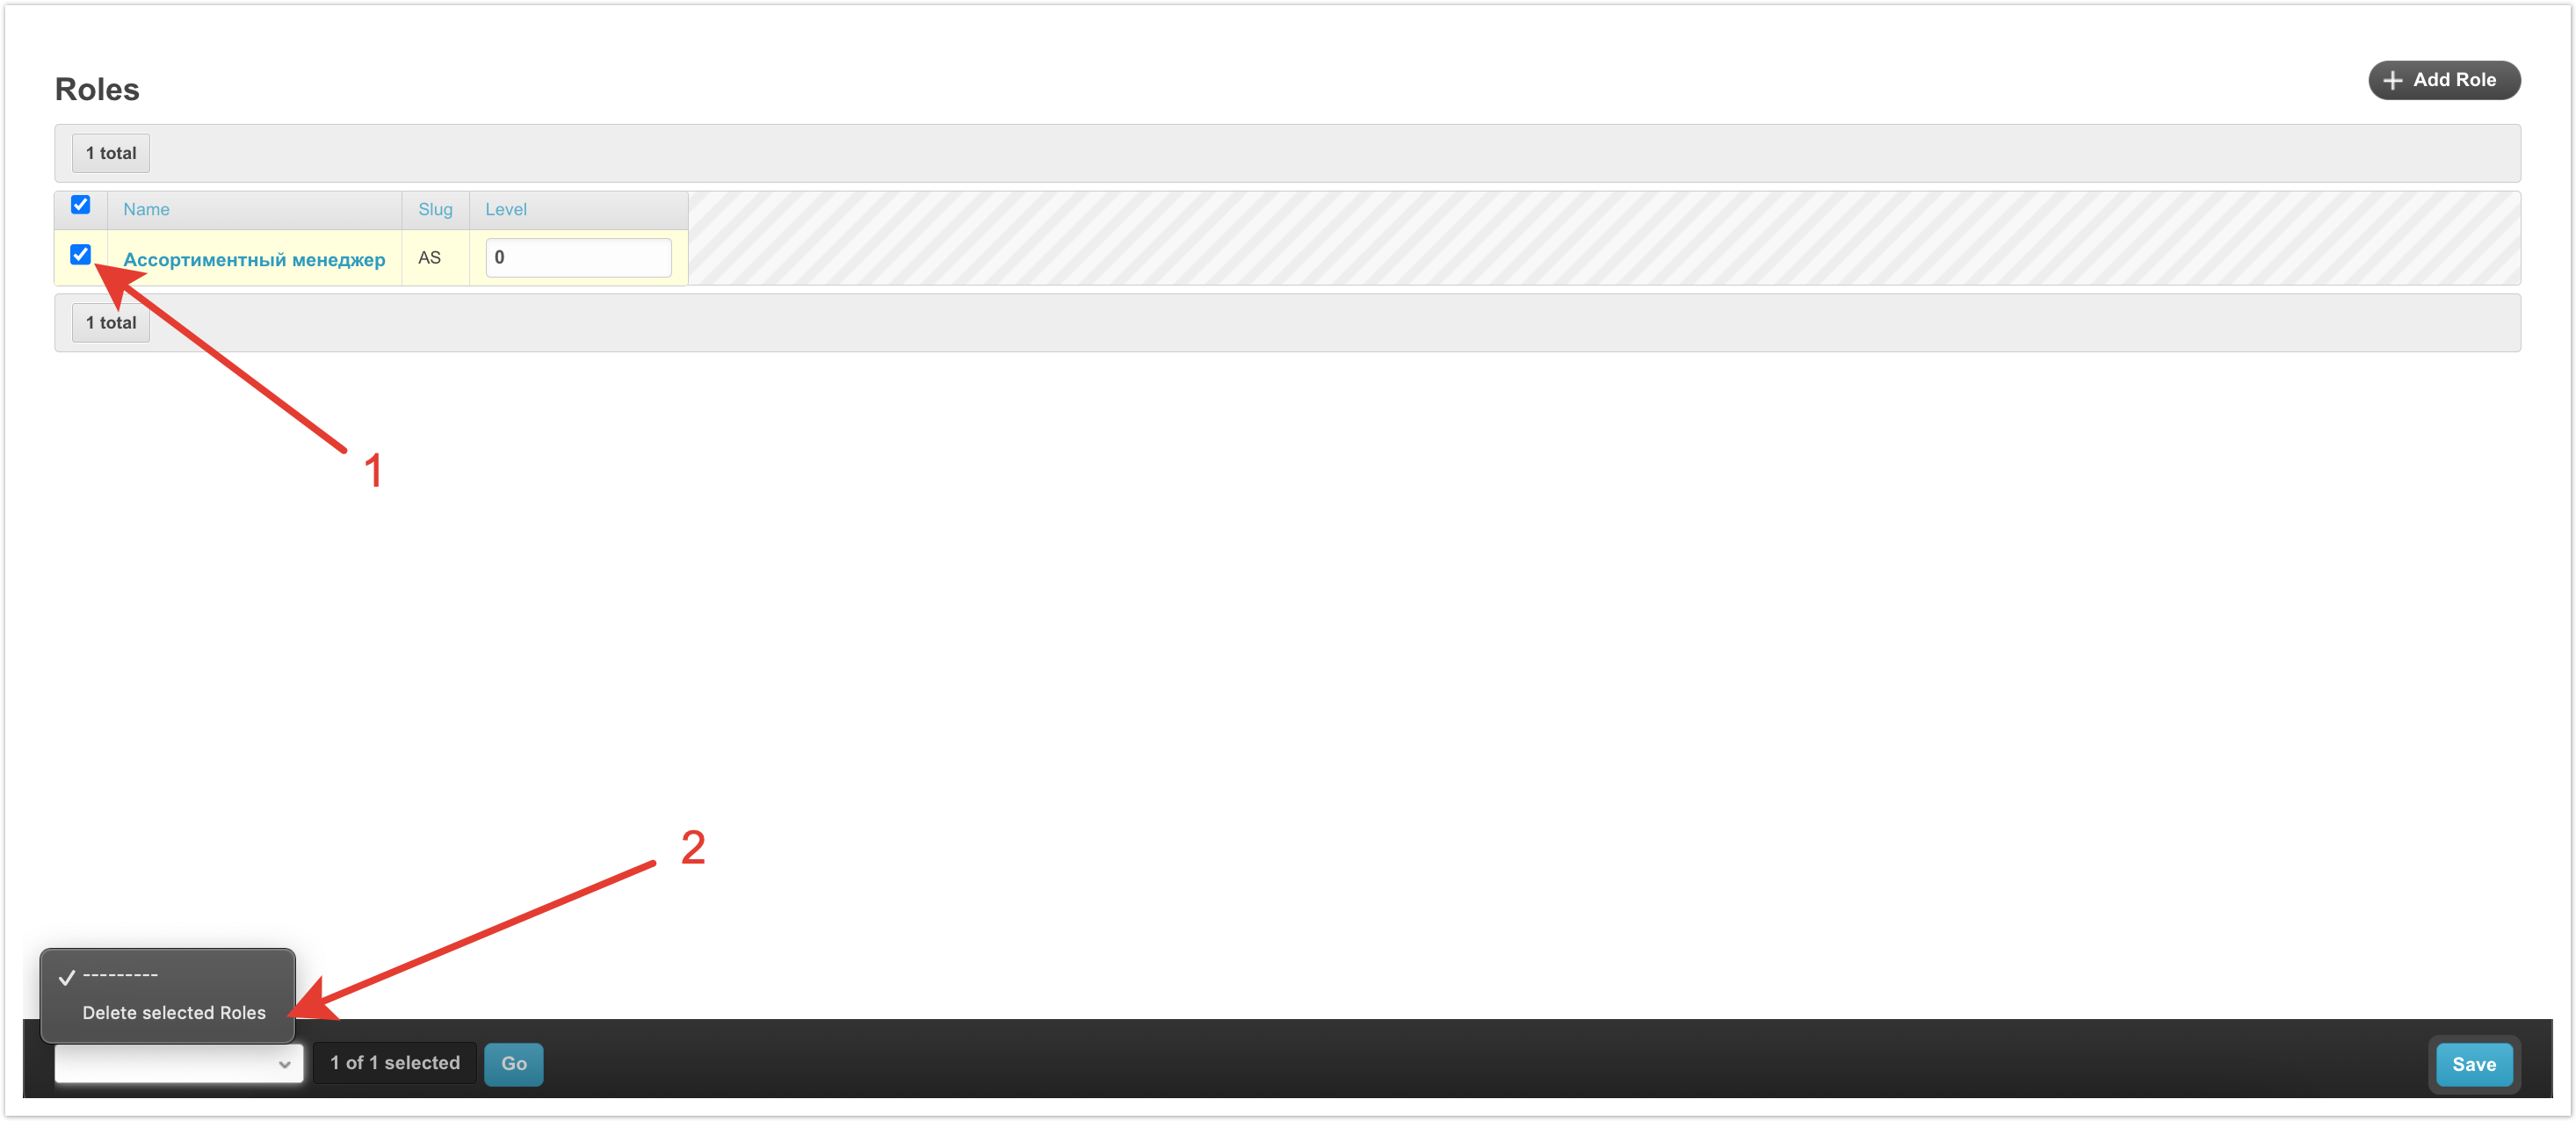
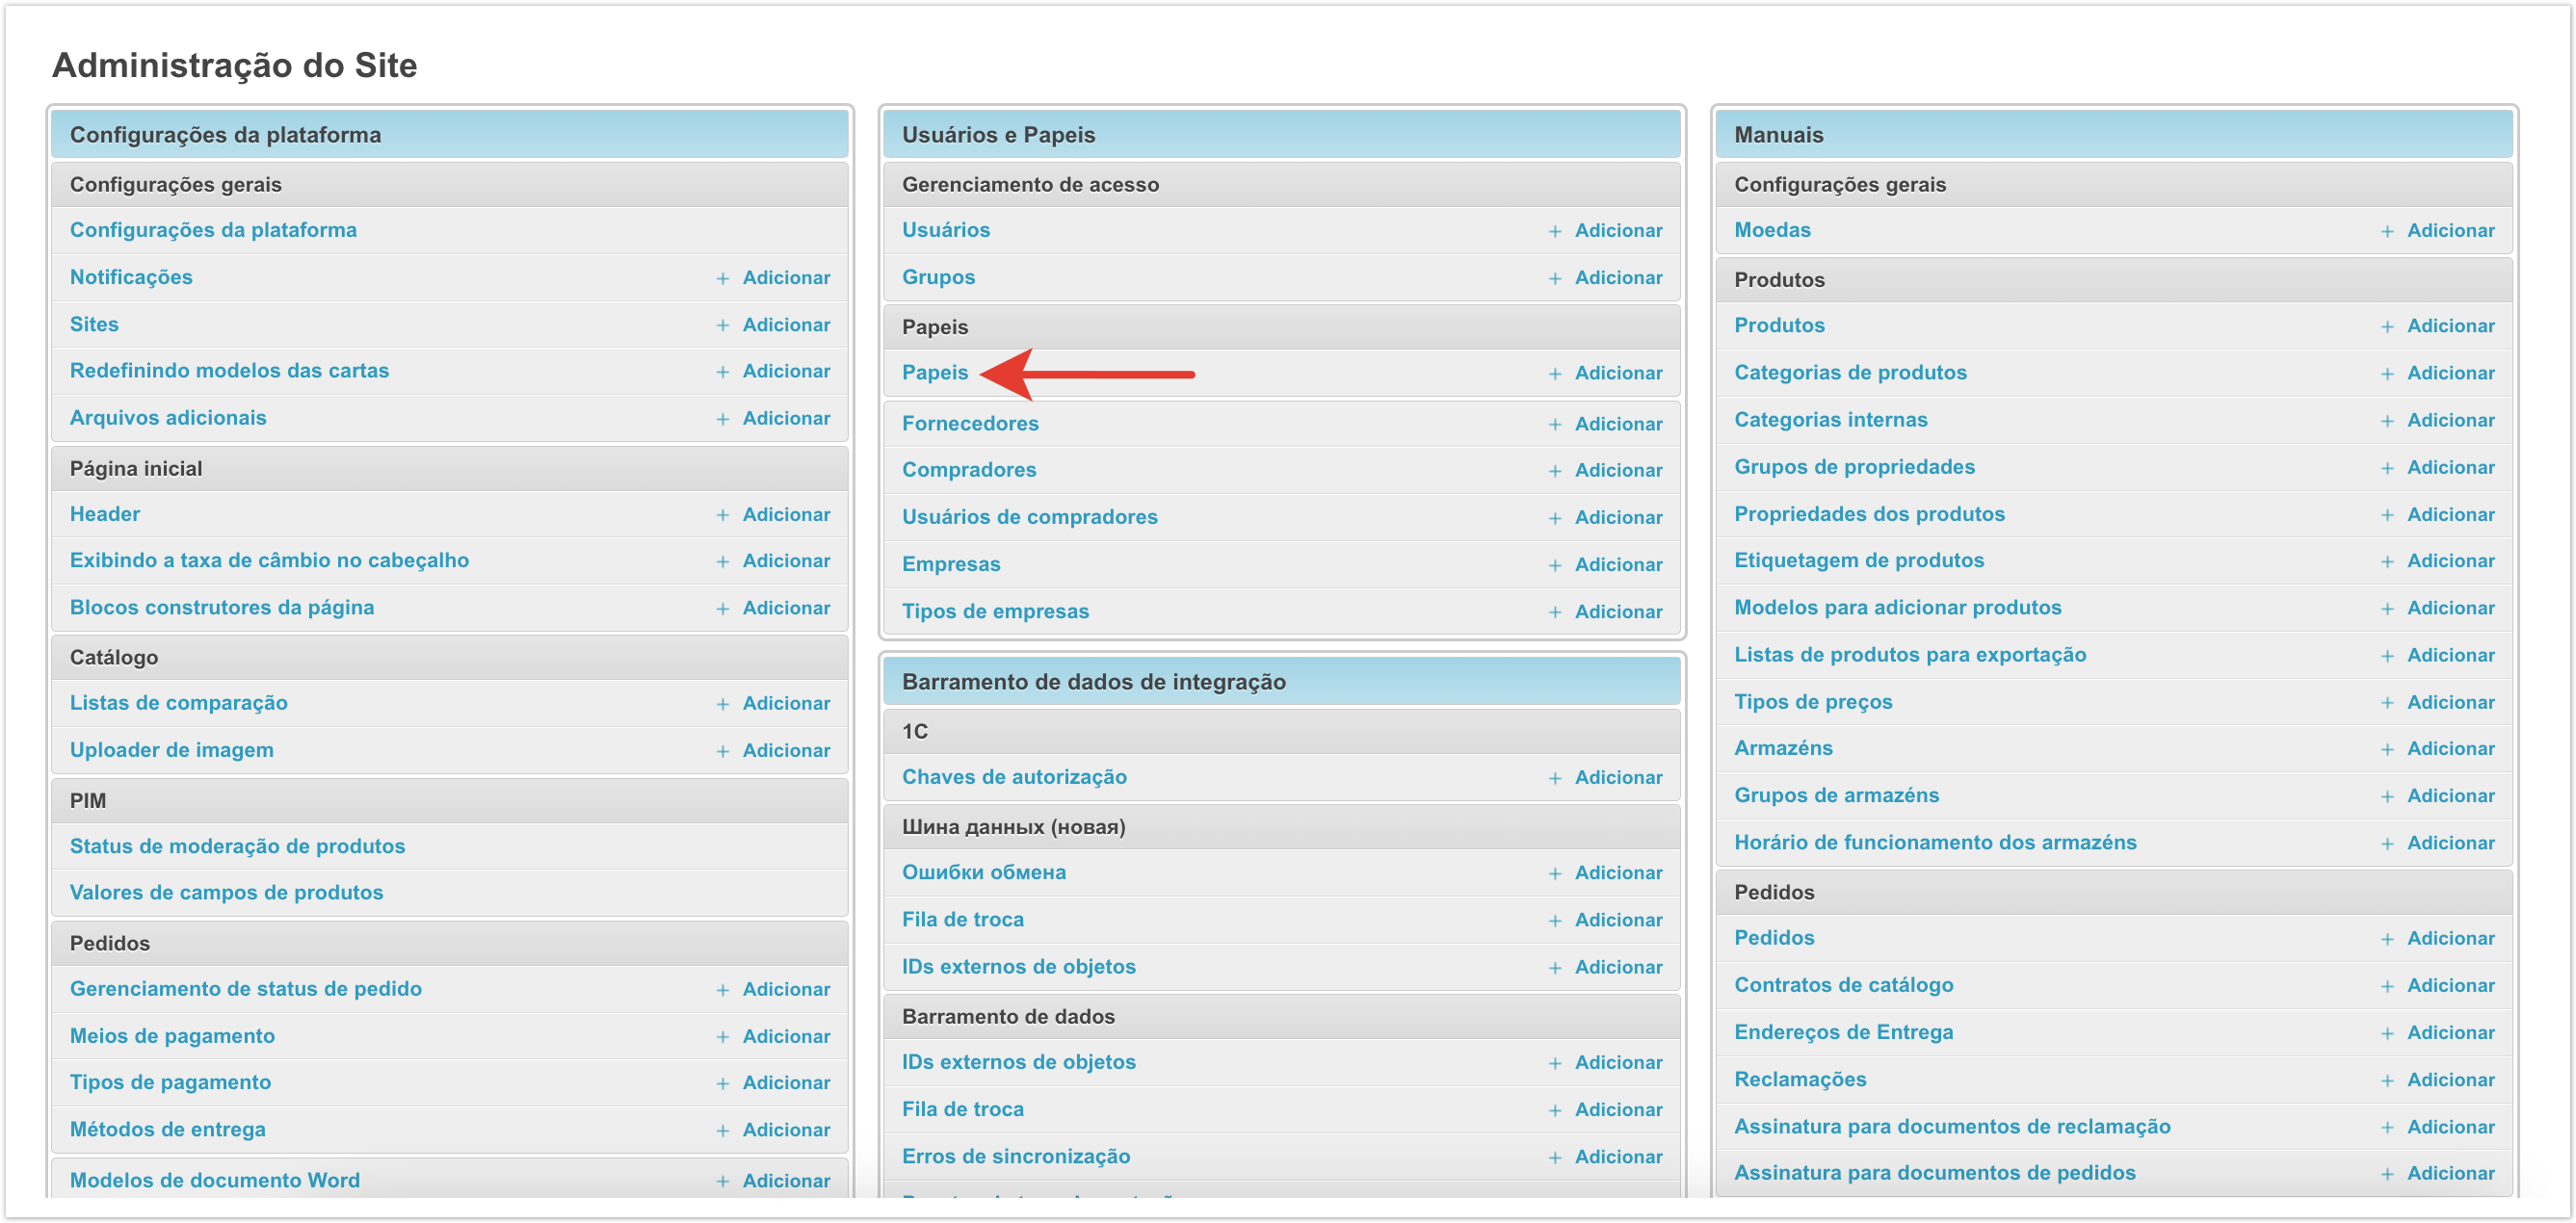
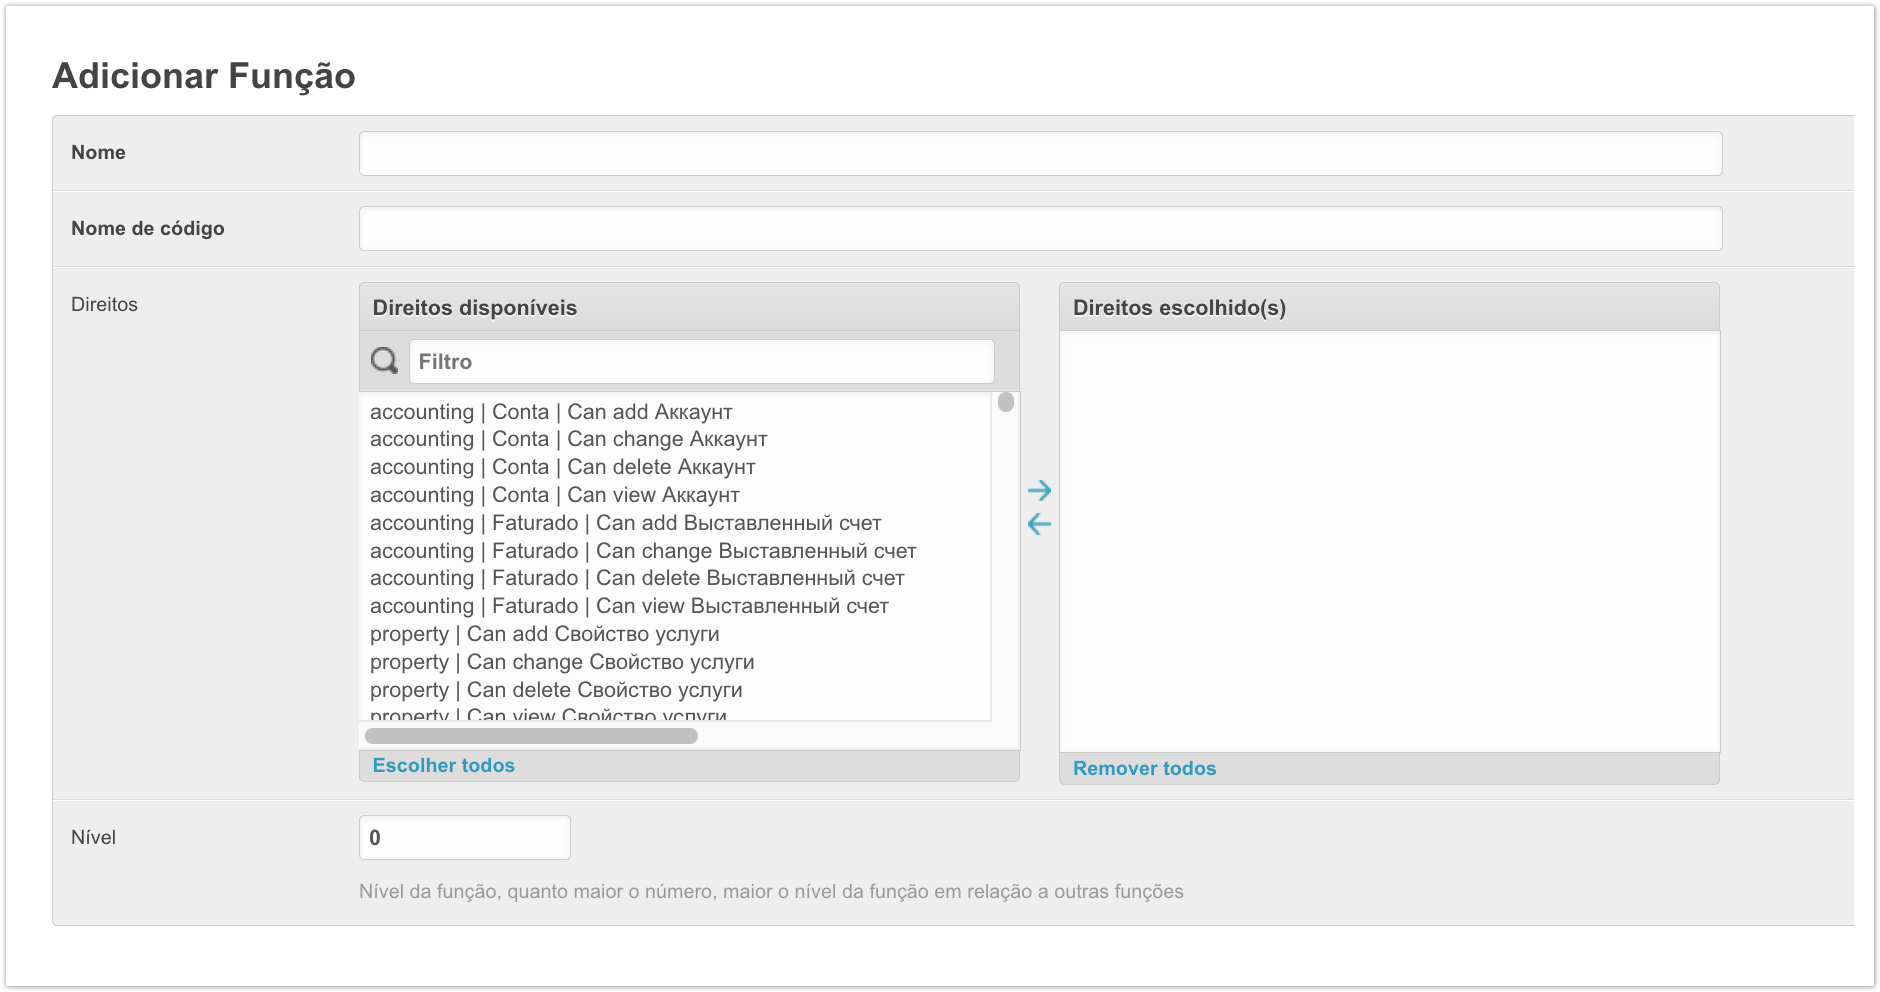
Через раздел Роли в панели администратора можно завести набор прав для пользователей под конкретные задачи. Например, можно настроить доступность конкретных разделов для менеджера или ограничить некоторые действия для пользователей поставщика таким образом, чтобы они не могли вносить правки по товарам, но не могли видеть заказы. На открывшейся странице можно увидеть заведенный ранее набор ролей. Для добавления новой роли нужно нажать на кнопку Добавить Роль. Далее нужно заполнить поля настроек. Наименование - название роли пользователя. Кодовое имя - краткое обозначение роли. Права - в этом поле можно выбрать конкретный набор прав, которые будут доступны для роли. Для этого в левом блоке нужно выделить и с помощью стрелок перенести в правую часть необходимые права. Поскольку прав достаточно много, то можно воспользоваться полем Фильтр для поиска нужного, достаточно просто начать вводить текст и поиск будет выполнен автоматически. Уровень - с помощью этой настройки можно настроить иерархию ролей, то есть чем выше значение, тем выше уровень по отношению к другим ролям. После заполнения данных нужно их Сохранить и роль появится в списке. Далее нужно привязать роль к конкретному пользователю. Для этого нужно перейти в раздел Пользователи. Откроется страница с пользователями. Нужно перейти в карточку пользователя, нажав на его имя. Внутри карточки пользователя нужно прокрутить страницу до блока Права доступа, в котором будет настройка Роли. Здесь можно выбрать заведенную роль и присвоить ее пользователю. Для этого перенесите с помощью стрелок роль в правый столбец, а далее Сохраните изменения. Роли полезно настроить когда набор прав нужно выдать нескольким пользователям. Если же такой пользователь один, то можно вручную настроить ему необходимые права с помощью настройки Права пользователя. После внесения изменений также необходимо их Сохранить. Вернемся к разделу Роли. Если какая-то из ролей более не используется, то ее можно удалить. Для этого достаточно выделить ее в списке, а далее в меню внизу страницы выбрать Удалить выбранное Роли.
|
| Sv translation | ||||||||||
|---|---|---|---|---|---|---|---|---|---|---|
| ||||||||||
Through the Roles section in the admin panel, you can create a set of rights for users for specific tasks. For example, you can configure the availability of specific sections for a manager or limit certain actions for supplier users so that they can make edits on products, but cannot see orders. On the page that opens, you can see the previously created set of roles. To add a new role, click on the Add Role button. Next you need to fill out the settings fields. Name - the name of the user role. Slug is a short description of the role. Rights - in this field you can select a specific set of rights that will be available for the role. To do this, you need to select in the left block and use the arrows to move the necessary rights to the right side. Since there are quite a lot of rights, you can use the Filter field to search for what you need; just start entering text and the search will be performed automatically. Level - with this setting you can configure the hierarchy of roles, that is, the higher the value, the higher the level in relation to other roles. After filling in the data, you need to Save it and the role will appear in the list. Next, you need to bind the role to a specific user. To do this, go to the Users section. A page with users will open. You need to go to the user’s card by clicking on his name. Inside the user card, you need to scroll the page to the Access Rights block, which will contain the Roles setting. Here you can select an existing role and assign it to the user. To do this, use the arrows to move the role to the right column, and then Save the changes. It is useful to configure roles when a set of rights needs to be issued to several users. If there is only one such user, then you can manually configure the necessary rights for him using the User permissions setting. After making changes, you also need to Save them. Let's return to the Roles section. If one of the roles is no longer used, it can be deleted. To do this, just select it in the list, and then select Delete selected Roles in the menu at the bottom of the page.
|
| Sv translation | ||||||||||
|---|---|---|---|---|---|---|---|---|---|---|
| ||||||||||
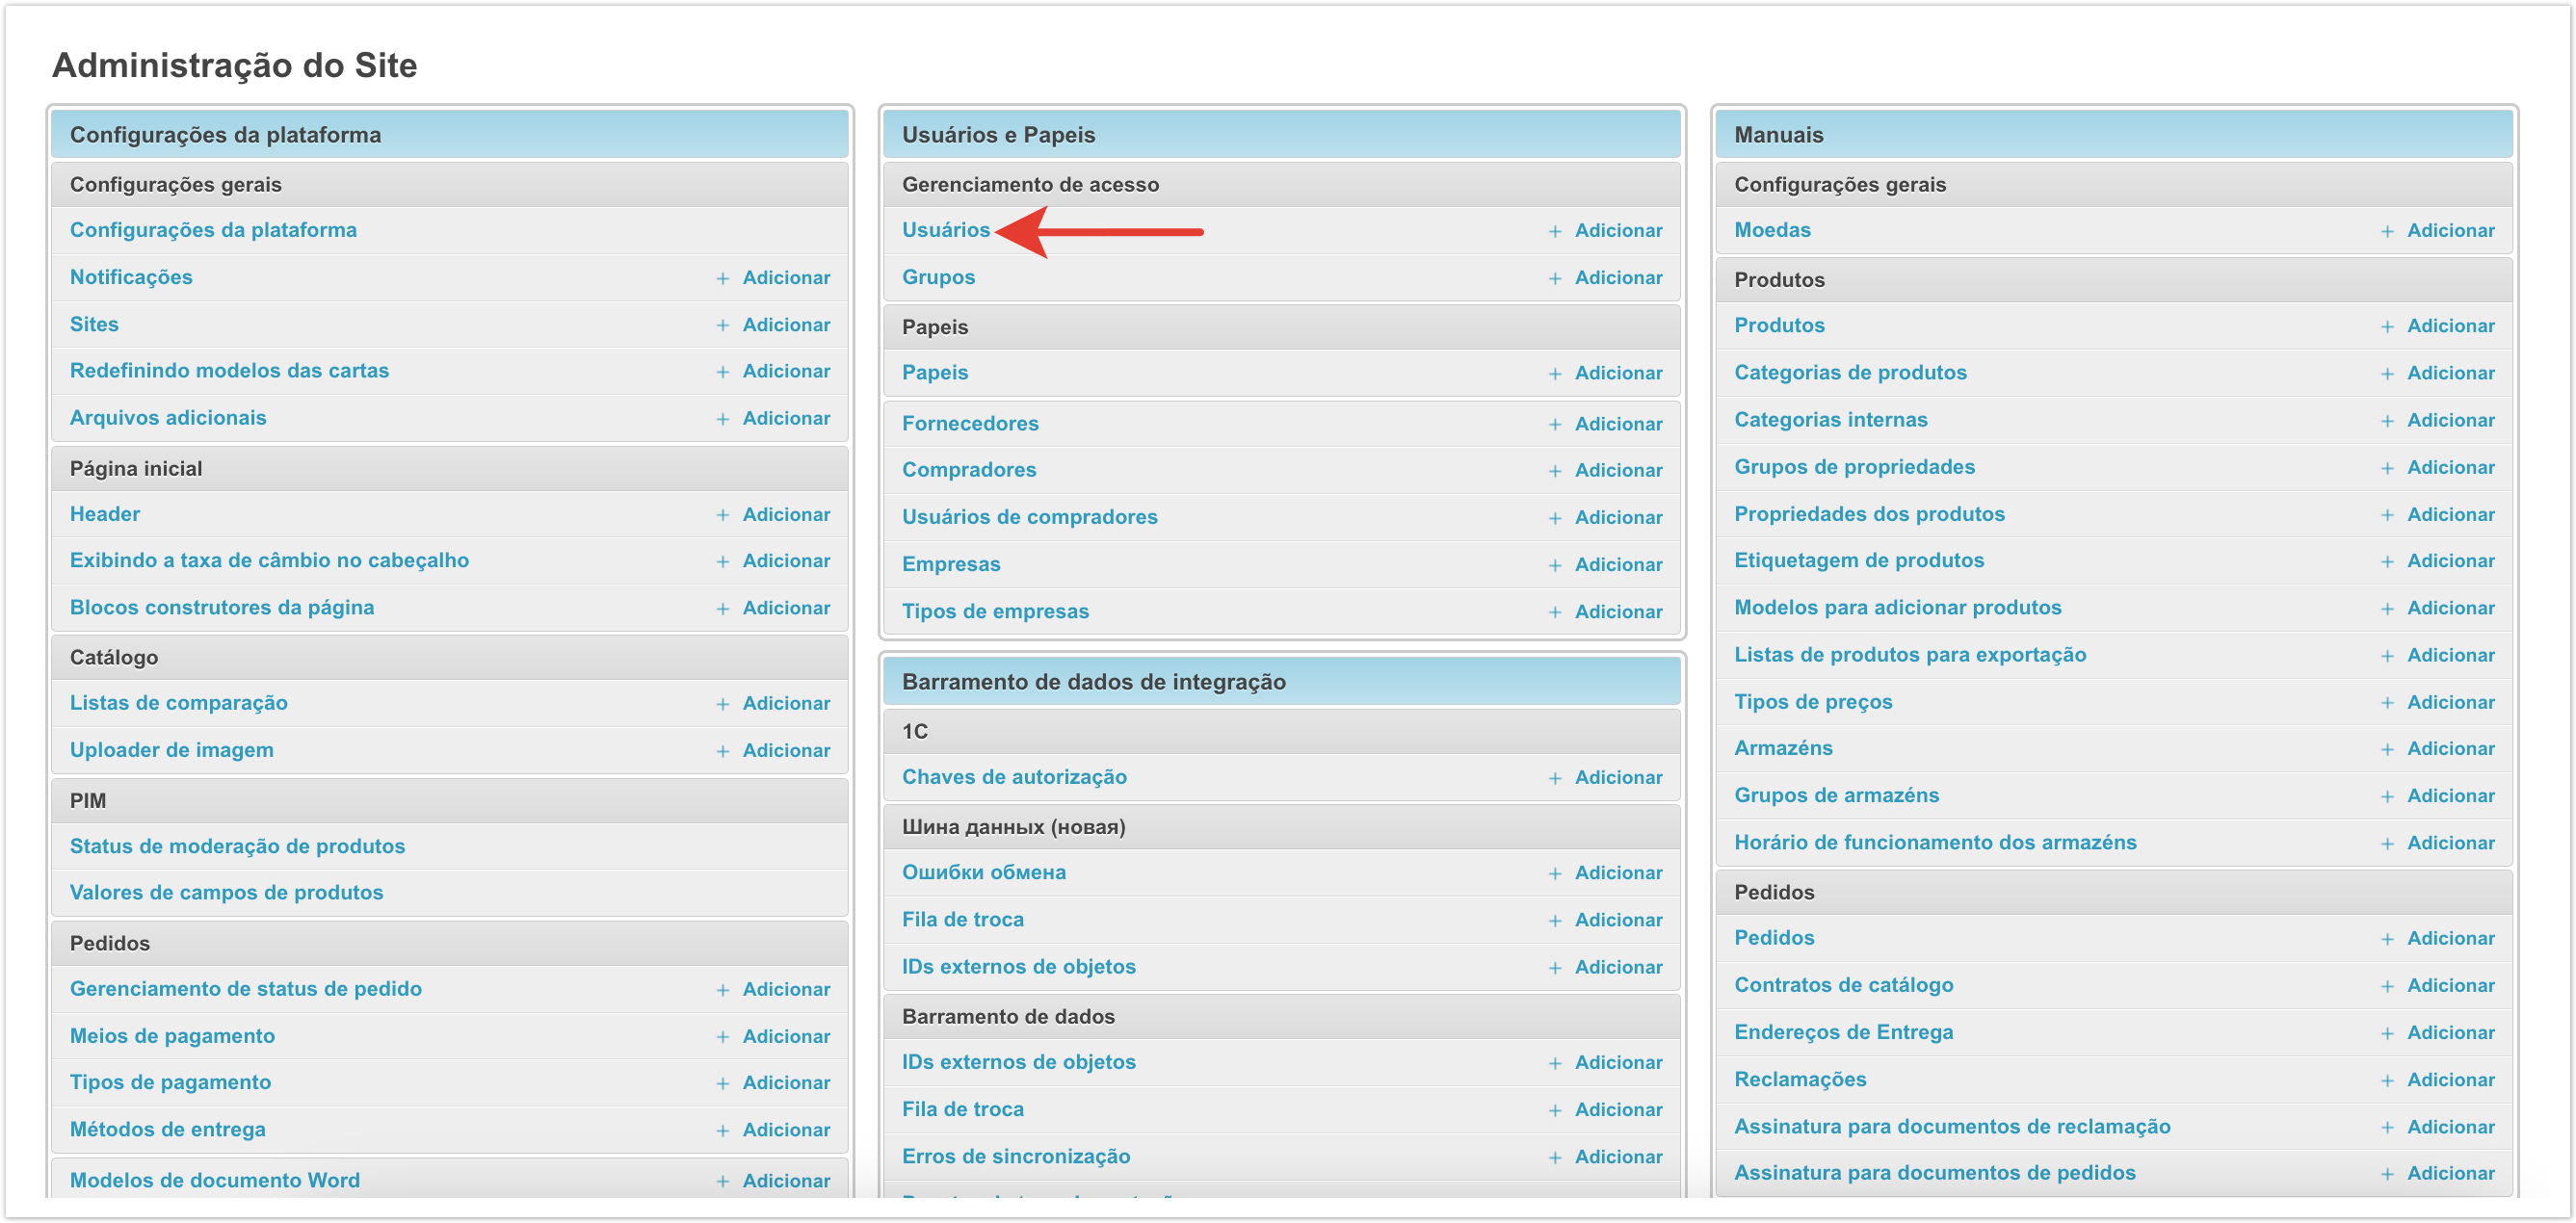
Por meio da seção Papeis do painel de administração, você pode criar um conjunto de direitos para usuários para tarefas específicas. Por exemplo, você pode disponibilizar seções específicas para o gerente ou restringir determinadas ações para usuários do fornecedor para que eles possam fazer edições em produtos, mas não possam ver pedidos. Na página que é aberta, você pode ver o conjunto de funções criado anteriormente. Para adicionar uma nova função, clique no botão Adicionar Função. Em seguida, você precisa preencher os campos de configurações. Nome — O nome da função do usuário. Um nome de código é uma designação curta para uma função. Direitos - Neste campo, você pode selecionar um conjunto específico de direitos que estarão disponíveis para a função. Para fazer isso, selecione os direitos necessários no bloco esquerdo e use as setas para mover os direitos necessários para o lado direito. Como há muitos direitos, você pode usar o campo Filtro para procurar o que você precisa, basta começar a digitar e a pesquisa será realizada automaticamente. Nível - Com essa configuração, é possível configurar a hierarquia de funções, ou seja, quanto maior o valor, maior o nível em relação a outras funções. Depois de preencher os dados, você precisa salvá-los e a função aparecerá na lista. Em seguida, você precisa vincular a função a um usuário específico. Para fazer isso, vá para a seção Usuários. Uma página com usuários é aberta. Você precisa ir para o cartão do usuário clicando em seu nome. Dentro do cartão de usuário, role até a seção Direitos de acesso, onde a configuração Papeis será exibida. Aqui você pode selecionar uma função criada e atribuí-la ao usuário. Para fazer isso, use as setas para arrastar a função para a coluna da direita e, em seguida, Salvar alterações. É útil configurar funções quando você deseja atribuir um conjunto de permissões a vários usuários. Se houver apenas um desses usuários, você poderá configurar manualmente os direitos necessários para ele usando a configuração Permissões de usuário. Depois de fazer as alterações, você também precisa salvá-las. Vamos voltar à seção Papeis. Se uma função não estiver mais em uso, você poderá excluí-la. Para fazer isso, basta selecioná-lo na lista e, em seguida, selecionar Remover Papeis selecionadas no menu na parte inferior da página.
|

